MENU
MENU
IPC
IPC
Network Cable
Network Cable
Network Cable
Switch
Router
Computer
Computer
●
Access the camera through IP
-
Tool
Rubber
P
lug
Lock Screw
F
o
c
u
s
Zo
om
Focus
Zoom
Focus
Zoom
③
Adjust the camera to obtain an optimum angle by loosening the
lock screws. Before adjustment, preview the image of the camera
on a monitor. Tighten the lock screws after you finish adjusting the
view angle of the camera.
Fo
cu
s
Zo
om
④
Adjust the Zoom screw and the Focus screw with the screwdriver
until you get the optimum image (if the camera you get is fixed lens,
please skip this step).
F
o
c
u
s
F
o
c
u
s
Zo
om
Focus
Z
o
o
m
Zo
om
⑤
Remove the protection film gently to finish the installation.
Fo
cu
s
Zo
om
5
IE Network Connection
●
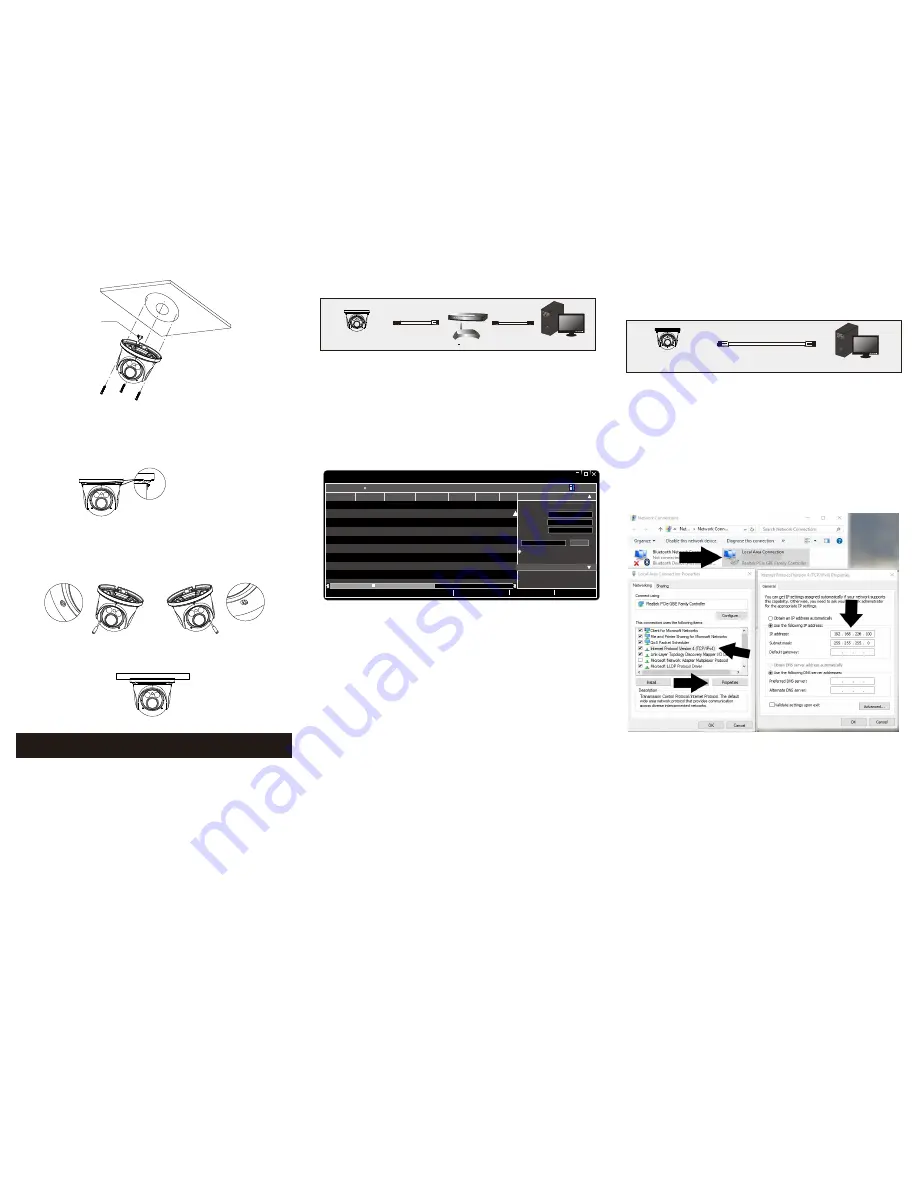
SECTION 1: Accessing the camera using the IP Tool
1.**Default Network settings for the camera are:
IP address: 192.168.226.201
Subnet Mask 255.255.255.0
Gateway: 192.168.226.1
2.
Connect the IP camera and a Windows computer to a network switch
or router
3.
Find IPTool on the CD, and install it on the computer.
4.
Determine what the local network scheme is.
Device
Network
Search
Immediate
Refresh
name
name
name
IPC
IPC
IPC
unknown
unknown
unknown
192.168.226.201
192.168.1.2
192.168.1.3
80
80
80
9008
9008
9008
255.255.
255.255.
255.255.
Modify Network Parameter
Mac Address
IP Address
Modify
CE :98 :23 :75 :35 :22
192
.
168
.
226
. 201
255
.
255
.
255
. 0
192
.
168
.
226
. 1
i
Tip: Enter the administrator password, and
then modify the network parameters.
Total Device: 3
Local IP Address:192
.
168
.
1
.
4
Subnet Mask:255
.
255
.
255
.
0 Gateway: 192
.
168
.
1
.
1
DNS
:
210
.
21
.
196
.
6
Device Name Device Type
IP Address
Http Port
Data Port
Subnet
Product Model
About
Subnet Mask
Gateway
Restore IPC Default Configuration
5. Type IPCONFIG within the console > Press Enter
6. Listed is LOCAL AREA CONNECTION with an IP address/Subnet
Mask/Default Gateway
7. Write down the information for local area connection displayed in
Command prompt
8. Double-click to open the IP search tool
9. Under Modify network parameter, change the first 3 DIGITS
(OCTETS) OF THE IP ADDRESS TO MATCH THE NETWORK
SCHEME FROM STEP 5 ABOVE. THE LAST OCTET WILL BE A
DIFFERENT NUMBER, YOU MUST CHOOSE AN IP ADDRESS
THAT IS AVAILABLE ON THE NETWORK TO PREVENT A
CONFLICT. Use the PING command in the command prompt to find
and available IP address.
**ex. C:\user\desktop> ping 192.168.1.199 If the ping “request times
out”, or “destination host unavailable” then the IP address is available for
use.
10. Proceed to enter in the available IP address, and use the same subnet
mask and Default Gateway from step 5
11. Type in the password of the camera:
DEFAULT PW:
123456
> Click MODIFY
12. The camera IP will change if modify is successful
13. You can now access the camera settings via Internet Explorer by
typing http://<ip address of camera>
SECTION 2: Accessing the camera using Internet
Explorer WITHOUT IPTool:
6. After saving your temporary settings on the computer, you can now
access the camera using Internet Explorer. In the address bar type:
http://192.168.226.201
**IMPORTANT: AFTER you have configured the camera with a
permanent IP address. You must repeat steps 2-4 and set your
network adapter back to “obtain an IP address automatically.”
If everything has been setup correctly, in both cases you should be
able to access the camera on the local network using Internet Explorer,
or Sibell NVMS
1. connect the IP camera and a Windows computer to a network
switch or router
2. On the computer, browse to:
a. Control Panel\Network and Internet\Network Connections
3. Right-Click Local Area Connection > Choose Properties
4. Highlight Internet Protocol TCP/IP version 4 > Click the Properties
Button
5. See figure 1 Below for temporary IP configuration


