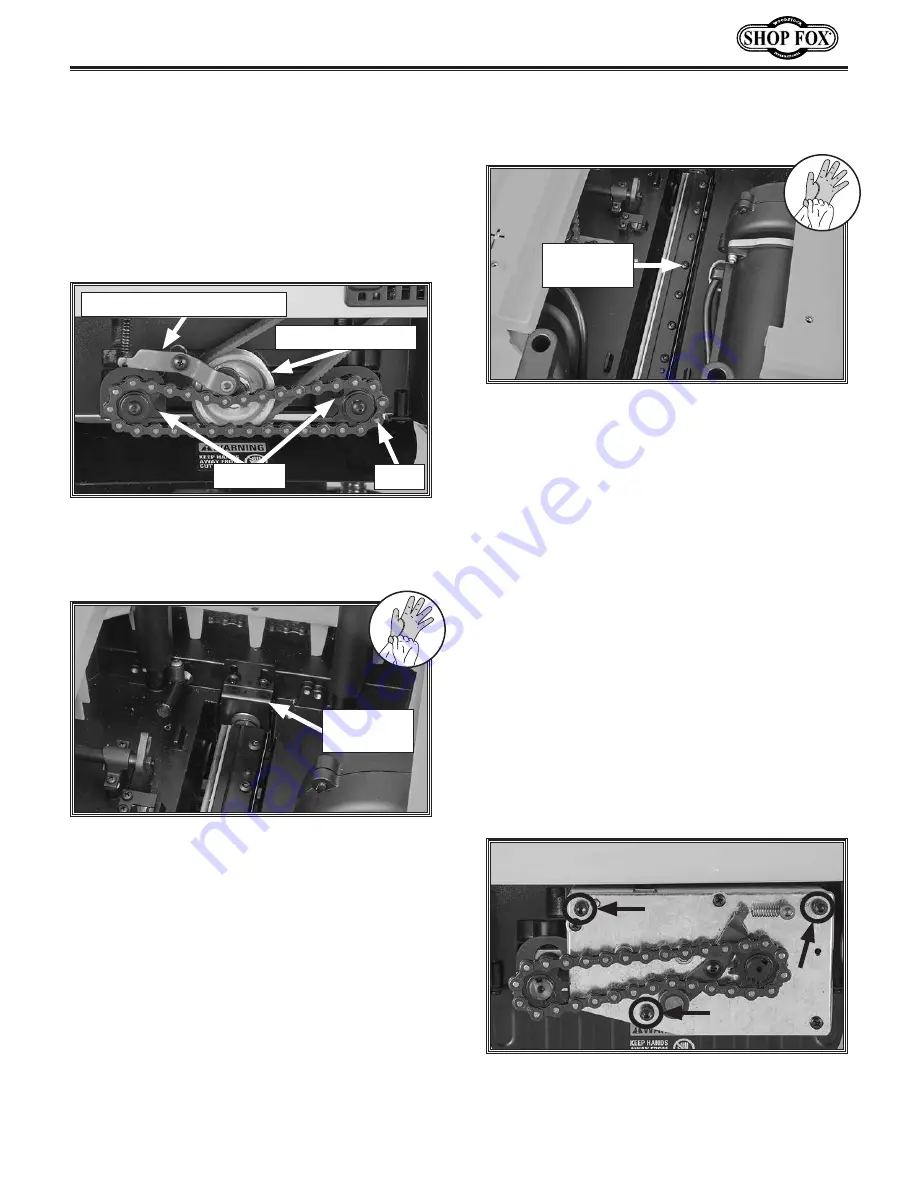
Figure 8. T-30 Torx screws on knife clamp.
Torx Screw
(1 of 8)
Figure 6. Pulley area components.
Chain Tensioner Assembly
Sprocket
Chain
Cutterhead Pulley
Figure 7. Cutterhead lock lever.
Cutterhead
Lock Lever
Figure 9. Gearbox attachment screws.
-3-
D4934 13" Helical Cutterhead Instructions
15. Press cutterhead lock lever down to allow
cutterhead to rotate (see
Figure 7).
11. Remove depth adjustment crank handle
(see
Figure 2 on Page 2).
12. Remove pulley cover.
13. Remove chain tensioner assembly (see
Figure 6).
14. Remove sprockets and chain (see Figure 6).
16. Remove drive belt by slowly rotating
cutterhead pulley counterclockwise and
pulling belt off. Use rear roller to secure
belt after removal.
17. Cover table under cutterhead carriage with
scrap cardboard to protect surface from
dropped parts/tools.
18. Press cutterhead lock lever and rotate
cutterhead until T-30 Torx screws are
visible on knife clamp (see
Figure 8).
19. Remove screws securing knife clamp.
Note: T-30 Torx driver included with
DW735/X has magnets built into handle.
20. Attract knife clamp with magnet and
remove.
21. Attract knife with magnet and remove.
22. Repeat Steps 18–21 until all (3) knives have
been removed from cutterhead.
23. Remove cutterhead lock lever.
Note: Cutterhead lock lever has a spring
underneath that is hidden from view.
24. Remove gearbox attachment screws (see
Figure 9).


