background image

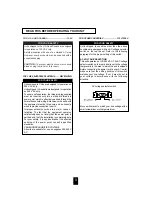
FOR U.S.A AND CANADA  .................................. 120 V

Units shipped to the U.S.A and Canada are designed
for operation on 120 V AC only.

Safety precaution with use of a polarized AC plug.
However, some products may be supplied with a
nonpolarized plug.

CAUTION : To prevent electric shock, match wide
blade of plug to wide slot, fully insert.

FOR YOUR SAFETY

FOR  CHINA, EUROPE AND AUSTRALIA ........ 220V/230V/240V

Units shipped to China are designed for operation on
220 V AC only.
Units shipped to Australia are designed for operation
on 240 V AC only.
To ensure safe operation, the three-pin plug supplied
must be inserted only into a standard three-pin
power point which is effectively earthed through the
normal household wiring. Extension cords used with
the equipment must be three-core and be correctly
wired to provide connection to earth.
Improper extension cords are a major cause of
fatalities. The fact that the equipment operates
satisfactorily does not imply that the power point is
earthed and that the installation is completely safe.
For your safety, if in any doubt about the effective
earthing of the power point, consult a qualified
electrician.
PAN-EUROPEAN UNIFIED VOLTAGE
All units are suitable for use on supplies 230-240 V
AC.

FOR YOUR SAFETY

3

READ THIS BEFORE OPERATING YOUR UNIT

FOR OTHER COUNTRIES ........................ 115 V/230 V

Units shipped to countries other than the above
countries are equipped with an AC voltage selector
switch on the rear panel. Refer to the following
paragraph for the proper setting of this switch.

AC VOLTAGE SELECTION

This unit operates on 115/230 V AC. The AC voltage
selector switch on the rear panel is set to the voltage
that prevails in the area to which the unit is shipped.
Before connecting the power cord to your AC outlet,
make sure that the setting position of this switch
matches your line voltage. If not, it must be set to
your voltage in accordance with the following
direction.

AC voltage selector switch

Move switch lever to match your line voltage with a
small screwdriver or other pointed tool.

FOR YOUR SAFETY

Summary of Contents for RX-4105

Page 1: ...RX 4105 AM FM STEREO RECEIVER O P E R A T I N G I N S T R U C T I O N S ...

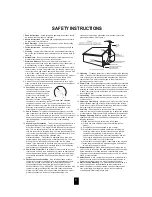
Page 2: ...eptacles and the point where they exit from the product 14 Outdoor Antenna Grounding If an outside antenna or cable system is connected to the product be sure the antenna or cable system is grounded so as to provide some protection against voltage surges and built up static charges Article 810 of the National Electrical Code ANSI NFPA 70 provides information with regard to proper grounding of the ...

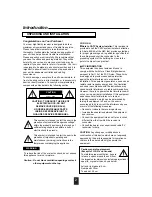
Page 3: ...m Installer This reminder is provided to call the CATV system installer s attention to Article 820 40 of the NEC that provides guidelines for proper grounding and in particular specifies that the cable ground shall be connected to the grounding system of the building as close to the point of cable entry as practical FCC INFORMATION This equipment has been tested and found to comply with the limits...

Page 4: ...orily does not imply that the power point is earthed and that the installation is completely safe For your safety if in any doubt about the effective earthing of the power point consult a qualified electrician PAN EUROPEAN UNIFIED VOLTAGE All units are suitable for use on supplies 230 240 V AC FOR YOUR SAFETY 3 READ THIS BEFORE OPERATING YOUR UNIT FOR OTHER COUNTRIES 115 V 230 V Units shipped to c...

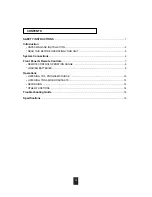
Page 5: ... BEFORE OPERATING YOUR UNIT 3 System Connections 5 Front Panel Remote Controls 7 REMOTE CONTROL OPERATION RANGE 9 LOADING BATTERIES 9 Operations LISTENING TO A PROGRAM SOURCE 10 LISTENING TO RADIO BROADCASTS 12 RECORDING 14 OTHER FUNCTIONS 14 Troubleshooting Guide 15 Specifications 16 ...

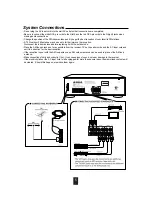
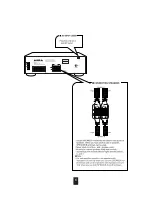
Page 6: ...tion Disconnect the indoor antenna before replacing it with the outdoor one Place the AM loop antenna as far as possible from the receiver TV set speaker cords and the AC input cord and set it to a direction for the best reception If the reception is poor with the AM loop antenna an AM outdoor antenna can be used in place of the AM loop antenna Make connections firmly and correctly If not it can c...

Page 7: ...6 ...

Page 8: ...7 Front Panel Remote Controls ...

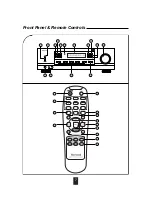
Page 9: ...h these buttons At the desired tone mode adjust the tone as desired with these buttons TONE DIRECT BUTTON Press this button to listen to a program source without the tone effect MEMORY BUTTON Press this button to store preset stations TUNING PRESET MODE BUTTON Press this button to select the tuning mode or the preset mode NUMERIC BUTTONS 0 9 Press these buttons to select or to store preset station...

Page 10: ...hin a range of about 7 meters 23 feet and angles of up to 30 degrees aiming at the remote sensor Remove the cover 2 Remove the batteries when they are not used for a long time Do not use the rechargeable batteries Ni Cd type Load two batteries matching the polarity FLUORESCENT DISPLAY ...

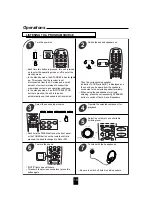
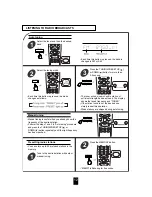
Page 11: ...it is turned on automatically and the desired input is selected Then the corresponding speaker indication SPK A or and B is displayed and the sound can be heard from the speakers connected to the selected speaker terminals When using the headphones for private listening press the corresponding SPEAKER button to switch off both A and B speakers Turn the power on 1 Switch the desired speakers on 2 M...

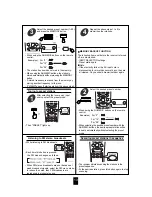
Page 12: ...tes Extreme settings at high volume may damage your speakers In general the bass and treble levels are adjusted to 0 At the desired tone mode adjust the tone as desired 9 Adjusting the tone bass and treble BAL and the balance level is displayed for 3 seconds Enter the balance mode 11 If the balance display disappears start from the step 11 again Note In general the balance level is set to 0 Adjust...

Page 13: ...l when you already know the frequency of the desired station Perform the steps 1 and 2 in Auto tuning procedure and press the TUNING PRESET UP or DOWN button repeatedly until the right frequency has been reached You can store up to 30 preferred stations in the memory MEMO is flickering for 5 seconds Manual tuning Each time this button is pressed the band is changed to FM or AM Select the tuner and...

Page 14: ...ils or the AC input cord is disconnected for more than several days they are all cleared So you should memorize them again While listening to FM broadcasts Each time this button is pressed the FM mode changes as follows Scanning preset stations in sequence The receiver will start scanning the stations in the preset sequence At the desired station press this button again to stop scanning When using...

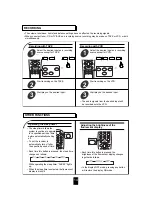
Page 15: ...th TAPE Start play on the desired input 3 Start recording on the VCR 2 Recording with VCR Start play on the desired input 3 The audio signals from the desired input will be recorded onto the VCR The volume tone bass treble and balance settings have no effect on the recording signals When you select tuner CD or TV AUX as a recording source recording may be made on TAPE or VCR or both simultaneously...

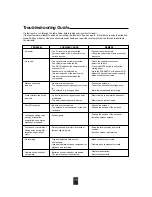
Page 16: ... antenna is connected The desired station frequency is not tuned in The antenna is in wrong position An incorrect station frequency has been memorized The memorized stations are cleared No antenna is connected The antenna is not positioned for the best reception Weak signals Noise is caused by motors fluorescent lamps or lightning etc Incorrect selection between the components Incorrect operation ...

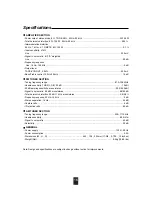
Page 17: ...itivity THD 3 S N 30 dB 15 dBf 50 dB quieting sensitivity mono stereo 25 2 45 2 dBf Signal to noise ratio 65 dBf mono stereo 68 65 dB Total harmonic distortion 65 dBf 1 kHz mono stereo 0 5 0 8 Frequency response 25 Hz 14 kHz 3 dB Stereo separation 1 kHz 35 dB Capture ratio 4 dB IF rejection ratio 80 dB AM TUNER SECTION Tuning frequency range 520 1710 kHz Usable sensitivity 800 V m Signal to noise ...

Page 18: ...RX 4105 AM FM STEREO RECEIVER O P E R A T I N G I N S T R U C T I O N S 5707 04740 004 1 ...

Reviews: