


Page 27
There is one special case: some routers such as Comcast SMC business
gateways have been preconfigured for a DHCP range of .2 - .255 which leaves
no available IP address outside the range. In that case you first have to reduce
the range by setting it to .2 - .199. Then you have addresses from .200 - .255
available for IP cameras, printers, and other devices needing a fixed IP.
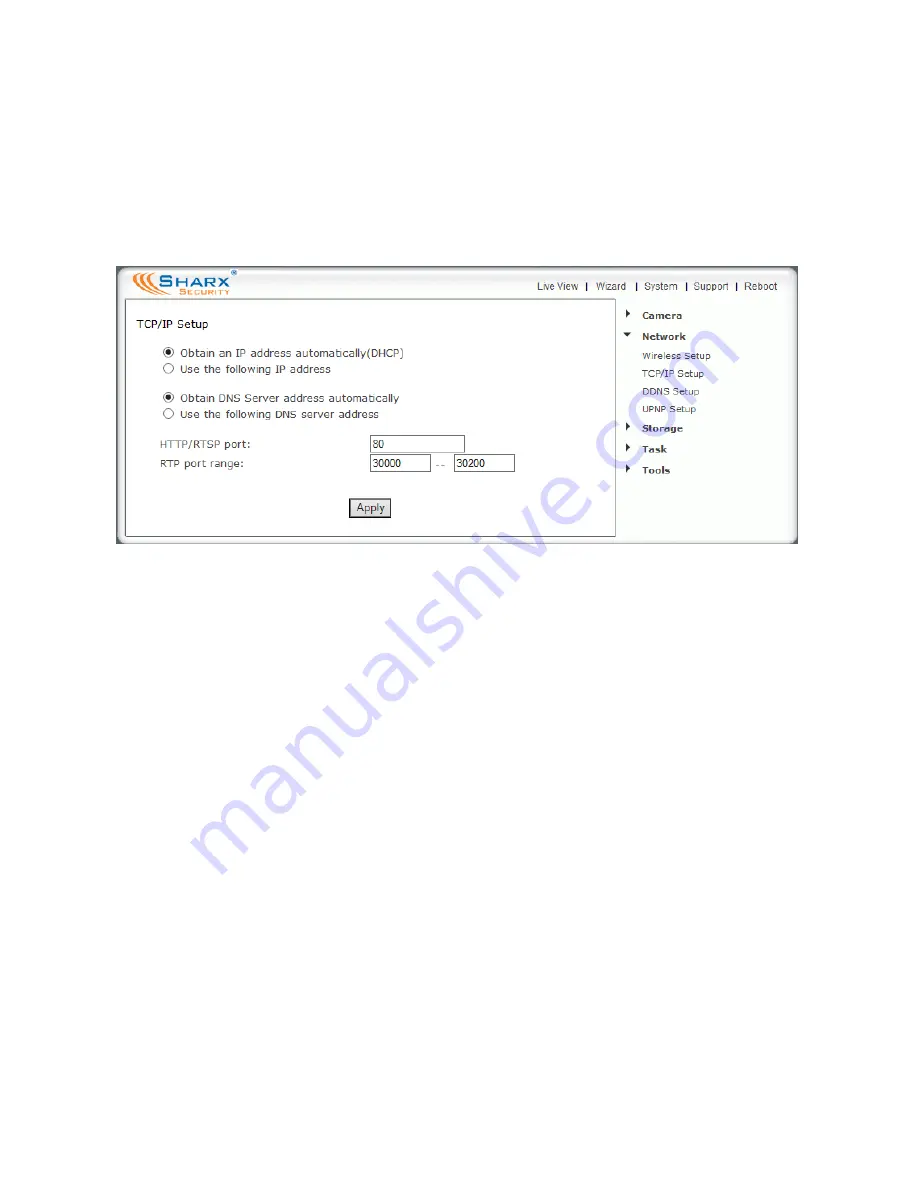
Once you know your router’s IP and have chosen a valid IP for your camera, go
to the Camera Settings menu, then select “Network” and “TCP / IP Setup”:
Click on “use the following IP address”. Then enter the IP address you picked
that is outside your router’s DHCP range. Do not change the subnet mask. The
default setting of 255.255.255.0 is correct unless you have a very unusual
home network.
Then enter your own router’s address in the “Default Gateway” box
and also in “Primary DNS IP address”.
IMPORTANT: Do not leave the “Default gateway” or “Primary DNS”
fields blank. Your own router’s IP address must be entered in both.
Note that the first 3 groups of digits of your default gateway should be the
same as your camera’s IP. Usually the last digit is 1, sometimes it is 254.
It is very important to add both the “Default Gateway” and at least the
“Primary DNS” address when assigning a static local IP. While the camera gets
this information automatically from the router when using DHCP, the camera
will not obtain this information if a local IP address is assigned manually.
For primary/secondary DNS IP address it is also possible to copy the exact
same IP addresses that are shown for primary/secondary DNS IP in your
router’s WAN or status menu, or Google’s public DNS such as 8.8.8.8
Summary of Contents for SCNC3904
Page 62: ...Page 62...


