- 3 -
PARTS GUIDE
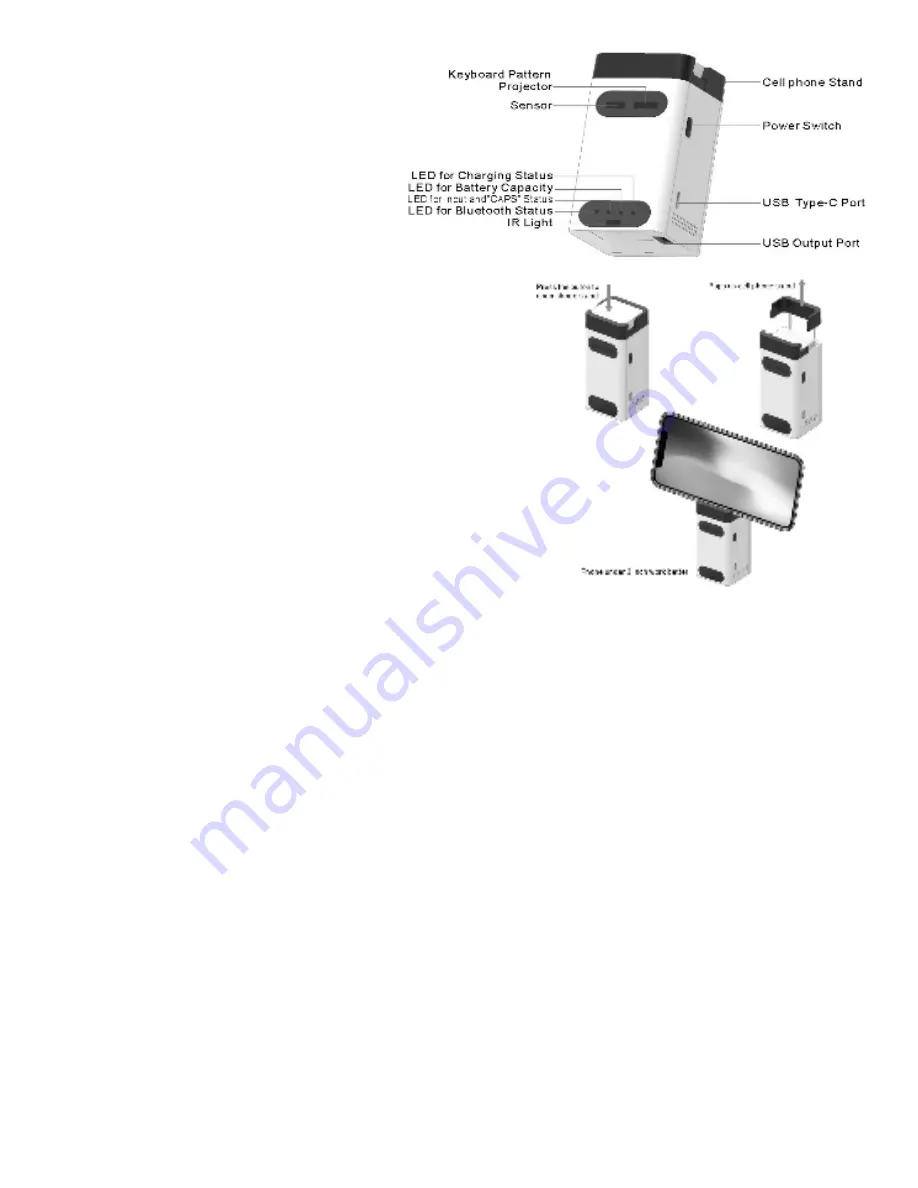
A. Keyboard pattern projector
B. Sensor
C. Cell phone stand
D. Power switch
E. Charging status LED
F. Battery capacity LED
G. LED for input / “CAPS” status
H. Bluetooth status LED
I. Infrared light
J. USB-C port
K. USB Output port
•
OPERATION
L. Press button to open smartphone stand.
M. Smartphone stand pops up.
N.
NOTE:
Works best with phones under 6”.
CONNECTING VIA USB
This device features plug and play capability, without installing a separate driver or other software.
1. Connect Laser Projection Keyboard and host device using supplied USB Type-C cable. Host
device must support USB HID.
2. Power on the Laser Projection Keyboard.
CONNECTING VIA BLUETOOTH
This device supports Bluetooth connection. Connection via Bluetooth HID does not require
installation of separate driver as long as the host device has HID compatibility. Bluetooth 3.0 or
higher is required for connecting to some devices.
1. Power on the Laser Projection Keyboard.
2. The Bluetooth Status LED will be blinking, indicating the Laser Projection Keyboard is searching
for a new device or previously paired devices within its proximity.
3. Laser Projection Keyboard will automatically attempt to re-connect to the recently connected
devices.
4. To pair it with a new device, turn the connected device Bluetooth off. The Bluetooth Status LED
will be blinking again.
5. On primary device, go to Bluetooth setting; search for Bluetooth devices.
6. When the device discovers “Laser Projection Keyboard,” tap to connect.
7. Upon successful pairing, the LED will stop blinking and turn off.


