Sharper Image 205404 User Manual Download Page 10

To charge the smartphone or PDA: 

1.

Turn off the radio and flashlight to conserve power.

2.

Lift  the  rubber  tab  on  the  back  of  the  Emergency  Solar  Hand  Crank  Radio  to  expose  the

connectors, as shown in Figure 2.

3.

Plug the smartphone charging cable (Figure 

2

, reference 1) into the Emergency Solar Hand

Crank  Radio  charge  USB  output  (Figure 

2

).  Connect  the  appropriate  smartphone tip into

the other end of the smartphone charging cable. Plug other end of the smartphone tip into


the

smartphone’s charging connector.

4.

If the phone does not begin charging, disconnect the phone and begin cranking. When


charging

a smartphone via the smartphone charger, it is important to turn the crank at least


two

revolutions per second. After two minutes of cranking at two revolutions per minute, wait


two

minutes to begin cranking again. This will extend the crank life.

NOTE:

 You may receive a charging compatibility error on your smartphone, but your device may 

still charge and it will not harm your device. 

CAUTION

: Before charging, please refer to the user manual of the device you wish to charge to 

make sure the charging current required does not exceed 1Amp (1,000 mA) of charging current. 

Overloading the charge circuit may damage the Emergency Solar Hand Crank Radio and void the 

warranty. 

5.6 Low Battery Indication 

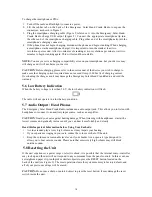
When the battery voltage is less than 3.0V, the low battery indication will flash: 

The radio will not operate in a low battery condition. 

5.7 Audio Output / Head Phones 

The Emergency Solar Hand Crank Radio includes an audio output jack.  This allows you to listen with 

headphones or connect to an auxiliary input source, such as an amplifier. 

CAUTION

: Guard your ears against hearing damage. When listening with headphones, start at the 

lowest volume and gradually increase until you can hear it comfortably and clearly. 

Read this Important Information before Using Your Earbuds: 

Avoid extended play at very high volume as it may impair your hearing.

If you experience ringing in your ears, reduce the volume or shut off the unit.

Keep the volume at a reasonable level even if your headset is an open-air


type designed to

allow you to hear outside sounds. Please note that excessively high volume


may still block

outside sounds

.

If the unit experiences a power surge or electric shock, it is possible that the internal micro-controller 

may lock up and the unit will not respond to any commands from the panel controls. In this event, use 

a straightened paper clip, toothpick or similar objects to press the RESET button located on the 

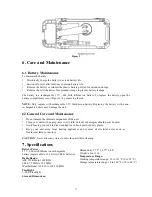
back of the unit (see Figure 9). The reset operation clears the system memory to factory default, and 

all of your previous settings will be erased. 

CAUTION: 

Do not use a sharp or pointed object to press the reset button. It may damage the reset 

switch inside the unit. 

10

5.8 Resetting the Unit

Summary of Contents for 205404

Page 1: ...Emergency Solar Hand Crank Radio Item No 205404 User s Guide...

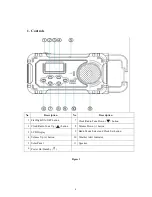
Page 2: ...t ON OFF button 7 Clock Radio Tune Down button 2 LCD Display 8 Volume Down button 3 Clock Radio Tune Up button 9 Radio Mode Select and Clock Set button 4 Volume Up button 10 Weather Alert Indicator 5...

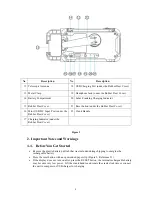
Page 3: ...ank Handle 17 Charging Indicator under the Rubber Dust Cover Figure 2 2 Important Notes and Warnings 1 1 Before You Get Started Remove the plastic battery pull tab that was included during shipping to...

Page 4: ...anufacturer 9 Refer all servicing to qualified service personnel Servicing is required when the device has been damaged in any way such as liquid has been spilled or the device has been exposed to rai...

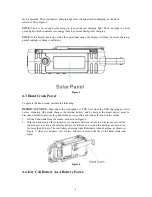
Page 5: ...it Figure 2 reference 17 The LED is flashing during charging When fully charged the LED will turn on constantly NOTE Lithium battery is always on priority in power supply compared with AAA batteries O...

Page 6: ...he smartphone or PDA first from the USB charging port first before cranking the crank charges the internal battery and by design the smart device must be disconnected first to prevent the phone from p...

Page 7: ...ower sources Mode Typical User Operation Power Consumption Recommend Power Source Flashlight Emergency or remote use Low Solar Hand Crank AAA Batteries AM FM Weather Band Radio Emergency or remote use...

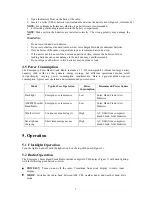
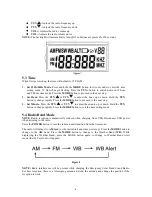
Page 8: ...p 3 Set Minute Press the TUN or TUN to adjust the minute up or down Hold the TUN button to change rapidly Press the MODE button to exit the time setting mode 5 4 Radio Band Mode NOTE Radio reception i...

Page 9: ...s a weather statement watch or warning In the event of an alert the alert light will flash and the radio will sound with the voice of the National Weather Service To disable the alert light press MODE...

Page 10: ...e battery voltage is less than 3 0V the low battery indication will flash The radio will not operate in a low battery condition 5 7 Audio Output Head Phones The Emergency Solar Hand Crank Radio includ...

Page 11: ...General Care and Maintenance Do not tamper the internal components of the unit Clean your unit with a damp never wet cloth Solvent or detergent should never be used Avoid leaving your unit in direct s...

Page 12: ...ntended for emergency charges and not for topping off already charged devices The Emergency Solar Hand Crank Radio will no longer hold a charge Replace the 3V lithium ion rechargeable battery CR123A T...

Page 13: ...mergency Solar Hand Crank Radio is locked up and will not respond to commands How do I reset it Remove the battery Press the reset button with a paperclip If the display does not turn on after press t...

Page 14: ...se harmful interference to radio or television reception which can be determined by turning the equipment off and on the user is encouraged to try correcting the interference by one or more of the fol...

Reviews: