background image

11/9/8

10_XL-HF301PH_EN.fm

10

9

8

7

6

5

4

3

2

1

E-6

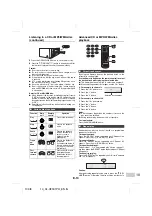
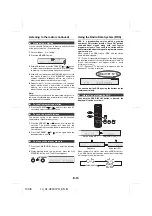
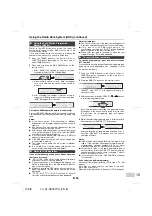
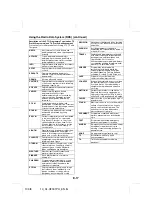
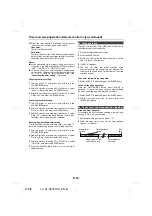
General control 

Press the ON/STAND-BY button to turn the power on.

To dim the display brightness, press the DEMO/DIMMER
button on the remote control.

If you turn off and on the main unit with the volume set to 27
or higher, the volume starts at 16 and fades in to the last set
level.

Turn the volume knob towards /– (on main unit) or
press VOL +/– (on remote control) to increase or decrease the
volume.

When you press any of the following buttons, the unit turns on.

iPod, CD, USB, AUDIO / LINE (INPUT), TUNER on the
remote control: Selected function is activated.

/  button on the main unit: The unit turns on and play-

back of the last function will start (CD, TUNER, USB, iPod,
AUDIO IN, LINE IN)

The main unit will enter the stand-by mode (when iPod or
iPhone is not docked) after 15 minutes of inactivity during:
iPod or iPhone: No connection.
CD / USB: In the stop mode.
AUDIO IN / LINE IN: No detection of input signal or very low

  sound audibility.

Note:

However, if iPod or iPhone is docked, the unit will begin
charging.
“Charge Mode” will be displayed.

The volume is muted temporarily when pressing the 

 button

on the remote control. Press again to restore the volume.

When the power is first turned on, the unit will enter the extra
bass mode which emphasises the bass frequencies, and
“X-BASS ON” will appear. To cancel the extra bass mode,
press the X-BASS button on the remote control.

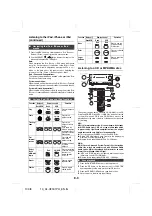
1

Press the BASS/TREBLE button to select “Bass”.

2

Within 5 seconds, press the VOLUME (+ or –) button to
adjust the bass.

1

Press the BASS/TREBLE button to select “Treble”.

2

Within 5 seconds, press the VOLUME (+ or –) button to
adjust the treble.

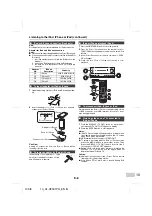
When the FUNCTION button on main unit is pressed, the
current function will change to different mode. Press the
FUNCTION button repeatedly to select desired function.

Note:

The backup function will protect the memorised function
mode for a few hours should there be a power failure or the
AC power lead becomes disconnected.

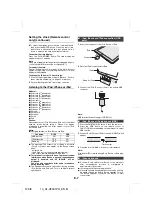
Setting the clock (Remote control only)

In this example, the clock is set for the 24-hour (0:00) display.

To turn the power on

After use:

Press the ON/STAND-BY button to enter the power stand-
by mode.

Display brightness control

Volume auto fade-in

Volume control

Auto power on function

Auto power off function

Muting

X-Bass control

CD/USB

RDS

Dimmer 1

Dimmer 2

Dimmer off

(Display is dim).

(Display is bright).

(Display gets dimmer).

Bass control

Treble control

Function

1

Press the ON/STAND-BY button to turn the power on.

2

Press the CLOCK/TIMER button.

3

Within 10 seconds, press the ENTER button. To adjust
the day, press the 

 or 

 button and then press the

ENTER button.

4

Press the 

 or 

 button to select 24-hour or 12-hour

display and then press the ENTER button. 

The 24-hour display will appear.
(0:00 -  23:59)

The 12-hour display will appear.
(AM 12:00 - PM 11:59)

The 12-hour display will appear.
(AM 0:00 - PM 11:59)

 To adjust the hour, press the 

 or 

 button and then

press the ENTER button. Press the 

 or 

 button

once to advance the time by 1 hour. Hold it down to
advance continuously.

- 5 

↔ 

- 4........

↔ + 

↔ + 

5

- 5 

↔ 

- 4........

↔ + 

↔ + 

5

FM STEREO

FM MONO

USB

iPod

Audio In

Line In

CD

CD/USB

RDS

Summary of Contents for XL-HF301PH

Page 1: ...GSANLEITUNG MODE D EMPLOI MANUAL DE MANEJO BRUKSANVISNING MANUALE DI ISTRUZIONI GEBRUIKSAANWIJZING MANUAL DE OPERAÇÃO KÄYTTÖOHJE INSTRUKCJA OBSŁUGI OPERATION MANUAL DEUTSCH PORTUGUÊS FRANÇAIS ESPAÑOL SVENSKA ITALIANO NEDERLANDS SUOMI POLSKI ENGLISH Siehe Seiten i bis x und D 1 bis D 22 Se reporter aux pages i à x et F 1 à F 22 Consulte las páginas i a x y S 1 a S 22 Hänvisa till sidorna i till x o...

Page 2: ...aget före reparationsarbeten och bör dras ut om apparaten inte ska användas på mycket länge Quando il tasto ON STAND BY si trova in posizione STAND BY all interno dell apparecchio c è ancora la corrente Se il tasto ON STAND BY si trova nella posizione STAND BY l unità può essere accesa con il modo timer o con il telecomando Avvertenza L apparecchio non contiene parti riparabili dall utente Non tog...

Page 3: ... DRAG UT STICKPROPPEN Audio visueel materiaal kan worden beschermd door auteursrechten in welk geval het niet mag worden opgenomen zonder de toestemming van de auteursrechthouder Zie voor nadere informatie de betreffende wetten in het land van gebruik O material audiovisual pode consistir de trabalhos de direitos autorias que não devem ser gravados sem autorização do proprietário dos direitos Favo...

Page 4: ...r på dette apparat Advarsel For å unngå brann eller kortslutning utsett ikke produktet for vann eller fuktighet Gjenstander som inneholder vaeske feks en blomstervase må ikke plasseres oppå apparatet Varoitus Älä vie laitetta sateeseen tai kosteisiin tiloihin Jos laite on kostunut anna sen kuivua ennen kuin käytät sitä verkkovirralla Nestettä sisältäviä astioita kuten esim kukkamaljakoita ei saa a...

Page 5: ... in questo giradischi può danneggiare gli occhi non smontare l apparecchio Per le riparazioni rivolgersi a personale specializzato LET OP Gebruik van regelaars het maken van instellingen gebruik of handelingen anders dan in deze gebruiksaanwijzing vermeld kan gevaarlijke straling blootleggen De laserstraal in deze CD speler kan de ogen beschadigen Probeer derhalve de ombouw niet te verwijderen Laa...

Page 6: ...aserowej Materiał AlGaAs Długość fali 790 nm Okres emisji ciągły Moc wyjściowa lasera maks 0 7 mW Laser Diode Properties Material AIGaAs Wavelength 790 nm Emission Duration continuous Laser Output max 0 7 mW Made for iPod Made for iPhone und Made for iPad bedeutet dass ein elektronisches Zubehörteil speziell für den Anschluss an einen iPod iPhone oder iPad konzipiert wurde und der Entwickler sich ...

Page 7: ...iligheids en regelgevende maatstaven Realiseer u dat het gebruik van dit accessoire een negatieve invloed kan hebben op draadloos gebruik van uw iPod iPhone of iPad A indicação Made for iPod Made for iPhone e Made for iPad significa que um acessório electrónico foi concebido para se ligar especificamente ao iPod iPhone ou iPad respectivamente e foi certificado pelo fabricante para satisfazer os pa...

Page 8: ...opéenne Si vous souhaitez mettre ce produit au rebut veuillez contacter votre administration locale qui vous renseignera sur la méthode d élimination correcte de cet appareil Attention votre produit comporte ce symbole Il signifiequeles produits électriques et électroniques usagés ne doivent pas être mélangés avec les déchets ménagers généraux Un système de collecte séparé est prévupources produit...

Page 9: ...ullo smaltimento per gli utenti privati 1 Nell Unione europea Attenzione Per smaltire il presente dispositivo non utilizzare il normale bidone della spazzatura Le apparecchiature elettriche ed elettroniche usate devono essere gestite a parte e in conformità alla legislazione che richiede il trattamento il recupero e il riciclaggio adeguato dei suddetti prodotti In seguito alle disposizioni attuate...

Page 10: ...cje na temat prawidłowej metody jego usunięcia Uwaga Państwa produkt oznaczony jest tym sym bolem Oznacza to że zużytego sprzętu elek trycznego i elektronicz nego nie należy łączyć z odpadami zgospo darstw do mowych Dla tego typu produktów istnieje odrębny sys tem zbiórki odpadów Information on Proper Disposal A Information on Disposal for Users private households 1 In the European Union Attention...

Page 11: ...gli del sistema di raccolta e riciclaggio Per la Svizzera Le batterie usate devono essere restituite al punto vendita Per altri Stati non EU Vi prego di contattare le autorità locali per conoscere il metodo corretto di conferimento delle batterie usate Informatie over afvalverwerking van batterijen De batterij die bij dit toestel geleverd wordt bevat sporen van Lood Voor EU De doorgestreepte vuiln...

Page 12: ...se is required For details please visit http mp3licensing com MPEG Layer 3 audio coding technology licensed from Fraunhofer IIS and Thomson Accessories The following accessories are included Page General Information Precautions 2 Controls and indicators 2 3 Preparation for Use System connections 4 5 Remote control 5 Basic Operation General control 6 Setting the clock Remote control only 6 7 iPod i...

Page 13: ...drawn to the environmental aspects of battery disposal This unit should only be used within the range of 5 C 35 C 41 F 95 F The apparatus is designed for use in moderate climates Warning The voltage used must be the same as that specified on this unit Using this product with a higher voltage other than that which is specified is dangerous and may result in a fire or other type of accident causing ...

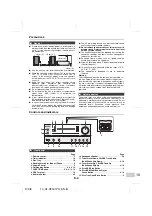
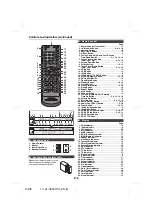
Page 14: ...ton 9 10 13 34 CD USB Stop Button 9 10 13 35 RDS Display Button 15 36 RDS PTY Button 15 Page 1 USB Indicator 13 2 iPod Indicators 8 3 CD Indicator 10 4 MP3 Indicator 11 5 WMA Indicator 11 6 RDM Random Indicator 11 7 MEM Memory Indicator 11 8 Repeat Indicator 10 9 Play Pause Indicator 10 10 Tuning FM Indicator 15 11 FM Stereo Mode Indicator 15 12 Stereo Station Indicator 15 13 RDS Indicator 15 14 P...

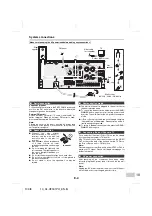
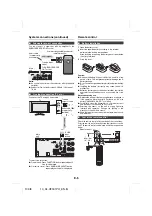
Page 15: ...ct it to the VIDEO OUT socket at the back of the unit and set the TV Out on the iPod or iPhone unit to ON position Note Please make sure to set iPod unit to either NTSC or PAL to match your TV signal Please visit Apple s homepage for further information After checking all the connections have been made correctly plug the AC power lead of this unit into the wall socket Note Unplug the AC power lead...

Page 16: ...comes erratic Purchase an AA size battery UM SUM 3 R6 HP 7 or similar Periodically clean the transmitter on the remote control and the sensor on the unit with a soft cloth Exposing the sensor on the unit to strong light may interfere with operation Change the lighting or the direction of the unit if this occurs Keep the remote control away from moisture heat shock and vibrations Check the remote c...

Page 17: ...ct Bass 2 Within 5 seconds press the VOLUME or button to adjust the bass 1 Press the BASS TREBLE button to select Treble 2 Within 5 seconds press the VOLUME or button to adjust the treble When the FUNCTION button on main unit is pressed the current function will change to different mode Press the FUNCTION button repeatedly to select desired function Note The backup function will protect the memori...

Page 18: ...ll be displayed You may also experience brief audio interference during incoming calls The headphone output is switched off during inserting iPod iPhone and iPad unit This is an Apple product specification Note USB terminal does not support VIDEO out 1 Press the ON STAND BY button to turn the power on 2 Press the USB button on the remote control or FUNCTION button repeatedly on the main unit to se...

Page 19: ...AY TV OUT button will not toggle video out display between iPod and TV Caution Unplug all accessories for the iPod or iPhone before inserting it into the docking station Stop button at main unit is invalid during iPod function iPod and iPhone connection Dock only Adaptor No iPhone Description Capacity 12 iPhone 4GB 8GB 16GB 15 iPhone 3G 8GB 16GB 15 iPhone 3GS 16GB 32GB 19 iPhone 4 16GB 32GB To ins...

Page 20: ...A files are Advanced System Format files that include audio files which are compressed with Windows Media Audio codec WMA is developed by Microsoft as an audio format file for Windows Media Player MP3 and WMA indicator will light up after the unit reads information on an MP3 or WMA disc Bitrate which is supported by WMA is 64 160 kbps Navigating the iPod iPhone or iPad menus 1 Press the MENU butto...

Page 21: ...m play direct search is not possible To stop playback Press the CD USB button Repeat play can play one track all tracks or a programmed sequence continuously To repeat one track Press the REPEAT button repeatedly until Repeat One appears Press the CD USB button To repeat all tracks Press the REPEAT button repeatedly until Repeat All appears Press the CD USB button To repeat desired tracks Perform ...

Page 22: ...Notes When a disc is ejected the programme is automatically cancelled If you press the ON STAND BY button to enter the stand by mode or change the function from CD to another the programmed selections will be cleared During the programme operation random play is not possible Random play Programmed play CD 1 Whilst in the stop mode press the MEMORY button on the remote control to enter the programm...

Page 23: ...f Not Support is displayed it means Copyright protected WMA file or Not supported playback file is selected About folder playback order 1 ROOT folder is set as folder 1 2 As for folders inside ROOT folder Folder A and Folder B the folder which is recorded earlier on the disc will be set as folder 2 and folder 6 3 As for folder inside Folder A Folder C and Folder D the folder which is recorded earl...

Page 24: ...due to various unforeseen reasons from some devices Should this happen turn off the unit and then turn it on again During CD function MP3 player will not be charging To play back USB MP3 player with folder mode off 1 Press the USB button on the remote control or FUNCTION button repeatedly on main unit to select USB function Connect the USB memory device that has MP3 WMA format files on the unit Wh...

Page 25: ... file playback or pause mode WMA meta tag also supports title artist and album name which are recorded in WMA files Copyright protected WMA files cannot be played back Listening to the radio Notes When radio interference occurs auto scan tuning may stop automatically at that point Auto scan tuning will skip weak signal stations To stop the auto tuning press the TUNING or button again When an RDS R...

Page 26: ...ssed the display will switch as follows Memorising a station 1 Perform steps 1 3 in Tuning 2 Press the MEMORY button 3 Within 30 seconds press the PRESET or button to select the preset channel number Store the stations in memory in order starting with preset channel 1 4 Within 30 seconds press the MEMORY button to store that station in memory If the MEMORY and preset number indicators disappear be...

Page 27: ...change RT will be displayed To specify programmed types and select stations PTY search You can search a station by specifying the programme type news sports traffic programme etc see page 17 from the stations in memory Notes If the display has stopped flashing start again from step 2 If the unit finds a desired programme type the corresponding channel number will lit for about 8 seconds and then t...

Page 28: ...m Blues and Reggae are examples WEATHER Weather reports and forecasts and meteorological information FINANCE Stock Market reports commerce trading etc CHILDREN For programmes targeted at a young audience primarily for entertainment and interest rather than where the objective is to educate SOCIAL Programmes about people and things that influence them individually or in groups Includes sociology hi...

Page 29: ... on 2 Press and hold the CLOCK TIMER button 3 Within 10 seconds press the or button to select Once or Daily and press the ENTER button 4 Within 10 seconds press the or button to select Timer Set and press the ENTER button 5 To select the timer playback source CD TUNER USB iPod AUDIO IN LINE IN press the or button Press the ENTER button When you select the tuner select a station by pressing the or ...

Page 30: ...CLOCK TIMER button 2 Within 10 seconds press the or button to select Once or Daily and press the ENTER button 3 Within 10 seconds press the or button to select Timer Call and press the ENTER button 1 Turn the power on and press and hold down the CLOCK TIMER button 2 Within 10 seconds press the or button to select Once or Daily and press the ENTER button 3 Within 10 seconds press the or button to s...

Page 31: ...lay the connected equipment If volume level of the connected device is too high sound distortion may occur Should this happen lower the volume of the connected device If volume level is too low increase the volume of the connected device Headphones Audio cable not supplied Portable audio player etc General Symptom Possible cause The clock is not set to the correct time Did a power failure occur Re...

Page 32: ...r water on the CDs can cause noise or mistracking If a CD is dirty or does not play properly clean it with a soft dry cloth wiping straight out from the centre along the radius Maintenance Periodically wipe the cabinet with a soft cloth and a diluted soap solution then with a dry cloth Caution Do not use chemicals for cleaning petrol paint thinner etc It may damage the cabinet Do not apply oil to ...

Page 33: ...recommended 32 ohms Input terminals Audio In audio signal 500 mV 47 k ohms Line in Analogue input 500 mV 47 k ohms CD player Type Single disc multi play compact disc player Signal readout Non contact 3 beam semiconductor laser pickup D A converter Multi bit D A converter Frequency response 20 20 000 Hz Dynamic range 90 dB 1 kHz USB MP3 WMA USB host interface Complies with USB 1 1 Full Speed 2 0 Ma...

Page 34: ...XL HF301PH_Back fm 2011September8 TINSZB041AWZZ 11K R KI 1 ...

Page 35: ...XL HF301PH S HI FI COMPONENT SYSTEM U P DOWN ...

Reviews: