1
Features of This Software
•
SV Photo Capture
SV Photo Capture can be used to control your
camcorder connected to your PC, and to
capture images being displayed on the LCD
screen, or images recorded on tapes into the
PC as still pictures.
•
SV Card Link*
SV Card Link can be used to capture still
pictures stored on a camcorder’s media card
directly into your PC.
* SV Card Link can only be used with a
camcorder equipped with a card slot.
System Requirements
• IBM PC/AT or compatible with Intel
®
Pentium
®
133 MHz or faster processor
• Microsoft Windows
®
95B, Windows
®
95C,
Windows
®
98, Windows
®
98 Second Edition,
Windows
®
Me, or Windows
®
2000 Profes-
sional* operating system
• 32 MB or more of RAM
• 9 MB minimum of available hard-disk space
• SVGA (800
×
600 pixels) color display monitor
with 16-bit color or higher
• CD-ROM drive (for installation)
• RS-232C serial port
• Mouse or other pointing device
* In the Windows
®
2000 Professional environ-
ment, only the system administrator has
installation access rights.
Note:
• For the latest product information, be sure to
read the “Readme” text file located in the
“Readme” folder of the supplied PixLab CD-
ROM. Select the “Readme” text file you prefer.
The letters between “Readme” and “.txt” define
the language; for example, “en” in
“Readmeen.txt” stands for English, etc.
Supplied Accessories
Installing the Software
1
Turn on the PC and start up Windows.
2
Insert the PixLab CD-ROM into the
CD-ROM drive.
3
Double click on the “My Computer” icon.
4
Double click on the CD-ROM drive icon.
5
Double click on the “Setup.exe” file.
6
Follow the instructions as they appear
on the PC monitor until the installation is
complete.
7
Restart the PC.
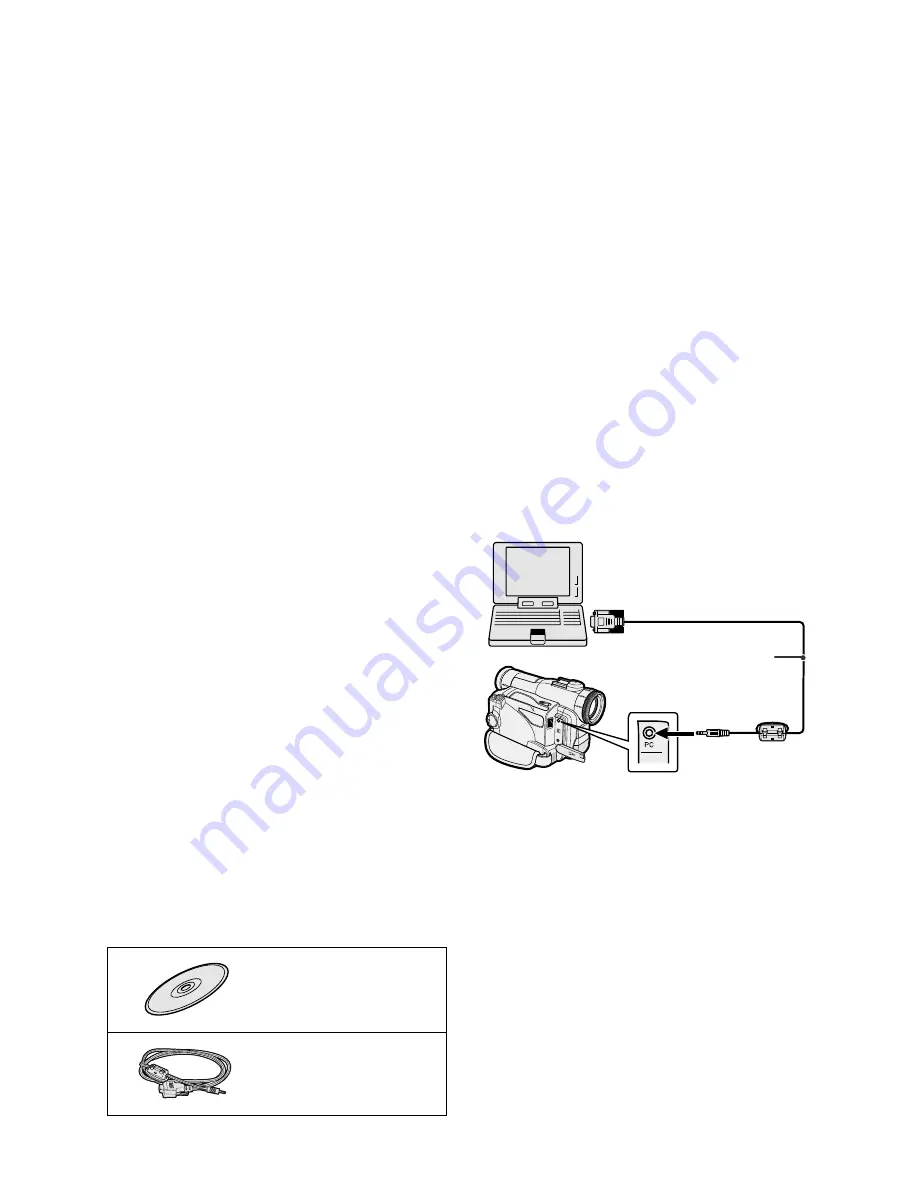
Connecting the camcorder to a
Personal Computer
1
Turn off the PC.
2
Connect the camcorder as shown below.
• Before connecting the camcorder to the
PC, make sure that the PC power is off
to insure that images are transferred
properly.
3
Turn on the PC.
For details on how to use the PixLab, refer to
the PDF manual included in the supplied
PixLab CD-ROM.
Refer to “Using the PDF Manual” on the next
page.
Note:
• It is recommended to use the AC adapter/battery
charger as a power source for extended periods
of use.
PixLab CD-ROM
PC connecting cable
To RS-232C port
(D-sub 9-pin port)
PC connecting cable
(supplied)
To PC connection jack*
*Refer to the operation manual that comes with your
camcorder about the PC connection jack.


