background image

3

This appliance must be grounded. This oven is equipped with a cord having a grounding wire with a grounding plug.
It must be plugged into a wall receptacle that is properly installed and grounded in accordance with the National
Electrical Code and local codes and ordinances. In the event of an electrical short circuit, grounding reduces risk of
electric shock by providing an escape wire for the electric current.

WARNING

 – Improper use of the grounding plug can result in a risk of electric shock.

Electrical Requirements
The electrical requirements are a 120 volt 60 Hz, AC only, 15 amp. or more
protected electrical supply. It is recommended that a separate circuit serving   only
this appliance be provided.
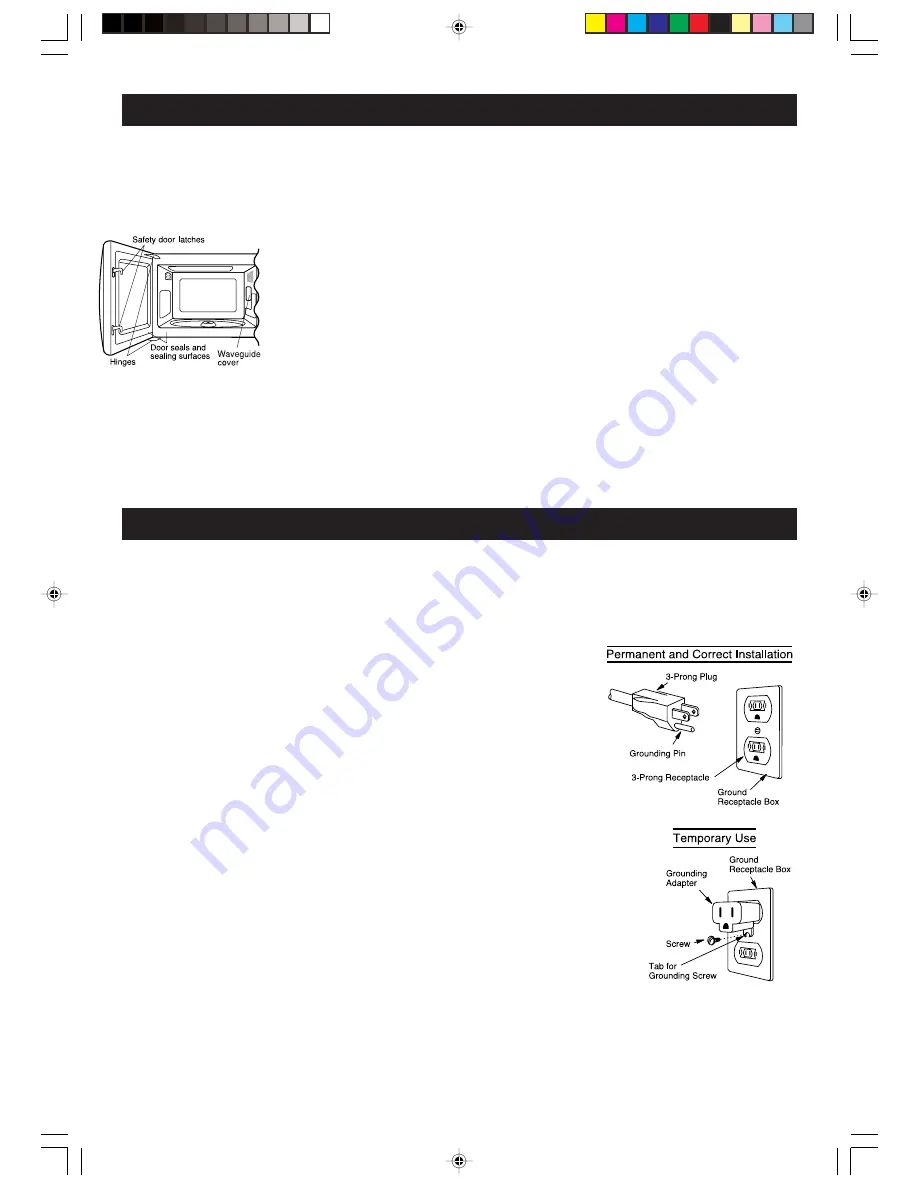
The oven is equipped with a 3-prong grounding plug. It must be plugged into a
wall receptacle that is properly installed and grounded. Should you only have a
2-prong outlet, have a qualified electrician install a correct wall receptacle.
A 3-prong adapter may be purchased and used temporarily if local codes allow.
Follow package directions.
A short power-supply cord is provided to reduce risk of becoming entangled in or
tripping over a longer cord.

Extension Cord
If it is necessary to use an extension cord, use only a 3-wire extension cord that
has a 3-blade grounding plug and a 3-slot receptacle that will accept the plug on
the microwave oven. The marked  rating of the extension cord should be AC 115-
120 volt, 15 amp. or more.
Be careful not to drape the cord over the countertop or table where it can be pulled
on by children or tripped over accidentally.
Notes:
1. If you have any questions about the grounding or electrical instructions, consult

a qualified electrician or service person.

2. Neither Sharp nor the dealer can accept any liability for damage to the oven or

personal injury resulting from failure to observe the correct electrical connection procedures.

Radio or TV Interference
Should there be any interference caused by the microwave oven to your radio or TV, check that the microwave oven
is on a different electrical circuit, relocate the radio or TV as far away from the oven as feasible or check position and
signal of receiving antenna.

G R O U N D I N G   I N S T R U C T I O N S

Unpacking and Examining Your Oven

Remove:
1. all packing materials from inside the oven cavity;

however, DO NOT REMOVE THE WAVEGUIDE
COVER, which is located on the right cavity wall.

Read enclosures and SAVE
the Operation Manual.
2. the feature sticker, if there
is one, from the outside of the
door.
Check the oven for any dam-
age, such as misaligned or
bent door, damaged door
seals and sealing surfaces,
broken or loose door hinges

and latches and dents inside the cavity or on the door.
If there is any damage, do not operate the oven and
contact your dealer or SHARP AUTHORIZED
SERVICER.

Choosing a Location for Your Oven

You will use the oven frequently so plan its location for

ease of use. It's wise, if possible, to have counter space
on at least one side of the oven. Allow at least 2 inches
on the sides, top and at the rear of the oven for air
circulation. Do not place or install the oven in any area
where heat and steam are generated; for example,
next to or above a conventional gas or electric range
or above a conventional wall oven. Heat and steam
may damage the electronics or the mechanical parts of
the oven.

Built-in Kit

Your oven can be built into a cabinet or wall—not
near or above a heat source—using Sharp’s black
Built-in Kit RK-46K24 for the R-408JK and the white
RK-46W24 for the R-408JW. If your dealer does not
stock the kit, it can be ordered directly from the Sharp
Accessories and Supplies Center. Have your credit
card number available and call toll-free: 1-800-642-2122
for ordering the kit to be sent to your address.
The kit includes ducts and finish trim strips and easy-
to-follow instructions for installation as well as the
location of the power supply.

U N P A C K I N G   A N D   I N S T A L L A T I O N   I N S T R U C T I O N S

1.408JK/W_376 24 pgs

2/18/04, 2:29 PM

3

Summary of Contents for R-408J

Page 1: ...and Installation Instructions 3 Grounding Instructions 3 Information You Need to Know 4 6 Part Names 7 Before Operating 8 Manual Operation 9 Special Features 10 15 Other Convenient Features 16 17 Cleaning and Care 18 Service Call Check 19 The Ultimate Accessory 19 Specifications 20 Cookbook Order Form 20 Guia Auto Touch 21 Auto Touch Guide Back Cover MODEL R 408J Followed by letter indicating colo...

Page 2: ...ulate on sealing surfaces c Do not operate the oven if it is damaged It is particularly important that the oven door close properly and that there is no damage to the 1 door bent 2 hinges and latches broken or loosened 3 door seals and sealing surfaces d The oven should not be adjusted or repaired by anyone except properly qualified service personnel TO PHONE DIAL 1 800 BE SHARP 237 4277 for SERVI...

Page 3: ...er based on contract negligence strict liability or otherwise In no event shall Sharp be liable or in any way responsible for any damages or defects in the Product which were caused by repairs or attempted repairs performed by anyone other than an authorized servicer Nor shall Sharp be liable or in any way responsible for any incidental or consequential economic or property damage Some states do n...

Page 4: ...rd away from heated surfaces 14 Do not let cord hang over edge of table or counter 15 See door surface cleaning instructions on page 18 16 To reduce the risk of fire in the oven cavity a Do not overcook food Carefully attend to appliance when paper plastic or other combustible materials are placed inside the oven to facilitate cooking b Remove wire twist ties from paper or plastic bags before plac...

Page 5: ...ould there be any interference caused by the microwave oven to your radio or TV check that the microwave oven is on a different electrical circuit relocate the radio or TV as far away from the oven as feasible or check position and signal of receiving antenna G R O U N D I N G I N S T R U C T I O N S Unpacking and Examining Your Oven Remove 1 all packing materials from inside the oven cavity howev...

Page 6: ...p fat fry Dry wood gourds herbs or wet papers DO DON T FOOD This Operation Manual is valuable read it carefully and always save it for reference A good microwave cookbook is a valuable asset Check it for microwave cooking principles techniques hints and recipes See pages 19 and 20 for ordering the Ultimate Accessory the Sharp Carousel Microwave Cookbook NEVER use the oven without the turntable and...

Page 7: ...ecause they may be extra hot Don t assume that because a child has mastered one cooking skill he she can cook everything Children need to learn that the microwave oven is not a toy See page 17 for Child Lock feature It is not necessary to buy all new cookware Many pieces already in your kitchen can be used success fully in your new microwave oven Make sure the utensil does not touch the interior w...

Page 8: ...aque and flakes easily with a fork Check foods to see that they are cooked to the United States Department of Agriculture s recommended temperatures To test for doneness insert a meat thermometer in a thick or dense area away from fat or bone NEVER leave the thermometer in the food during cooking unless it is approved for microwave oven use ALWAYS use potholders to prevent burns when handling uten...

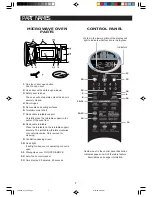
Page 9: ...e turntable support securely The turntable will rotate clockwise or counterclockwise Only remove for cleaning 9 Ventilation openings rear 10 Oven light It will light when oven is operating or door is open 11 Waveguide cover DO NOT REMOVE 12 Auto Touch control panel 13 Time display 99 minutes 99 seconds CONTROL PANEL Number next to the control panel illustration indicates pages on which there are f...

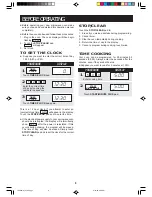
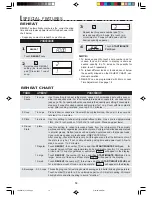
Page 10: ...clock B E F O R E O P E R AT I N G 88 88 ERROR Touch the STOP CLEAR pad to 1 Erase if you make a mistake during programming 2 Cancel timer 3 Stop the oven temporarily during cooking 4 Return the time of day to the display 5 Cancel a program during cooking touch twice 88 88 TO SET THE CLOCK Suppose you want to enter the correct time of day 12 30 A M or P M P R O C E D U R E D I S P L AY 1 2 3 STOP ...

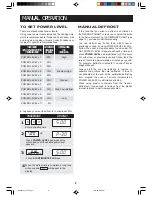
Page 11: ... or is above or below the limits in the Amount column on the DEFROST CHART see page 14 you need to defrost manually You can defrost any frozen food either raw or previously cooked by using POWER LEVEL for 30 Follow the exact 4 step procedure found under TO SET POWER LEVEL Estimate defrosting time and press POWER LEVEL pad eight times for 30 power For either raw or previously cooked frozen food the...

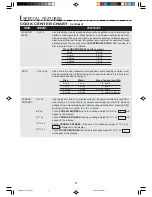
Page 12: ... cooking time for most brands of microwave popcorn You may wish to try several and choose your favorite Pop only one bag at a time Unfold bag and place in oven according to directions Suppose you want to pop a 3 5 oz bag regular of popcorn Touch POPCORN once for 3 5 oz bag Regular Touch POPCORN twice within 2 seconds for 2 85 3 5 oz bag Regular Light Touch POPCORN three times within 3 seconds for ...

Page 13: ... give satisfactory results for most brands You may wish to try several and choose your favorite Remove package from outer wrapping and follow package directions for covering After cooking let stand covered for 1 to 3 minutes Touch FROZEN ENTREES once for package weight of 6 8 oz will appear in the display Touch FROZEN ENTREES twice for package weight of 9 11 oz will appear in the display Touch FRO...

Page 14: ...ted canned or homemade pasta with sauce or other cooked casserole For room temperature pasta or casserole use Less option see page 16 For pasta without sauce double the quantity per setting For example measure 2 cups of cooked noodles and program for 1 cup Cover with lid or plastic wrap After cooking let stand covered 2 to 3 minutes This setting is good for restoring cooled beverages to a better d...

Page 15: ...uillon and instant soup as well as heat the water to cook pasta When preparing individual cups place instant coffee tea or bouillon in cup and stir before heating Allow to stand 20 seconds after heating before stirring and drinking Stir carefully after removing from the oven When heating 6 cups of water place in large casserole and cover with lid or plasticwrap Whenovensignals addpastaandcontinue ...

Page 16: ... of aluminum foil to cover edges and thinner sections of the food DEFROST CHART F O O D P R O C E D U R E 5 2 0 lb 5 2 0 lb 5 3 0 lb FOOD NO LBS CUPS OZ COOK DEFROST A M O U N T 5 3 0 lb Pull apart and remove any thawed pieces after each stage Let stand covered for 5 to 10 minutes After each stage rearrange and if there are warm or thawed portions shield with smallflatpiecesofaluminumfoil Removean...

Page 17: ...er 2 Chocolate 2 tbsp 1 2 cup 1 cup chips 1 square Use a Pyrex measuring cup Cover with plastic wrap After touching MELT touch 1 two times for 2 tbsp After touching MELT touch 1 three times for 1 2 cup After touching MELT touch 2 two times for 1 cup chips After touching MELT touch 2 three times for 1 square SOFTEN 1 Ice cream 2 Cream cheese 1 pint 1 2 gallon 3 oz 8 oz DO NOT COVER After touching S...

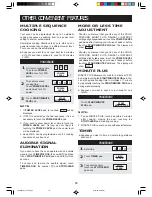
Page 18: ...l Your oven can do this automatically Suppose you want to cook roast beef for 5 minutes at 100 and then continue to cook for 30 minutes at 50 Suppose you want to time a 3 minute long distance phone call TIMER Should you discover that you like any of the COOK POPCORN SHORT CUTS REHEAT or DEFROST settings slightly more done touch the POWER LEVEL pad once after touching your choice of pads or before ...

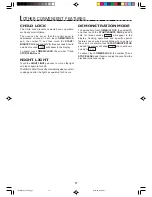
Page 19: ... three seconds will appear in the display Cooking operations and specific special features can now be demonstrated with no power in the oven For example touch START MINUTE PLUS pad and the display will show and count down quickly to End To cancel touch TIMER CLOCK the number 0 and STOP CLEAR pads If easier unplug the oven from the electrical outlet and replug DEMONSTRATION MODE O T H E R C O N V E...

Page 20: ...ith a soft cloth and warm water DO NOT USE ABRASIVE OR HARSH CLEANERS OR SCOURING PADS For heavier soil use baking soda or a mild soap rinse thoroughly with hot water NEVER SPRAY OVEN CLEANERS DIRECTLY ONTOANY PART OF THE OVEN Waveguide Cover The waveguide cover is made from mica so requires special care Keep the waveguide cover clean to as sure good oven performance Carefully wipe with a damp clo...

Page 21: ...ay is counting down very rapidly check Demonstration Mode on page 17 and cancel S E R V I C E C A L L C H E C K TO ORDER Simply call this toll free number 1 800 642 2122 Please have your credit card ready If you prefer to order by mail complete and return the order form on page 20 Please include check or money order payable to Sharp Accessories Supplies Center for 6 00 plus 4 25 shipping handling ...

Page 22: ...e is subject to change without notice COOKBOOK ORDER FORM Mail to SHARP Accessories Supplies Center 2130 Townline Road Peoria Illinois 61615 1560 R 408J S P E C I F I C AT I O N S The International Electrotechnical Commission s standardized method for measuring output wattage This test method is widely recognized Internal capacity is calculated by measuring maximum width depth and height Actual ca...

Page 23: ...grama deseado en el configuración de REHEAT Ex Pulse 2 para recalentar 1 plato de sopa 3 Pulse dos veces el botón 2 para 3 tazas 4 Pulse el botón START MINUTE PLUS T I P O D E C O M I D A C A N T I D A D POPCORN Oprima POPCORN una vez para el tamaño normal de palomitas 3 5 onzas 2 veces tamaño regular ligero 2 85 a 3 5 onzas 3 veces tamaño mini 1 2 a 1 6 onzas 3 veces con et ajuste MORE tamaño ref...

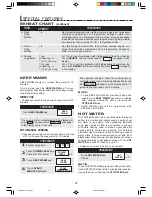
Page 24: ...ze 1 5 1 75 oz COOK CENTER CHART F O O D A M O U N T Touch KEEP WARM pad KEEP WARM starts automatically and continues for 15 minutes KEEP WARM Carousel is a registered trademark of Sharp Corporation REHEAT START MINUTE PLUS 1 Pasta Sauce 2 Soup 3 Pizza 4 Dinner Plate 5 Beverage 6 Fresh Rolls Muffins 7 Frozen Rolls Muffins 8 Canned Vegetables 1 6 cups 1 6 cups 1 6 slices 1 plate Reg Large or Small ...

Reviews: