background image

EN-9


If the door of machine does not close properly, check if the machine is stable on

the floor if not, adjust the feet and ensure its stable position.

Water connection

Indoor plumbing must be suitable for installing a dishwasher. Also, we recommend

that you fit a filter at the entrance of your property so as to avoid any damage 

to your machine because of contamination (sand, clay, rust etc.) that might be 

occasionally carried in through the mains water supply or the indoor plumbing, 

and to prevent such complaints as yellowing and formation of deposits after 

washing.

Water inlet hose

Do not use the water inlet hose of your old machine.

Use the new one supplied with your machine instead. If

you connect a new or long - unused water inlet hose

to your machine ,run water through it for a while before

making the connection. Connect the water inlet hose

directly to the water inlet tap. The pressure supplied by

the tap should be at a minimum of 0.03 Mpa and and at

a maximum of 1 Mpa.If the water pressure is above 1

Mpa,a pressure-relief valve should be fitted inbetween.


After making connections, the tap should be turned on fully and checked for

water tightness. For safety purposes, we recommend that you turn off the water 

inlet tap when the machine is not going to be  used for an extended period of 

time.

NOTE:

 An  Aquastop water etc. spout is used in some

models. With Aquastop, a potentially dangerous

tension exists.Do not cut the Aquastop water spout.

Do not let it get folded or twisted.

Water outlet hose 

The water drain hose can be connected either directly

to the water drain hole or to the sink outlet spigot.

Using a special bent pipe (if available), the water can

be drained directly into the sink via hooking the bent

pipe over the edge of the sink. This connection should

be between 50 and 110 cm from the floor plane. 

CHAPTER -3:  INSTALLING THE MACHINE

Summary of Contents for QW-S32I472X-EN

Page 1: ...QW S32I472X EN ...

Page 2: ......

Page 3: ...PTER 5 LOADING YOUR DISHWASHER Dish rack 14 Alternative basket loads 16 CHAPTER 6 PROGRAMME DESCRIPTIONS Programme items 18 CHAPTER 7 SWITCHING ON THE MACHINEAND SELECTINGAPROGRAMME Switching on the machine 21 Programme follow up 21 Changing a programme 21 Changing a programme with resetting 22 Switching the machine off 22 CHAPTER 8 MAINTENANCE AND CLEANING Filters 23 Spray arms 23 Hose filter 23 ...

Page 4: ...spray arm 3 Lower basket 4 Lower spray arm 5 Filters 6 Rating plate 7 Control Panel 8 Detergent and rinse aid dispenser 9 Salt dispenser 10 Upper basket track latch 11 Upper Cutlery Basket Active Drying Unit This system provides better drying performance for your dishes 12 ...

Page 5: ...supply pressure 0 03 MPa 0 3 bar 1 MPa 10 bar Current 10 A Technical specifications Conformity with the standards and Test data EU Declaration of Conformity This product meets the requirements of all applicable EU directives with the corresponding harmonised standards which provide for CE marking Please visit www sharphomeappliances com for an electronic copy of this user manual CHAPTER 1 TECHNICA...

Page 6: ... by following the instructions We recommend that the machine is installed by an authorised installer and should only be serviced by an approved technician Only original spare parts should be used with the machine Before installing be sure that the machine is unplugged Check whether the indoor electrical fuse system is connected according to the regulations All electrical connections must match val...

Page 7: ...ll be opened at the end of the program Do not force the door closed to avoid harming the auto door mechanism for 1 minute The door must be open for 30 minutes to dry effecti vely in models with auto door opening system Warning Do not stand in front of the door after the auto open signal sounds For your children s safety After removing the machine s packaging make sure that the packaging material i...

Page 8: ...tant lead crystal glasses cutting boards items manufactured with synthetic fibre Absorbent items as sponges or kitchen rags are not suitable for dishwashing Warning Take care to buy dishwasher proof sets in your future purchases INSTALLING THE MACHINE Positioning the machine When determining the installation place choose an accessible place for easy loading and unloading of the dishes Do not put y...
Page 9: ...e water inlet hose directly to the water inlet tap The pressure supplied by the tap should be at a minimum of 0 03 Mpa and and at a maximum of 1 Mpa If the water pressure is above 1 Mpa a pressure relief valve should be fitted inbetween After making connections the tap should be turned on fully and checked for water tightness For safety purposes we recommend that you turn off the water inlet tap w...

Page 10: ...If the mains voltage in your location is 110 V connect a transformer of 110 220 V and 3000 W inbetween The machine should not be plugged in during positioning Always use the coated plug supplied with your machine Running in low voltage will cause a decline in washing quality The machine s electrical cable should be replaced by an authorised service or an authorised electrician only Failure to do s...

Page 11: ...achine Otherwise the function of the softener the compartment may decrease over time When you start the machine the salt compartment gets filled with water There fore add the softener salt in prior to starting your machine This way overflowing salt gets immediately cleaned up through the wash operation If you will not wash any dishes immediately after adding salt then run a short washing program w...

Page 12: ...Detergent usage Use a detergent specifically designed for use in domestic dishwashers You can find powder gel and tablet detergents that have been designed for household dishwashers Detergent should be put into the compartment prior to starting the machine Keep your detergents in cool dry places out of reach of your children Do not overfill the detergent compartment otherwise it may cause scratche...

Page 13: ...rgent manufacturer directly When you stop using combined detergents Fill the salt and rinse aid compartments Adjust the water hardness setting to the highest position and run an empty wash Adjust the water hardness level Make the suitable rinse aid setting Filling with rinse aid and making the setting Adequate amount of rinse aid prevents the accumulation of white water drops lime stains white fil...

Page 14: ...n the basket Also you can use these racks by placing long forks knives and spoons on them laterally Folding Racks Foldable racks on the upper basket are designed in order to let you place big items easier such as pots pans etc If requested each part can be folded separately or all of them can be folded and larger spaces can be obtained You can use foldable racks by raise them upwards or by folding...

Page 15: ... are located on the lower basket of your machine are designed in order to let you place big items easier such as pots pans etc If requested each part can be folded separately or all of them can be folded and larger spaces can be obtained You can use folding racks by raising them upwards or by folding them down ...

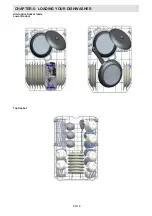
Page 16: ...EN 16 Alternative basket loads Lower Basket Top basket CHAPTER 5 LOADING YOUR DISHWASHER ...

Page 17: ...or detailed information on performance tests please contact following address dishwasher standardtest info In your email please provide the model name and serial number 20 digits which you can find on the appliance door ñ CHAPTER 5 LOADING YOUR DISHWASHER X X ...

Page 18: ...A 5 cm3 A B A B A B A B 50 C Wash 45 C Wash 65 C Wash Prewash 70 C Wash 65 C Wash Intermediate rinse 60 C Wash Cold Rinse Cold Rinse Hot rinse Hot rinse Hot rinse Intermediate rinse End Dry Dry Hot rinse End End Dry End Programme duration min 124 115 50 100 Electricity consumption kW hours 1 31 1 33 1 08 1 03 Water consumption litres 15 1 17 6 10 5 14 5 Warning Short programmes do not include a dr...

Page 19: ...ing full load then select a programme Level of soil Medium Medium Small Detergent amount B 25 cm3 15 cm3A 5 cm3 A B A B B Prewash Prewash 40 C Wash Prewash 50 C Wash 40 C Wash Cold Rinse End Hot rinse Cold Rinse Hot rinse Dry Hot rinse End End Dry End Programme duration min 198 74 30 15 Electricity consumption kW hours 0 73 0 71 0 71 0 02 Water consumption liters 11 0 14 1 10 3 5 Only powder deter...

Page 20: ...you want to change or cancel the delayed start time you can adjust it with the delay timer button it will be activated according to the last value entered 5 Tablet Detergent Button 3 in 1 button Press the tablet detergent button when using combined detergents that include salt and rinse aid 6 Half load option By using the half load feature of your dishwasher you can reduce the duration of your sel...

Page 21: ...order to stop the washing programme before it is completed first open the door slightly to avoid water spillage CHAPTER 7 SWITCHING ON THE MACHINE AND SELECTING A PROGRAMME 1 3 2 The machine is powered when the On Off button is pressed one dash appears in the programme display and the end of programme indicator turns on When you select a programme with the programme selection button the program yo...

Page 22: ...to the programme once the door is shut or the power is back Please note If the power supply is cut or the machine door is opened during the drying process the programme is terminated Your machine becomes ready for a new programme selection Open the door of your machine The last selected programme will appear on the screen The discharge process starts after the door of the machine is closed The mac...

Page 23: ...ts of water under the tap Refit the metal plastic filter Insert the coarse filter into the micro filter in a way that the marks correspond to one another Attach micro filter into the metal plastic filter and turn to the direction of arrow and it is locked when the arrow on micro filter can be seen from across 4 Never use your dishwasher without a filter Incorrect fitting of the filter will reduce ...

Page 24: ...is turned on Be sure that you have closed the machine door Be sure that you switched off the machine by pressing the Power On Off button Be sure that the water inlet filter and the machine filters are not clogged If the lamps Wash Dry and End keep flashing The water overflow alarm is active Turn off your tap and contact the Sharp helpdesk If the control lamps won t go out after a wash operation Ch...

Page 25: ...r slightly ajar in order to prevent the formation of unpleasant smells Keep the machine interior clean 2 Eliminating water droplets Wash the dishes with the intensive programme Take all of the metal containers in the machine out Do not add detergent 3 If you properly place your dishes into the machine you will be using it in the best way in terms of energy consumption washing and drying performanc...

Page 26: ...es recycling electrical and electronic equipment You will help avoid damage to the environment and risks to public health Recycling materials will help natural resources to be preserved For more detailed information regarding recycling of this product please contact your local authority or the shop where you purchased the product from DISPOSAL OF YOUR OLD MACHINE ...

Page 27: ...27 52222806 R25 Register your product here WWW SHARPHOMEAPPLIANCES COM by registering with Sharp you become part of our For Life promise to always be there for you and your appliance 100 recycleable paper ...

Reviews: