


-18
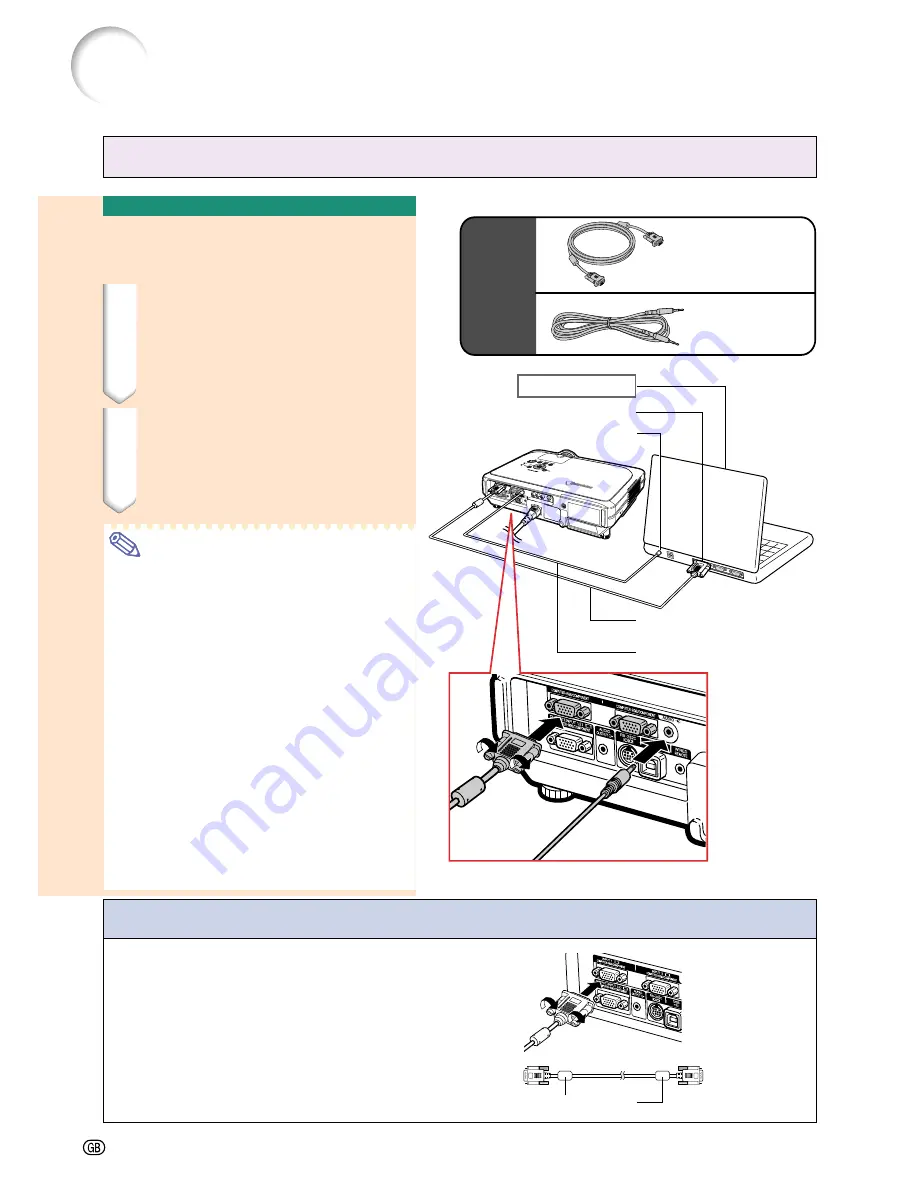
Connecting the Projector to a Computer
Connecting the thumbscrew cables
■
Connect the thumbscrew cable making sure that
it fits correctly into the terminal. Then, firmly se-
cure the connectors by tightening the screws on
both sides of the plug.
■
Do not remove the ferrite core attached to the RGB
cable.
Ferrite core
Connecting to a Computer
Using the RGB Cable
1
Connect the projector to the
computer using the supplied
RGB cable.
•
Secure the connectors by tightening
the thumbscrews.
2
To input audio signal, connect
the projector to the computer
using the supplied computer
audio cable.
Note
•
See page
93
“Computer Compatibility
Chart” for a list of computer signals com-
patible with the projector. Use with com-
puter signals other than those listed may
cause some of the functions not to work.
•
When connecting the projector to a com-
puter in this way, select “RGB” for “Signal
Type” in the “Picture” menu. See page
46
.
•
A Macintosh adaptor may be required for
use with some Macintosh computers. Con-
tact your nearest Sharp Authorized
Projector Dealer or Service Center.
•
Depending on the computer you are us-
ing, an image may not be projected unless
the signal output setting of the computer is
switched to the external output. Refer to
the computer operation manual for switch-
ing the computer signal output settings.
Supplied
accessories
Connecting the Projector to Other Devices
Computer audio
cable
RGB cable
2
Computer audio cable
To RGB output terminal
To audio output terminal
1
RGB cable
Notebook computer
Summary of Contents for Notevision PG-C45S
Page 19: ...Connections and Setup Connections and Setup ...
Page 37: ...Basic Operation Basic Operation ...
Page 55: ...Easy to Use Functions Easy to Use Functions ...
Page 83: ...Appendix Appendix ...
Page 106: ...SHARP CORPORATION ...


