CHAPTER 2. CONNECTION, ADJUSTMENT, OPERATION, AND FUNCTIONS
[1] CONNECTION, POWER ON/OFF
CONNECTING THE MONITOR TO A POWER SOURCE
Use only the AC adapter supplied.
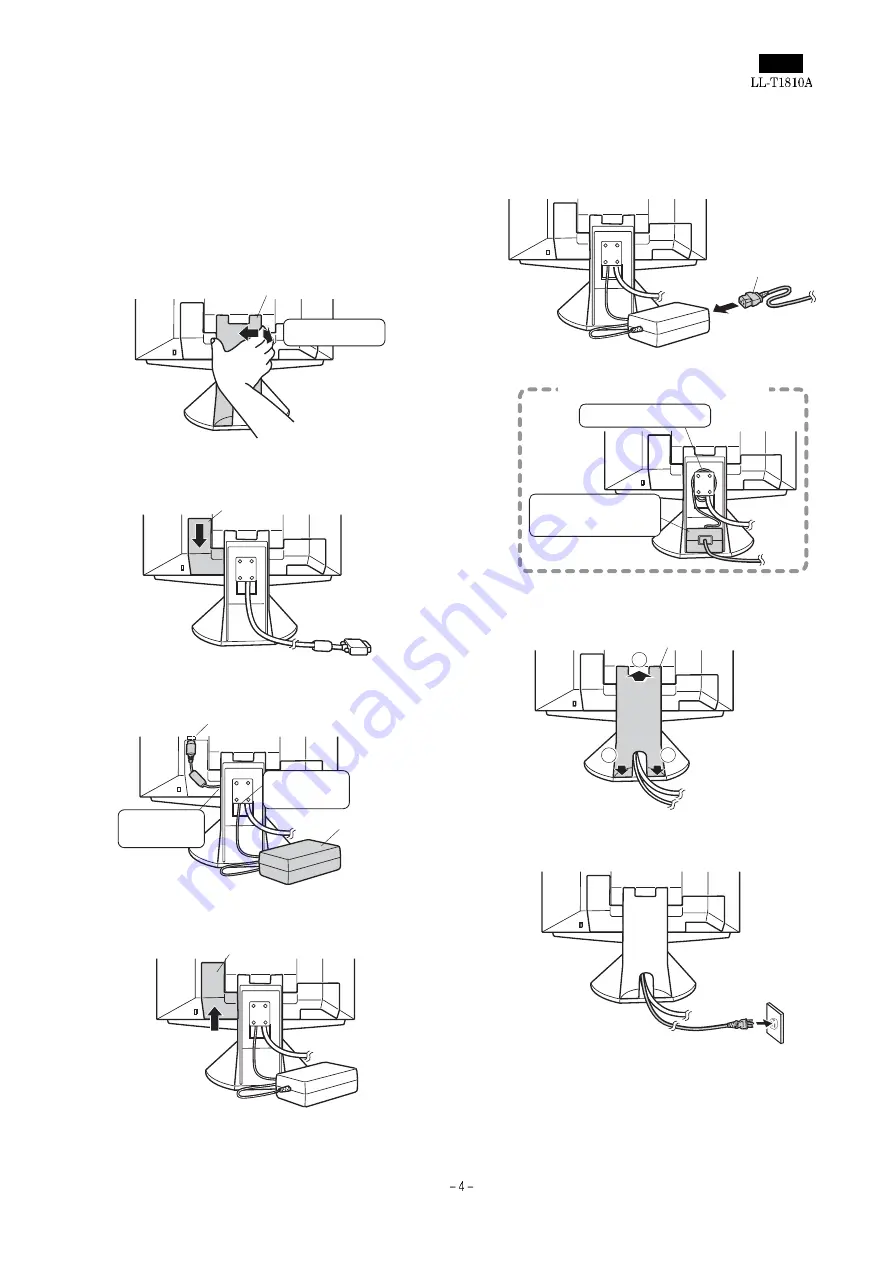
1. Remove the stand cover.
2. Remove the cover.
3. Connect the AC adapter to the monitor’s power terminal.
4. Replace cover.
5. Connect power cord to AC adapter.
6. Replace stand cover.
7. Place power plug into AC outlet.
(Rear View)
Stand cover
Lift one side
Cover
Power terminal
Place cord
on hook
Run cord
through hole.
AC adapter
Cover
Power cord
Fitting the AC adapter inside the stand
Wind the cord
Place adapter
inside stand cavity.
2
1
1
Stand cover
Summary of Contents for LL-T1810A
Page 21: ...IC terminal diagram 1 3 ...
Page 22: ...IC terminal diagram 2 3 ...
Page 23: ...IC terminal diagram 3 3 ...
Page 34: ...DC JACK PWB 1 1 ...
Page 36: ...D sub PWB 1 1 ...
Page 37: ...USB PWB 1 1 ...
Page 38: ...Main PWB front surface CHAPTER 7 PARTS LAYOUT Symbol PartsCod ...
Page 39: ...Main PWB rear surface ...


