


English
- 10 -
Note
: If you switch on your TV via
CH / CH
buttons on the remote
control or on the TV set, the programme that you were watching last
will be reselected.
By either method the TV will switch on.
To Switch the TV to Standby
To switch the TV to low power stand by press the
“ ” button on the remote control or right hand side of the TV.
Note
: When the TV is switched to standby mode, standby LED can blink
to indicate that features such as Standby Search, Over Air Download
or Timer is active.
To Switch the TV Off
Switch the “
•
” button on the bottom right hand side under the
screen to position 2 as illustrated,
to isolate the TV from the
mains, the LED will go out.
If the TV will not be used for a long period i.e. holidays, then unplug
•
the power cord from the mains socket.
Input Selection
Once you have connected external systems to your TV, you can switch
to different input sources. Press
“SOURCE”
button on your remote
control consecutively for directly changing sources.
Basic Operations
You can operate your TV using both the remote control and onset
buttons.
Operation with the Buttons on the TV
Volume Setting
Press “
•
” button to decrease volume or “
” button to
increase volume, so a volume level scale (slider) will be displayed
on the screen.
Programme Selection
Press “
•
P/CH +
” button to select the next programme or “
P/CH -
” button
to select the previous programme.
Viewing Main Menu
Press “
•
” / “
” buttons at the same time to view main menu.
In the Main menu select sub-menu using “
P/CH -
” or “
P/CH +
” buttons
and enter the sub-menu using “
” or “
” buttons. To learn
the usage of the menus, refer to the menu system sections.
AV Mode
Press the “
•
TV/AV
” button in the control panel on the TV to switch
between AV modes.
Operation with the Remote Control
The remote control of your TV is designed to control all the functions of
•
the model you selected. The functions will be described in accordance
with the menu system of your TV.
Volume Setting
Press “
•
V+
” button to increase the volume. Press “
V-
” button to
decrease the volume. A volume level scale (slider) will be displayed
on the screen.
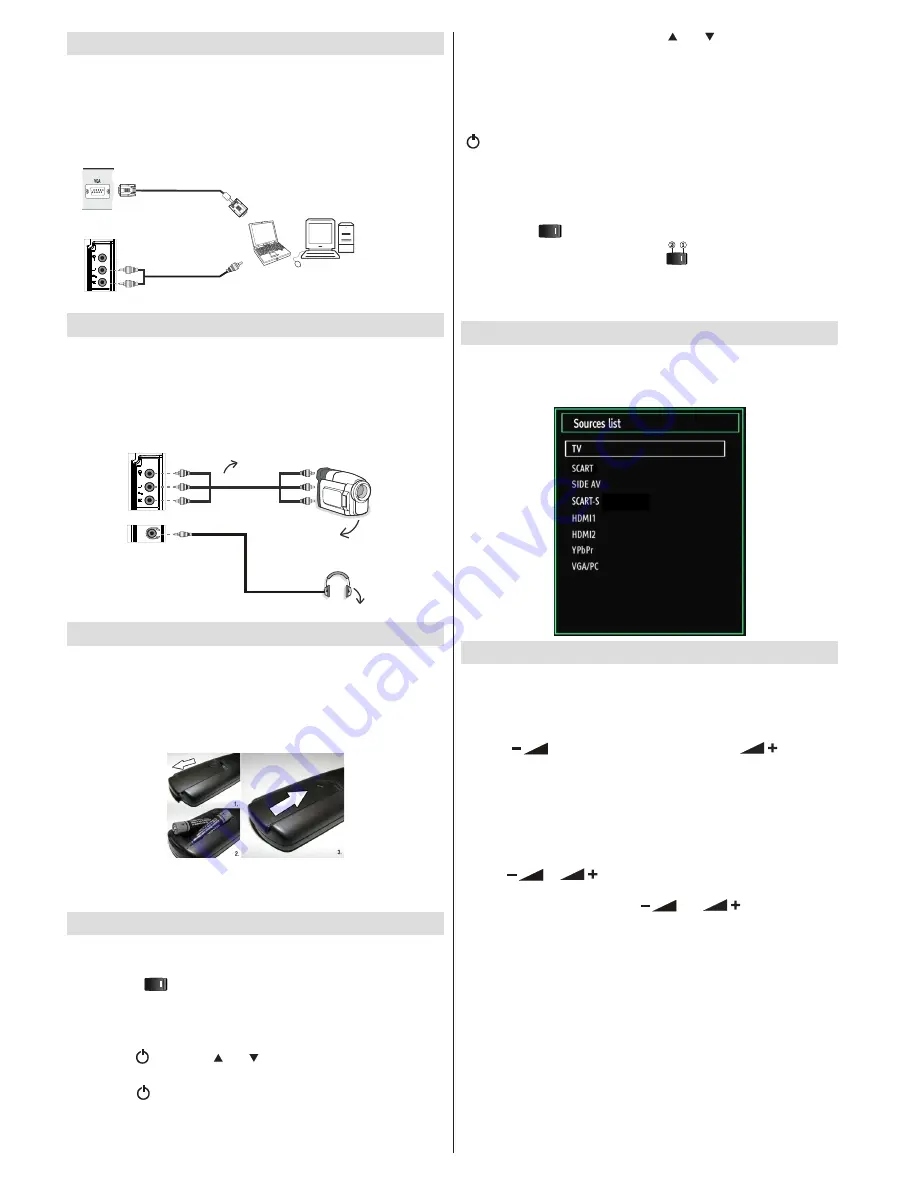
Connecting the LCD TV to a PC
For displaying your computer’s screen image on your LCD TV, you
can connect your computer to the TV set. Power off both computer
and display before making any connections. Use 15-pin D-sub display
cable to connect a PC to the LCD TV. When the connection is made,
switch to PC source. See “Input selection” section. Set the resolution
that suits your viewing requirements. Resolution information can be
found in the appendix parts.
.
PC Input
(back)
Side AV Input
PC VGA Cable
(Not supplied)
PC Audio Cable
(Not supplied)
Or
Using Side AV Connectors
You can connect a range of optional equipment to your LCD TV.
For connecting a camcorder, connect to the VIDEO IN socket and the
•
AUDIO SOCKETS. For selecting the related source, see the section
“Input selection” in the following parts.
To listen the TV sound from headphones, connect to the HEADPHONE
•
jack of theTV.
Camera
AVCable
(notsupplied)
Headphone
Remote Control Handset
Inserting Batteries
Remove the battery cover located on the back of the handset by
•
gently pulling backwards from the indicated part.
Insert two
•
AAA/R3
or equivalent type batteries inside. Observe the
correct polarity (+/-) when inserting batteries and replace the battery
cover.
Note
: Remove the battery from remote control handset when it is not
to be used for a long period. Otherwise it can be damaged due to any
leakage of batteries. Remote range is approximately 7m/23ft.
Switching On/Off
To Switch the TV On
Connect the power cord to the 220-240V AC 50 Hz.
Switch the “
•
” button on the bottom right hand side under the
screen to position “|” so the TV will switch to standby mode. Then
the standby LED lights up.
To switch on the TV from standby mode either:
•
Press the “
•
” button, CH / CH or a numeric button on the remote
control.
Press the “
•
” or +/- button on the TV.
The TV will then switch on.
•
Summary of Contents for LC-32SH130K
Page 29: ...English 28 Dimensional Drawings ...


