Sharp GX10i User Manual Download Page 137

137

QUICKSTART GUIDE

QUICKSTART GUIDE: RINGTONES & PORTAL

Polyphonic Ringtones

The Sharp GX10i comes with a range of amazing ringtones 
already loaded for you to try out.

Choosing a ringtone: 

1. From the Main Menu select “Profiles”, 

 select “Normal”, 

 then go to “Edit” and press 

.

2. Select  “Assign Melody”, 

 then “Preset Melody” and press  

. Choose a melody.

3. To hear it, select 

 [Play]. To stop, press 

 [Stop].

4. If you like it, you can press 

 to select. Or try out another 

ringtone.

Download a new ringtone:

 You can also download one of the 

many amazing new polyphonic ringtones, which the download will 
store in the “My Sounds” folder in the “My Phone” section of the 
Main Menu.
First you need to access the Vodafone live! portal.

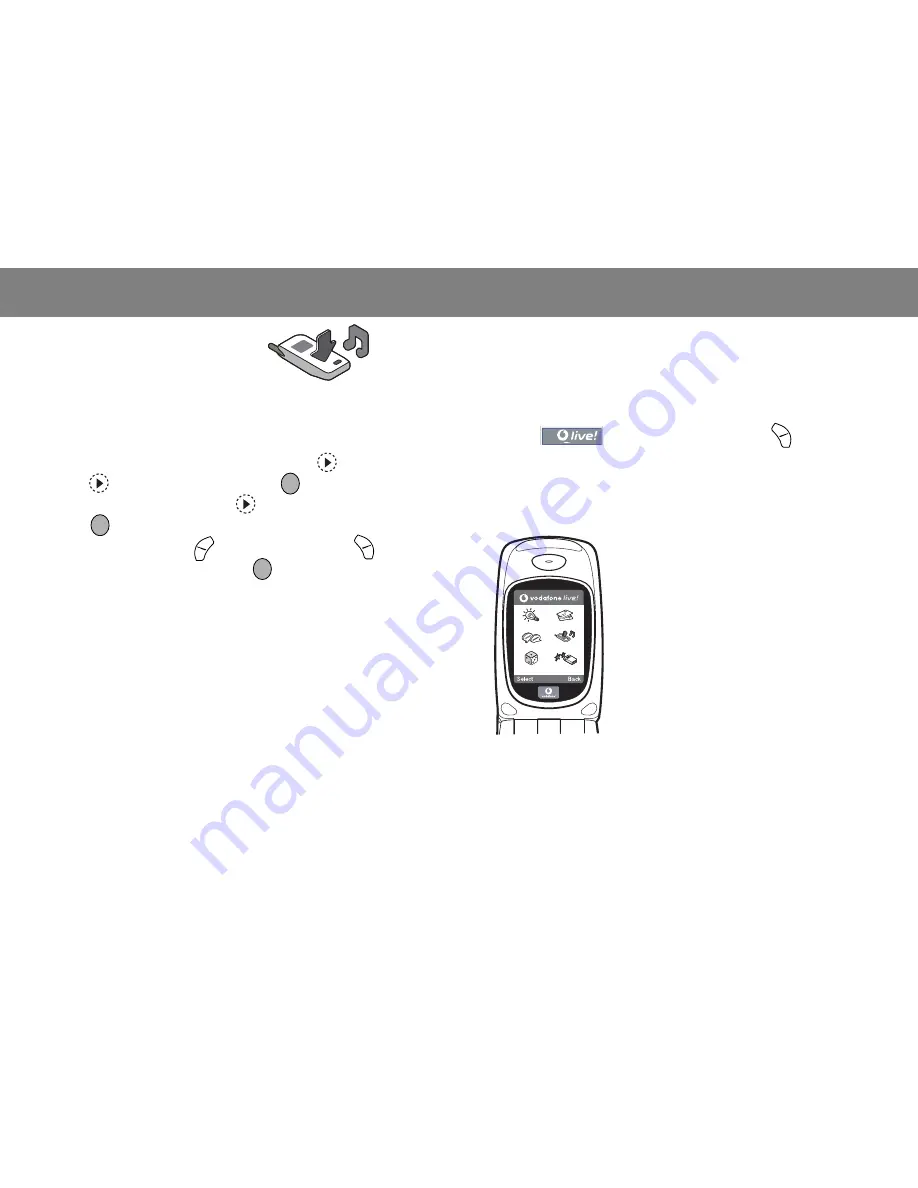
Accessing the Vodafone live! portal

1. Your phone is already set up to use the mobile internet 

browser. On the start-up screen you’ll see the Vodafone live! 
logo 

 at the bottom right . Press 

 to select it, 

and this will start the connection process (see the Vodafone 
section, p.105).

2. Once connected you'll see a menu of icons which take you to 

different areas of the portal for you to explore.

3. To download a ringtone, go to 

“Downloads” and follow the prompts to 
listen to and download a new ringtone. 
You can now choose it on your phone as 
before.

The tip of the iceberg:

 This portal has a 

whole world of news and entertainment to 
offer you. For more details, please refer to 
the Vodafone live! guide.

New

Downloads

More...

Messages

Chat

Games

Summary of Contents for GX10i

Page 1: ... under certain circumstances Therefore we assume no responsibility for data lost or otherwise rendered unusable whether as a result of improper use repairs defects battery replacement use after the specified battery life has expired or any other cause We assume no responsibility directly or indirectly for financial losses or claims from third parties resulting from the use of this product and any ...

Page 2: ... Windows is a registered trademark of Microsoft Corporation in the United States and or other countries Powered by JBlend 1997 2003 Aplix Corporation All rights reserved Java and all Java based trademarks and logos are trade marks or registered trademarks of Sun Microsystems Inc in the U S and other countries JBlend and all JBlend based trademarks and logos are trademarks or registered trademarks ...

Page 3: ... LCD makes the screens clearer more beautiful and easier to view Sub Screen allowing you to see who is calling and new message indicators You can create various melodies for original ring tones using up to 16 chords Voice memo function allows you to record and play back your voice message Licensed under U S Patent 4 558 302 and foreign counterparts T9 Text input is licensed under one or more of th...

Page 4: ... 19 Speed Dialling 19 Redialling 20 Ending a Call 20 Answering a Call 20 Incall Menus 21 Phonebook 24 Entering Characters 24 Creating a New Entry 25 Finding a Name and Number 28 Editing Phonebook Entries 28 Deleting Phonebook Entries 29 Checking Your Own Numbers 29 View Groups 29 Memory Status 30 Speed Dial List 30 Sending Messages 31 Using the Menu 32 List of Menu Functions 33 Camera 34 Using the...

Page 5: ... Sound 66 Message Alert 67 Low Battery Alert 68 Any Key Answer 68 Organiser 69 Calculator 69 Calendar 70 Clock Alarm 71 Voice Memo 75 Help List 76 Call Manager 77 Call Log 77 Call Timers 78 Call Costs 79 Data Counter 81 Diverts 82 Settings 84 Phone Settings 84 Call Settings 89 Network Settings 93 Internet Settings 95 Infrared 99 Security 100 Master Reset 104 Vodafone live 105 Viewing the WAP Brows...

Page 6: ...ission 120 System Requirements 120 GSM GPRS Modem 120 Handset Manager 120 Software Installation 121 Troubleshooting 122 Safety Precautions and Conditions of Use 124 CONDITIONS OF USE 124 ENVIRONMENT 126 PRECAUTIONS CONCERNING VEHICLE USE 127 Index 128 QUICKSTART GUIDE 134 ...

Page 7: ...chargeable Li ion battery AC charger Hands free kit CD ROM User guide Accessories Li ion spare battery XN 1BT11 Cigarette lighter charger XN 1CL10 Car holder XN 1CH11 Data cable RS232C cable XN 1DC10 AC charger XN 1QC17 Some of the above accessories may not be offered by every region For details please contact your dealer optional ...

Page 8: ...Getting Started 8 Getting Started ...

Page 9: ... Key Makes or accepts calls views the call in stand by mode 6 Voice Mail Key Used to connect to Voice mail centre Depends on the SIM card 7 Shift Key Used to enter or switch the text mode 8 Main Screen Display 9 Hands free Connector 10 Right Soft Key Executes the function at the bottom right on the screen 11 End Power Key Ends a call turns power on off 12 Keypad 13 Microphone 14 External Connector...

Page 10: ...Getting Started 10 Inserting the SIM Card and the Battery 1 Slide off the battery cover 2 Slide the SIM card into the SIM holder SIM card ...

Page 11: ...battery are facing down slide the guides on the top of the battery into the battery slots and then insert it 4 Replace the battery cover so that the marks are aligned and slide it as shown Note Make sure that only 3V SIM cards are used Use only the approved battery XN 1BT11 ...

Page 12: ... to turn off your phone and disconnect charger and other accessories Slide off the battery cover 2 Pick up the battery using the protruding edge and remove the battery from the phone 3 Slide the SIM card by pushing the back of the card and remove it from the SIM holder ...

Page 13: ...e with the household waste Charging the Battery You must charge the battery for at least 2 hours before using your phone for the first time To Charge Using the Charger 1 Connect the charger to the external socket located at the bottom of the phone with the charger s PUSH TOP mark facing towards you and to an AC outlet The LED indicator lights in red Standard charging time Approx 2 hours Note Charg...

Page 14: ...e lighter charger option supplies power for charging from the cigarette lighter socket of a car Battery Level Indicator The current battery level is displayed in the upper right hand side of the screen and the Sub screen Low Battery During Use When the battery is running low an alarm will sound and the will appear on the screen and the Sub screen If you are using your phone and you hear the low ba...

Page 15: ...pproximately 2 seconds Entering the PIN Code If activated you will be asked to enter a PIN Personal Identification Number code after turning on your phone 1 Enter your PIN code 2 Press Note If your PIN code is entered incorrectly three times in a row the SIM card is locked See Enabling Disabling the PIN Code on page 100 Display Indicators Status Indicators Right softkey Left softkey ...

Page 16: ... to MMS 8 Indicates a Phonebook entry stored in the phone memory 9 Indicates a Phonebook entry stored on the SIM card 10 Indicates the battery level 11 Appears when your phone is roaming outside of your network 12 Appears when your phone is in data communication mode 13 Appears when your phone is in fax communication mode 14 Appears when your phone is GPRS enabled and within range Flashes during G...

Page 17: ...ss each corresponding key 25 Area at the lower left of a screen Displays the operation executed by left softkey 26 Area at the lower right of a screen Displays the operation executed by right softkey Sub Screen Status Indicators 1 Indicates the received signal strength 2 Appears when GPRS is within range and can be used Flashes during in GPRS communication mode 3 Appears when a new SMS MMS Alert o...

Page 18: ...Getting Started 18 8 Appears when the data cable is connected to your phone 9 Appears when Ringer Volume p 64 is set to Silent ...

Page 19: ...make an emergency call in any country with or without a SIM card inserted if a GSM network is within range International Calls 1 Press and hold until a international dialling prefix sign appears 2 Enter the country code followed by the area code and the number 3 Press to dial Note Enter the area code omitting the first 0 when making international calls in most cases It differs for some countries S...

Page 20: ...edial Function 1 Press to display the Main Menu 2 Press or to select Settings then press 3 Press or to select Call Settings then press 4 Press or to select Auto Redial then press 5 Select On to enable the Auto Redial function or Off to disable it then press Note When you receive an incoming call the Auto Redial function will be interrupted Automatic redialling is not available for fax and data cal...

Page 21: ...eys up or down whilst the phone is ringing Incall Menus Your phone has additional functions available whilst a call is in progress Adjusting the Earpiece Volume You can adjust the earpiece volume during a call 1 During a call press 2 Press to increase the earpiece volume or press to decrease the earpiece volume Each press of or adjusts the earpiece volume by one of 5 levels 3 Press OK Tip You can ...

Page 22: ... to set Call Waiting to On if you use Call Waiting service p 89 Call Waiting service may not be available on all networks Contact your network operator for more information If you do not wish to answer the second call press Reject in step 1 The call log of the second call will be saved as a missed call Conference Call Conference call is a call with more than 2 participants You may include up to 5 ...

Page 23: ...tions to display the Options Menu 3 Press or to select End Call then press To Have a Private Conversation with one of the participants If you wish to have a private conversation with one of the participants you may select the participant from the conference list and put the other participants on hold 1 During the conference call select the person that you wish to talk to by pressing or 2 Press Opt...

Page 24: ...entry screen usable characters are limited Normal Mode Press and hold to enter 0 9 numbers Press and hold to shift to Sentence mode Capital letter Small letter Numeric Press and hold to shift between Normal and T9 mode Note When you send an SMS with Optimisation set On in SMS Settings characters with an accent will be sent as characters with no accent For details see Optimisation on page 115 Key U...

Page 25: ...ation To enter symbols or punctuation press Using Text Template You can use the sentences registered in My Text Templates when entering characters For details on creating the text template see Adding Phrases to My Text Templates on page 46 1 Press Options to display the Options Menu 2 Press or to select Insert Template then press 3 Select a desired text template by pressing or then press The selec...

Page 26: ...s on page 24 The phone number prompt appears 5 Enter the phone number then press Up to 40 digits can be entered 6 Select a desired number type by pressing or then press 7 Press Save You can divide the phone numbers of the Phonebook into groups You can also register E mail address personal data and picture image data See Storing Optional Data for details Storing Optional Data You can store optional...

Page 27: ...ess 8 Select the desired picture image then press The selected picture image will appear on the screen 9 Specify the range for displaying the picture image by pressing or then press 10 Press Save Note The stored picture image is automatically saved under the in Phonebook section of the Saved Pictures The picture image cannot be deleted in the Saved Pictures Remove the picture image data from the P...

Page 28: ...Press or to select the desired phone number then press to dial Tip If you press and select Search after step 2 you can also search the name and number You can also dial the desired phone number by pressing the digit key corresponding to the list number instead of step 6 Search in Alphabetical Order 1 Press or whilst in stand by to open the Phonebook 2 Scroll the list by pressing or to find the des...

Page 29: ... and edit your own voice data and fax phone numbers in the Phonebook 1 Press to display the Phonebook menu 2 Press or to select Own Numbers then press 3 Press or to select the phone number you wish to check from either Voice Data or Fax then press Note Data or Fax may not be displayed depending on SIM card Editing Your Phone Numbers 1 Perform steps 1 to 3 in Checking Your Own Numbers 2 Press 3 Pre...

Page 30: ...IM is dependant on its capacity Speed Dial List You can set a maximum of 9 phone numbers to the Speed Dial List Use the phonebook entries on the SIM card Adding Phonebook entries to the Speed Dial List 1 Search for the desired Phonebook entries For details on searching through Phonebook entries see steps 1 to 4 in Search by Name on page 28 2 Press or to select the phone number 3 Press 4 Press or t...

Page 31: ... 2 Press or to highlight the right side of or then press or Press or to highlight the right side of then press 3 Press or to select Send Message then press If you highlight the right side of or in step 2 4 Press or to select MMS or SMS then press 5 Enter your message For details on creating a message see Creating a New MMS on page 107 or Creating a New SMS on page 115 ...

Page 32: ...e and These keys change usage depending on the situation The function of each softkey at any given time is highlighted at the bottom left and bottom right of the screen Shortcut Keys When pressing several key combinations during stand by mode you can shortcut to the specified menus To access the desired menu directly press and digit keys for the menu s corresponding number during stand by mode See...

Page 33: ...eeting 3 Activity 4 Car 5 Silent 5 Organiser 1 Calculator 2 Calendar 3 Clock Alarm 4 Voice Memo 5 Help List 6 Call Manager 1 Phonebook 2 Call Register 3 Diverts 7 Settings 1 Phone Settings 2 Call Settings 3 Network Settings 4 Internet Settings 5 Infrared 6 Security 7 Master Reset 8 Vodafone live 1 Vodafone live 2 New 3 Chat 4 Games 5 Find Seek 6 News 7 Sport 8 Shopping 9 Search 9 Info Service 0 Me...

Page 34: ...re by MMS after taking the picture press in step 3 The camera returns to step 1 Repeat process as desired 4 Press to return to stand by Tip To leave Camera Mode without registering the taken picture after step 2 in Taking Pictures Press and select Yes then press To take a picture of yourself press or the Side keys up or down whilst checking the image reflected on the mirror on the back of the phon...

Page 35: ...efore taking or registering a picture the picture quality may be poor In the Case of No Available Memory When the number of pictures that can be taken becomes 5 or less or when the remaining capacity becomes 27 5 Kbytes when Medium is selected as the picture size or less will appear on screen The screen returns to step 2 in Taking Pictures on page 34 The number of pictures that can be taken is dis...

Page 36: ... pressing or then press The selected picture is displayed 4 Once you have finished press Back to return to the list Tip Your pictures are given file names which show the time and date when the picture was taken Example The file name 13 05 03_12 34 56 is displayed for the picture taken at 12 34 56 of 13th May 2003 The file names of your pictures can be changed p 41 Using the Timer Taking a Picture ...

Page 37: ...se the timer setting is cancelled The zooming function with Zoom Wide or the adjustment of brightness of the picture with or is unavailable whilst the delay timer is operating Cancelling the Delay Timer 1 Press Options whilst the delay timer setting is on The Options Menu is displayed 2 Press or to select Delay Timer then press 3 Press or to select Off then press goes off Sending Pictures See Send...

Page 38: ... Internet to update information play games The network may charge you more for using network based applications Please contact your service provider for more information Downloading Java Applications Confirmation screen Before downloading the Java application you will be asked to confirm what you are about to receive After checking the information on the confirmation screen the Java application ca...

Page 39: ...is displayed The downloaded Java applications are sequentially displayed from the latest one 5 Select the title of the Java application you wish to execute by pressing or then press The selected Java application is executed When using network connection type Java applications connection to the network can be selected To end the Java application 1 Press 2 Press or to select End then press The scree...

Page 40: ...hen press Note You cannot delete preloaded Java applications My Pictures Pictures that are taken by a digital camera or images that are downloaded from mobile Internet sites can be managed This is the folder where the pictures images registered in the Phonebook are saved Images in PNG format Pictures Images in JPEG format e Animation file NEVA Images in GIF format Images in BMP format Images in WB...

Page 41: ...displayed Whether the picture image can be copied forwarded or saved is also displayed To return to the Saved Pictures press Back twice Changing the File Name 1 Perform steps 1 to 4 in Viewing Pictures Images 2 Select the file name you wish to change by pressing or then press Options The Options Menu is displayed 3 Select Rename then press 4 Enter a new file name To correct the last character pres...

Page 42: ...orm steps 1 to 4 in Viewing Pictures Images on page 41 2 Select the file name you wish to send by pressing or then press Options The Options Menu is displayed 3 Press or to select Send Message then press 4 Enter your message For details on creating a message see Creating a New MMS on page 107 Note Pictures images with a red icon cannot be sent attached to a message Deleting Pictures Images 1 Perfo...

Page 43: ... 3 Select My Sounds then press 4 Select Download More then press The sound file downloaded site is displayed Playing Back Sounds 1 Press to display the Main Menu 2 Press or to select My Phone then press 3 Select My Sounds then press 4 Select Saved Sounds then press The Saved Sounds is displayed 5 Select the sound you wish to play back by pressing or then press The selected sound is played To stop ...

Page 44: ... file This new file then becomes the original ring tone Setting the Tone and Strength 1 Perform steps 1 to 4 in Playing Back Sounds on page 43 2 Select the file name you wish to edit by pressing or then press Options The Options Menu is displayed 3 Press or to select Tone Set or Strength Set then press For full details see pages 55 to 57 Note If Tone Set and Strength Set are not displayed in the m...

Page 45: ...el deletion select No at step 4 then press My Bookmarks You can store desired or frequently used pages addresses in My Bookmarks It can save your time in accessing WAP pages sites Adding a Bookmark 1 Press to display the Main Menu 2 Press or to select My Phone then press 3 Press or to select My Bookmarks then press The list of My Bookmarks is displayed 4 Press Options to display the Options Menu W...

Page 46: ...to select Yes then press The selected bookmark has been deleted To cancel deletion select No at step 4 then press My Text Templates You can register up to 20 text templates for use in SMS and MMS You can input messages or others more easily by registering frequently used text 128 characters may be registered in any text template Adding Phrases to My Text Templates 1 Press to display the Main Menu ...

Page 47: ...ss The selected text template is displayed 4 After confirmation press Back to return to template list Deleting Text Templates 1 Perform steps 1 to 3 in Adding Phrases to My Text Templates on page 46 2 Select the text template you wish to delete by pressing or then press 3 Press or to select Delete then press 4 Select Yes then press The selected text template is deleted To cancel deletion select No...

Page 48: ...ter finishing the call or alarm the suspend icon is displayed to let you know there is a suspended Java application Notice The marquee character scrolls is displayed on the first line on the screen whilst the Java application continues If you press the Java application is suspended and you can receive the call After finishing the call the suspend icon is displayed and you will know there is a susp...

Page 49: ...her the blinking operation which is embedded in Java application is enabled 1 Perform steps 1 and 2 in Backlight 2 Press or to select Blink then press 3 Select On or Off by pressing or then press Vibration When vibrator is set in the Java application you can choose whether the operation is enabled or disabled When a SMAF file is specified in the Java application you can operate the vibrator set in...

Page 50: ... code the screen will return to step 4 in Operation Priority on page 48 4 Select Settings Reset then press 5 Press or to select Yes then press All settings in a Java application will be reset To cancel resetting select No then press To clear all Java applications All Java applications stored in Saved Games are cleared The preloaded Java application cannot be deleted 1 Perform steps 1 to 4 in Opera...

Page 51: ... 4 Press or to select the desired game then press 5 Select New Game then press 6 When you have finished playing press Note If an incoming call is detected during gameplay the game will be stopped Game Guide 1 Perform steps 1 to 4 in Starting Games 2 Press or to select Guide then press Game instructions are displayed Collection Hunter M 3 2 2 Check of a collection and reset of a game can be perform...

Page 52: ...to adjust the sound volume then press 6 Press to increase the sound volume or press to decrease the sound volume and then press Note If you wish to mute the sound during gameplay press Press again to return the volume Melody Editor Use this to create an original ring tone or to send a melody attached to an MMS You can input up to 190 tones 16 chords or 380 tones 8 chords per melody The original ri...

Page 53: ...12 Repeat steps 9 to 11 to input notes When you press during input the melody that you have entered is played back When you press Options and select Play before Cursor whilst entering notes the melody that is displayed on the screen is played back up to the cursor position When you press Options and select Select Chord you can select another chord Repeat steps 9 to 11 to input notes for the new ch...

Page 54: ...gh the available octave ranges When you press or whilst a note is selected the note will raise one semitone higher or lower When entering rest Crotchet rest is entered Specifying the Types of Notes and Rests Specify notes and rests by pressing or repeatedly When you make a dotted note or triplet press after selecting the target note Do Re Mi Fa Sol La Ti Rest Crotchet Crotchet rest Quaver Quaver r...

Page 55: ...hone can play notes using different instruments 1 Perform steps 1 to 13 in Creating Your Original Ring Tone on page 52 2 Press or to select Tone Set then press 3 Select a category of the tone by pressing or 4 Select a tone by pressing or then press When Play Current Chord is selected the melody entered is played back in the selected tone When Confirm Tones is selected the syllable names are played...

Page 56: ...hs Synth Voice Orchestra Hit Brasses Trumpet Trombone Tuba Muted Trumpet French Horn Brass Section Synth Brass 1 Synth Brass 2 Category Tone Category Tone Reeds Soprano Sax Alto Sax Tenor Sax Baritone Sax Oboe English Horn Bassoon Clarinet Flutes Pipes Piccolo Flute Recorder Pan Flute Blown Bottle Shakuhachi Whistle Ocarina Synth Leads Square Lead Sawtooth Lead Calliope Lead Chiff Lead Charang Lea...

Page 57: ...elected the original ring tone entered is played back in the selected strength of the tone 4 Select OK then press Now you can create an original ring tone Deleting an Original Ring Tone Perform steps 1 to 4 in Deleting Sounds on page 45 Editing Original Ring Tones 1 Perform steps 1 to 3 in Creating Your Original Ring Tone on page 52 2 Press or to select Existing Melodies then press Percus sions Ti...

Page 58: ... Save then press 11 Select Save to My Phone then press 12 Press or to select Over Write then press The original ring tone is changed If you select New the melody before the correction is not modified The original ring tone is registered as a new original ring tone Note When the number of chords is modified in step 7 the confirmation screen may be displayed When you select Yes a section of the melo...

Page 59: ...6 Press Options to display the Options Menu 7 Press or to select Paste then press 8 Move the cursor to the point you wish to paste the notes then press Saved notes are pasted Tone Editor You can make a tone and use it for the original ring tone Up to five types of tones can be registered respectively for 8 chords and 16 chords FM Sound Source Various types of tones can be composed by combining the...

Page 60: ...ous types of notes by changing the values of the modulator Envelope Continu ous Decay This sets continuous same note or fade out Sustain On Off This sets a note to be sustained after com pleting the note If you want to have a note with reverberation set this function on Key Scale Rate 2 levels Set the function to 2 if you want to a short note Key Scale Level 4 levels This function sets the rate of...

Page 61: ...ng or Decay Rate 16 levels This sets the time from the maximum volume to the volume of the sustain level Sustain Level 16 levels In sustaining note this displays the volume of the sound that continues to produce In fading out note this displays the volume when the note starts fading out Release Rate 16 levels In sustaining note this displays the sustain ing time from note completion to no sound In...

Page 62: ...ter is set in advance 17 Select a parameter you wish to change by pressing or 18 Press or to change the content of the parameter For details of parameter see pages 60 to 61 When you press the syllable names are played back in the selected content of the parameter Repeat steps 17 and 18 to change another content of the parameter 19 Press or to select Setup End then press If you do not wish to chang...

Page 63: ...set the icon which corresponds to the profile name appears in the stand by screen Normal Is the default setup not displayed in the stand by screen Meeting For use when discretion is needed Activity For use in busy environments Car For use in the car connected to a hands free kit Silent For use when silence is needed All sounds are muted and you are alerted to calls with the vibrator Tip You can al...

Page 64: ...an adjust the ringer volume to one of 5 levels When it is set to Silent the volume of games and Java applications is muted 1 Perform steps 1 to 3 in Customising Profiles on page 63 2 Press or to select Ringer Volume then press The current volume level is displayed 3 Press to increase the ringer volume or press to decrease the ringer volume and then press To select Step Tone press at level 5 To sel...

Page 65: ... Sound is selected in step 3 melodies are synchronised with the vibrator for the ring tone However this function may not work depending on data When you select Enable or Link to Sound in step 3 appears on the stand by screen Keypad Tones When the keypad tone is set to on you will hear a confirmation tone each time you press a numerical key 1 Perform steps 1 to 3 in Customising Profiles on page 63 ...

Page 66: ...f you select Off the screen returns to step 1 4 Select Volume then press 5 Press to increase the volume or press to decrease the volume then press 6 Press or to select Melody then press 7 Press or to select Preset Melody or My Sounds then press 8 Select the warning tone For details on selecting a ring tone see Ringer Type on page 64 9 Press or to select Duration then press 10 Select the duration b...

Page 67: ... digits 01 to 10 seconds using the digit keys then press Message Alert When receiving messages special ring tones can be set 1 Perform steps 1 to 3 in Customising Profiles on page 63 2 Press or to select Message Alert then press 3 Press or to select MMS SMS or WAP then press 4 Select Volume then press 5 Press to increase the volume or press to decrease the volume and then press 6 Press or to selec...

Page 68: ...ume of the alarm when the battery becomes low 1 Perform steps 1 to 3 in Customising Profiles on page 63 2 Press or to select Low Battery Alert then press 3 Press to increase the volume or press to decrease the volume and then press Any Key Answer 1 Perform steps 1 to 3 in Customising Profiles on page 63 2 Select Any Key Answer then press 3 Select On or Off by pressing or then press ...

Page 69: ...alculations press 6 If you wish to start a new calculation press C When calculation is complete press Rate Conversion You can also use the calculator as a currency calculator to convert from to a home currency using a conversion rate that you enter To Set a Currency Conversion Rate M 5 1 2 1 Perform steps 1 to 3 in Calculator 2 Press or to select Exchange Rate then press 3 Press or to select Forei...

Page 70: ...rent date will be highlighted 4 Select the day for the schedule by pressing or then press 5 Press or and select the note number then press 6 Enter the schedule content press Up to 3 schedule items can be stored For details on entering characters see Entering Characters on page 24 If you wish to add another item repeat steps 5 and 6 7 When you have finished entering press Back The screen returns to...

Page 71: ... 3 Press or to select Delete then press 4 Select 1 Day to delete all contents for a day then press 5 Select Yes then press To cancel deleting select No at step 5 then press To Delete All Scheduled Entries 1 Perform steps 1 to 3 in Calendar on page 70 2 Press Options to display the Options Menu 3 Press or to select Delete to delete all scheduled entries then press 4 Press or to select All Data to d...

Page 72: ...Month Year Month Day Year or Year Month Day 1 Perform steps 1 to 3 in Setting the Date and Time on page 71 2 Press or to select Clock Settings then press 3 Press or to select Date Format then press 4 Press or to select D M Y M D Y or Y M D then press To Set the Clock Display 1 Perform steps 1 to 3 in Setting the Date and Time on page 71 2 Press or to select Clock Settings then press 3 Press or to ...

Page 73: ...m Zone then press 4 Enter the time using the digit keys then press Each press of switches and Setting Alarm Alarm function allows you to be alerted at a specified time Note that the clock must be set for the alarm to function properly 1 Press to display the Main Menu 2 Press or to select Organiser then press 3 Press or to select Clock Alarm then press 4 Select Set Alarm then press 5 Select List Al...

Page 74: ...e demo play press Play To stop playing press Stop 6 When selection is complete press To Change the Alarm Vibration 1 Perform steps 1 to 6 in Setting Alarm on page 73 2 Press or to select Alarm Tone then press 3 Press or to select Vibration then press 4 Press or to select Enable Disable or Link to Sound then press To Change the Duration of Alarm 1 Perform steps 1 to 10 in Setting Alarm on page 73 2...

Page 75: ...mber you wish to reset by pressing or then press 3 Press or to select Reset Alarm then press 4 Press or to select Yes then press Resetting All Alarm Settings 1 Perform steps 1 to 4 in Setting Alarm on page 73 2 Press or to select Clear All then press 3 Press or to select Yes then press Voice Memo This allows you to record a voice message of up to 10 seconds which can be used to remind you of sched...

Page 76: ...ack the Saved Voice Memo 1 Perform steps 1 to 4 in Recording a Voice Memo on page 75 2 Press or to select Playback then press 3 Press The recorded voice memo is played back To stop playback press Stop Help List You can view the help list and use it to guide you in the phone s functions 1 Press to display the Main Menu 2 Press or to select Organiser then press 3 Press or to select Help List then pr...

Page 77: ... you wish to dial the number press 7 When you have finished press Back to return to step 4 Tip You can also confirm call records by pressing in stand by mode You can switch between histories by pressing or in step 5 only when you enter by in stand by mode Sending Messages 1 Perform steps 1 to 5 in Viewing Call Log 2 Select the file name you wish to send by pressing or then press 3 Press or to sele...

Page 78: ...n the selected category will be deleted Call Timers This function lets you check the duration of your calls Checking the Duration of the Last Call 1 Press to display the Main Menu 2 Press or to select Call Manager then press 3 Press or to select Call Register then press 4 Press or to select Call Timers then press 5 Select Last Call then press The duration of the last call is now displayed 6 When y...

Page 79: ...h your service provider for availability Checking the Cost of the Last Call 1 Press to display the Main Menu 2 Press or to select Call Manager then press 3 Press or to select Call Register then press 4 Press or to select Call Costs then press 5 Select Last Call then press The cost of the last call is now displayed 6 When you have finished press Back to return to call costs menu Checking the Total ...

Page 80: ...ct Read Units then press at step 3 in Setting the Charge Rate The charge rate is now displayed 2 When you have finished press Back Setting the Charge Limit This function is useful if you wish to make sure you do not exceed a certain charge limit 1 Perform steps 1 to 4 in Checking the Cost of the Last Call on page 79 2 Press or to select Max Cost then press 3 Press or to select Set Limit then press...

Page 81: ...n you have finished press Back Data Counter You can confirm the amount of bytes which you used in the GPRS transmission 1 Press to display the Main Menu 2 Press or to select Call Manager then press 3 Press or to select Call Register then press 4 Press or to select Data Counter then press 5 Press or to select Last Data or All Data then press You can now check the amount of bytes 6 When you have fin...

Page 82: ...e Not Reachable Diverts incoming calls when your phone is out of network service or switched off 5 Select On then press 6 If you wish to divert calls to a number which is located in the Phonebook search for the desired Phonebook entry Press or Search to search the number by name or press or to search in alphabetical order then press For details on searching the Phonebook entries see Finding a Name...

Page 83: ...lling All Divert Settings 1 Perform steps 1 to 3 in Divert Calls on page 82 2 Press or to select Cancel All then press 3 Press or to select Yes then press To cancel the resetting select No in step 3 then press 4 Press OK All divert settings are cancelled To cancel the Divert Settings Individually 1 Perform steps 1 to 3 in Divert Calls on page 82 2 Select the divert option you wish to cancel by pre...

Page 84: ... digital camera or images downloaded from a WAP site can be used for wallpapers To Set Built in Animations or Illustrations 1 Perform steps 1 to 3 in Changing the Language 2 Press or to select Wallpaper then press 3 Press or to select On then press 4 Select Animation or Illustration 1 to Illustration 3 by pressing or then press 5 Press again to set The selected animation or illustration is display...

Page 85: ... the main screen display on or off when you press the keypad or the optional cigarette lighter charger is connected to the phone You can change or specify the amount of time the backlight is ON for which will help conserve battery life To Turn On Off the Backlight 1 Perform steps 1 to 3 in Changing the Language on page 84 2 Press or to select Backlight then press 3 Press or to select On Off then p...

Page 86: ...battery life You can change the time before the Display Saving will go into effect from between 2 and 20 minutes Tip When you purchase this phone the Display Saving is set to work after 10 minutes 1 Perform steps 1 to 3 in Changing the Language on page 84 2 Press or to select Display Saving then press 3 Enter the time until the Display Saving works in two digits 02 to 20 minutes using the digit ke...

Page 87: ...hen operating the alarm Pictures taken by a digital camera or images downloaded from a WAP site can be used To Set Built in Pictures Images 1 Perform steps 1 to 3 in Changing the Language on page 84 2 Press or to select Assign Pictures then press 3 Select the screen to set the picture image by pressing or then press 4 Select Animation 1 or Animation 2 by pressing or then press or Select Illustrati...

Page 88: ...een Display on or Off to set Sub Screen Display off by pressing or then press To Turn On Off the Backlight of the Sub Screen Display You can turn the backlight of the Sub Screen Display on or off when the phone is closed You can also change or specify the duration of the Sub Screen Display backlight 1 Perform steps 1 to 3 in Changing the Language on page 84 2 Press or to select External Display th...

Page 89: ...tep 4 then press All phone settings are reset Note If you enter a wrong handset code in step 3 operation is cancelled Call Settings Set various types of functions and services Call Waiting If you wish to be able to receive another incoming call whilst you have a call in progress you must activate the Call Waiting service 1 Press to display the Main Menu 2 Press or to select Settings then press 3 P...

Page 90: ... 89 2 Press or to select Caller No Status then press 3 Select the option you wish to set by pressing or then press The options available are Show Callers No Displays whether caller numbers are displayed or not Show Your No Displays whether your phone number is notified to your caller or not This function can be turned On Off with this option Select On to activate the option you wish to set or Off ...

Page 91: ...Press or to select Assign Melody then press 6 Select a ring tone For details on selecting a ring tone see Ringer Type on page 64 7 Press or to select Vibration then press 8 Press or to select Enable Disable or Link to Sound then press For details on setting the vibrator see Vibration on page 65 9 When setting is complete select Setup End then press Group Call M 7 2 5 Phone numbers can be registere...

Page 92: ...er function informs you of your talk time by sounding a tone after every minute 1 Perform steps 1 to 3 in Call Waiting on page 89 2 Press or to select Minute Minder then press 3 Press or to select On or Off then press Call Setting Reset M 7 2 8 The call settings can be reset to their default settings 1 Perform steps 1 to 3 in Call Waiting on page 89 2 Press or to select Set to Default then press 3...

Page 93: ...Network Manually 1 As in step 5 in Selecting a Network Automatically press or to select Manual then press 2 Select the network from the list by pressing or then press Adding a New Network 1 Perform steps 1 to 4 in Selecting a Network Automatically 2 Press or to select Add New Network then press 3 Press or to select Add then press 4 Enter the country code 5 Press 6 Enter the network code 7 Press 8 ...

Page 94: ...Enter the old password then press 4 Enter a new password then press 5 Enter a new password again then press If you enter the incorrect password in step 5 the screen will return to step 4 and you will be asked to enter the password again 6 Press Selecting an Applicable Zone You need to select the applicable zone when using your phone in different area For America 1 Perform steps 1 to 3 in Selecting...

Page 95: ...mepage URL if needed and press Port Number Security Option Select Port Number and press Enter Port Number 1024 65535 and press M 7 4 Circuit Prompt Circuit Prompt Select Circuit Prompt and press Select Enable or Disa ble and press Connection Type Bearer Con nection Type Select Connection Type and press Select GPRS Then CSD GPRS or CSD and press GPRS Settings If GPRS Then CSD or GPRS will be select...

Page 96: ...s Line Type ISDN or Ana logue Select Line Type and press Select ISDN or Analogue and press UserName User Name Select UserName and press Enter User Name and press Item Description Operation Password Password Select Password and press Enter Password and press Linger Time Linger Time Select Linger Time and press Enter second time 0 99999 and press Item Description Operation Profile Name MMS Profile N...

Page 97: ...N Access Point Name Select APN and press Enter Access Point Name and press Item Description Operation UserName User Name Select UserName and press Enter User Name and press Password Password Select Password and press Enter Password and press Linger Time Linger Time Select Linger Time and press Enter second time 0 99999 and press CSD Settings If GPRS Then CSD or CSD will be selected as connection t...

Page 98: ... or to select Edit then press 7 Select the item you wish to edit then press 8 Edit each item 9 When you have finished editing select Setup End then press To Select Network Connection Profile 1 Perform steps 1 to 4 in To Set up your Account Information 2 Select the profile name to use by pressing or then press 3 Press or to select Activate then press UserName User Name Select UserName and press Ent...

Page 99: ...elect Allow or Reject then press Tip To cancel the information supply select Reject then press Infrared You can use the built in infrared modem to establish contact between your phone and a PC equipped with an infrared port 1 Press to display the Main Menu 2 Press or to select Settings then press 3 Press or to select Infrared then press 4 Press or to select On then press will appear on the screen ...

Page 100: ... lock To remove the lock contact your service provider SIM vendor Changing PIN Code This allows you to change the PIN code stored on the SIM 1 Perform steps 1 to 3 in Enabling Disabling the PIN Code 2 Press or to select PIN Entry then press 3 Press or to select Change PIN then press 4 Enter the existing PIN code then press 5 Enter a new PIN code then press 6 Enter a new PIN code again then press I...

Page 101: ...t certain functions in the phone such as Fixed Dialling No and call cost limits The following shows you how to change PIN2 code 1 Perform steps 1 to 3 in Enabling Disabling the PIN Code on page 100 2 Press or to select Change PIN2 then press 3 Enter the existing PIN2 code then press 4 Enter a new PIN2 code then press 5 Enter a new PIN2 code again then press If you enter a code different from the c...

Page 102: ... Restricts all messages All except Msgs Restricts all services except messages 5 Select On then press If you select Off the selected call barring setting is cancelled 6 Enter the network password then press To change the network password see Changing the Network Password on page 94 7 Press OK The selected call barring function is activated If you enter a wrong network password the entered password...

Page 103: ...de on page 100 2 Press or to select Fixed Dialling No then press 3 Enter a PIN2 code then press 4 Select Settings then press 5 Select On then press If you select Off Fixed Dialling No is disabled Adding a New Name 1 Perform steps 1 to 3 in Enabling Fixed Dialling No 2 Press or to select Edit Dial List then press 3 Press 4 Press or to select Add New Name then press 5 Add a name and a phone number F...

Page 104: ...ish to delete then press 3 Press or to select Delete then press 4 Select Yes then press The selected name will be deleted To cancel deletion select No at step 4 then press Master Reset The settings can be reset to their default settings 1 Press to display the Main Menu 2 Press or to select Settings then press 3 Press or to select Master Reset then press 4 Enter your handset code then press 5 Press...

Page 105: ...ng stand by 2 Select the menu you wish to view by pressing or then press To Exit the WAP Browser 1 Press to exit the browser Navigating a WAP Page Move the highlights around in the screen Used to select an action displayed in the lower left corner of the screen Used to select an action displayed in the lower right corner of the screen press and hold Used to start the Go to URL to press and hold Us...

Page 106: ...f WAP push messages You can receive push messages via WAP Services This means that a service provider sends WAP content to your phone without any set up Reload Refresh the contents of the WAP page Settings Includes Restart Browser some settings etc Tip The information accessed through the WAP browser on the Internet will be stored in the cache memory of your phone When the same information is acce...

Page 107: ...ttings then press 4 Select the desired item to set then press The items available are Roam Download Delivery Report Delivery Rep Allow Expiry Time Sender Visibility Anonymous Reject Slide Interval 5 Edit the each item 6 When you finish setting press Back Creating a New MMS 1 Press during stand by 2 Select MMS then press 3 Select Compose then press 4 Enter your message then press 5 Enter phone numb...

Page 108: ...form steps 1 to 3 in Creating a New MMS on page 107 2 Press Options to display the Options Menu 3 Select Subject then press 4 Enter the subject of your message then press To Add Recipients 1 Perform steps 1 to 5 in Creating a New MMS on page 107 2 Press or to select Add address then press 3 Select To to add recipients or Cc to send a copy of this MMS to other recipients by pressing or then press 4...

Page 109: ... have up to 3 slides Each slide can contain one picture image one sound file and up to 512 characters of text up to the message total 30kb limit The slide options available are Add Slide To add a new slide Delete Slide To delete the active slide Previous Slide To navigate to the previous slide Next Slide To navigate to the next slide EVA data cannot be attached as a slide data to a message If You ...

Page 110: ...ge in the Drafts Box 1 Perform steps 1 and 2 in Creating a New MMS on page 107 2 Press or to select Drafts then press 3 Select the desired message to send in the Drafts box by pressing or then press Options The Options Menu is displayed 4 Press or to select Send then press The confirmation screen of file size is displayed 5 Select Yes then press The phone begins the sending process and the MMS is ...

Page 111: ... the Sender from Inbox 1 Perform steps 1 and 2 in Creating a New MMS on page 107 2 Press or to select Inbox then press 3 Press Options to display the Options Menu 4 Press or to select Reply then press 5 Enter your message For details on entering characters see Entering Characters on page 24 6 Press The phone number or E mail address of the recipient is automatically filled in the sender s phone nu...

Page 112: ...lso sent However if there is any material which the phone recognises as having copyright it will not be sent Subject field is automatically filled in with the original subject preceded by Fw The original message and subject cannot be changed Modifying a Message 1 Perform steps 1 to 3 in Replying to a Message to the Sender from Inbox on page 111 2 Select Edit then press 3 Modify the message 4 Press...

Page 113: ...ete Message then press 5 Press or to select One Message or All Messages then press 6 Select Yes then press To cancel deletion select No then press Note You cannot delete locked messages To Lock Message 1 Perform steps 1 and 2 in Creating a New MMS on page 107 2 Press or to select Inbox or Sent then press 3 Select the message you wish to lock by pressing or then press Options The Options Menu is di...

Page 114: ... system information To set up the Service Centre Address 1 Press during stand by to display the Message menu 2 Press or to select SMS then press 3 Press or to select Settings then press 4 Select Message Centre then press 5 Enter the centre number If you wish to enter a country code for a message to an international number press and hold until a sign appears 6 Press Validity Period This indicates t...

Page 115: ...Off 1 Perform steps 1 to 3 in Setting up SMS on page 114 2 Press or to select Optimisation then press 3 Press or to select On or Off then press Creating a New SMS 1 Press during stand by 2 Press or to select SMS then press 3 Select Compose then press 4 Enter your message For details on entering characters see Entering Characters on page 24 5 Press To Use the Text Template 1 Perform steps 1 to 3 in...

Page 116: ...nt Reading SMS Incoming Messages The SMS indicator will appear when an incoming message arrives 1 When you receive a SMS press during stand by 2 Press or to select the desired message The sender s phone number and a part of the message are displayed When the sender s phone number is stored in the Phonebook the sender s name is displayed instead of the phone number Messages are marked with denote u...

Page 117: ...and Number on page 28 5 Press or to select Send then press The phone begins the sending process and the SMS is sent Modifying a Message 1 Perform steps 1 and 2 in Creating a New SMS on page 115 2 Press or to select Outbox then press 3 Select the desired message to modify in the Outbox by pressing or then press 4 Press Options to display the Options Menu 5 Select Edit then press 6 Modify the messag...

Page 118: ...umber entry prompt with the sender s number entered For details on entering a name see Storing Names and Numbers on page 26 Cell Broadcast You can receive Cell Broadcast messages or general messages like weather reports traffic reports etc broadcast to all subscribers in a certain network area This function may not be available on all mobile phone networks Contact your network operator for more in...

Page 119: ...etting Languages Allows you to select your preferred language for the cell broadcast message display Cell Information The Cell Information is the message information that operators sent to subscribers in certain areas When you receive Cell Information the message will be displayed on the stand by screen Note This function may not be available on all mobile phone networks Contact your network opera...

Page 120: ...nnectable Interface by Function GSM GPRS Modem You can use GX10i as a GSM GPRS modem to access the Internet from your PC For software support refer to the following site http www sharp mobile com Handset Manager You can transmit picture image files between your phone and your PC The data cable RS232C XN 1DC10 option is necessary for connection to a PC For software support refer to the following si...

Page 121: ...screen instructions to complete installation Infrared communication When using the infrared modem function for executing data transmission align the infrared port with each other Note The maximum distance for communicating between the infrared ports is 20 cm within a 30º angle When transmitting data via infrared communication you need to set the infrared setting to On p 99 It is not recommended th...

Page 122: ... display is diffi cult to read Adjust the LCD contrast Phone functions do not work after the phone is turned on Check the radio signal strength indicator as you may be outside the service area Check to see if any error message is displayed when you turn your phone on If so contact your dealer Make sure the SIM card is correctly inserted Calls cannot be made or received If the message SIM Card Erro...

Page 123: ... sure you are correctly subscribed for the Short Message Service that the network supports this service and that the centre number is set up correctly If not contact your network service provider Cannot connect to MMS service pro vider MMS settings and configuration may be missing or incorrect or network does not support it Check your service provider s access point number Contact your service pro...

Page 124: ...n the opposite side of your body from where it is located The phone should be kept at least 6 inches 15 24 cm from a pacemaker ANYTIME the phone is switched on Do not switch on your phone near gas or flammable substances Observe the rules concerning the use of mobile phones at gasoline stations chemical plants and at all sites where a risk of explosion exists Caring for your phone Do not allow chi...

Page 125: ...ial touches exposed terminals When the battery is detached from the phone use a cover made of non conductive material for keeping and carrying the battery safely Recommended temperature for using and storing batteries is approximately 20 C The batteries performance is limited in low temperatures particularly below 0 C and the phone may not work temporarily regardless of the amount of remaining bat...

Page 126: ...aking a picture the picture can be blurred When taking a picture hold the phone firmly to prevent it from moving or use the delay timer Clean the lens cover before taking a picture Fingerprints oils etc on the lens cover hinder clear focusing Wipe them off with a soft cloth before taking a picture Others As with any electronic storage unit data may be lost or corrupted under various circumstances ...

Page 127: ...ed and tested so as not to exceed the limits for exposure to electromagnetic fields set by the Australian Radiation Protection and Nuclear Safety Agency ARPANSA These limits are part of comprehensive guidelines developed by independent scientific organizations The guidelines include a substantial safety margin designed to assure the safety of the phone user and others and to take into account vari...

Page 128: ...All Call Costs 81 Setting Charge Limit 80 Setting Charge Rate 80 Call Log 77 Deleting 77 Sending Messages 77 Viewing 77 Call Manager 77 Call Settings 89 Auto Redial 92 Call Waiting 89 Caller No Status 90 Display Call Timers 90 Group Call 91 Minute Minder 92 Personal Call 91 Resetting 92 Call Timers 78 Checking Duration of Last Call 78 Checking Total Call Time 78 Resetting All Call Timers 78 Call W...

Page 129: ...Diverts 82 Cancelling All Divert Settings 83 Cancelling Divert Settings Indi vidually 83 Checking Divert Status 83 Divert Calls 82 E Earpiece 9 Earpiece Volume 21 Emergency Calls 19 End Power Key 9 Entering Characters 24 Changing Input Mode 25 Symbols and Punctuation 25 T9 Text Input 25 Table of Characters 24 Text Template 25 External Connector 9 F Fun Games 48 H Hands free Connector 9 Help List 7...

Page 130: ...109 Lock Unlock 113 Making a Call 113 Modifying 112 Reading 110 Replying 111 Retrieving 113 Saving in Drafts Box 109 Sending Message in Drafts Box 110 Setting up 107 Storing the Phone Number or E mail Address of a Sender in the Phonebook 112 Turning the Slide Show Setting On or Off 109 My Bookmarks 45 Accessing 45 Adding 45 Deleting 46 Editing 46 My Java Games 39 Checking Information 39 Deleting 4...

Page 131: ...Wallpaper 84 Phonebook 24 Adding Number from Call Log 27 Creating New Entry 25 Deleting 29 Editing 28 Group Name 24 26 Memory Status 30 Searching 28 Sending Messages 31 Storing Inputted Number 27 View Groups 29 Your Own Number 29 PIN Code 100 PIN2 Code 101 Profiles 63 Activating 63 Any Key Answer 68 Customising 63 Keypad Tones 65 Low Battery Alert 68 Message Alert 67 Power On Off Sound 66 Resettin...

Page 132: ...ng in Outbox 115 Sending 116 Setting up 114 Storing Sender s Number in Phonebook 118 Speaker 9 Speed Dialling 19 30 T Tone Editor 59 Algorithm 60 Creating Your Original Tone 61 Effect Frequency 61 FM Sound Source 59 Operator 60 Troubleshooting 122 Turning Your Phone On Off 15 V Vodafone live 105 Browser Menu 106 Navigating WAP Page 105 Viewing WAP Browser 105 Voice Memo 75 Playing Back 76 Recordin...

Page 133: ...133 Index ...

Page 134: ...is described in detail inside this manual But if you are already familiar with how a mobile phone works you probably want to try out the new features straight away the things you couldn t do before In which case the next three pages will show you how to Take your first picture with the camera Send it as a multimedia message with text Try out a Java game using animation 2D and 3D effects Experiment...

Page 135: ...ght of the screen often as an alternative to the menu keys Using the camera Taking a photo 1 From the start up screen press and hold for two seconds to go into Camera mode see Section M1 Camera p 34 for full details 2 Press to capture the image on screen 3 Press Save Save to My Phone is shown or press to Send your picture to someone else see next page Or press Back instead to re take Note always r...

Page 136: ...n a mobile number or an email address to enter text first press and hold to get the symbol press the key 3 times 2 Press choose Send and press Select 3 You ll be asked to OK the file size select Yes press and watch it being sent Tip Try sending to yourself to see how it works Problems You may need to be registered for MMS speak to Vodafone customer services Playing games Your phone comes with two ...

Page 137: ...y Phone section of the Main Menu First you need to access the Vodafone live portal Accessing the Vodafone live portal 1 Your phone is already set up to use the mobile internet browser On the start up screen you ll see the Vodafone live logo at the bottom right Press to select it and this will start the connection process see the Vodafone section p 105 2 Once connected you ll see a menu of icons wh...

Reviews: