background image

Optional Answering Machine Settings

32

1

Press 

 once and 

 once.

2

Press 

 once and 

 twice.

3

Press .

4

Press 

 to turn on automatic fax 

reception, or 

 to turn it off.

5

Press 

 to return to the date and time display.

FUNCTION

1

2

STOP

ON A.M. FAILURE

Automatic fax reception YES: The reception mode will switch to FAX mode, 
allowing the machine to continue to receive faxes automatically. With this 
setting, you can still use the remote commands to listen to your messages 
and then erase them (see 

Remote Operations

 on page 38).

Automatic fax reception is set to NO at the factory before shipping. If you want 
to set it to YES, press the panel keys as follows:

Display:

A.M. SETTING

1=YES, 2=NO

The display briefly shows 
your selection, then:

OGM ONLY MODE

OGM only mode

If needed, you can turn off recording of incoming messages. In this case, your 
outgoing message will play, but callers will not be able to leave a message. 
(The machine will still receive faxes sent by automatic dialling.)

1

Press 

 once and 

 once.

2

Press 

 once and 

 once.

FUNCTION

OGM ONLY MODE

Display:

A.M. SETTING

all.book

Page 32

Thursday, March 7, 2002

9:12 AM

Summary of Contents for FO-A650

Page 1: ...ODEL FO A650 OPERATION MANUAL FACSIMILE 1 Installation 2 Using the Answering Machine 3 Sending Faxes 4 Receiving Faxes 5 Making Copies 6 Special Functions 7 Printing Lists 8 Maintenance 9 Troubleshooting ...

Page 2: ...bps with automatic fallback to lower speeds Transmission time Approx 6 seconds only when ECM is on Resolution Horizontal 8 pels mm Vertical Standard 3 85 lines mm Fine Halftone 7 7 lines mm Super fine 15 4 lines mm Automatic document feeder 10 pages max Letter A4 80 g m2 paper Recording system Thermal transfer recording Halftone grayscale 64 levels Compression scheme MR MH MMR Paper tray capacity ...

Page 3: ...G3 mode Input document size Automatic feeding Width 148 to 216 mm Length 140 to 297 mm Manual feeding Width 148 to 216 mm Length 140 to 600 mm Effective scanning width 210 mm max Effective printing width 210 mm max Contrast control Automatic Dark selectable Reception modes TEL FAX TEL FAX A M Copy function Single Multi 99 copies page Telephone function Yes cannot be used if power fails Power requi...

Page 4: ...e connected to a 220 240 V 50 60 Hz earthed 2 prong outlet Connecting it to any other kind of outlet will damage the machine and invalidate the warranty Never insert objects of any kind into slots or openings on the machine This could create a risk of fire or electric shock If an object falls into the machine that you cannot remove unplug the machine and consult a qualified service representative ...

Page 5: ...oing Message 26 Operating the Answering Machine 27 Optional Answering Machine Settings 31 Transfer Function 33 Override Ringing 36 Remote Operations 38 3 Sending Faxes 44 Transmittable Documents 44 Loading the Document 45 Adjusting the Resolution and Contrast 46 Sending a Fax by Normal Dialling 48 Sending a Fax by Automatic Dialling 49 Sending a Fax From Memory 56 4 Receiving Faxes 58 Using TEL FA...

Page 6: ...l Functions 69 Blocking Reception of Unwanted Faxes 69 7 Printing Lists 70 8 Maintenance 74 9 Troubleshooting 77 Problems and Solutions 77 Messages and Signals 81 Clearing Paper Jams 84 Quick Reference Guide 86 Guide de Reference Rapide 87 Index 88 ...

Page 7: ... Number keys Use these keys to dial numbers and enter numbers and letters when storing auto dial numbers Panel release Press this release to open the operation panel STOP key Press this key to cancel an operation before it is completed COPY HELP key When a document is in the feeder press this key to make a copy of a document At any other time press this key to print out the Help List a quick refer...

Page 8: ...lume setting When a document is not in the feeder press these keys to change the speaker volume when the key has been pressed or the ringer volume at any other time FUNCTION key settings Press these keys after pressing the FUNCTION key to scroll through the FUNCTION MODE settings key Press this key to listen to the line and fax tones through the speaker when faxing a document 12 10 9 Monitoring ph...

Page 9: ...T key Press this key while listening to a message to play it again SKIP key Press this key while listening to a message to skip to the next message DELETE key Press this key to erase recorded messages 14 15 16 ...

Page 10: ...oved from a cold to a warm place it is possible that condensation may form on the scanning glass preventing proper scanning of documents for transmission To remove the condensation turn on the power and wait approximately two hours before using the machine Paper tray Paper tray extension Operation manual Gears 2 Handset Handset cord Telephone line cord Imaging film initial starter roll If any are ...

Page 11: ...e the handset to make ordinary phone calls or to transmit and receive faxes manually Connecting the power cord Plug the power cord into a 220 240 V 50 60 Hz earthed AC 2 prong outlet When disconnecting the fax unplug the telephone line cord before unplugging the power cord Caution The power outlet must be installed near the equipment and must be easily accessible The machine does not have a power ...

Page 12: ...ys on the operation panel as follows 1 Press once and once 2 Press once and 3 times 3 Press once 4 To select tone dialling press 1 To select pulse dialling press 2 if you are in a Group 1 country or 3 if you are in a Group 2 country TONE PULSE GROUP 1 PULSE GROUP 2 Group 1 countries Iran Saudi Arabia Egypt Yemen Kuwait West Africa India Philippines Israel Group 2 countries Qatar Bahrain Oman UAE T...

Page 13: ...install surge protectors for the power and telephone lines Surge protectors can be purchased from your dealer or at most telephone specialty stores Moving your fax and reconnecting Should it be necessary to move your fax to a new location first disconnect the telephone line cord before disconnecting the power lead When reconnecting it is necessary to connect the power lead before connecting the te...

Page 14: ...nsion phone optional If desired you can connect an extension phone to the TEL SET socket on the fax 1 Remove the seal covering the TEL SET socket 2 Connect the extension phone line to the TEL SET socket TEL SETTEL LINE TEL LINE TEL SET ...

Page 15: ...Remove the paper from the paper tray and open the operation panel press 2 Remove the used film and empty spool 3 Remove the two green gears from the spools DO NOT DISCARD THE TWO GREEN GEARS 1 2 When replacing the film use a roll of Sharp FO 6CR imaging film One roll can print about 150 A4 size pages The initial starter roll of imaging film included with your fax can print about 150 A4 size pages ...

Page 16: ...er 5 Insert the green gears 6 Insert the film into the print compartment 7 Rotate the front gear as shown until the film is taut 8 Close the operation panel press down on both sides to make sure it clicks into place Fit ends of rolls onto hubs Make sure the gears fit into the slots in the ends of the rolls 1 slot 2 slots Thick roll to rear ...

Page 17: ...ing on the reverse side may result in poor print quality GENTLY LOAD PAPER INTO THE PAPER TRAY DO NOT FORCE IT DOWN INTO THE FEED SLOT Note Do not use paper that has already been printed on or paper that is curled Loading Printing Paper You can load up to 50 sheets of letter A4 size 5 sheets of legal size 60 80 g m2 paper in the paper tray at room temperature maximum stack height should not be hig...

Page 18: ...R PRESS START KEY 1 Press once and once 2 Press once and twice 3 Press once 4 Select the paper size LETTER LEGAL A4 5 Press to return to the date and time display FUNCTION 1 2 3 STOP The display briefly shows your selection then PAPER SIZE SET COPY CUT OFF 1 LETTER Display OPTION SETTING Setting the paper size The fax has been set at the factory to scale received faxes to A4 size paper If you load...

Page 19: ... you can change the print contrast setting to LIGHT 1 Press once and once 2 Press once and 3 times 3 Press once 4 Select the print contrast NORMAL LIGHT 5 Press to return to the date and time display FUNCTION 1 2 STOP Display The display briefly shows your selection then OPTION SETTING PRINT CONTRAST PAPER SIZE SET 1 NORMAL ...

Page 20: ...utomatically appear at the top of each fax page you send Before you can begin sending faxes you must enter your name and fax telephone number You also need to set the date and time FUNCTION START MEMORY STOP 1 Press once and twice 2 Press once 3 Press once FUNCTION 1 9 4 5 6 7 8 0 2 3 Display ENTER FAX ENTRY MODE OWN NUMBER SET ...

Page 21: ...to 24 characters can be entered Example SHARP 7777 44 2 777 7 To enter two letters in succession that require the same key press after entering the first letter To clear a mistake press To enter a lower case letter continue pressing the key for the letter until the lower case letter appears To enter one of the following symbols press or repeatedly _ 7 Press 8 Press to return to the date and time d...

Page 22: ...h To correct a mistake press to move the cursor back to the mistake and then enter the correct number FUNCTION 0 5 The date and time appear in the display and are printed at the top of every page you fax Set the date and time as shown below FUNCTION STOP 1 9 4 5 6 7 8 0 2 3 Display The currently set date appears example ENTRY MODE DATE TIME SET DATE 15 08 2002 DATE 05 08 2002 START MEMORY ...

Page 23: ...r the year four digits Example 2002 7 Enter a two digit number for the hour 00 to 23 and a two digit number for the minute 00 to 59 Example 9 25 8 Press to start the clock 9 Press to return to the date and time display 0 1 2 0 0 2 0 9 2 5 START MEMORY STOP The currently set time appears example TIME 12 19 05 JAN 09 25 ANTI JUNK DATE 05 01 2002 ...

Page 24: ...ng sound to alert you to answer If it is an automatically dialled fax reception will begin automatically A M mode Select this mode when you go out and want the built in answering machine to answer all calls Voice messages will be recorded and fax messages will be received automatically Setting the reception mode Make sure a document is not loaded in the document feeder and then press until the arr...

Page 25: ... Adjustment You can adjust the volume of the speaker and ringer using the up and down arrow keys 1 Press 2 Press or until the display shows the desired volume level Press again to turn off the speaker Speaker 1 9 4 5 6 7 8 0 2 3 ...

Page 26: ... feeder The ringer will ring once at the selected level then the date and time will reappear in the display 2 If you selected RINGER OFF OK press Note When the reception mode is set to TEL the ringer will still ring at LOW if turned off START MEMORY Ringer Display RINGER HIGH RINGER MIDDLE RINGER LOW RINGER OFF OK ...

Page 27: ...hat the machine plays after answering a call to inform callers that they can leave a message or send a fax Follow the steps below to record a message Example Hello You ve reached ______ No one is available to take your call right now Please leave a message after the beep or press your facsimile Start key to send a fax Thank you for calling Display OGM1 GENERAL LIFT HANDSET OR PLAY PLAYBACK To use ...

Page 28: ...erating the Answering Machine Activating the answering machine To turn on the answering machine so that callers can leave messages press until the arrow in the display points to A M PLAY RESOLUTION RECEPTION MODE 4 Press and speak into the handset to record a message The outgoing message can be up to 60 seconds long While recording the display will show the time left to record 5 When finished repl...

Page 29: ...n The number of rings on which the machine answers incoming calls in A M mode depends on whether the Toll Saver function is turned on and if it is on whether you have messages The Toll Saver function is initially turned on ON OFF No received messages 4 Rings Received messages 2 Rings Toll Saver Toll Saver NOTHING Hello Hi Hi Ring Ring Ring Ring Ring Ring Ring Ring Ring Ring Answer according to NUM...

Page 30: ... plays the date and time of recording will appear briefly in the display If no messages were received NO MESSAGES will appear Repeat To listen to a message a second time press before playback of that message ends To move back to the previous message press within 3 seconds of the beginning of the current message Skip To skip forward to the next message press Note Playback will stop if you receive a...

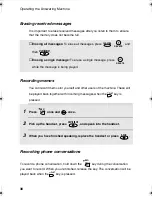
Page 31: ...ording memos You can record memos for yourself and other users of the machine These will be played back together with incoming messages when the key is pressed PLAY 1 Press once and once 2 Pick up the handset press and speak into the handset 3 When you have finished speaking replace the handset or press REC MEMO START MEMORY STOP Recording phone conversations To record a phone conversation hold do...

Page 32: ...d you can change this setting to 15 30 or 60 seconds Display A M SETTING RECORDINGTIME 1 2 3 4 The display briefly shows your selection then REMOTE CODE Fax reception on A M failure If the memory for recording incoming messages becomes full while you are out the answering machine will no longer be able to record messages The ON A M FAILURE setting is used to choose the response of the machine to i...

Page 33: ...ands to listen to your messages and then erase them see Remote Operations on page 38 Automatic fax reception is set to NO at the factory before shipping If you want to set it to YES press the panel keys as follows Display A M SETTING 1 YES 2 NO The display briefly shows your selection then OGM ONLY MODE OGM only mode If needed you can turn off recording of incoming messages In this case your outgo...

Page 34: ...en when you are at a remote location To use the Transfer function you must first program the number that you wish the machine to call the transfer number and record the transfer message that plays when you answer the phone at the remote location When you go out and wish to use the transfer function turn it on When you return and no longer wish to use the transfer function turn it off Programming t...

Page 35: ... when you answer the telephone and informs you that the call is a transfer call It can be up to 15 seconds long To record a transfer message follow the steps below The following is an example Hello This is a transfer call for YOUR NAME Enter your remote code number now 1 Press once and twice 2 Press once If you have already recorded a message you can press to listen to the message or press to dele...

Page 36: ...fer message follow Steps 1 and 2 of the above procedure and then press to check the message or to erase the message PLAY DELETE Turning the Transfer function on and off When you go out and wish to use the Transfer function turn it on as follows 1 Press once and once 2 Press once and 3 times 3 Press 4 Press to turn on the Transfer function Press to turn the function off 5 Press to return to the dat...

Page 37: ...f you want to hang up during message playback first enter and to stop playback then enter twice 0 Override Ringing This function allows selected callers using a touch tone telephone to override the answering machine s outgoing message and cause the machine to make a special ringing sound alerting you that they are calling This is useful when you are near the machine but only want to talk with cert...

Page 38: ...ins they should press the key on their telephone The caller will hear a short beep and the outgoing message will stop 2 The caller should enter the override code and by pressing the appropriate keys on their telephone If an incorrect code is entered the caller will hear four beeps He or she must re enter the correct code within 10 seconds or the line will be disconnected 3 Your machine will make a...

Page 39: ...code number has been set to 001 at the factory If you wish to use a different number follow these steps Display A M SETTING REMOTE CODE Toll Saver When you call the machine to listen to your messages it will answer after two rings if it has received at least one message or after four rings if it has not received any messages This allows you to save money on telephone charges particularly if you ar...

Page 40: ... message begins press on the telephone You will hear a short beep and the outgoing message will stop 2 Enter your remote code number and then press You will hear a series of beeps equal to the number of messages recorded or one long beep if four or more messages have been received The machine will then play back the messages beeping once at the end of each message When all messages have been playe...

Page 41: ...ack by pressing and and then press and Erase a message To erase the message you are currently listening to press and before it ends 4 When you have finished listening to your messages you can do any of the following Erase all messages Press and Repeat playback Press and Perform other operations You can enter any of the commands described in the following section Other remote operations Hang up If ...

Page 42: ...ommand from the beginning If you pause for longer than 10 seconds before entering a command or make two errors while entering your remote code number the line will be disconnected This prevents unauthorized people from attempting to guess your remote code number A M mode and FAX mode and TEL mode and Caution If you select TEL mode you will not be able to change the reception mode again TEL FAX mod...

Page 43: ...s silence after you finish speaking you will hear a beep and the new message will be played back 4 Turning the Transfer function on or off To turn Transfer on Press and on the telephone To turn Transfer off Press and on the telephone 9 1 9 2 Changing the transfer telephone number 1 Press and on the telephone 2 After you hear a short beep enter the new telephone number When finished press To insert...

Page 44: ...cording a new transfer message 1 Press and on the telephone 2 When you hear a short beep speak into the telephone to record the new message The time for the transfer message is fixed at 15 seconds After 15 seconds or earlier if the machine detects silence after you finish speaking you will hear a beep and the new message will be played back automatically 9 3 OGM only mode To turn on OGM only mode ...

Page 45: ... or several pages at once Note Letters or graphics on the edges of a document will not be scanned Letters in the shaded area will not be scanned 52 g m 157 g m 80 g m Loading one page at a time Minimum size Maximum size Minimum weight Maximum weight Minimum size Maximum size Minimum weight Maximum weight Loading up to 10 pages at once 140 mm 148 mm 140 mm 148 mm 52 g m 216 mm 600 mm 297 mm 216 mm ...

Page 46: ...ent Up to 10 pages can be placed in the feeder at one time The pages will automatically feed into the machine starting from the bottom page If you need to send or copy more than 10 pages place the additional pages gently and carefully in the feeder just before the last page is scanned Do not try to force them in as this may cause double feeding or jamming If your document consists of several large...

Page 47: ...ical transmission FINE Use FINE for documents containing small letters or fine drawings SUPER FINE Use SUPER FINE for documents containing very small letters or very fine drawings HALF TONE Use HALF TONE for photographs and illustrations The original will be reproduced in 64 shades of gray You must adjust the settings each time you don t want to use the default settings The default resolution sett...

Page 48: ...rast can be adjusted 2 Press one or more times until the desired resolution and contrast settings appear in the display The first time you move through the list of resolution settings the contrast setting AUTO will appear next to each resolution setting The second time you move through the list the contrast setting DARK will appear RESOLUTION RECEPTION MODE Display STANDARD AUTO FINE AUTO SUPER FI...

Page 49: ...hem to press their Start key if you pressed pick up the handset to speak with them This causes the receiving machine to issue a fax tone RESOLUTION RECEPTION MODE or Sending a Fax by Normal Dialling With Normal Dialling you pick up the handset or press and dial by pressing the number keys If a person answers you can talk with them through the handset before sending the fax If you pressed you must ...

Page 50: ...e numbers for automatic dialling START MEMORY 1 Press once and once 2 Press once 3 Enter the fax or voice number by pressing the number keys Up to 32 digits can be entered Note A space cannot be entered To clear a mistake press If a pause is required between any of the digits to access a special service or an outside line press The pause appears as a hyphen two seconds per pause Several pauses can...

Page 51: ...pears To enter one of the following symbols press or repeatedly _ 6 Press 7 Return to Step 2 to store another number or press to return to the date and time display START MEMORY START MEMORY STOP A B C D E F G H I J K L M N O P Q R S T U V W X Y Z SPACE Display Note The fax machine uses a lithium battery to keep automatic dialling numbers and other programmed information in memory when the power i...

Page 52: ...red changes to the number Press or to move the cursor to the digit or digits you wish to change and then enter the new digit The new digit will replace the old digit If you do not wish to change the number go directly to Step 6 6 Press 7 Make the desired changes to the name Press or to move the cursor to the letter or letters you wish to change and then press the appropriate number key repeatedly ...

Page 53: ...esired press to set the resolution and or contrast 2 Press or until the name of the other party appears in the display if no name was stored the number will appear 3 If you are sending a fax press Dialling and transmission begins If the transmission is completed successfully the fax will beep once If an error occurs the fax will beep three times and print a Transaction Report to inform you of the ...

Page 54: ... resolution and or contrast 2 Enter the number of the receiving machine by pressing the number keys If a pause is required between any of the digits to access a special service or an outside line press The pause will appear as a hyphen two seconds per pause Several pauses can be entered in a row 3 Check the display If the number of the receiving machine shown is correct press If the number is not ...

Page 55: ... can be used to send a fax or make a phone call Note If a fax transmission is unsuccessful and DOCUMENT JAMMED appears in the display remove the document as explained on page 84 This may occur if the other fax machine doesn t respond properly when you attempt to send the document Automatic redialling If you use automatic dialling including Direct Keypad Dialling to send a fax and the line is busy ...

Page 56: ...ing at the receiving end This function is called Error Correction Mode ECM ECM is effective for both transmissions and receptions and is only effective when the other fax machine has ECM as well If desired you can turn ECM off This will increase slightly the amount of memory available for memory transmission and reception STOP 1 Press once and once 2 Press once and 5 times 3 Press once 4 Press to ...

Page 57: ...t locations in just one operation When sending to multiple locations only auto dial numbers can be used to dial the numbers of the receiving machines 1 Load the document s If desired press to set the resolution and or contrast 2 Press 3 Press or until the name of the number appears in the display if no name was stored the number will appear 4 Press to select the number 5 Repeat Steps 3 and 4 for e...

Page 58: ...emory load the document press and then dial using one of the following methods Press the number keys to enter the fax number and then press Press repeatedly to select an auto dial number and press Press once to select the last number dialled and press START MEMORY START MEMORY START MEMORY START MEMORY If the memory becomes full If the memory becomes full while the document is being scanned MEMORY...

Page 59: ...n t detect a fax tone this means that the call is a voice call or manually dialled fax it will make a ringing sound called pseudo ringing for 15 seconds to alert you to answer If you don t answer within this time your fax will send a fax tone to the other machine to allow the calling party to send a fax manually if they desire Note Only the fax will alert you to voice calls or manually dialled fax...

Page 60: ...nds 60 SEC 60 seconds 120 SEC 120 seconds STOP 1 2 3 4 Using A M Mode To select A M mode press until the arrow in the display points to A M RESOLUTION RECEPTION MODE In A M mode your fax machine will automatically receive voice messages and faxes See Chapter 2 for more details PSEUDO RING 1 15 SECONDS The display briefly shows your selection then FAX SIGNAL RX RESOLUTION RECEPTION MODE FAX TEL A M...

Page 61: ... explained in Using TEL Mode on page 61 2 rings Fax reception Changing the number of rings If desired you can change the number of rings on which the fax machine answers incoming calls in FAX and TEL FAX mode Any number from 2 to 5 can be selected 1 Press once and once FUNCTION Display FAX TEL A M TEL FAX OPTION SETTING To select FAX mode press until the arrow in the display points to FAX RESOLUTI...

Page 62: ...Using TEL Mode To select TEL mode press until the arrow in the display points to TEL RESOLUTION RECEPTION MODE When the reception mode is set to TEL you must answer all calls by picking up the fax machine s handset or an extension phone connected to the same line FAX TEL A M TEL FAX The display briefly shows your selection then NUMBER OF RING FAX REMOTE ENTER 2 5 2 RESOLUTION RECEPTION MODE ...

Page 63: ...nd then wants to send a fax press after speaking Press before the sender presses their Start key When RECEIVING appears in the display hang up START MEMORY Answering on an extension phone Answering with the fax s handset Note If you have set the Fax Signal Receive setting page 63 to NO press to begin reception START MEMORY Beep START MEMORY 1 Answer the extension phone when it rings RECEIVING RECE...

Page 64: ...e below to NO Your fax will not accept the signal to begin reception 5 if a document is loaded in its feeder 5 Phone goes dead Beep Optional Reception Settings Fax Signal Receive Your fax will automatically begin reception if you hear a soft fax tone after answering a call on your fax or an extension phone If you use a computer fax modem to send documents on the same line you must turn this functi...

Page 65: ...remote fax activation If desired you can use a number other than 5 to activate fax reception from an extension telephone You can select any number from 0 to 9 1 Press once and once 2 Press once and once 3 Press once 4 Enter the desired number any number from 0 to 9 Example 3 5 Press to return to the date and time display FUNCTION 3 STOP Display OPTION SETTING FAX REMOTE The display briefly shows y...

Page 66: ...e remainder will be printed on a second page In this case the cut off point may occur in the middle of a line Automatic reduction may not be possible if the received document is too large contains too many fine graphics or images or is sent at high resolution In this case the remainder of the document will be printed on a second page 1 Press once and once 2 Press once and 4 times 3 Press once 4 Pr...

Page 67: ...placement or the paper jams incoming faxes will be received to memory When you have received a document in memory FAX RX IN MEMORY will appear in the display alternating with ADD PAPER PRESS START KEY or CHECK FILM CHECK COVER CHECK PAPER JAM When you add paper and press replace the imaging film or clear the jam the stored documents will automatically print out START MEMORY ...

Page 68: ...he default setting is 100 Example Press twice Number of copies per original Press the number keys to enter a number from 1 to 99 The default setting is 1 Example Press for five copies 3 When you are ready to begin copying press RESOLUTION RECEPTION MODE 5 COPY HELP READY TO SEND RATIO 125 5 If MEMORY IS FULL appears If the memory becomes full while a document is being scanned MEMORY IS FULL and SE...

Page 69: ...rn to the date and time display FUNCTION 1 2 STOP Display The display briefly shows your selection then OPTION SETTING COPY CUT OFF NUMBER OF RING 1 YES 2 NO Copy Cut off When making a copy of a document that is longer than the printing paper use the copy cut off setting to select whether the remaining part of the document will be cut off or printed on a second page The initial setting is YES cut ...

Page 70: ... then press to return to the date and time display FUNCTION 1 2 START MEMORY STOP 6 Special Functions Blocking Reception of Unwanted Faxes The Anti Junk Fax function allows you to block reception of faxes from a party that you specify This saves paper by not printing out unwanted junk faxes To use this function follow the steps below to enter the fax number from which you do not wish to receive fa...

Page 71: ...in the fax machine The lists are described below To print a list follow these steps 1 Press once and twice 2 Press once 3 Press or until the desired list appears in the display 4 Press once 5 Press to print the list FUNCTION START MEMORY Display LISTING MODE TEL LIST PRESS START KEY ...

Page 72: ...ecorded the length and the type Telephone Number List This list shows the fax and phone numbers that have been stored for automatic dialling Setup List This list shows your current selections for the FUNCTION key settings The list also shows your name and fax telephone number as entered in the machine and a sample of the header printed at the top of every page you transmit HEADER PRINT ...

Page 73: ...ted received NOTE One of the following notes will appear under NOTE in the report to indicate whether the transaction was successful and if not the reason for the failure OK Transmission reception was successful P FAIL A power failure prevented the transaction JAM The printing paper or document jammed preventing the transaction BUSY The fax was not sent because the line was busy COM E X Where X is...

Page 74: ...o the date and time display ALWAYS PRINT A report will be printed after each transmission reception or error ERROR MEMORY A report will be printed after an error or a memory operation SEND ONLY A report will be printed after each transmission ERROR ONLY A report will be printed only when an error occurs NEVER PRINT A report will never be printed FUNCTION 1 5 STOP Display The display briefly shows ...

Page 75: ...he operation panel press 2 Take the imaging film out of the print compartment and place it on a sheet of paper 3 Wipe the print head with isopropyl alcohol or denatured alcohol Caution Do not use benzene or thinner Avoid touching the print head with hard objects The print head may be hot if your fax machine has just received a large number of documents If this is the case allow the print head to c...

Page 76: ... close the operation panel press down on both sides to make sure it clicks into place Scanning glass and rollers Clean the scanning glass and rollers frequently to ensure the quality of transmitted images and copies Note Remove the paper from the paper tray before cleaning the scanning glass and rollers 1 Open the operation panel press 1 2 ...

Page 77: ...you find it difficult to remove dirt from the scanning glass you can try moistening the swab with isopropyl alcohol or denatured alcohol Take care that no alcohol gets on the rollers 4 Flip down the green levers on each side of the white roller Rotate the front gear until the film is taut and then close the operation panel press down on both sides to make sure it clicks into place The housing Wipe...

Page 78: ...on The cord from the TEL LINE socket to the wall socket should be no longer than two meters Make sure there are no modem devices sharing the same telephone line Check with the other party to make sure their fax machine is functioning properly Have your telephone line checked for line noise Try connecting the fax machine to a different telephone line If the problem still occurs your fax machine may...

Page 79: ...n page 11 The power is on but no transmission takes place Make sure that the receiving machine has paper Make sure that the telephone line cord is plugged into the TEL LINE socket and not the TEL SET socket If the receiving machine is in manual mode with no attendant reception will not be possible Check the display for error messages Pick up the handset and check for a dial tone Nothing is printed...

Page 80: ...ds to yield a lighter print quality The received document is faint Ask the other party to send higher contrast documents If the contrast is still too low your fax machine may need service Make a copy or print a report to check your machine s printing ability Received images are distorted Noise on the telephone line may cause distortion Have the other party try sending the document again The print ...

Page 81: ...dback turn off the speaker press before you replace the handset Auto dial numbers cannot be stored in the fax Make sure the fax is plugged in and the imaging film has been loaded Auto dial numbers cannot be stored if the imaging film has not been loaded See Loading the Imaging Film on page 14 Nothing appears in the display Make sure the power cord is properly plugged into a power outlet Connect an...

Page 82: ... needs replacement Make sure the operation panel is completely closed press down on both sides If a paper jam has occurred clear the jam as explained in the following section Clearing Paper Jams CHECK PAPER SIZE The paper size setting is incorrect Change the paper size setting as explained on page 17 DOCUMENT JAMMED The original document is jammed See the following section Clearing Paper Jams Docu...

Page 83: ... This appears if you attempt to search for an auto dial number when none have been stored OFF HOOK This appears if you forgot to replace the handset after using it to dial and send a fax Replace the handset or press the STOP key to clear the message ON HOOK DIAL The key has been pressed and the fax machine is waiting for you to dial OVER HEAT The print head has overheated Operation can be continue...

Page 84: ...sages TOTAL PAGE S 01 Number of pages transmitted received or copied Continuous tone 3 seconds Indicates the end of transmission reception or copying Intermittent tone 3 beeps 5 seconds 1 second on 1 second off Indicates incomplete transmission reception or copying Rapid intermittent tone 35 seconds 0 7 seconds on 0 3 seconds off Indicates that the handset is off hook ...

Page 85: ...ressing If the document doesn t feed out remove it as explained below Important Do not try to remove a jammed document without releasing it as explained below This may damage the feeder mechanism START MEMORY 1 Press and slowly open the operation panel until it is half open 2 Flip up the green levers on each side of the white roller 3 Gently remove the document Be careful not to tear the document ...

Page 86: ...ent or rollers 3 Rotate the front gear until the film is taut and then close the operation panel press down on both sides to make sure it clicks into place Clearing jammed printing paper 4 Flip down the green levers on each side of the white roller Rotate the front gear until the film is taut and then close the operation panel press down on both sides to make sure it clicks into place 1 2 ...

Page 87: ...ax machine automatically answers and receives faxes Voice calls are signalled by a special ringing sound A M mode Select this mode when you go out to receive both voice messages and faxes START MEMORY FAX TEL A M TEL FAX 01 JAN 10 30 FAX TEL A M TEL FAX 01 JAN 10 30 A M TEL FAX FAX TEL 01 JAN 10 30 A M TEL FAX FAX TEL 01 JAN 10 30 RESOLUTION RECEPTION MODE Storing Auto Dial Numbers 1 Press once an...

Page 88: ... télécopieur répond automatiquement et réceptionne les télécopies Les messages vocaux sont signalés par une sonnerie spécifique A M mode Sélectionnez ce mode lorsque vous devez vous absenter de manière à recevoir tant des messages vocaux que des télécopies START MEMORY FAX TEL A M TEL FAX 01 JAN 10 30 FAX TEL A M TEL FAX 01 JAN 10 30 A M TEL FAX FAX TEL 01 JAN 10 30 A M TEL FAX FAX TEL 01 JAN 10 3...

Page 89: ...5 Extension telephone Connecting 13 Using 62 F FAX reception mode 23 60 Fax reception on A M failure 31 Fax Signal Receive 63 H Halftone setting 46 Handset 10 Housing cleaning 76 I Imaging film replacing 14 J Jams clearing 84 85 L Letters entering 20 50 Line error 77 Loading paper 16 Loading the document 45 M Memory transmission 57 Memory substitute reception to 66 Message List 71 Messages Erasing...

Page 90: ... Ratio setting 65 Redialling 54 Remote code number 38 Remote operations 38 Resolution 46 Ringer volume 25 S Scanning glass cleaning 75 Sender s name and number entering 19 20 Setup List 71 Speaker volume 24 T TEL reception mode 23 61 TEL LINE socket 11 TEL SET socket 13 TEL FAX reception mode 23 58 Tel Fax Remote Number 64 Telephone line cord 11 Telephone Number List 71 Time setting 21 Toll Saver ...

Page 91: ......

Page 92: ......

Page 93: ......

Page 94: ...r remote code 3 Press 4 After listening to your messages you can either hang up to save them or enter one of the commands on the reverse side REMOTE OPERATION CARD The card below is provided as a quick guide to remote operation Cut it out and carry it with you when you go out Remote Operation Guide ...

Page 95: ...nsfer number 9 0 Tel No Record transfer OGM 9 3 To quickly disconnect OGM ONLY MODE Turn on 1 1 Turn off 1 2 PLAYBACK Play messages 7 Move backward repeat 2 Skip forward 5 Stop 0 Play new messages only 6 first stop playback ERASING MESSAGES Erase single message 3 Erase all messages 3 3 RECORDING A MEMO Start End 0 RECORDING A NEW OGM Start 4 ...

Page 96: ...ﻓﻘﻂ اﻹرﺳﺎل وﻗﺖ أﻓﻘﻲ ٨ ﺑﻞ ﻣﻢ رأﺳﻲ ﻗﻴﺎﺳﻲ ٣ ٨٥ ﺧﻂ ﻣﻢ دﻗﻴﻖ ﻧﺼﻔﻲ ﻟﻮن ٧ ٧ ﺧﻂ ﻣﻢ اﻟﺪﻗﺔ ﻓﺎﺋﻖ ١٥ ٤ ﺧﻂ ﻣﻢ اﻟﺪﻗﺔ ١٠ أﻗﺼﻰ آﺤﺪ ﺻﻔﺤﺎت ورق Letter A4 ٨٠ ﺟﻢ م ٢ اﻟﺘﻠﻘﺎﺋﻴﺔ اﻟﺘﻐﺬﻳﺔ وﺣﺪة ﺑﺎﻟﻤﺴﺘﻨﺪات اﻟﺤﺮاري ﺑﺎﻟﻨﻘﻞ ﺗﺴﺠﻴﻞ اﻟﺘﺴﺠﻴﻞ ﻧﻈﺎم ٦٤ درﺟﺔ اﻟﻨﺼﻔﻲ اﻟﻠﻮن ا ﺗﺪرج ﻟﺮﻣﺎدي MR و MH و MMR اﻟﻀﻐﻂ ﻧﻈﺎم ﺣﻮاﻟﻲ ٥٠ ﺣﺠﻢ ﻣﻦ ورﻗﺔ Letter A4 ارﺗﻔﺎع أﻗﺼﻰ ﻳﺘﻌﺪى أﻻ ﻳﺠﺐ اﻟﻐﺮﻓﺔ ﺣﺮارة درﺟﺔ ﻓﻲ اﻟﺪرج ﻋﻠﻰ اﻟﻤﻮﺟﻮد اﻟﺨﻂ اﻟﻮرق ﻟﺮزﻣﺔ Legal ٥ ورﻗﺎت اﻟ...

Page 97: ... A M ﺁﻟﻲ رد اﻻﺳﺘﻘﺒﺎل أوﺿﺎع ﻣﻔﺮد ﻣﺘﻌﺪد ٩٩ ﻧﺴﺨﺔ ﺻﻔﺤﺔ اﻟﻨﺴﺦ وﻇﻴﻔﺔ Yes ﻧﻌﻢ اﻟﺘﻴﺎر اﻧﻘﻄﺎع ﺣﺎﻟﺔ ﻓﻲ اﺳﺘﺨﺪاﻣﻬﺎ ﻳﻤﻜﻦ ﻻ اﻟﻬﺎﺗﻒ وﻇﻴﻔﺔ ٢٢٠ ٢٤٠ ﻣﺘﺮدد ﺗﻴﺎر ﻓﻮﻟﺖ ٥٠ ٦٠ هﺮﺗﺰ اﻟﻄﺎﻗﺔ ﻣﺘﻄﻠﺒﺎت ٥ ٣٥ ﻣﺌﻮﻳﺔ درﺟﺔ درﺟﺔ اﻟﺘﺸﻐﻴﻞ ﺣﺮارة ٢٥ ٨٥ ﻧﺴﺒﻴﺔ رﻃﻮﺑﺔ اﻟﺮﻃﻮﺑﺔ اﻻﺳﺘﻌﺪاد وﺿﻊ ٢ ٥ واط اﻷﻗﺼﻰ اﻟﺤﺪ ١١٠ واط اﻟﻄﺎﻗﺔ اﺳﺘﻬﻼك اﻟﻌﺮض ٣٢٧ ﻣﻢ اﻟﻌﻤﻖ ١٩٣ ﻣﻢ اﻻرﺗﻔﺎع ١٦٣ ﻣﻢ اﻷﺑﻌﺎد اﻟﻤﻠﺤﻘﺎت ﺑﺪون ﺣﻮاﻟﻲ ٢ ٨ ﺟﺮام آﻴﻠﻮ اﻟﻮزن اﻟﻤﻠﺤﻘﺎت ﺑﺪون ﺗﺤﺘﻔ اﻟﻤﺴﺘ...

Page 98: ...ز هﺬ ﺗﻮﺻﻴﻞ ﻳﺠﺐ ٢٢٠ ٢٤٠ ﻓﻮﻟﺖ ٥٠ ٦٠ ﺑﺄرﺿﻲ ّﻞ ﺻ ﻣﻮ هﺮﺗﺰ ﻃﺮﻓﻴﻦ ﻓﺘﻮﺻﻴﻞ اﻟﻀﻤﺎن وﺑﻄﻼن إﺗﻼﻓﻪ ﻓﻲ ﺳﻴﺘﺴﺒﺐ اﻟﻤﺂﺧﺬ ﻣﻦ ﺁﺧﺮ ﻧﻮع ﺑﺄي اﻟﺠﻬﺎز اﻟﺠﻬﺎز ﻋﻠﻰ اﻟﻤﻮﺟﻮدة اﻟﻔﺘﺤﺎت ﻓﻲ اﻷﺟﺴﺎم ﻣﻦ ﻧﻮع أي ﺑﺈدﺧﺎل ﺗﻘﻢ ﻻ أو ﺣﺮﻳﻖ ﻓﻲ هﺬا ﻳﺘﺴﺒﺐ أن اﻟﻤﻤﻜﻦ ﻓﻤﻦ آﻬﺮﺑﻴﺔ ﺻﺪﻣﺔ ﻓﻨﻲ واﺳﺘﺸﺮ اﻟﺠﻬﺎز اﻓﺼﻞ إﺧﺮاﺟﻪ ﻳﻤﻜﻨﻚ وﻻ اﻟﺠﻬﺎز داﺧﻞ ﺟﺴﻢ أي ﺳﻘﻮط ﺣﺎﻟﺔ وﻓﻲ ﺧﺪﻣـﺔ ﻣﺆهﻞ ﺛﺎﺑﺘﺔ ﻏﻴﺮ ﻣﻨﻀﺪة أو ﺣﺎﻣﻞ أو ﻣﺴﻨﺪ ﻋﻠﻰ اﻟﺠﻬﺎز هﺬ ﺗﻀﻊ ﻻ ﺗﻠﻒ إﺣﺪاث ﻓﻲ اﻟﺠﻬﺎز ﺳﻘﻮط ﻳﺘﺴﺒﺐ أن...

Page 99: ...ﻟﺮد ﺟﻬﺎز ﺗﺸﻐﻴﻞ ٢٧ اﻻﺧﺘﻴﺎرﻳﺔ اﻵﻟﻲ اﻟﺮد ﺟﻬﺎز ﺿﻮاﺑﻂ ٣١ اﻟﺘﺤﻮﻳﻞ وﻇﻴﻔﺔ ٣٣ اﻵﻟﻲ اﻟﺮد ﺟﻬﺎز ﺗﺠﺎوز ﻧﻐﻤﺎت ٣٦ ﺑﻌﺪ ﻋﻦ اﻟﺘﺸﻐﻴﻞ ٣٨ ٣ اﻟﻔﺎآﺴﺎت إرﺳﺎل ٤٤ ﻟﻺرﺳﺎل اﻟﻘﺎﺑﻠﺔ اﻟﻤﺴﺘﻨﺪات ٤٤ اﻟﻤﺴﺘﻨﺪ ﺗﺤﻤﻴﻞ ٤٥ واﻟﺘﺒﺎﻳﻦ اﻟﺪﻗﺔ ﺿﺒﻂ ٤٦ اﻟﻌﺎدي ﺑﺎﻻﺗﺼﺎل ﻓﺎآﺲ إرﺳﺎل ٤٨ إرﺳ اﻟﺘﻠﻘﺎﺋﻲ ﺑﺎﻻﺗﺼﺎل ﻓﺎآﺲ ﺎل ٤٩ اﻟﺬاآﺮة ﻣﻦ ﻓﺎآﺲ إرﺳﺎل ٥٦ ٤ اﻟﻔﺎآﺴﺎت اﺳﺘﻘﺒﺎل ٥٨ وﺿﻊ اﺳﺘﺨﺪام TEL FAX هﺎﺗﻒ ﻓﺎآﺲ ٥٨ وﺿﻊ اﺳﺘﺨﺪام A M ﺁﻟﻲ رد ٥٩ وﺿﻊ اﺳﺘﺨﺪام FAX ﻓﺎآﺲ ٦٠ وﺿﻊ ا...

Page 100: ... ٦٧ ٦ ﺧﺎﺻﺔ وﻇﺎﺋﻒ ٦٩ ﻓﻴﻬﺎ اﻟﻤﺮﻏﻮب ﻏﻴﺮ اﻟﻔﺎآﺴﺎت اﺳﺘﻘﺒﺎل ﻣﻨﻊ ٦٩ ٧ ﻃﺒﺎﻋﺔ اﻟ ﻘﻮاﺋﻢ ٧٠ ٨ اﻟﺼﻴﺎﻧﺔ ٧٤ ٩ اﺳﺘﻜﺸﺎف اﻟ واﺻﻼﺣﻬﺎ ﻤﺸﺎآﻞ ٧٧ اﻟ و ﻤﺸﺎآﻞ اﻟ ﺤﻠﻮل ٧٧ واﻹﺷﺎرات اﻟﺮﺳﺎﺋﻞ ٨١ ا زاﻟﺔ اﻟﻮرق اﻧﺤﺸﺎر ٨٤ اﻟ ﺪﻟﻴﻞ اﻟ ﻤﺮﺟﻌ ﻲ اﻟ ﺴﺮﻳﻊ ٨٦ اﻟﻔﻬﺮس ٨٧ ...

Page 101: ... ﺗﻢ رﻗﻢ وﺁﺧﺮ اﻟﺘﻠﻘﺎﺋﻲ اﻻﺗﺼﺎل أرﻗﺎم ﺧﻼل اﻻﺗﺼﺎل إﻋﺎدة ﻣﻔﺘﺎح ﺿﻮاﺑﻂ FUNCTION وﻇﻴﻔﺔ اﻟﺴﻬﻢ اﺿﻐﻂ ﻟ اﻟﺴﻬﻤ ﺑﻤﻔﺘﺎﺣﻲ اﻟﺘﻨﻘﻞ ﺑﻌﺪ ﻸﻳﻤﻦ ﻴﻦ ﻟﻸﻋﻠﻰ وﻟﻸ اﻟﻤﻔﺘﺎح ﺿﺒﻂ ﻟﺘﺤﺪﻳﺪ ﺳﻔﻞ FUNCTION وﻇﻴﻔﺔ اﻷرﻗﺎم ﻣﻔﺎﺗﻴﺢ ﺗﻠﻘﺎﺋﻲ اﺗﺼﺎل أرﻗﺎم ﺗﺨﺰﻳﻦ ﻋﻨﺪ واﻷﺣﺮف اﻷرﻗﺎم وإدﺧﺎل ﺑﺎﻷرﻗﺎم ﻟﻼﺗﺼﺎل اﻟﻤﻔﺎﺗﻴﺢ هﺬﻩ اﺳﺘﺨﺪم اﻟﻠﻮﺣﺔ ﺗﺤﺮﻳﺮ اﻟ هﺬا اﺿﻐﻂ ﻤﻔﺘﺎح اﻟﺘﺸﻐﻴﻞ ﻟﻮﺣﺔ ﻟﻔﺘﺢ ﻣﻔﺘﺎح STOP إﻳﻘﺎف اﻟﻌﻤﻠﻴﺎ إﺣﺪى ﻹﻟﻐﺎء اﻟﻤﻔﺘﺎح هﺬا اﺿﻐﻂ اآﺘﻤﺎﻟﻬﺎ ﻗﺒﻞ ت ﻣﻔﺘﺎح COPY ...

Page 102: ...ﺗﻜﺒﻴﺮ ﺗﺼﻐﻴﺮ اﻟﺼﻮت ﻣﺴﺘﻮى ﺿﺒﻂ هﺬ اﺿﻐﻂ اﻟﺘﻐﺬﻳﺔ وﺣﺪة ﻓﻲ ﻣﺴﺘﻨﺪ وﺟﻮد ﻋﺪم ﻋﻨﺪ ﻳﻦ اﻟﻤﻔ ﺘ ﺎﺣ ﻴﻦ ﻟﺘﻐﻴﻴﺮ اﻟﺨﺎرﺟﻴﺔ اﻟﺴﻤﺎﻋﺔ ﺻﻮت ﻣﺴﺘﻮى ﻋﻠﻰ اﻟﻀﻐﻂ ﻋﻨﺪ ﺁﺧﺮ وﻗﺖ أي ﻓﻲ اﻟﺠﺮس ﺻﻮت ﻟﺘﻐﻴﻴﺮ أو اﻟﻤﻔﺘﺎح ﺿﻮاﺑﻂ FUNCTION وﻇﻴﻔﺔ اﻟﻤﻔﺘﺎح ﻋﻠﻰ اﻟﻀﻐﻂ ﺑﻌﺪ اﻟﻤﻔﺘﺎﺣﻴﻦ هﺬﻳﻦ ﻋﻠﻰ اﺿﻐﻂ FUNCTION وﻇﻴﻔﺔ ﺿﻮاﺑﻂ ﺧﻼل ﻟﻠﺘﻨﻘﻞ FUNCTION MODE اﻟﻮﻇﻴﻔﺔ وﺿﻊ ﻣﻔﺘﺎح ﻣﺴﺘﻨﺪ إرﺳﺎل ﻋﻨﺪ اﻟﺨﺎرﺟﻴﺔ اﻟﺴﻤﺎﻋﺔ ﺧﻼل ﻣﻦ واﻟﺨﻂ اﻟﻔﺎآﺲ ﻧﻐﻤﺎت ﻟﺴﻤﺎع اﻟﻤﻔﺘﺎح هﺬا ﻋﻠﻰ اﺿﻐﻂ ﺑﺎﻟﻔﺎآ...

Page 103: ... ﺗﻜﺮار ﻣﺮة ﻟﺘﺸﻐﻴﻠﻬﺎ اﻟﺮﺳﺎﺋﻞ إﺣﺪى إﻟﻰ اﻻﺳﺘﻤﺎع أﺛﻨﺎء اﻟﻤﻔﺘﺎح هﺬا اﺿﻐﻂ أﺧﺮى ﻣﻔﺘﺎح SKIP ﺗﺨﻄﻲ اﻟﺘﺎﻟﻴﺔ ﻟﻠﺮﺳﺎﻟﺔ ﻟﺘﺨﻄﻴﻬﺎ اﻟﺮﺳﺎﺋﻞ إﺣﺪى إﻟﻰ اﻻﺳﺘﻤﺎع أﺛﻨﺎء اﻟﻤﻔﺘﺎح هﺬا اﺿﻐﻂ ﻣﻔﺘﺎح DELETE ﺣﺬف اﻟﻤﺴﺠﻠﺔ اﻟﺮﺳﺎﺋﻞ ﻟﻤﺴﺢ اﻟﻤﻔﺘﺎح هﺬا اﺿﻐﻂ ...

Page 104: ...ﻬﺎز ﺗﻀﻊ ﻻ هﻮاء ﻣﻜﻴﻒ أو ﻣﺪﻓﺌﺔ ﻣﻦ ١ اﻟﺘ ﺮآﻴﺐ اﻟﻌﺒﻮة ﻣﺤﺘﻮﻳﺎت ﻗﺎﺋﻤﺔ اﻹﻋﺪاد ﻋﻤﻠﻴﺔ ﻓﻲ اﻟﺒﺪء ﻋﻨﺪ ﺗﺬآﺮهﺎ ﻳﺠﺐ ﻧﻘﺎط اﻟﻮرق درج ﻣﺴﻨﺪ درج اﻟﻮرق اﻟﺘﺸﻐﻴﻞ دﻟﻴﻞ اﻟﺘﺮوس ٢ اﻟﺴﻤﺎﻋﺔ ﺳﻠﻚ اﻟﻬﺎﺗﻒ ﺧﻂ ﺳﻠﻚ اﻟﺤﺮاري اﻟﻮرق ﺑﻜﺮة اﻷوﻟﻲ اﻟﺘﺸﻐﻴﻞ ﺣﻮل اﻟﺘﻜﺜﻴ ﻒ ﻋﻠ ﻟﻠﺮﻃﻮﺑﺔ ﺗﻜﺜﻴﻒ ﻳﺤﺪث ﻗﺪ داﻓﺊ ﺁﺧﺮ إﻟﻰ ﺑﺎرد ﻣﻜﺎن ﻣﻦ اﻟﺠﻬﺎز ﻧﻘﻞ ﺣﺎﻟﺔ ﻓﻲ اﻟﻤﺴﺢ زﺟﺎج ﻰ ﻧﺴﺨﻬﺎ أو إرﺳﺎﻟﻬﺎ ﻋﻨﺪ ﻟﻠﻤﺴﺘﻨﺪات اﻟﺴﻠﻴﻢ اﻟﻀﻮﺋﻲ اﻟﻤﺴﺢ ﻳﻌﻮق ﻣﻤﺎ اﻟﻀﻮﺋﻲ اﻟﺘﻜﺜﻴﻒ ﻣﻦ وﻟﻠﺘﺨﻠﺺ اﻟﺠﻬﺎز...

Page 105: ...ﺳﺎل ﺳﻠﻚ ﺗﻮﺻﻴﻞ ا ﻟﺘﻴﺎر ﻣﺘﺮدد ﺗﻴﺎر ﺑﻤﺄﺧﺬ اﻟﺘﻴﺎر ﺳﻠﻚ ﺻﻞ ٢٢٠ ٢٤٠ ﻓﻮﻟﺖ ٥٠ ٦٠ ﺑﺄرﺿﻲ ﻞ ﻣﻮﺻ هﺮﺗﺰ ﻃﺮﻓﻴﻦ اﻟﺘﻴﺎر ﺳﻠﻚ ﻓﺼﻞ ﻗﺒﻞ اﻟﻬﺎﺗﻒ ﺧﻂ ﺳﻠﻚ اﻓﺼﻞ اﻟﻔﺎآﺲ ﻓﺼﻞ ﻋﻨﺪ ﺗﺤﺬﻳﺮ ﻣﺄﺧﺬ ﺗﺮآﻴﺐ ﻳﺠﺐ اﻟﺘﻴﺎر إﻟﻴﻪ اﻟﻮﺻﻮل ﺳﻬﻮﻟﺔ ﻣﺮاﻋﺎة ﻣﻊ اﻟﺠﻬﺎز ﻣﻦ ﺑﺎﻟﻘﺮب ﻣﻦ ﺗﺄآﺪ ﺗﻮﺻﻴﻞ اﻟﺴﻤﺎﻋﺔ ﺳﻠﻚ ﺑ ﺎﻟﻤﻘ ﺒﺲ ﻋﻠﻴﻪ ﻳﻮﺟﺪ اﻟـﺬي رﻣﺰ اﻟﺴﻤﺎﻋﺔ واﻟﻤﻮﺟﻮد ﺟﺎﻧﺐ ﻋﻠﻰ اﻟﺠﻬﺎز ﺑﻤﻔﺘﺎح ﻣﺰود ﻏﻴﺮ اﻟﺠﻬﺎز هﺬا ﺗﺸﻐﻴﻞ ﻳﺘﻢ ﻓﺈﻧﻪ ﻟﺬا ﻟﻠﻄﺎﻗﺔ إﻳﻘﺎف ﻃﺮﻳﻖ ﻋﻦ وﻓﺼﻠﻪ اﻟﺘﻴﺎر ﺗﺸﻐﻴﻞ اﻟﺘﻴ...

Page 106: ...ﺾ ﻳﻠﻲ آﻤﺎ اﻟﺘﺸﻐﻴﻞ ﻟﻮﺣﺔ ﻓﻲ اﻟﻤﻔﺎﺗﻴﺢ ﻋﻠﻰ اﺿﻐﻂ اﻟﺸﺎﺷﺔ اﺿﻐﻂ و واﺣﺪة ﻣﺮة واﺣﺪة ﻣﺮة ١ اﺿﻐﻂ و واﺣﺪة ﻣﺮة ﻣﺮات ﺛﻼث ٢ اﺿﻐﻂ واﺣﺪة ﻣﺮة ٣ ﺑﻚ اﻟﺨﺎص اﻟﺘﺤﺪﻳﺪ اﻟﺸﺎﺷﺔ ﺗﻌﺮض وﺟﻴﺰ ﻟﻔﺘﺮة ﺛﻢ ة اﺿﻐﻂ ﺑﺎﻟﻨﻐﻤﺔ اﻻﺗﺼﺎل ﻟﺘﺤﺪﻳﺪ ١ اﻻﺗﺼﺎل وﻟﺘﺤﺪﻳﺪ اﺿﻐﻂ ﺑﺎﻟﻨﺒﺾ ٢ اﻟﻤﺠﻤﻮﻋﺔ دول إﺣﺪى ﻓﻲ آﻨﺖ إذا ١ اﺿﻐﻂ أو ٣ اﻟﻤﺠﻤﻮﻋﺔ دول إﺣﺪى ﻓﻲ آﻨﺖ إذا ٢ ﺑﺎﻟ ﻨﻐﻤ ﺔ TONE ﺑﺎﻟ ﻨﺒﺾ PULSE اﻟﻤﺠﻤﻮﻋﺔ ١ ﺑﺎﻟ ﻨﺒﺾ اﻟﻤﺠﻤﻮﻋﺔ ٢ دول اﻟﻤﺠﻤﻮﻋﺔ ١ اﻟﻤﻤﻠﻜﺔ إﻳﺮان اﻟﺴﻌﻮدﻳﺔ اﻟﻌ...

Page 107: ...ﻴﺮات أو ﻟﻠﺒﺮق آﺜﻴﺮا ﺗﺘﻌﺮض ﻣﻨﻄﻘﺘﻚ آﺎﻧﺖ إذا اﻟﻬﺎﺗﻒ وﺧﻂ اﻟﻜﻬﺮﺑﻲ اﻟﺘﻴﺎر ﻓﻲ اﻟﻤﻔﺎﺟﺊ اﻟﺘﻐﻴﺮ ﺿﺪ ﺣﻤﺎﻳﺔ أﺟﻬﺰة ﺑﺘﺮآﻴﺐ أﺟﻬﺰة ﺷﺮاء ﻳﻤﻜﻦ ﻣﺴﺘﻠﺰﻣﺎت ﺑﻴﻊ ﻓﻲ اﻟﻤﺘﺨﺼﺼﺔ اﻟﻤﺤﻼت ﻣﻦ أو اﻟﻤﻌﺘﻤﺪ اﻟﻤﻮزع ﻣﻦ اﻟﻤﻔﺎﺟﺊ اﻟﺘﻐﻴﺮ ﺿﺪ اﻟﺤﻤﺎﻳﺔ اﻟ ﻬﻮاﺗﻒ ﻧﻘﻞ ﺗﻮﺻﻴﻠ وإﻋﺎدة اﻟﻔﺎآﺲ ﺟﻬﺎز ﻪ ﺟﺪﻳﺪ ﻣﻮﻗﻊ إﻟﻰ اﻟﻔﺎآﺲ ﻧﻘﻞ اﻟﻀﺮوري ﻣﻦ آﺎن إذا ﻓ أو اﻟﻬﺎﺗﻒ ﺧﻂ ﺳﻠﻚ ﺎﻓﺼﻞ ﺳﻠﻚ ﻓﺼﻞ ﻗﺒﻞ ﻻ اﻟﺘﻴﺎر اﻟﻬﺎﺗﻒ ﺧﻂ ﺳﻠﻚ ﺗﻮﺻﻴﻞ ﻗﺒﻞ اﻟﺘﻴﺎر ﺳﻠﻚ ﺗﻮﺻﻴﻞ اﻟﻀﺮوري ﻓﻤﻦ اﻟﺘﻮﺻﻴﻞ إﻋﺎد...

Page 108: ...١ اﻟﺘﺮآﻴﺐ ١٣ اﻟ ﻬﺎﺗﻒ اﻟ ﻔﺮﻋﻲ اﺧﺘﻴﺎري ﻳﻤﻜﻨﻚ أردت إن هﺎﺗﻒ ﺗﻮﺻﻴﻞ ﻣﻘﺒﺲ ﻓﻲ ﻓﺮﻋﻲ TEL SET اﻟﻬﺎﺗﻒ ﺳﻤﺎﻋﺔ ﺑﻤﺆﺧﺮة اﻟﻔﺎآﺲ ﻣﻘﺒﺲ ﻋﻠﻰ اﻟﻤﻮﺟﻮد اﻟﻐﻄﺎء اﻧﺰع TEL SET اﻟﻬﺎﺗﻒ ﺳﻤﺎﻋﺔ ١ ﺑﻤﻘﺒﺲ اﻟﻔﺮﻋﻲ اﻟﻬﺎﺗﻒ ﺧﻂ ﺻﻞ TEL SET اﻟﻬﺎﺗﻒ ﺳﻤﺎﻋﺔ ٢ ...

Page 109: ...ﻊ اﻟﺘﺸﻐﻴﻞ ﻟﻮﺣﺔ واﻓﺘﺢ اﻟﻮرق درج ﻣﻦ اﻟﻮرق أﺧﺮج اﺿﻐﻂ ١ أﺧﺮج اﻟﻮرق اﻟﻤﺴﺘﻬﻠﻚ واﻹﺳﻄﻮاﻧﺔ اﻟﻔﺎرﻏ ﺔ ٢ أﺧﺮج اﻟﺨﻀﺮاوﻳﻦ اﻟﺘﺮﺳﻴﻦ ﻣﻦ اﻹﺳﻄﻮاﻧﺘﻴﻦ ﺗﺘﺨﻠﺺ ﻻ اﻟﺨﻀﺮاوﻳﻦ اﻟﺘﺮﺳﻴﻦ هﺬﻳﻦ ﻣﻦ ٣ اﻟﺤﺮاري اﻟﻮرق اﺳﺘﺒﺪال ﻋﻨﺪ اﻟﺤﺮاري اﻟﻮرق ﺑﻜﺮة اﺳﺘﺨﺪم ﺷﺎرب FO 6CR اﻟﻮاﺣ ﻟﻠﺒﻜﺮة وﻳﻤﻜﻦ ـ ﺪة ﻳﻘ ﻣﺎ ﺗﻄﺒﻊ أن ــ ﻣﻦ ﺮب ١٥٠ ﺻﻔﺤﺔ ﻣﻘﺎس A4 اﻷوﻟ اﻟﺘﺸﻐﻴﻞ ﺑﻜﺮة ﻰ اﻟﻤﺮﻓﻘﺔ ﻳﻤﻜﻨﻬﺎ اﻟﻔﺎآﺲ ﺟﻬﺎز ﻣﻊ ﻳﻘﺮ ﻣﺎ ﻃﺒﺎﻋﺔ ﻣﻦ ب ١٥٠ ﻣﻘﺎس ﺻﻔﺤﺔ A4 آﻨﺖ إذا ﺑ ﺗﻘﻮم ﺘﺤﻤ ﻴ ...

Page 110: ... اﻟﺘﺮﺳﻴﻦ ٥ أدﺧﻞ اﻟﺤﺮاري اﻟﻮرق ﺑﻜﺮة ﻓﻲ وﺣﺪة اﻟﻄﺒﺎﻋﺔ ٦ ّ ﻒ ﻟ اﻟﺘﺮس اﻷﻣﺎﻣﻲ ﻣﻮﺿﺢ هﻮ آﻤﺎ ﺣﺘﻰ ّ ﺪ ﺗﺸ اﻟﺤﺮاري اﻟﻮرق ٧ ﻟﻮﺣﺔ أﻏﻠﻖ اﻟﺘﺸﻐﻴﻞ ا ﻋﻠﻰ ﺿﻐﻂ ﻓﻲ ﺗﺴﺘﻘﺮ ﺣﺘﻰ اﻟﻠﻮﺣﺔ ﺟﺎﻧﺒﻲ ﻣ ﻜ ﺎ ﻧﻬﺎ ٨ ﺗﺄآﺪ أن اﻟﺘﺮﺳ ﻴﻦ ﻗﺪ ﺑﺈﺣﻜﺎم أدﺧﻼ ﻓﻲ اﻟ ﻔﺘﺤ ﺎت ﻓﻲ اﻟﻤﻮﺟﻮدة ﻧ ﻬﺎﻳ ﺔ اﻟﺒﻜﺮﺗﻴﻦ اﻟ اﻟﺒﻜﺮة ﺴﻤﻴﻜﺔ ﻓﻲ اﻟﺨﻠﻒ رآﺐ ﻧ ﻬﺎﻳ ﺔ اﻟﺒﻜﺮﺗﻴﻦ اﻟﻤﺤﻮ ﻓﻲ ر اﻟﺒﺎرزﻳﻦ ﻳﻦ ١ ﻓﺘﺤﺔ ٢ ﻓﺘﺤﺔ ...

Page 111: ...ﻟﻮرق رزﻣﺔ ﺑﺘﻬﻮﻳﺔ ﻗﻢ اﻟﻮرق ﻟﺘﺴﻮﻳﺔ ﻣﺴﺘﻮ اﻟﻮرق رزﻣﺔ ﺣﻮاف أن ﺗﺄآﺪ ﻣﺴﺘﻮﻳﺔ ١ درج ﻓﻲ اﻟﻮرق رزﻣﺔ أدﺧﻞ ﻷﺳﻔﻞ ﻋﻠﻴﻪ ﺳﺘﻄﺒﻊ اﻟﺬي اﻟﻮﺟﻪ ﻳﻜﻮن ﺑﺤﻴﺚ اﻟﻮرق ﻣﻊ واﺣﺪة رزﻣﺔ ﻓﻲ وﺿﻌﻪ أﺧﺮﺟﻪ اﻟﺪرج ﻓﻲ ّ ﻖ ﻣﺘﺒ ورق هﻨﺎك آﺎن إذا اﻟﺠﺪﻳﺪ اﻟﻮرق ﻣﻦ ﻟﺬﻟﻚ اﻟﻤﺨﺼﺺ اﻟﻮﺟﻪ ﻋﻠﻰ اﻟﻄﺒﺎﻋﺔ ﺗﺘﻢ ﺣﻴﺚ ﺻﺤﻴﺤﺔ ﺑﻄﺮﻳﻘﺔ اﻟﻮرق ﺗﺤﻤﻴﻞ ﻣﻦ ﺗﺄآﺪ اﻟﻮرق ﻟﻠﻤﻄﺒﻮﻋﺎت ردﻳﺌﺔ ﺟﻮدة إﻟﻰ اﻵﺧﺮ اﻟﻮﺟﻪ ﻋﻠﻰ اﻟﻄﺒﺎﻋﺔ ﺗﺆدي ﻓﻘﺪ اﻟﻮرق درج ﻓﻲ ﺑﺮﻓﻖ اﻟﻮرق ﺑﺘﺤﻤﻴﻞ ﻗﻢ اﻟﺘﻐﺬﻳﺔ ﻓﺘﺤﺔ داﺧﻞ...

Page 112: ...ﻣﺮة واﺣﺪة ١ اﺿﻐﻂ ﻣﺮة واﺣﺪة و ﻣﺮﺗﻴﻦ ٢ اﺿﻐﻂ واﺣﺪة ﻣﺮة ٣ ﺑﻚ اﻟﺨﺎص اﻟﺘﺤﺪﻳﺪ اﻟﺸﺎﺷﺔ ﺗﻌﺮض ﺛﻢ وﺟﻴﺰة ﻟﻔﺘﺮة ﺣﺪد اﻟﻮرق ﻣﻘﺎس A4 LEGAL LETTER ٤ اﺿﻐﻂ واﻟﻮﻗﺖ اﻟﺘﺎرﻳﺦ ﻋﺮض إﻟﻰ ﻟﻠﺮﺟﻮع ٥ ﻣﻼﺣﻈﺔ وﻗﺖ أي ﻓﻲ اﻟﻌﺮض ﺷﺎﺷﺔ ﻋﺮﺿﺖ إذا اﻟﺮﺳﺎﻟﺘﻴﻦ ﺑﺎﻟﺘﺘﺎﺑﻊ ﺗﻈﻬﺮان واﻟﻠﺘﺎن اﻟﻴﺴﺎر ﻋﻠﻰ اﻟﻤﻮﺟﻮدﺗﻴﻦ ﻓﺎﻓﺤﺺ اﻟﻮرق درج ﺎ ورﻗ ﻓﺄﺿﻒ ﻓﺎرﻏﺎ اﻟﺪرج آﺎن إذا إذا أﻣﺎ أﺧﺮى ﻣﺮة أدﺧﻠﻪ ﺛﻢ اﻟﺪرج ﻓﺄﺧﺮج ﺑﺎﻟﺪرج ورق هﻨﺎك آﺎن اﺿﻐ اﻻﻧﺘﻬﺎء ﺑﻌﺪ ﻂ ADD PAPER PRESS S...

Page 113: ... ﺗﺒﺎﻳﻦ ﺿﺒﻂ ﺗﻐﻴﻴﺮ أردت إﻟﻰ اﻟﻄﺒﺎﻋﺔ LIGHT ﺧﻔﻴﻒ اﻟﺸﺎﺷﺔ اﺿﻐﻂ ﻣﺮة واﺣﺪة و ﻣﺮة واﺣﺪة ١ اﺿﻐﻂ ﻣﺮة واﺣﺪة و ﻣﺮات ﺛﻼث ٢ اﺿﻐﻂ ﻣﺮة واﺣﺪة ٣ ﺑﻚ اﻟﺨﺎص اﻟﺘﺤﺪﻳﺪ اﻟﺸﺎﺷﺔ ﺗﻌﺮض ﻟﻔﺘﺮة ﺛﻢ وﺟﻴﺰة اﻟﻄﺒﺎﻋﺔ ﺗﺒﺎﻳﻦ ﺣﺪد ﺧﻔﻴﻒ LIGHT ﻋﺎدي NORMAL ٤ اﺿﻐﻂ ﻟﻠﺮﺟﻮع واﻟﻮﻗﺖ اﻟﺘﺎرﻳﺦ ﻋﺮض إﻟﻰ ٥ OPTION SETTING PRINT CONTRAST 1 NORMAL PAPER SIZE SET ...

Page 114: ...ة و ﻣﺮﺗﻴﻦ ١ اﺿﻐﻂ واﺣﺪة ﻣﺮة ٢ اﺿﻐﻂ واﺣﺪة ﻣﺮة ٣ اﻟﺒﻴﺎﻧﺎت هﺬﻩ إدﺧﺎل وﺑﻤﺠﺮد آﻞ أﻋﻠﻰ ً ﺎ ﺗﻠﻘﺎﺋﻴ ﺳﺘﻈﻬﺮ اﻟﺘﻲ اﻟﻔﺎآﺴﺎت ﻣﻦ ﺻﻔﺤﺔ ﺑﺈرﺳﺎﻟﻬﺎ ﺗﻘﻮم اﻟﻔﺎآﺴﺎت إرﺳﺎل ﻓﻲ اﻟﺒﺪء إﻣﻜﺎن ﻗﺒﻞ اﻟﻔﺎآﺲ ورﻗﻢ اﺳﻤﻚ إدﺧﺎل ﻳﺠﺐ اﻟﻬﺎﺗﻒ ﺑﻚ اﻟﺨﺎص أﻳﻀﺎ ﺗﺤﺘﺎج واﻟﻮﻗﺖ اﻟﺘﺎرﻳﺦ إدﺧﺎل إﻟﻰ ENTRY MODE OWN NUMBER SET ENTER FAX ...

Page 115: ...ﻟﻲ اﻟﺸﻜﻞ ﻓﻲ ﻣﻮﺿﺢ هﻮ آﻤﺎ ﺣﺮف ﻟﻜﻞ اﻷرﻗﺎم ﻣﻔﺎﺗﻴﺢ ﻋﻠﻰ ﺑﺎﻟﻀﻐﻂ اﺳﻤﻚ أدﺧﻞ إدﺧﺎل ﻳﻤﻜﻦ ٢٤ أﻗﺼﻰ آﺤﺪ ﺣﺮﻓﺎ ﻣﺜﺎل SHARP 7777 44 2 777 7 اﺿﻐﻂ اﻟﻤﻔﺘﺎح ﻧﻔﺲ ﻳﺘﻄﻠﺒﺎن ﻣﺘﺘﺎﻟﻴﻴﻦ ﺣﺮﻓﻴﻦ ﻹدﺧﺎل إ ﺑﻌﺪ دﺧﺎل اﻟﺤﺮف اﻷول اﺿﻐﻂ ﺧﻄﺄ ﻟﻤﺴﺢ اﻟﺼﻐﻴﺮ اﻟﺤﺮف ﻳﻈﻬﺮ ﺣﺘﻰ اﻟﺤﺮف ﻣﻔﺘﺎح ﻋﻠﻰ اﻻﺳﺘﻤﺮار ﻣﻊ اﺿﻐﻂ ﺻﻐﻴﺮ ﺣﺮف ﻹدﺧﺎل اﺿﻐﻂ اﻟﺘﺎﻟﻴﺔ اﻟﺮﻣﻮز أﺣﺪ ﻹدﺧﺎل أو ﻣﺘﻜﺮر ﺑﺸﻜﻞ _ ٦ اﻟﺸﺎﺷﺔ اﺿﻐﻂ ٧ اﺿﻐﻂ ﻟﻠ واﻟﻮﻗﺖ اﻟﺘﺎرﻳﺦ ﻋﺮض إﻟﻰ ﻌﻮدة ٨ DATE TIME SET ...

Page 116: ... ﺣﺎﻟ ﻣﺜﺎل ا ﺿﻐﻂ واﺣﺪة ﻣﺮة ٣ اﻟﻴﻮم ﻟﻴﻤﺜﻞ رﻗﻤﻴﻦ ﻣﻦ ً ﺎ ﻣﻜﻮﻧ ً ا ﻋﺪد أدﺧﻞ ﻣﻦ 01 إﻟﻰ 31 ﻣﺜﺎل اﻟﺨﺎ ﻣﺲ ﻟﺘﺼﺤﻴﺢ اﺿﻐﻂ ﺧﻄﺄ اﻟﺼﺤﻴﺢ اﻟﺮﻗﻢ أدﺧﻞ ﺛﻢ اﻟﺨﻄﺄ ﻟﻤﻜﺎن ﻟﻠﺨﻠﻒ اﻟﻤﺆﺷﺮ ﻟﺘﺤﺮﻳﻚ ٤ ﺷﺎﺷﺔ ﻓﻲ واﻟﻮﻗﺖ اﻟﺘﺎرﻳﺦ ﻳﻈﻬﺮ آﻞ أﻋﻠﻰ ُﻄﺒﻌﺎن ﻳ و اﻟﻌﺮض ﺻﻔﺤﺔ ﻓﺎآﺲ ﺑﺈرﺳﺎﻟﻬﺎ ﺗﻘﻮم آ واﻟﻮﻗﺖ اﻟﺘﺎرﻳﺦ اﺿﺒﻂ هﻮ ﻤﺎ أدﻧﺎﻩ ﻣﻮﺿﺢ ENTRY MODE DATE TIME SET DATE 15 08 2002 DATE 05 08 2002 ...

Page 117: ...ﺜﺎل ﻳﻨﺎﻳﺮ ٥ اﻟﻌﺎم أدﺧﻞ ٤ أرﻗﺎم ﻣﺜﺎل 2002 ٦ ﻣﻜ ًا د ﻋﺪ أدﺧﻞ اﻟﺴﺎﻋﺔ ﻟﻴﻤﺜﻞ رﻗﻤﻴﻦ ﻣﻦ ًﺎ ﻧ ﻮ ﻣﻦ 00 إﻟﻰ 23 ﻟﻴﻤﺜﻞ رﻗﻤﻴﻦ ﻣﻦ ﻣﻜﻮﻧﺎ وﻋﺪدا اﻟﺪﻗﺎﺋﻖ ﻣﻦ 00 إﻟﻰ 59 ﻣﺜﺎل 9 25 ٧ اﺿﻐﻂ ﻟﺒﺪء ﺗﺸﻐﻴﻞ اﻟﺴﺎﻋﺔ ٨ اﺿﻐﻂ واﻟﻮﻗﺖ اﻟﺘﺎرﻳﺦ ﻋﺮض إﻟﻰ ﻟﻠﻌﻮدة ٩ DATE 05 01 2002 TIME 12 19 ﻳﻈﻬﺮ اﻟﻮﻗﺖ اﻟﻤﻀﺒﻮط ًﺎ ﻴ ﺣﺎﻟ ﻣﺜﺎل 05 JAN 09 25 ANTI JUNK ...

Page 118: ... ﻓﺎآﺲ أﻧﻬﺎ أو اﻟﺘﻠﻘﺎﺋﻲ ﺑﺎﻻﺗﺼﺎل إﻟﻴﻚ إرﺳﺎﻟﻪ ﻳﺘﻢ ﻓ ﺻﻮﺗﻴﺔ ﻣﻜﺎﻟﻤﺔ آﺎﻧﺖ ﺈذا ﻳ اﻟﻔﺎآﺲ ﺟﻬﺎز ﺼﺪر ﻧﻐﻤﺔ ﻣﻤﻴﺰة ﺗﺮد ﺣﺘﻰ ﻟﺘﻨﺒﻴﻬﻚ آﺎﻧ إذا أﻣﺎ ﺖ ﻓﺎآﺲ إرﺳﺎﻟ ﻳﺘﻢ اﻟﺘﻠﻘﺎﺋﻲ ﺑﺎﻻﺗﺼﺎل إﻟﻴﻚ ﻪ اﻻ ﻳﺒﺪأ ﺳﺘﻘﺒﺎل ﺗﻠﻘﺎﺋﻴﺎ وﺿﻊ A M ﺁﻟﻲ رد اﻟﻤﻜﺎﻟﻤﺎت آﻞ ﻋﻠﻰ ﺑﺎﻟﺮد اﻵﻟﻲ اﻟﺮد ﺟﻬﺎز ﻳﻘﻮم أن وﺗﺮﻳﺪ ﺑﺎﻟﺨﺎرج ﺗﻜﻮن ﻋﻨﺪﻣﺎ اﻟﻮﺿﻊ هﺬا اﺧﺘﺮ ﺎ ﺗﻠﻘﺎﺋﻴ اﻟﻔﺎآﺲ رﺳﺎﺋﻞ واﺳﺘﻘﺒﺎل اﻟﺼﻮﺗﻴﺔ اﻟﺮﺳﺎﺋﻞ ﺗﺴﺠﻴﻞ ﺳﻴﺘﻢ ﺿﺒﻂ اﻻﺳﺘﻘﺒﺎل وﺿﻊ ﻣﻦ ﺗﺄآﺪ ﻣ أي وﺟﻮد ﻋﺪم ﺑﺎﻟﻤﺴﺘﻨﺪات...

Page 119: ...ت ﻣﺴﺘﻮى ﺿﺒﻂ اﻟﺨﺎرﺟ اﻟﺴﻤﺎﻋﺔ ﺻﻮت ﻣﺴﺘﻮى ﺿﺒﻂ ﻳﻤﻜﻨﻚ ـ واﻟﺠ ﻴﺔ ــ ﺑﺎﺳﺘﺨ ﺮس ـ ﻣﻔﺘ ﺪام ـ اﻟﺴﻬﻤﻴﻦ ﺎﺣﻲ ﻟﻸﻋﻠﻰ وﻟﻸﺳﻔﻞ اﻟﺨﺎرﺟﻴﺔ اﻟﺴﻤﺎﻋﺔ اﺿﻐﻂ ١ ا ﺿﻐﻂ أو اﻟﺼﻮت ﻣﺴﺘﻮى ﻳﻈﻬﺮ ﺣﺘﻰ اﻟﻌﺮض ﺷﺎﺷﺔ ﻓﻲ اﻟﻤﻄﻠﻮب اﺿﻐﻂ أﺧﺮى ﻣﺮة اﻟﺴﻤﺎﻋﺔ ﺗﺸﻐﻴﻞ ﻹﻳﻘﺎف اﻟﺨﺎرﺟﻴﺔ ٢ ...

Page 120: ... وﺣﺪة ﻓﻲ اﻟﻤﺤﺪد اﻟﻤﺴﺘﻮى ﻋﻠﻰ واﺣﺪة ﻣﺮة اﻟﺠﺮس ﺳﻴﺮن أﺧﺮى ﻣﺮة اﻟﺸﺎﺷﺔ ﻋﻠﻰ واﻟﻮﻗﺖ اﻟﺘﺎرﻳﺦ وﺳﻴﻈﻬﺮ ١ ﺣﺪدت ﻗﺪ آﻨﺖ إذا RINGER OFF OK ﻣﻮاﻓﻖ اﻟﺠﺮس ﺗﺸﻐﻴﻞ إﻳﻘﺎف اﺿﻐﻂ ﻣﻼﺣﻈﺔ ﻋ ﻋﻠﻰ اﻻﺳﺘﻘﺒﺎل وﺿﻊ ﺿﺒﻂ ﻨﺪ TEL هﺎﺗﻒ وﺿﻊ ﻓﻲ رﻧﻴﻦ إﺻﺪار ﻓﻲ اﻟﺠﺮس ﺳﻴﻈﻞ LOW ﻣﻨﺨﻔﺾ ﺗﺸﻐﻴﻠﻪ إﻳﻘﺎف ﺗﻢ إذا ٢ RINGER HIGH RINGER MIDDLE RINGER LOW RINGER OFF OK ...

Page 121: ...ﺠﻴﻞ أدﻧﺎﻩ اﻟﺨﻄﻮات اﺗﺒﻊ ﻣﺜﺎل ﻣﺮﺣﺒﺎ ﺷﺮآﺔ ﻧﺤﻦ ______ ﺣﺎﻟﻴﺎ ﻣﻜﺎﻟﻤﺘﻚ ﻋﻠﻰ ﻟﻠﺮد أﺣﺪ ﻳﻮﺟﺪ ﻻ ﺑﻌﺪ رﺳﺎﻟﺔ ﺗﺮك ﺑﺮﺟﺎء ﻣﻔﺘﺎح ﻋﻠﻰ اﻟﻀﻐﻂ أو اﻟﺼﻔﺎرة ﺳﻤﺎع Start ﻓﺎآﺲ ﻹرﺳﺎل ﻟﺪﻳﻚ ﺑﺎﻟﻔﺎآﺲ ﻻﺗﺼﺎﻟﻜﻢ ﺷﻜﺮا اﻟﺸﺎﺷ ﺔ اﺿﻐﻂ و واﺣﺪة ﻣﺮة واﺣﺪة ﻣﺮة ١ اﺿﻐﻂ واﺣﺪة ﻣﺮة رﺳﺎﻟﺔ ﺑﺘﺴﺠﻴﻞ ﻗﻤﺖ ﻗﺪ آﻨﺖ إذا ﺑﺎﻟﻔﻌﻞ اﻟﻀﻐﻂ ﻳﻤﻜﻨﻚ ﻋﻠﻰ اﻟﺮﺳﺎﻟﺔ ﻟﺴﻤﺎع ٢ اﻟﺴﻤﺎﻋﺔ ارﻓﻊ ٣ إﻟﻰ ﺳﺘﺤﺘﺎج اﻵﻟﻲ اﻟﺮد ﺟﻬﺎز ﻻﺳﺘﺨﺪام أوﻻ ﺻﺎدرة رﺳﺎﻟﺔ ﺗﺴﺠﻴﻞ ﺗﻨﻮي ﻋﻨﺪﻣﺎ ﻋﻦ اﻵﻟﻲ اﻟﺮد ﺟﻬﺎز ﺑﺘ...

Page 122: ...رة اﻟﺮﺳﺎﻟﺔ ﻣﺴﺢ ﻳﻤﻜﻦ ﻻ أﻧﻪ ﻻﺣﻆ ﺗﻐﻴﻴﺮهﺎ أردت إذا ﻓ ﺑﺘﻜﺮا ﻘﻢ اﻟﺘﺴﺠﻴﻞ إﺟﺮاءات ر ﻣﻼﺣﻈﺔ اﻟﻔﺎآﺲ ﺑﺤﻬﺎز ً ﻼ ﻣﻮﺻ ﻓﺮﻋﻲ هﺎﺗﻒ هﻨﺎك آﺎن وإذا FO A650 ﺑﺎﻹﻣﻜﺎن ﻳﻜﻮن ﻓﻠﻦ اﻟﻔﺮﻋﻲ اﻟﻬﺎﺗﻒ اﺳﺘﺨﺪام أﺛﻨﺎء ﺣﺬﻓﻬﺎ أو ﺗﺸﻐﻴﻠﻬﺎ أو ﺻﺎدرة رﺳﺎﻟﺔ ﺗﺴﺠﻴﻞ اﻵﻟﻲ اﻟﺮد ﺟﻬﺎز ﺗﺸﻐﻴﻞ اﻵﻟﻲ اﻟﺮد ﺟﻬﺎز ﺗﻨﺸﻴﻂ ﺗﺮك ﻟﻠﻤﺘﺼﻠﻴﻦ ﻳﺘﺴﻨﻰ ﺣﺘﻰ اﻵﻟﻲ اﻟﺮد ﺟﻬﺎز ﻟﺘﺸﻐﻴﻞ اﺿﻐﻂ رﺳﺎﻟﺔ اﻟﺴﻬﻢ ﻳﺸﻴﺮ ﺣﺘﻰ اﻟﻮﺿﻊ إﻟﻰ اﻟﻌﺮض ﺷﺎﺷﺔ ﻓﻲ A M ﺁﻟﻲ رد ﺳﻴ ـ اﻟﺼﺎدرة اﻟﺮﺳﺎﻟﺔ ﺗﺸﻐﻴﻞ ﺘﻢ ﻋﻠﻰ ...

Page 123: ... ﻋﻠﻰ ﺑﻌﺪهﺎ اﻟﺠﻬﺎز ﻳﺮد اﻟﺘﻲ اﻟﺮﻧﺎت ﻋﺪد ﻳﻌﺘﻤﺪ A M إذا ﻋﻤﺎ ﻋﻠﻰ وﻇﻴﻔﺔ آﺎﻧﺖ Toll Saver اﻟﺘﻜﺎﻟﻴﻒ ﻣﻮﻓﺮ اﻟﺘﺸﻐﻴﻞ وﺿﻊ ﻓﻲ آﺎﻧﺖ وإذا ﻻ أم اﻟﺘﺸﻐﻴﻞ وﺿﻊ ﻓﻲ ﻻ أم رﺳﺎﺋﻞ ﻟﺪﻳﻚ هﻞ وﻇﻴﻔﺔ Toll Saver اﻟﺘﻜﺎﻟﻴﻒ ﻣﻮﻓﺮ اﻟﺘﺸﻐﻴﻞ وﺿﻊ ﻓﻲ اﻓﺘﺮاﺿﻴﺎ ﺿﺒﻂ ﻟﺘﻌﺪﻳﻞ NUMBER OF RINGS ﻋﺪد اﻟﺮﻧﺎت ﺻﻔﺤﺔ اﻧﻈﺮ ٦٠ اﻟﺘﻜﺎﻟﻴﻒ ﻣﻮﻓﺮ اﻟﺘﻜﺎﻟﻴﻒ ﻣﻮﻓﺮ ﻣﺴﺘﻠﻤﺔ رﺳﺎﺋﻞ ﺗﻮﺟﺪ ﻣﺴﺘﻠﻤﺔ رﺳﺎﺋﻞ ﺗﻮﺟﺪ ﻻ ﺷ ﻻ ﻰء أهﻼ هﻼ هﻼ ٤ رﻧﺎت رﻧﺘﺎن رﻧﺔ رﻧﺔ رﻧﺔ رﻧﺔ رﻧﺔ رﻧﺔ رﻧﺔ رﻧﺔ رﻧﺔ رﻧ...

Page 124: ...اﻟﺮﺳﺎﺋﻞ ﺗﺸﻐﻴﻞ ﺳﻴﺘﻢ اﻟﻌﺮض ﺷﺎﺷﺔ ﻓﻲ وﺟﻴﺰة ﻟﻔﺘﺮة اﻟﺘﺴﺠﻴﻞ ووﻗﺖ ﺗﺎرﻳﺦ ﺳﻴﻈﻬﺮ اﻟﺮﺳﺎﻟﺔ ﺗﺸﻐﻴﻞ أﺛﻨﺎء ﻳﻜﻦ ﻟﻢ إذا اﻟﺮﺳﺎﻟﺔ ﺳﺘﻈﻬﺮ ﻣﺴﺘﻠﻤﺔ رﺳﺎﺋﻞ هﻨﺎك NO MESSAGES رﺳﺎﺋﻞ ﺗﻮﺟﺪ ﻻ Repeat ﺗﻜﺮار إ ﻟﻼﺳﺘﻤﺎع اﺿﻐﻂ أﺧﺮى ﻣﺮة اﻟﺮﺳﺎﻟﺔ ﻟﻰ ﺗﻠﻚ ﺗﺸﻐﻴﻞ إﻧﺘﻬﺎء ﻗﺒﻞ اﻟﺮﺳﺎﻟﺔ اﺿﻐﻂ اﻟﺴﺎﺑﻘﺔ اﻟﺮﺳﺎﻟﺔ إﻟﻰ ﻟﻠﻌﻮدة اﻟﺮﺳﺎﻟﺔ ﺑﺪاﻳﺔ ﻣﻦ ﺛﻮان ﺛﻼث ﻏﻀﻮن ﻓﻲ اﻟﺤﺎﻟﻴﺔ Skip ﺗﺨﻄﻲ اﺿﻐﻂ اﻟﺘﺎﻟﻴﺔ ﻟﻠﺮﺳﺎﻟﺔ اﻟﺮﺳﺎﻟﺔ ﺗﻠﻚ ﻟﺘﺨﻄﻲ ﻣﻼﺣﻈﺔ ﺳ ﻴ ﺘﻮﻗﻒ ﺗﺸﻐﻴﻞ اﻟﺮﺳﺎﻟﺔ ﻓﻲ ﺣﺎﻟﺔ اﻟﺴﻤ ...

Page 125: ... ﺗﺬآﻴﺮات ﺗﺴﺠﻴﻞ ا وﻟﻠﻤﺴﺘﺨﺪﻣﻴﻦ ﻟﻚ ﺗﺬآﻴﺮات ﺗﺴﺠﻴﻞ ﻳﻤﻜﻨﻚ ﻟﻠﺠﻬﺎز ﻵﺧﺮﻳﻦ اﻟﺮﺳﺎﺋﻞ ﻣﻊ اﻟﺘﺬآﻴﺮات ﺗﻠﻚ ﺗﺸﻐﻴﻞ وﺳﻴﺘﻢ ﻣﻔﺘﺎح ﻋﻠﻰ اﻟﻀﻐﻂ ﻋﻨﺪ اﻟﻮاردة اﺿﻐﻂ واﺣﺪة ﻣﺮة و واﺣﺪة ﻣﺮة ١ واﺿﻐﻂ اﻟﺴﻤﺎﻋﺔ ارﻓﻊ اﻟﺴﻤﺎﻋﺔ ﻓﻲ ﺗﺤﺪث ﺛﻢ ٢ ﺑ اﺿﻐﻂ أو اﻟﺴﻤﺎﻋﺔ ﺿﻊ اﻟﺘﺤﺪث ﻣﻦ اﻻﻧﺘﻬﺎء ﻌﺪ ٣ اﻟﻬﺎﺗﻔﻴﺔ اﻟﻤﺤﺎدﺛﺎت ﺗﺴﺠﻴﻞ هﺎ ﻣﺤﺎدﺛﺔ ﻟﺘﺴﺠﻴﻞ اﻟﻤﻔﺘﺎح ﻋﻠﻰ اﻻﺳﺘﻤﺮار ﻣﻊ اﺿﻐﻂ ﺗﻔﻴﺔ ﺗﺴﺠﻴﻠﻬﺎ ﺗﺮﻳﺪ اﻟﺘﻲ اﻟﻤﺤﺎدﺛﺔ أﺛﻨﺎء ﺑ اﻻﻧﺘﻬﺎء ﻌﺪ ﻣﻦ اﻟﻤﻔﺘﺎح ﺣﺮر اﻟﺘﺴﺠﻴﻞ اﻟﻤﻔﺘﺎح ﻋﻠﻰ ...

Page 126: ...ﻴﺔ ٦٠ ﺛﺎﻧﻴﺔ ٣٠ ﺛﺎﻧﻴﺔ ٤ دﻗﺎﺋﻖ اﻟﺨﺎص اﻟﺘﺤﺪﻳﺪ اﻟﺸﺎﺷﺔ ﺗﻌﺮض ﺑﻚ ﺛﻢ وﺟﻴﺰة ﻟﻔﺘﺮة ٤ اﺿﻐﻂ ﻟﻠﺮﺟﻮع واﻟﻮﻗﺖ اﻟﺘﺎرﻳﺦ ﻋﺮض إﻟﻰ ٥ وﺿﻊ ﻓﺸﻞ ﺣﺎﻟﺔ ﻓﻲ اﻟﻔﺎآﺲ اﺳﺘﻘﺒﺎل A M ﺁﻟﻲ رد ﻋﻨﺪﺋﺬ اﻵﻟﻲ اﻟﺮد ﺟﻬﺎز ﻳﺴﺘﻄﻴﻊ ﻓﻠﻦ اﻟﺨﺎرج ﻓﻲ وأﻧﺖ اﻟﻮاردة اﻟﺮﺳﺎﺋﻞ ﺗﺴﺠﻴﻞ ذاآﺮة اﻣﺘﻸت إذا ﺗﺴﺠ اﻟﺮﺳﺎﺋﻞ ﻴﻞ ﻳ ا ﺘﻢ ﺳﺘﺨﺪ ا ﺿﺒﻂ م ON A M FAILURE وﺿﻊ ﻋﻠﻰ اﻻﺳﺘﻘﺒﺎل ﻓﺸﻞ A M ذﻟﻚ ﺣﺪوث ﻋﻨﺪ اﻟﻮاردة ﻟﻠﺮﺳﺎﺋﻞ اﻟﺠﻬﺎز اﺳﺘﺠﺎﺑﺔ ﻻﺧﺘﻴﺎر ً ﺎ ﺗﻠﻘﺎﺋﻴ اﻟﻔﺎآﺴﺎت اﺳﺘﻘﺒﺎل NO ﻻ ﺳﻴ...

Page 127: ...ﺗﻴﺢ اﻟﺸﺎﺷﺔ اﺿﻐﻂ و واﺣﺪة ﻣﺮة واﺣﺪة ﻣﺮة ١ اﺿﻐﻂ و واﺣﺪة ﻣﺮة ﻣﺮﺗ ﻴﻦ ٢ اﺿﻐﻂ ٣ اﻟﺘﺤﺪﻳﺪ اﻟﺸﺎﺷﺔ ﺗﻌﺮض ﺛﻢ وﺟﻴﺰة ﻟﻔﺘﺮة ﺑﻚ اﻟﺨﺎص اﺿﻐﻂ أو ً ﺎ ﺗﻠﻘﺎﺋﻴ اﻟﻔﺎآﺲ اﺳﺘﻘﺒﺎل ﻟﺘﺸﻐﻴﻞ ﺗﺸﻐﻴﻠﻪ ﻹﻳﻘﺎف ٤ اﺿﻐﻂ ﻟﻠﺮﺟﻮع اﻟﺘﺎ ﻋﺮض إﻟﻰ واﻟﻮﻗﺖ رﻳﺦ ٥ وﺿﻊ OGM only ﻓﻘﻂ اﻟﺼﺎدرة ﻟﺮﺳﺎﺋﻞ ﻳﻤﻜﻨﻚ اﻷﻣﺮ ﻟﺰم إذا اﻟﻮاردة اﻟﺮﺳﺎﺋﻞ ﺗﺴﺠﻴﻞ إﻳﻘﺎف اﻟﺮﺳﺎﺋﻞ ﺗﺸﻐﻴﻞ ﺳﻴﺘﻢ اﻟﺤﺎﻟﺔ هﺬﻩ وﻓﻲ رﺳﺎﻟﺔ ﺗﺮك ﻣﻦ اﻟﻤﺘﺼﻠﻮن ﻳﺘﻤﻜﻦ ﻟﻦ وﻟﻜﻦ اﻟﺼﺎدرة ﺳﻴﻈﻞ ﺑﺎﻣﻜﺎن اﻟﻔﺎآﺲ ﺟﻬﺎز ا ﺳﺘﻘﺒ ﺎ...

Page 128: ...ﺠﺮد اﻟﺮﺳﺎﺋﻞ ﺳﻤﺎع ﻣﻦ ﺗﻤﻜﻨﻚ وﻇﻴﻔﺔ وهﻲ اﻟﺬي اﻟﺮﻗﻢ إدﺧﺎل أوﻻ ﻋﻠﻴﻚ ﻳﺠﺐ اﻟﺘﺤﻮﻳﻞ وﻇﻴﻔﺔ ﻻﺳﻨﺤﺪام اﻟﺠﻬﺎز ﻋﻠﻴﻪ ﺳﻴﺘﺼﻞ اﻟﺘﺤﻮﻳﻞ رﻗﻢ ﺑﻌﻴﺪ ﻣﻜﺎن ﻓﻲ ﺗﻮاﺟﺪك أﺛﻨﺎء اﻟﻬﺎﺗﻒ ﻋﻠﻰ ﺗﺮد ﻋﻨﺪﻣﺎ ﺳﺘﻌﻤﻞ اﻟﺘﻲ اﻟﺘﺤﻮﻳﻞ رﺳﺎﻟﺔ ﺗﺴﺠﻴﻞ ﺛﻢ ﺑﺘﺸﻐﻴﻠﻬﺎ ﻓﻘﻢ اﻟﺘﺤﻮﻳﻞ وﻇﻴﻔﺔ اﺳﺘﺨﺪام ﻓﻲ وﺗﺮﻏﺐ ﺳﺘﺨﺮج آﻨﺖ إذا هﻨﺎك ﺗﻌﺪ وﻟﻢ ﻋﻮدﺗﻚ وﻋﻨﺪ ﺗﺸﻐﻴﻠﻬﺎ أوﻗﻒ ﻻﺳﺘﺨﺪاﻣﻬﺎ ﺣﺎﺟﺔ اﻟﺘﺤﻮﻳﻞ رﻗﻢ إدﺧﺎل ﻻﺳﺘﺨﺪا ﺑﻪ ﺳﻴﺘﺼﻞ اﻟﺬي ﺑﺎﻟﺮﻗﻢ اﻟﺠﻬﺎز ﺗﺰوﻳﺪ أوﻻ ﻳﺠﺐ اﻟﺘﺤﻮﻳﻞ وﻇﻴﻔﺔ م اﻟﺘﺤﻮﻳﻞ ...

Page 129: ...ﺎﻟﻤﺔ هﺬﻩ أن ﺗﻌﻠﻤﻚ وهﻲ اﻟﻬﺎﺗﻒ ﻋﻠﻰ ﺗﺮد ﻋﻨﺪﻣﺎ اﻟﺘﺤﻮﻳﻞ رﺳﺎﻟﺔ ﺗﻌﻤﻞ أن وﻳﻤﻜﻦ إﻟﻰ ﻃﻮﻟﻬﺎ ﻳﺼﻞ ١٥ ﺛﺎﻧﻴﺔ اﻟﺘﺤﻮﻳﻞ رﺳﺎﻟﺔ ﻟﺘﺴﺠﻴﻞ اﻵﺗﻴﺔ اﻟﺨﻄﻮات اﺗﺒﻊ ﻣﺜﺎل ﻳﻠﻲ وﻓﻴﻤﺎ ﻣﺮﺣﺒﺎ هﺬﻩ ﻟـ ﻣﺤﻮﻟﺔ ﻣﻜﺎﻟﻤﺔ اﺳﻤﻚ اﻵن ﺑﻌﺪ ﻋﻦ اﻟﺘﺸﻐﻴﻞ رﻣﺰ رﻗﻢ أدﺧﻞ اﻟﺸﺎﺷﺔ اﺿﻐﻂ واﺣﺪة ﻣﺮة و ﻣﺮ ﺗﻴﻦ ١ اﺿﻐﻂ واﺣﺪة ﻣﺮة رﺳﺎﻟﺔ ﺑﺘﺴﺠﻴﻞ ﻗﻤﺖ ﻗﺪ آﻨﺖ إذا ﺑﺎﻟﻔﻌﻞ اﻟﻀﻐ ﻳﻤﻜﻨﻚ ـ ﻋﻠﻰ ﻂ اﻟﺮﺳﺎﻟﺔ ﻟﺴﻤﺎع اﺿﻐﻂ أو ﻟﻤﺴﺤﻬﺎ ٢ اﻟﺴﻤﺎﻋﺔ ارﻓﻊ ٣ OGM2 TRANSFER ...

Page 130: ...ﺨﻄﻮﺗﻴﻦ اﺗﺒﻊ ١ و ٢ اﺿﻐﻂ ﺛﻢ اﻟﺴﺎﺑﻘﺔ اﻟﺨﻄﻮات ﻣﻦ إﻟ ﻟﻼﺳﺘﻤﺎع اﻟﺘﺤﻮﻳﻞ رﺳﺎﻟﺔ ﻰ أو ﻟﻤﺴﺤﻬﺎ ﺗﺸﻐﻴﻠﻬﺎ إﻳﻘﺎف أو اﻟﺘﺤﻮﻳﻞ وﻇﻴﻔﺔ ﺗﺸﻐﻴﻞ ﻟﺘﺸﻐﻴﻠﻬﺎ ﻳﻠﻲ ﻣﺎ اﺗﺒﻊ اﻟﺘﺤﻮﻳﻞ وﻇﻴﻔﺔ اﺳﺘﺨﺪام ﻓﻲ وﺗﺮﻏﺐ ﺳﺘﺨﺮج آﻨﺖ إذا اﻟﺸﺎﺷﺔ اﺿﻐﻂ و واﺣﺪة ﻣﺮة واﺣﺪة ﻣﺮة ١ اﺿﻐﻂ و واﺣﺪة ﻣﺮة ﻣﺮات ﺛﻼث ٢ اﺿﻐﻂ ٣ اﻟﺘﺤﺪﻳﺪ اﻟﺸﺎﺷﺔ ﺗﻌﺮض اﻟ ﺛﻢ وﺟﻴﺰة ﻟﻔﺘﺮة ﺑﻚ ﺨﺎص اﺿﻐﻂ اﻟﺘﺤﻮﻳﻞ وﻇﻴﻔﺔ ﻟﺘﺸﻐﻴﻞ اﺿﻐﻂ ﺗﺸﻐﻴﻞ ﻹﻳﻘﺎف اﻟﻮﻇﻴﻔﺔ ٤ اﺿﻐﻂ ﻟﻠﺮﺟﻮع واﻟﻮﻗﺖ اﻟﺘﺎرﻳﺦ ﻋﺮض إﻟﻰ ٥ A M SETTI...

Page 131: ...ﺿﻐ ﻮﻟﺔ ـ ﻂ اﻟﺨﻂ إﻏﻼق ﻗﺒﻞ ﻣﺮﺗﻴﻦ ﻓﺎﺿﻐﻂ اﻟﺮﺳﺎﺋﻞ إﻟﻰ اﻻﺳﺘﻤﺎع أﺛﻨﺎء اﻟﺨﻂ إﻏﻼق أردت وإذا ً ﻻ أو ﺛﻢ ﺗﺸﻐ ﻹﻳﻘﺎف ﻴﻞ اﺿﻐﻂ ﺛﻢ اﻟﺮﺳﺎﺋﻞ ﻣﺮﺗﻴﻦ ٦ اﻵﻟﻲ اﻟﺮد ﺟﻬﺎز ﺗﺠﺎوز ﻧﻐﻤﺎت ﺑﺘﺠﺎوز ﺑﺎﻟﻠﻤﺲ اﻻﺗﺼﺎل ذات اﻟﻬﺎﺗﻒ أﺟﻬﺰة ﻳﺴﺘﺨﺪﻣﻮن واﻟﺬﻳﻦ ﻣﺤﺪدﻳﻦ ﻟﻤﺘﺼﻠﻴﻦ اﻟﻮﻇﻴﻔﺔ هﺬﻩ ﺗﺴﻤﺢ ﻳﺘﺼﻠﻮن أﻧﻬﻢ ﻟﻚ ً ﺎ ﺗﻨﺒﻴﻬ ﺧﺎﺻﺔ ﻧﻐﻤﺔ ﻳﺼﺪر وﺟﻌﻠﻪ اﻟﺼﺎدرة اﻵﻟﻲ اﻟﺮد ﺟﻬﺎز رﺳﺎﻟﺔ هﺬﻩ وﻓﺎﺋﺪة ﻗﺮ ﺗﻜﻮن ﻋﻨﺪﻣﺎ اﻟﻮﻇﻴﻔﺔ اﻟﻤﻜﺎﻟﻤﺎت ﺑﺎﻗﻲ وﺗﺬهﺐ ﻣﻌﻴﻨﻴﻦ أﺷﺨﺎص إﻟﻰ اﻟﺘﺤﺪث وﺗﺮﻳ...

Page 132: ...ﻟﺔ ﺗﺒﺪأ ﻋﻨﺪﻣﺎ اﻟﻤ ﺿﻐﻂ ﻋﻠﻴﻬﻢ ﻳﺠﺐ اﻟﺼﺎدرة ﻔﺘﺎح ﻣﻦ هﺎﺗﻔﻪ ﻗﺼﻴﺮة ﺻﻔﺎرة اﻟﻤﺘﺼﻞ ﺳﻴﺴﻤﻊ اﻟﺼﺎدرة اﻟﺮﺳﺎﻟﺔ وﺳﺘﺘﻮﻗﻒ ١ ﺛﻢ اﻟﺘﺠﺎوز رﻣﺰ إدﺧﺎل اﻟﻤﺘﺼﻞ ﻋﻠﻰ ﻳﺠﺐ هﺎﺗﻔﻪ ﻣﻦ اﻟﻤﻨﺎﺳﺒﺔ اﻟﻤﻔﺎﺗﻴﺢ ﻋﻠﻰ ﺑﺎﻟﻀﻐﻂ ﺻﻔﺎرات أرﺑﻊ ﻓﺴﻴﺴﻤﻊ ً ﺄ ﺧﻄ ً ﺎ رﻗﻤ اﻟﻤﺘﺼﻞ أدﺧﻞ إذا اﻟﺮﻣﺰ إدﺧﺎل إﻋﺎدة ﺣﻴﻨﺌﺬ ﻋﻠﻴﻪ وﻳﺠﺐ ﻏﻀﻮن ﻓﻲ اﻟﺼﺤﻴﺢ ١٠ وإ ٍ ن ﺛﻮا اﻟﺨﻂ ﺳﻴﻔﺼﻞ ﻻ ٢ ﺧﺎﺻﺔ ﻧﻐﻤﺔ ﺟﻬﺎزك ﺳﻴﺼﺪر اﻟﻤﻜﺎﻟﻤﺔ ﻋﻠﻰ ﻟﻠﺮد اﻟﺴﻤﺎﻋﺔ ارﻓﻊ هﺎﺗﻒ هﻨﺎك آﺎن إذا أﻧﻪ ﻻﺣﻆ ﻧﻌﻤﺔ أي ﻳﺼﺪر ﻓ...

Page 133: ...ﺎم ﻣﻔﺎﺗﻴﺢ اﺿﻐﻂ ﻣﻦ ﻣﻜﻮن ﺑﻌﺪ ﻋﻦ ﺗﺸﻐﻴﻞ رﻣﺰ رﻗﻢ ﺧﺎل ٣ أرﻗﺎم ٤ اﺿﻐﻂ ﺛﻢ ﺑﻌﺪ ﻋﻦ اﻟﺘﺸﻐﻴﻞ رﻗﻢ ﻟﺘﺨﺰﻳﻦ ﻟﻠﺮﺟﻮع واﻟﻮﻗﺖ اﻟﺘﺎرﻳﺦ ﻋﺮض إﻟﻰ ٥ Toll Saver اﻟﺘﻜﺎﻟﻴﻒ ﻣﻮﻓﺮ اﺳﺘﻘﺒﺎل ﺣﺎﻟﺔ ﻓﻲ ﻧﻐﻤﺘﻴﻦ ﺑﻌﺪ ﺑﺎﻟﺮد اﻟﺠﻬﺎز وﺳﻴﻘﻮم اﻟﺮﺳﺎﺋﻞ إﻟﻰ ﻟﻼﺳﺘﻤﺎع ﺑﺎﻟﺠﻬﺎز اﻻﺗﺼﺎل ﻳﻤﻜﻨﻚ اﻷﻗ ﻋﻠﻰ واﺣﺪة رﺳﺎﻟﺔ رﺳﺎﺋﻞ أﻳﺔ اﺳﺘﻘﺒﺎل ﻋﺪم ﺣﺎﻟﺔ ﻓﻲ ﻧﻐﻤﺎت أرﺑﻊ ﺑﻌﺪ أو ﻞ ﺑﺘﻮﻓﻴﺮ هﺬا ﻟﻚ ﻳﺴﻤﺢ ﺗﻜﺎﻟﻴ ﺑﻌﻴﺪة ﺑﺄﻣﺎآﻦ ﺗﺘﺼﻞ آﻨﺖ إذا ﺧﺎﺻﺔ اﻻﺗﺼﺎل ﻒ ﺑﻌﺪ اﻟﺠﻬﺎز ﻳﺮد ﻟﻢ إذا اﻟﻤﻜﺎﻟ...

Page 134: ...ﻨﺪ اﺿﻐﻂ ﺼﺎدرة ﻋﻠﻰ اﻟﻬﺎﺗﻒ ﻣﻔﺎﺗﻴﺢ ﻟﻮﺣﺔ اﻟﺼﺎدرة اﻟﺮﺳﺎﻟﺔ وﺳﺘﺘﻮﻗﻒ ﻗﺼﻴﺮة ﺻﻔﺎرة ﺳﺘﺴﻤﻊ ١ اﺿﻐﻂ ﺛﻢ ﺑﻌﺪ ﻋﻦ اﻟﺘﺸﻐﻴﻞ رﻣﺰ رﻗﻢ أدﺧﻞ ﺗ إذا ﻃﻮﻳﻠﺔ واﺣﺪة ﺻﻔﺎرة أو اﻟﻤﺴﺠﻠﺔ اﻟﺮﺳﺎﺋﻞ ﻟﻌﺪد ﻣﺴﺎوﻳﺔ اﻟﺼﻔﺎرات ﻣﻦ ﺳﻠﺴﻠﺔ ﺳﺘﺴﻤﻊ ـ اﺳﺘﻼم ﻢ أآﺜﺮ أو رﺳﺎﺋﻞ أرﺑﻊ اﻟ ﺑﺘﺸﻐﻴﻞ اﻟﺠﻬﺎز ﺳﻴﻘﻮم ﺻﻔ ً ا ﻣﺼﺪر ﺮﺳﺎﺋﻞ ـ رﺳﺎﻟﺔ آﻞ ﻧﻬﺎﻳﺔ ﻓﻲ ﺎرة ﻋﻨﺪ ﻃﻮﻳﻠﺔ ﺻﻔﺎرة ﺳﺘﺴﻤﻊ اﻟﺮﺳﺎﺋﻞ آﻞ ﺗﺸﻐﻴﻞ ﻣﻦ اﻻﻧﺘﻬﺎء ﻗﺼﻴﺮة ﺻﻔﺎرة ﺳﺘﺴﻤﻊ رﺳﺎﺋﻞ هﻨﺎك ﻳﻜﻦ ﻟﻢ إذا ﻋﻤﻠﻴﺎت ﻣﻦ أي ﺗﻨﻔﻴﺬ أ...

Page 135: ...ﻞ ﺑﺈﻳﻘﺎف ﻗﻢ اﻟﺠﺪﻳﺪة اﻟﺮﺳﺎﺋﻞ إﻟﻰ ﻓﻘﻂ ﻟﻼﺳﺘﻤﺎع اﻟﻀﻐﻂ ﻳﻖ ﻋﻠﻰ ﺛﻢ اﺿﻐﻂ ﺛﻢ و ﻣ ﺴﺢ اﻟﺮﺳﺎ ﻟﺔ ﻟﻤﺴﺢ اﻟ ﺮﺳﺎﻟﺔ ﻟﻬﺎ اﺳﺘﻤﺎﻋﻚ أﺛﻨﺎء اﺿﻐﻂ و ﻗ ﺗﻨﺘﻬﻰ أن ﺒﻞ ٣ اﻵﺗﻲ ﻣﻦ ﺑﺄي اﻟﻘﻴﺎم ﻳﻤﻜﻨﻚ اﻟﺮﺳﺎﺋﻞ اﺳﺘﻤﺎع ﻣﻦ اﻻﻧﺘﻬﺎء ﺑﻌﺪ اﻟﺮﺳﺎﺋﻞ آﻞ ﻣﺴﺢ اﺿﻐﻂ و اﻟﺘﺸﻐﻴﻞ ﺗﻜﺮار اﺿﻐﻂ و أﺧﺮى ﺗﺸﻐﻴﻞ ﻋﻤﻠﻴﺎت ﺗﻨﻔﻴﺬ ﻳﻤﻜﻨﻚ اﻟﺘﺎﻟﻲ اﻟﻤﻄﻘﻊ ﻓﻲ اﻟﻤﻮﺿﺤﺔ اﻷواﻣﺮ ﻣﻦ أي إدﺧﺎل اﻟ ﻌﻤﻠﻴﺎت اﻷﺧﺮى ﻟ ﺑﻌﺪ ﻋﻦ ﻠﺘﺸﻐﻴﻞ اﻻﺗﺼﺎل ﻗﻄﻊ ﺟﺪﻳﺪة رﺳﺎﺋﻞ أﻳﺔ وﺗﺴﺠﻴﻞ ﺣﻔﻈﻬﺎ ﻓﺴﻴﺘﻢ أوﻻ ﺑﻚ اﻟﺨﺎ...

Page 136: ...ﺮ إدﺧﺎل أﻋﺪ اﻟﺤﺎﻟﺔ ﺪاﻳﺔ ﻣﻦ أآﺜﺮ ﺗﻮﻗﻔﺖ وإذا ١٠ ﺑﺈرﺗﻜﺎ ﻗﻤﺖ أو اﻷﻣﺮ إدﺧﺎل ﻗﺒﻞ ﺛﻮان ب رﻣﺰ رﻗﻢ إدﺧﺎل أﺛﻨﺎء ﺧﻄﺌﻴﻦ اﻟ ﺘﺸﻐﻴ اﻟﺨﻂ ﻓﺼﻞ ﺳﻴﺘﻢ ﺑﻌﺪ ﻋﻦ ﻞ اﻟﻤ ﻏﻴﺮ اﻷﺷﺨﺎص هﺬا وﻳﻤﻨﻊ ﺴﻤﻮ رﻗﻢ ﺗﺨﻤﻴﻦ ﺑﻤﺤﺎوﻟﺔ ﻟﻬﻢ ح ﺑﻚ اﻟﺨﺎص ﺑﻌﺪ ﻋﻦ اﻟﺘﺸﻐﻴﻞ رﻣﺰ اﻟ ﻌﻤﻠﻴﺎت اﻷﺧﺮى ﻟ ﺑﻌﺪ ﻋﻦ ﻠﺘﺸﻐﻴﻞ ا إﻟﻰ اﻻﺳﺘﻤﺎع ﺑﻌﺪ ﻃﺮﻳﻖ ﻋﻦ اﻟﺘﺎﻟﻴﺔ اﻟﺘﺸﻐﻴﻞ ﻋﻤﻠﻴﺎت ﻣﻦ ﺑﺄي اﻟﻘﻴﺎم ﻳﻤﻜﻨﻚ ﺑﻚ اﻟﺨﺎﺻﺔ ﻟﺮﺳﺎﺋﻞ اﻟﻬﺎﺗﻒ ﻋﻠﻰ اﻟﻤﻨﺎﺳﺒﺔ اﻟﻤﻔﺎﺗﻴﺢ ﻋﻠﻰ اﻟﻀﻐﻂ ﻣﻼﺣﻈﺔ اﻟﺘﺎﻟﻴﺔ اﻷواﻣﺮ إد...

Page 137: ...ﺛﺎﻧﻴﺔ اآﺘﺸ إذا ذﻟﻚ ﻗﺒﻞ أو ﻓﺘﺮة اﻟﺠﻬﺎز ﻒ اﻟﺘﺤﺪث ﻣﻦ اﻻﻧﺘﻬﺎء ﺑﻌﺪ ﺻﻤﺖ اﻟﺠﺪﻳﺪة اﻟﺮﺳﺎﻟﺔ ﺗﺸﻐﻴﻞ وﺳﻴﺘﻢ ﺻﻔﺎرة ﺳﺘﺴﻤﻊ ٢ ﺗﺸﻐﻴﻠﻬﺎ إﻳﻘﺎف أو اﻟﺘﺤﻮﻳﻞ وﻇﻴﻔﺔ ﺗﺸﻐﻴﻞ اﻟﺘﺤﻮﻳﻞ ﻟﺘﺸﻐﻴﻞ اﺿﻐﻂ و اﻟﻬﺎﺗﻒ ﻋﻠﻰ اﻟﺘﺤﻮﻳﻞ ﺗﺸﻐﻴﻞ ﻹﻳﻘﺎف اﺿﻐﻂ و اﻟﻬﺎﺗﻒ ﻋﻠﻰ اﻟﺘﺤﻮﻳﻞ هﺎﺗﻒ رﻗﻢ ﺗﻐﻴﻴﺮ اﺿﻐﻂ و و ﻋ اﻟﻬﺎﺗﻒ ﻠﻰ ١ اﻟﺠﺪﻳﺪ اﻟﻬﺎﺗﻒ رﻗﻢ أدﺧﻞ ﻗﺼﻴﺮة ﺻﻔﺎرة ﺳﻤﺎع ﺑﻌﺪ اﺿﻐﻂ اﻻﻧﺘﻬﺎء ﺑﻌﺪ ﻹدﺧﺎل وﻗﻔﺔ اﺿﻐﻂ اﻟﻬﺎﺗﻒ رﻗﻢ ﻣﻦ رﻗﻤﻴﻦ أي ﺑﻴﻦ ٢ ...

Page 138: ...ﺗ ـ ﺬآ ـ ﻴ ـ ﺮ اﻷﺧﺮ اﻟﺠﻬﺎز ﻟﻤﺴﺘﺨﺪﻣﻲ أو ﻟﻨﻔﺴﻚ ﻳﻦ إﻟﻰ اﻻﺳﺘﻤﺎع ﻋﻨﺪ اﻟﺘﺬآﻴﺮ ﺗﺸﻐﻴﻞ ﺳﻴﺘﻢ اﻟﻮاردة اﻟﺮﺳﺎﺋﻞ اﺿﻐﻂ و اﻟﻬﺎﺗﻒ ﻋﻠﻰ ١ اﻟﺘﺬآﻴﺮ ﻟﺘﺴﺠﻴﻞ اﻟﻬﺎﺗﻒ ﻓﻲ ﺗﺤﺪث ﻗﺼﻴﺮة ﺻﻔﺎرة ﺳﻤﺎع ﻋﻨﺪ ٢ اﺿﻐﻂ اﻻﻧﺘﻬﺎء ﺑﻌﺪ و اﻟﻬﺎﺗﻒ ﻋﻠﻰ اﻟﺘﺴﺠﻴﻞ ﺳﻴﻮﻗﻒ ﺻﻤﺖ ﻓﺘﺮة اﻟﺠﻬﺎز اآﺘﺸﻒ إذا ﻣﺒﺎﺷﺮة ٣ وﺿﻊ OGM only ﻓﻘﻂ اﻟﺼﺎدرة اﻟﺮﺳﺎﺋﻞ ﻟﺘﺸﻐﻴﻞ وﺿﻊ OGM only ﻓﻘﻂ اﻟﺼﺎدرة اﻟﺮﺳﺎﺋﻞ اﺿﻐﻂ و اﻟﻬﺎﺗﻒ ﻋﻠﻰ رﺳﺎﻟﺔ ﺗﺮك ﻣﻦ اﻟﻤﺘﺼﻠﻮن ﻳﺘﻤﻜﻦ ﻟﻦ وﻟﻜﻦ اﻟﺼﺎدرة اﻟﺮﺳﺎﻟﺔ ﺗﺸﻐﻴﻞ ...

Page 139: ...ﻔﺤﺎت ﻋﺪة أم ﻣﺮة آﻞ ﻓﻲ واﺣﺪة ﺻﻔﺤﺔ ﻟﻠﻤﻘﺎس اﻷدﻧﻰ اﻟﺤﺪ ﻟﻠﻤﻘﺎس اﻷﻗﺼﻰ اﻟﺤﺪ اﻟﺤ ﻟﻠﻤﻘﺎس اﻷدﻧﻰ ﺪ ﻟﻠﻤﻘﺎس اﻷﻗﺼﻰ اﻟﺤﺪ اﻷدﻧﻰ اﻟﺤﺪ ﻟﻠ اﻷﻗﺼﻰ اﻟﺤﺪ ﻮزن ﻟﻠ ﻮزن اﻷدﻧﻰ اﻟﺤﺪ ﻟﻠ ﻟﻠﻮزن اﻷﻗﺼﻰ اﻟﺤﺪ ﻮزن ﻣﻼﺣﻈﺔ ﻟ ﻣﺴﺢ ﻳﺘﻢ ﻟﻦ ﻸ ﺿﻮﺋﻴﺎ اﻟﻤﺴﺘﻨﺪ ﺣﻮاف ﻋﻠﻰ اﻟﻤﻮﺟﻮدة اﻟﺮﺳﻮﻣﺎت أو ﺣﺮف اﻟﻀﻮﺋﻲ اﻟﻤﺴﺢ ﻳﺘﻢ ﻟﻦ ﻟﻸ ﺣ ﻓﻲ اﻟﻤﻮﺟﻮدة ﺮف اﻟﻤﻈﻠﻠﺔ اﻟﻤﻨﺎﻃﻖ ﻣﺮة آﻞ ﻓﻲ واﺣﺪة ﺻﻔﺤﺔ ﺗﺤﻤﻴﻞ ﺣﺘﻰ ﺗﺤﻤﻴﻞ ١٠ واﺣﺪة دﻓﻌﺔ ﺻﻔﺤﺎت ...

Page 140: ...ت ﺗﺤﻤﻴﻞ اﻟﻤﺴﺘﻨﺪ ﺣﺘﻰ وﺿﻊ ﻳﻤﻜﻦ ١٠ ً ﺎ ﺗﻠﻘﺎﺋﻴ اﻟﺼﻔﺤﺎت ﺗﻠﻘﻴﻢ وﻳﺘﻢ ﻣﺮة آﻞ ﻓﻲ ﺑﺎﻟﻤﺴﺘﻨﺪات اﻟﺘﻐﺬﻳﺔ وﺣﺪة ﻓﻲ ﺻﻔﺤﺎت اﻟﺴﻔﻠﻰ اﻟﺼﻔﺤﺔ ﻣﻦ ً ء ﺑﺪ اﻟﺠﻬﺎز ﻓﻲ أآﺜﺮ ﻧﺴﺦ أو ﻹرﺳﺎل ﻣﻦ ١٠ ﺑﺎﻟﻤﺴﺘﻨﺪات اﻟﺘﻐﺬﻳﺔ وﺣﺪة ﻓﻲ اﻹﺿﺎﻓﻴﺔ اﻟﺼﻔﺤﺎت ﺿﻊ ﺻﻔﺤﺎت اﻟﻀ اﻟﻤﺴﺢ إﺟﺮاء ﻗﺒﻞ وﺣﺬر ﺑﺮﻓﻖ ﻣﺒﺎﺷﺮة اﻷﺧﻴﺮة ﻟﻠﺼﻔﺤﺔ ﻮﺋﻲ ﻳﺆدى ﻓﻘﺪ ﺑﻘﻮة إدﺧﺎﻟﻬﺎ وﺗﺠﻨﺐ اﻟﻮرق اﻧﺤﺸﺎر إﻟﻰ أو ﻣﺰدوﺟﺔ ﺗﻐﺬﻳﺔ ﺣﺪوث إﻟﻰ ذﻟﻚ اﻷﺧﺮى ﺗﻠﻮ ﺻﻔﺤﺔ ﺗﺤﻤﻴﻠﻬﺎ ﻳﺤﺘﻢ ﻣﻤﺎ ﺳﻤﻴﻜﺔ أو آﺒﻴﺮة ﺻﻔﺤﺎت ﻋﺪة...

Page 141: ...ﺎﺳﻲ هﺬا ﻳﻀﻤﻦ ﺣﻴﺚ اﻟﻌﺎدﻳﺔ ﻟﻠﻤﺴﺘﻨﺪات ﺗﻜﻠﻔﺔ وأﻗﻠﻬﺎ ﻟﻺرﺳﺎل ﻃﺮﻳﻘﺔ أﺳﺮع اﻹﻋﺪاد STANDARD ﻗﻴﺎﺳﻲ اﺳﺘﺨﺪم FINE دﻗﻴﻖ أو ﺻﻐﻴﺮة أﺣﺮف ﻋﻠﻰ ﺗﺤﺘﻮي اﻟﺘﻲ ﻟﻠﻤﺴﺘﻨﺪات دﻗﻴﻘﺔ رﺳﻮﻣﺎت FINE دﻗﻴﻖ اﺳﺘﺨﺪم FINE SUPER اﻟﺪﻗﺔ ﻓﺎﺋﻖ ﻋﻠﻰ ﺗﺤﺘﻮي اﻟﺘﻲ ﻟﻠﻤﺴﺘﻨﺪات اﻟﺪﻗﺔ ﺑﺎﻟﻐﺔ رﺳﻮﻣﺎت أو ً ا ﺟﺪ ﺻﻐﻴﺮة أﺣﺮف SUPER FINE اﻟﺪﻗﺔ ﻓﺎﺋﻖ اﺳﺘﺨﺪم HALF TONE ﻧﺼﻔﻲ ﻟﻮن واﻟﺮﺳﻮم اﻟﻔﻮﺗﻮﻏﺮاﻓﻴﺔ ﻟﻠﺼﻮر وﻳ اﻟﺘﻮﺿﻴﺤﻴﺔ اﻟﻠﻮن ﻇﻼل ﻣﻦ درﺟﺔ وﺳﺘﻴﻦ ﺑﺄرﺑﻊ اﻷﺻﻞ ﻨﺴﺦ اﻟﺮﻣﺎدي HALF...

Page 142: ... اﻟﻤﻄﻠﻮﺑﺔ واﻟﺘﺒﺎﻳﻦ اﻟﺪﻗﺔ إﻋﺪادات اﻷوﻟﻰ ﻟﻠﻤﺮة اﻟﺪﻗﺔ إﻋﺪادات ﻗﺎﺋﻤﺔ ﺧﻼل اﻟﺘﻨﻘﻞ ﻋﻨﺪ اﺧﺘﻴﺎر ﻳﻈﻬﺮ AUTO ﺗﻠﻘﺎﺋﻲ ﻣﻦ إﻋﺪاد آﻞ ﺑﺠﺎﻧﺐ اﻟﺪﻗﺔ إﻋﺪادات ﻟﻠﻤﺮة اﻹﻋﺪادات ﻗﺎﺋﻤﺔ ﺧﻼل اﻟﺘﻨﻘﻞ ﻋﻨﺪ إﻋﺪاد ﻳﻈﻬﺮ اﻟﺜﺎﻧﻴﺔ DARK داآﻦ ٢ ﻣﻼﺣﻈﺔ اﻟﺪﻗﺔ ﺑﺈﻋﺪاد اﻟﻤﺴﺘﻨﺪات ﻹرﺳﺎل SUPER FINE اﻟﺪﻗﺔ ﻓﺎﺋﻖ اﻹﻋﺪاد ﻳﺘﻮﻓﺮهﺬا أن ﻳﺠﺐ ﻣﺘﻮﻓﺮ إﻋﺪاد أﻓﻀﻞ إﻟﻰ ً ﺎ ﺗﻠﻘﺎﺋﻴ اﻟﺠﻬﺎز ﻳﻨﺘﻘﻞ ذﻟﻚ ﻳﺘﻮﻓﺮ ﻟﻢ ﻓﺈن ﻟﺮﺳﺎﻟﺘﻚ ّﻲ ﻘ اﻟﻤﺘﻠ اﻟﻔﺎآﺲ ﺟﻬﺎز ﻓﻲ ذﻟﻚ ﻳﻠﻲ HALF TONE DAR...

Page 143: ...ﻔﺎآﺲ ﺟﻬﺎز اﺳﺘﺠﺎﺑﺔ ﻣﻦ واﻟﺘﺄآﺪ ﻟﻠﺨﻂ ﺑﺎﻻﺳﺘﻤﺎع اﻟﻌﺎدي اﻻﺗﺼﺎل ﻳﺴﻤﺢ اﻟﻤﺴﺘﻨﺪ ﺑﺘﺤﻤﻴﻞ ﻗﻢ اﻟﻤﺴﺘﻨﺪات اﺿﻐﻂ رﻏﺒﺖ إذا و اﻟﺪﻗﺔ ﻟﻀﺒﻂ أو اﻟﺘﺒﺎﻳﻦ ١ اﺿﻐﻂ أو اﻟﺴﻤﺎﻋﺔ ارﻓﻊ اﻻﺗﺼﺎل ﻟﻨﻐﻤﺔ اﺳﺘﻤﻊ ٢ اﻟﻤﺴﺘﻘﺒﻞ اﻟﺠﻬﺎز رﻗﻢ اﻃﻠﺐ ﻋﻠﻰ اﻟﻀﻐﻂ ﻃﺮﻳﻖ ﻋﻦ اﻷرﻗﺎم ﻣﻔﺎﺗﻴﺢ ٣ اﻻﺗﺼﺎل ﻳﺘﻢ ﺣﺘﻰ اﻧﺘﻈﺮ ﻃﺮﻳﻘﺔ ﺣﺴﺐ اﻵﺧﺮ اﻟﻄﺮف ﻋﻠﻴﻚ ﺳﻴﺮد أو اﻟﻔﺎآﺲ ﺟﻬﺎز ﻧﻐﻤﺔ ﺳﺘﺴﻤﻊ اﻟﻤﺴﺘﻘﺒﻞ اﻟﺠﻬﺎز ﺿﺒﻂ ﻣﻔﺘﺎح ﻋﻠﻰ ﻳﻀﻐﻂ أن ﻣﻨﻪ اﻃﻠﺐ اﻵﺧﺮ اﻟﻄﺮف ﻋﻠﻴﻚ رد إذا Start ﺑﺪء ﻟﺪﻳﻪ اﻟﻔﺎآﺲ...

Page 144: ... ﻋﺪم ﺣﺎﻟﺔ ﻓﻲ هﺬا ﻳﺤﺪث أن اﻟﻤﻤﻜﻦ ﻣﻦ ﻣﺤﺎوﻟﺔ اﻟﻤﺴﺘﻨﺪ إرﺳﺎل اﻟﺘﻠﻘﺎﺋﻲ ﺑﺎﻻﺗﺼﺎل ﻓﺎآﺲ إرﺳﺎل Automatic Dialling ﺣﺘﻰ ﺗﺨﺰﻳﻦ ﻳﻤﻜﻨﻚ ٣٠ اﻟﺘﻠﻘﺎﺋﻲ اﻻﺗﺼﺎل ﻓﻲ ﻻﺳﺘﺨﺪاﻣﻬﺎ اﻟﺠﻬﺎز ﻓﻲ هﺎﺗﻒ أو ﻓﺎآﺲ رﻗﻢ ﻋﻠﻰ اﻟﻀﻐﻂ ﻃﺮﻳﻖ ﻋﻦ اﻟﺘﻠﻘﺎﺋﻲ اﻻﺗﺼﺎل أرﻗﺎم ﻃﻠﺐ ﻳﺘﻢ ﻋﻠﻰ اﻟﻤﻄﻠﻮب اﻟﺮﻗﻢ ﻳﻈﻬﺮ ﺣﺘﻰ ﺛﻢ اﻟﻌﺮض ﺷﺎﺷﺔ أرﻗﺎ ﺗﺨﺰﻳﻦ اﻟﺘﻠﻘﺎﺋﻲ ﻟﻼﺗﺼﺎل وهﺎﺗﻒ ﻓﺎآﺲ م اﻟﺸﺎﺷﺔ اﺿﻐﻂ و واﺣﺪة ﻣﺮة واﺣﺪة ﻣﺮة ١ اﺿﻐﻂ واﺣﺪة ﻣﺮة ٢ اﻷرﻗﺎم ﻣﻔﺎﺗﻴﺢ ﻋﻠﻰ ﺑﺎﻟﻀﻐﻂ اﻟﻬﺎﺗﻒ أو اﻟﻔﺎآ...

Page 145: ...ار ﻣﻊ اﺿﻐﻂ ﺻﻐﻴﺮ ﺣﺮف ﻹدﺧﺎل اﺿﻐﻂ اﻟﺘﺎﻟﻴﺔ اﻟﺮﻣﻮز أﺣﺪ ﻹدﺧﺎل أو ﻣﺘﻜﺮر ﺑﺸﻜﻞ _ ٥ اﻟﺸﺎﺷﺔ اﺿﻐﻂ ٦ ﻟﻠﺨﻄﻮة ارﺟﻊ ٢ اﺿﻐﻂ أو ﺁﺧﺮ رﻗﻢ ﻟﺘﺨﺰﻳﻦ واﻟﻮﻗﺖ اﻟﺘﺎرﻳﺦ ﻋﺮض إﻟﻰ ﻟﻠﻌﻮدة ٧ ﻣﻼﺣﻈﺔ اﻷﺧﺮى واﻟﺒﻴﺎﻧﺎت اﻟﺘﻠﻘﺎﺋﻲ اﻻﺗﺼﺎل ﺑﺄرﻗﺎم ﻟﻼﺣﺘﻔﺎظ ﻟﻴﺜﻴﻮم ﺑﻄﺎرﻳﺔ اﻟﻔﺎآﺲ ﺟﻬﺎز ﻳﺴﺘﺨﺪم اﻟﺬاآﺮة ﻓﻲ اﻟﻤﺤﻔﻮﻇﺔ اﻟﻜﻬﺮﺑﻲ اﻟﺘﻴﺎر اﻧﻘﻄﺎع ﻋﻨﺪ ﻋﻨﺪ اﻷول اﻟﻤﻘﺎم ﻓﻲ اﻟﺒﻄﺎرﻳﺔ ﻣﻦ اﻟﻄﺎﻗﺔ وﺗﺴﺘﻨﻔﺬ اﻟﻜﻬﺮﺑﻲ اﻟﺘﻴﺎر اﻧﻘﻄﺎع ﺧﻤﺴﺔ ﻟﻠﺒﻄﺎرﻳﺔ اﻻﻓﺘﺮاﺿﻲ اﻟﻌﻤﺮ ﻳﺒﻠﻎ اﻟﻜﻬﺮﺑﻲ ا...

Page 146: ...ﺪدت إذا CLEAR ﻣﺴﺢ ﻟﻠﺨﻄﻮة اﻧﺘﻘﻞ ٨ ٤ ﺣﺪدت إذا EDIT ﺗﻌﺪﻳﻞ اﻟﺮﻗﻢ ﻋﻠﻰ اﻟﻤﻄﻠﻮﺑﺔ اﻟﺘﻐﻴﻴﺮات ﺑﺈﺟﺮاء ﻗﻢ اﺿﻐﻂ أو ﺗﻐﻴﻴﺮه اﻟﻤﺮاد اﻷرﻗﺎم أو اﻟﺮﻗﻢ إﻟﻰ اﻟﻤﺆﺷﺮ ﻟﺘﺤﺮﻳﻚ اﻟﺠﺪﻳﺪ اﻟﺮﻗﻢ أدﺧﻞ ﺛﻢ ﺎ اﻟﻘﺪﻳﻢ ﻣﺤﻞ اﻟﺠﺪﻳﺪ اﻟﺮﻗﻢ ﻳﺤﻞ ﻟﻠﺨﻄﻮة ﻣﺒﺎﺷﺮة اﻧﺘﻘﻞ اﻟﺮﻗﻢ ﺗﻐﻴﻴﺮ ﻓﻲ ﺗﺮﻏﺐ ﻟﻢ إذا ٦ ٥ اﺿﻐﻂ ٦ اﻻﺳﻢ ﻋﻠﻰ اﻟﻤﻄﻠﻮﺑﺔ اﻟﺘﻐﻴﻴﺮات ﺑﺈﺟﺮاء ﻗﻢ اﺿﻐﻂ أو ﻋﻠﻰ اﺿﻐﻂ ﺛﻢ ﺗﻐﻴﻴﺮهﺎ اﻟﻤﺮاد اﻷﺣﺮف أو اﻟﺤﺮف إﻟﻰ اﻟﻤﺆﺷﺮ ﻟﺘﺤﺮﻳﻚ اﻟﻤﻨﺎﺳﺐ اﻟﺮﻗﻢ ﻣﻔﺘﺎح اﻟﻤﻄﻠﻮب اﻟﺤﺮف ﻳ...

Page 147: ...ﻟﻤﺴﺘﻨﺪ ﺑﺘﺤﻤﻴﻞ ﻗﻢ ﻓﺎآﺴﺎ ﺳﺘﺮﺳﻞ آﻨﺖ إذا اﻟﻤﺴﺘﻨﺪات اﺿـﻐــﻂ أردت إن اﻟـﺪﻗــﺔ ﻟﻀﺒـﻂ و أو اﻟﺘﺒﺎﻳﻦ ١ اﺿﻐﻂ أو اﻟﻌﺮض ﺷﺎﺷﺔ ﻋﻠﻰ اﻵﺧﺮ اﻟﻄﺮف اﺳﻢ ﻳﻈﻬﺮ ﺣﺘﻰ اﺳﻤﺎ هﻨﺎك ﻳﻜﻦ ﻟﻢ وإذا اﻟﺮﻗﻢ ﻓﺴﻴﻈﻬﺮ ﻣﺨﺰﻧﺎ ٢ اﺿﻐﻂ ﻓﺎآﺴﺎ ﺳﺘﺮﺳﻞ آﻨﺖ إذا واﻹرﺳﺎل اﻻﺗﺼﺎل ﻳﺒﺪأ ﻋﻤﻠ اآﺘﻤﻠﺖ إذا واﺣﺪة ﺻﻔﺎرة اﻟﻔﺎآﺲ ﺳﻴﺼﺪر ﺑﻨﺠﺎح اﻹرﺳﺎل ﻴﺔ ﺑﺎﻟﻤﺸﻜﻠﺔ ﻟﻴﻌﻤﻠﻚ ﻋﻤﻠﻴﺎت ﺗﻘﺮﻳﺮ وﺳﻴﻄﺒﻊ ﺻﻔﺎرات ﺛﻼث اﻟﻔﺎآﺲ ﺳﻴﺼﺪر ﺧﻄﺄ ﺣﺪث إذا ﺻﻔﺤﺔ اﻧﻈﺮ ٧٢ اﻟﺴﻤﺎﻋﺔ ارﻓﻊ هﺎﺗﻔﻴﺔ ﻣﻜﺎﻟﻤﺔ ﺳﺘﺠﺮ...

Page 148: ...اﻵﺧﺮ اﻟﻤﺴﺘﻨﺪ ﺑﺘﺤﻤﻴﻞ ﻗﻢ اﻟﻤﺴﺘﻨﺪات اﺿـﻐـﻂ أردت إن اﻟـﺪﻗــﺔ ﻟﻀﺒـﻂ و اﻟﺘﺒﺎﻳﻦ أو ١ اﻟﺴﺘ اﻟﺠﻬﺎز رﻗﻢ أدﺧﻞ اﻷرﻗﺎم ﻣﻔﺎﺗﻴﺢ ﻋﻠﻰ اﻟﻀﻐﻂ ﻃﺮﻳﻖ ﻋﻦ ﻘﺒﻞ اﺿﻐﻂ ﺧﺪﻣﺔ إﻟﻰ اﻟﻮﺻﻮل ﻳﻤﻜﻨﻚ ﺣﺘﻰ رﻗﻤﻴﻦ أي ﺑﻴﻦ وﻗﻔﺔ إدﺧﺎل اﻷﻣﺮ ﻳﺘﻄﻠﺐ ﻋﻨﺪﻣﺎ ﺧﺎرﺟﻲ ﺧﻂ أو ﺧﺎﺻﺔ ﻗﺼﻴﺮة ﺷﺮﻃﺔ ﺻﻮرة ﻓﻲ اﻟﻮﻗﻔﺔ وﺗﻈﻬﺮ وﻗﻔﺔ ﻟﻜﻞ ﺛﺎﻧﻴﺘﻴﻦ إدﺧﺎل وﻳﻤﻜﻦ ﻣﺘﺘﺎﺑﻌﺔ وﻗﻔﺎت ﻋﺪة ٢ واﺿﻐﻂ اﻟﻌﺮض ﺷﺎﺷﺔ راﺟﻊ ا رﻗﻢ آﺎن إذا ﺻﺤﻴﺤﺎ اﻟﺸﺎﺷﺔ ﻋﻠﻰ اﻟﻤﻮﺟﻮد اﻟﻤﺴﺘﻘﺒﻞ ﻟﺠﻬﺎز اﺿﻐﻂ ﺻﺤﻴﺢ ﻏﻴﺮ اﻟﺮﻗﻢ...

Page 149: ...ﻨﺖ إذا اﻻﺗﺼﺎل ﻳﺒﺪأ ٣ ﻣﻼﺣﻈﺔ اﻟﺮﺳﺎﻟﺔ وﻇﻬﺮت اﻟﻔﺎآﺲ إرﺳﺎل ﻳﺘﻢ ﻟﻢ إذا DOCUMENT JAMMED ﻣﺤﺸﻮر ﻣﺴﺘﻨﺪ ﻳﻮﺟﺪ ا ﺷﺎﺷﺔ ﻋﻠﻰ اﻟﺼﻔﺤﺔ ﻓﻲ ﻣﻮﺿﺢ هﻮ آﻤﺎ اﻟﻤﺴﺘﻨﺪ ﺑﺈزاﻟﺔ ﻗﻢ ﻟﻌﺮض ٨٤ ﻣﺤﺎوﻟﺔ ﻋﻨﺪ ﺻﺤﻴﺤﺔ ﺑﺼﻮرة اﻵﺧﺮ اﻟﻔﺎآﺲ ﺟﻬﺎز اﺳﺘﺠﺎﺑﺔ ﻋﺪم ﺣﺎﻟﺔ ﻓﻲ هﺬا ﻳﺤﺪث أن اﻟﻤﻤﻜﻦ ﻣﻦ اﻟﻤﺴﺘﻨﺪ إرﺳﺎل ﺗﻠﻘﺎﺋﻴﺎ اﻻﺗﺼﺎل إﻋﺎدة اﻟﺘﻠﻘﺎﺋﻲ اﻻﺗﺼﺎل اﺳﺘﺨﺪام ﻋﻨﺪ اﻟﻤﻔﺎﺗﻴﺢ ﻟﻮﺣﺔ ﻣﻦ اﻟﻤﺒﺎﺷﺮ اﻻﺗﺼﺎل ذﻟﻚ ﻓﻲ ﺑﻤﺎ ﻓﺎآﺲ ﻹرﺳﺎل ﺗﻠﻘﺎﺋﻴﺎ ﺑﺎﻟﺮﻗﻢ اﻻﺗﺼﺎل ﺑﺈﻋﺎدة اﻟﻔﺎآﺲ ﺟﻬﺎز ﺳﻴﻘ...

Page 150: ... اﻟﺘﻠﻘﻲ ﺟﻬﺔ ﻓﻲ اﻟﺨﻄﺄ ﺗﺼﺤﻴﺢ وﺿﻊ اﻟﻮﻇﻴﻔﺔ هﺬﻩ ﺗﺴﻤﻰ ECM ﻓﻌﺎل اﻟﻮﺿﻊ وهﺬا ﻧﻔﺲ ﻟﺪﻳﻪ اﻵﺧﺮ اﻟﻔﺎآﺲ ﺟﻬﺎز آﺎن إذا ﻓﻘﻂ اﻟﻮﻇﻴﻔﺔ هﺬﻩ وﺗﻌﻤﻞ واﻻﺳﺘﻘﺒﺎل اﻹرﺳﺎل ﻋﻤﻠﻴﺎت ﻣﻦ ﻟﻜﻞ اﻟﻮﻇﻴﻔﺔ وﻇﻴﻔﺔ ﺗﺸﻐﻴﻞ إﻳﻘﺎف ﻳﻤﻜﻨﻚ رﻏﺒﺖ إذا ECM اﻟﻤﺘﻮﻓﺮ اﻟﺬاآﺮة ﻣﻘﺪار ﻣﻦ ﻣﺎ ﺣﺪ إﻟﻰ هﺬا وﺳﻴﺰﻳﺪ اﻟﺬاآﺮة ﺧﻼل ﻣﻦ واﻻﺳﺘﻘﺒﺎل اﻹرﺳﺎل ﻟﻌﻤﻠﻴﺔ اﻟﺸﺎﺷﺔ اﺿﻐﻂ و واﺣﺪة ﻣﺮة واﺣﺪة ﻣﺮة ١ اﺿﻐﻂ و واﺣﺪة ﻣﺮة ﻣﺮات ﺧﻤﺲ ٢ اﺿﻐﻂ واﺣﺪة ﻣﺮة ٣ اﻟﺨﺎص اﻟﺘﺤﺪﻳﺪ اﻟﺸﺎﺷﺔ ﺗﻌﺮض ﺛﻢ وﺟﻴﺰة...

Page 151: ...ة إﻟﻰ اﻟﻔﺎآﺲ ﻧﻔﺲ ﺑﺈرﺳﺎل اﻟﻮﻇﻴﻔﺔ هﺬﻩ ﻟﻚ ﺗﺴﻤﺢ ٢٠ ﻋﻤﻠﻴﺔ ﻓﻲ ﺟﻬﺔ واﺣﺪة ﻳﻤﻜﻦ ﻻ ﻣﺘﻌﺪدة ﺟﻬﺎت إﻟﻰ ﻓﺎآﺲ إرﺳﺎل ﻋﻨﺪ ﺗﺴﺘﺨﺪم أن اﻟﺘﻠﻘﺎﺋﻲ اﻻﺗﺼﺎل أرﻗﺎم ﺳﻮى ﻟﻄﻠﺐ ﻓﻘﻂ أرﻗﺎم اﻟﻔﺎآﺲ أﺟﻬﺰة اﻟﻤ ﺴﺘﻘﺒﻠ ﺔ ﺑﺘﺤ ﻗﻢ اﻟﻤﺴﺘﻨﺪ ﻤﻴﻞ اﻟﻤﺴﺘﻨﺪات إن أردت اﺿﻐـﻂ اﻟـﺪﻗــﺔ ﻟﻀـﺒـﻂ و اﻟﺘﺒﺎﻳﻦ أو ١ اﺿﻐﻂ ٢ اﺿﻐﻂ أو اﻟﻌﺮض ﺷﺎﺷﺔ ﻋﻠﻰ ﻟﻠﺮﻗﻢ اﻟﻤﺼﺎﺣﺐ اﻻﺳﻢ ﻳﻈﻬﺮ ﺣﺘﻰ ﺗﺨﺰﻳﻦ ﻋﺪم ﺣﺎﻟﺔ ﻓﻲ اﻟﺮﻗﻢ ﻳﻈﻬﺮ اﻻﺳﻢ ٣ اﺿﻐﻂ ﻟﺘﺤﺪﻳﺪ اﻟﺮﻗ ﻢ ٤ اﻟﺨﻄﻮﺗﻴﻦ آﺮر ٣ و ٤ اﻷ اﻟﺠﻬﺎت ﻣﻦ...

Page 152: ... وﺣﺪة وﺗﻔﺮغ اﻷﺻﻠﻲ اﻟﻤﺴﺘﻨﺪ اﺿﻐﻂ ﺛﻢ اﻟﻤﺴﺘﻨﺪ ﺑﺘﺤﻤﻴﻞ ﻗﻢ اﻟﺬاآﺮة ﺧﻼل ﻣﻦ ﻓﺎآﺲ وﻹرﺳﺎل ﺛ ﺑﺈﺣﺪى اﻟﺮﻗﻢ اﻃﻠﺐ ﻢ اﻟﺘﺎﻟﻴﺔ اﻟﻄﺮق اﺿﻐﻂ ﻋﻠﻰ ﻋﻠﻰ اﺿﻐﻂ ﺛﻢ اﻟﻔﺎآﺲ رﻗﻢ ﻹدﺧﺎل اﻷرﻗﺎم ﻣﻔﺎﺗﻴﺢ اﺿﻐﻂ ﻣﺘﻜﺮر ﺑﺸﻜﻞ اﺿﻐﻂ ﺛﻢ اﻟﺘﻠﻘﺎﺋﻲ اﻻﺗﺼﺎل أرﻗﺎم أﺣﺪ ﻟﺘﺤﺪﻳﺪ اﺿﻐﻂ واﺣﺪة ﻣﺮة اﺿﻐﻂ ﺛﻢ ﺑﻪ اﻻﺗﺼﺎل ﺗﻢ رﻗﻢ أﺧﺮ ﻟﺘﺤﺪﻳﺪ اﻟﺬاآﺮة اﻣﺘﻼء ﻋﻨﺪ ﻋ ـ ﻨ ـ اﻣﺘ ﺪ ـ اﻟﺬاآ ﻼء ـ ﺮة أﺛﻨ ـ اﻟﻤﺴ ﺎء ـ اﻟﻀ ﺢ ـ ﻟﻠﻤﺴﺘ ﻮﺋﻲ ـ ﻨ ـ ﺗﻈﻬ ﺪ ـ ﺷﺎﺷ ﻋﻠﻰ ﺮ ـ رﺳﺎﻟﺘ اﻟﻌﺮض ﺔ ـ ﺎ ...

Page 153: ...ﻤﺔ هﻲ اﻟﻤﻜﺎﻟﻤﺔ أن هﺬا ﻳﻌﻨﻰ ا ﺑﻄﺮﻳﻘﺔ اﻟﻴﺪوي ﻻﺗﺼﺎل ً ﺎ رﻧﻴﻨ ﻓﺴﻴﺼﺪر اﻟﻜﺎذب اﻟﺮﻧﻴﻦ ﻳﺴﻤﻰ ﻟﻤﺪة ١٥ ﻋﻠﻰ ﻟﻠﺮد ﻟﺘﻨﺒﻴﻬﻚ ﺛﺎﻧﻴﺔ اﻟﻤﻜﺎﻟﻤﺔ ﺣﺘﻰ اﻵﺧﺮ اﻟﺠﻬﺎز إﻟﻰ ﻓﺎآﺲ ﻧﻐﻤﺔ اﻟﻔﺎآﺲ ﺟﻬﺎز ﻓﺴﻴﺮﺳﻞ اﻟﻔﺘﺮة هﺬﻩ ﺧﻼل ﺗﺮد ﻟﻢ إن ذﻟﻚ ﻓﻲ رﻏﺐ إذا ًﺎ ﻳ ﻳﺪو ﻓﺎآﺲ إرﺳﺎل اﻟﻤﺘﺼﻞ ﻟﻠﻄﺮف ﻳﺘﻴﺢ ﻣﻼﺣﻈﺔ ﺑﺎﻟﻤ ﻓﻘﻂ اﻟﻔﺎآﺲ ﺟﻬﺎز ﺳﻴﻨﺒﻬﻚ ﺑﻄﺮﻳﻘﺔ إرﺳﺎﻟﻬﺎ ﺗﻢ اﻟﺘﻲ اﻟﻔﺎآﺴﺎت أو اﻟﺼﻮﺗﻴﺔ ﻜﺎﻟﻤﺎت اﻟﻜﺎذب اﻟﺮﻧﻴﻦ ﺑﺎﺳﺘﺨﺪام اﻟﻴﺪوي اﻻﺗﺼﺎل ﻳﺘﻢ أن ﺑﻌﺪ اﻟﺨﻂ ﺑﻨﻔﺲ اﻟﻤﺘﺼﻞ ...

Page 154: ...٢٠ ﺛﺎﻧﻴﺔ ا اﻟﺘﺤﺪﻳﺪ اﻟﺸﺎﺷﺔ ﺗﻌﺮض ﺑﻚ ﻟﺨﺎص ﺛﻢ وﺟﻴﺰة ﻟﻔﺘﺮة ٤ اﺿﻐﻂ واﻟﻮﻗﺖ اﻟﺘﺎرﻳﺦ ﻋﺮض إﻟﻰ ﻟﻠﻌﻮدة ٥ وﺿﻊ اﺳﺘﺨﺪام A M ﺁﻟﻲ رد وﺿﻊ ﻟﺘﺤﺪﻳﺪ A M ﺁﻟﻲ رد اﺿﻐﻂ اﻟﻮﺿﻊ إﻟﻰ اﻟﻌﺮض ﺷﺎﺷﺔ ﻓﻲ اﻟﺴﻬﻢ ﻳﺸﻴﺮ ﺣﺘﻰ A M ﺁﻟﻲ رد وﺿﻊ ﻓﻲ A M ﺁﻟﻲ رد اﻟﺼﻮﺗﻴﺔ اﻟﺮﺳﺎﺋﻞ ﺑﺎﺳﺘﻘﺒﺎل اﻟﻔﺎآﺲ ﺟﻬﺎز ﺳﻴﻘﻮم ً ﺎ ﺗﻠﻘﺎﺋﻴ اﻟﻔﺎآﺲ ورﺳﺎﺋﻞ اﻧﻈﺮ اﻟﻔﺼﻞ ٢ اﻟﺘﻔﺎﺻﻴﻞ ﻣﻦ ﻟﻤﺰﻳﺪ PSEUDO RING وﺿﻊ اﺳﺘﺨﺪام A M ﺁﻟﻲ رد 1 15 SECONDS FAX SIGNAL RX ...

Page 155: ...ﺤﺪث ﻳﻤﻜﻨﻚ اﻟﻔﺎآﺲ ﺟﻬﺎز اﺳﺘﻘﺒﺎل أو وﺿﻊ اﺳﺘﺨﺪام ﻓﻲ ﻣﻮﺿﺢ هﻮ آﻤﺎ ﻓﺎآﺲ TEL ﺻﻔﺤﺔ ٦١ اﻟﺮﻧﺎت ﻋﺪد ﺗﻐﻴﻴﺮ ﻓﻲ اﻟﻮاردة اﻟﻤﻜﺎﻟﻤﺎت ﻋﻠﻰ اﻟﻔﺎآﺲ ﺟﻬﺎز ﺑﻌﺪهﺎ ﻳﺮد اﻟﺘﻲ اﻟﺮﻧﺎت ﻋﺪد ﺗﻐﻴﻴﺮ أردت إن ﻳﻤﻜﻨﻚ وﺿﻌﻲ FAX ﻓﺎآﺲ و TEL FAX هﺎﺗﻒ ﻓﺎآﺲ ﺗﺤﺪ ﻳﻤﻜﻦ ﻣﻦ ﻋﺪد أي ﻳﺪ ٢ إﻟﻰ ٥ اﻟﺸﺎﺷﺔ اﺿﻐﻂ و واﺣﺪة ﻣﺮة واﺣﺪة ﻣﺮة ١ ﻓﺎآﺲ اﺳﺘﻘﺒﺎل ّﺘﺎن ﻧ ر وﺿﻊ ﻟﺘﺤﺪﻳﺪ FAX ﻓﺎآﺲ اﺿﻐﻂ اﻟﺴﻬﻢ ﻳﺸﻴﺮ ﺣﺘﻰ ﺷﺎﺷﺔ ﻓﻲ إﻟﻰ اﻟﻌﺮض FAX OPTION SETTING وﺿﻊ اﺳﺘﺨﺪام FAX ﻓﺎآﺲ ...

Page 156: ... أي ٢ إﻟﻰ ٥ ﻣﺜﺎل ٣ رﻧﺎت ٤ اﺿﻐﻂ ا ﻋﺮض إﻟﻰ ﻟﻠﻌﻮدة واﻟﻮﻗﺖ ﻟﺘﺎرﻳﺦ ٥ وﺿﻊ اﺳﺘﺨﺪام TEL هﺎﺗﻒ ﻋﻠﻰ اﻻﺳﺘﻘﺒﺎل وﺿﻊ ﺿﺒﻂ ﻋﻨﺪ TEL هﺎﺗﻒ رﻓﻊ ﻃﺮﻳﻖ ﻋﻦ اﻟﻤﻜﺎﻟﻤﺎت ﺟﻤﻴﻊ ﻋﻠﻰ ﺗﺮد أن ﻳﺠﺐ اﻟﺨﻂ ﺑﻨﻔﺲ اﻟﻤﺘﺼﻞ اﻟﻔﺮﻋﻲ اﻟﻬﺎﺗﻒ أو اﻟﻔﺎآﺲ ﺟﻬﺎز ﺳﻤﺎﻋﺔ وﺿﻊ ﻟﺘﺤﺪﻳﺪ TEL هﺎﺗﻒ اﺿﻐﻂ اﻟﺴﻬﻢ ﻳﺸﻴﺮ ﺣﺘﻰ ﻓﻲ إﻟﻰ اﻟﻌﺮض ﺷﺎﺷﺔ TEL NUMBER OF RING ENTER 2 5 2 FAX REMOTE وﺿﻊ اﺳﺘﺨﺪام TEL هﺎﺗﻒ ...

Page 157: ...ﺮ اﻟﻄﺮف ﺗﺤﺪث إذا أ ﻓﺎﺿﻐﻂ ﻓﺎآﺲ إرﺳﺎل راد ﺑﻌﺪ اﻟﺤﺪﻳﺚ اﻧﺘﻬﺎء اﺿﻐﻂ Start ﺑﺪء أن ﻗﺒﻞ ﻣﻔﺘﺎ ﺑﻀﻐﻂ اﻟﻤﺮﺳﻞ ﻳﻘﻮم ح Start ﺑﺪء ﻋﻠﻰ اﻟﻔﺎآﺲ ﺟﻬﺎز ﻟﺪﻳﻪ اﻟﺴﻤﺎﻋﺔ ﺿﻊ ﻣﻜﺎﻧﻬﺎ ﻇﻬﻮر ﻋﻨﺪ RECEIVING اﻟﻌﺮض ﺷﺎﺷﺔ ﻋﻠﻰ ٣ ﻓﺮﻋﻲ هﺎﺗﻒ ﺑﺎﺳﺘﺨﺪام اﻟﺮد رد ﻋﻠﻰ اﻟ ﻬﺎﺗﻒ اﻟﻔﺮﻋﻲ ﻳﺮن ﻋﻨﺪﻣﺎ ﺟﺮﺳﻪ ١ وﺿﻊ اﺳﺘﺨﺪام TEL هﺎﺗﻒ RECEIVING ﻣﻼﺣﻈﺔ ﺑﻀﺒﻂ ﻗﻤﺖ إذا Fax Signal Receive إﺷﺎرة اﺳﺘﻘﺒﺎل اﻟﻔﺎآﺲ ﺻﻔﺤﺔ ٦٣ ﻋﻠﻰ NO ﻻ ﻋﻠﻰ اﺿﻐﻂ ﻟﺒﺪء اﻻ ﺳﺘﻘﺒﺎل RECEIVING ...

Page 158: ...ve اﻟﻔﺎآﺲ إﺷﺎرة اﺳﺘﻘﺒﺎل أدﻧﺎﻩ اﻧﻈﺮ ﻋﻠﻰ NO ﻻ اﻻﺳﺘﻘﺒﺎل ﺑﺪء إﺷﺎرة اﻟﻔﺎآﺲ ﻳﻘﺒﻞ ﻟﻦ 5 اﻟﺘﻐﺬﻳﺔ وﺣﺪة ﻓﻲ ﻣﺴﺘﻨﺪ وﺟﻮد ﻋﻨﺪ ٣ اﻻﺧﺘﻴﺎرﻳﺔ اﻻﺳﺘﻘﺒﺎل ﺿﻮاﺑﻂ اﻟﻔﺎآﺲ إﺷﺎرة اﺳﺘﻘﺒﺎل ﺗﻠﻘ اﻟﻔﺎآﺲ ﺳﻴﺒﺪأ ﺧﻼل ﻣﻦ ﻣﻜﺎﻟﻤﺔ ﻋﻠﻰ اﻟﺮد ﺑﻌﺪ ﺿﻌﻴﻔﺔ ﻓﺎآﺲ ﻧﻐﻤﺔ ﺳﻤﺎع ﻋﻨﺪ اﻻﺳﺘﻘﺒﺎل ﻓﻲ ً ﺎ ﺎﺋﻴ ﻓﺮﻋﻲ هﺎﺗﻒ أو اﻟﻔﺎآﺲ ﻧﻔﺲ ﻣﻦ اﻟﻤﺴﺘﻨﺪات ﻹرﺳﺎل ﻓﺎآﺲ ﺑﻤﻮدم ﻣﺠﻬﺰ آﻤﺒﻴﻮﺗﺮ ﺗﺴﺘﺨﺪم آﻨﺖ وإذا ﻣﻦ اﻟﻤﺴﺘﻨﺪات اﺳﺘﻘﺒﺎل ﻣﺤﺎوﻟﺔ ﻣﻦ اﻟﻔﺎآﺲ ﺟﻬﺎز ﺗﻤﻨﻊ ﺣﺘﻰ اﻟﻮﻇﻴﻔﺔ هﺬﻩ ﺗﺸﻐﻴﻞ...

Page 159: ...اﺳﺘﺨﺪام أردت إن ﻳﻤﻜﻨﻚ 5 ﻓﺮﻋﻲ هﺎﺗﻒ ﻣﻦ اﻟﻔﺎآﺲ اﺳﺘﻘﺒﺎل ﻟﺘﻨﺸﻴﻂ ﻳﻤﻜﻨﻚ رﻗﻢ أي ﺗﺤﺪﻳﺪ ﻣ ﻦ 0 إﻟﻰ 9 اﻟﺸﺎﺷﺔ اﺿﻐﻂ واﺣﺪة ﻣﺮة و واﺣﺪة ﻣﺮة ١ اﺿﻐﻂ ﻣ واﺣﺪة ﺮة و ﻣﺮة واﺣﺪة ٢ اﺿﻐﻂ واﺣﺪة ﻣﺮة ٣ ﺑﻚ اﻟﺨﺎص اﻟﺘﺤﺪﻳﺪ اﻟﺸﺎﺷﺔ ﺗﻌﺮض ﺛﻢ وﺟﻴﺰة ﻟﻔﺘﺮة أ اﻟﻤﻄﻠﻮب اﻟﺮﻗﻢ دﺧﻞ ﻣﻦ رﻗﻢ أي 0 إﻟﻰ 9 ﻣﺜﺎل 3 ٤ اﺿﻐﻂ واﻟﻮﻗﺖ اﻟﺘﺎرﻳﺦ ﻋﺮض إﻟﻰ ﻟﻠﻌﻮدة ٥ OPTION SETTING FAX REMOTE ENTER 0 9 5 TRANSACTION 1 YES 2 NO اﻻﺧﺘﻴﺎرﻳﺔ اﻻﺳﺘﻘﺒﺎل ﺿﻮاﺑﻂ ECM MODE ...

Page 160: ... ﺎﺳﺐ اﻟﺘﺎﻟﻴﺔ اﻟﺼﻔﺤﺔ ﻋﻠﻰ اﻟﺴﻄﻮر أﺣﺪ ﻣﻨﺘﺼﻒ ﻓﻲ اﻟﻘﻄﻊ ﻧﻘﻄﺔ ﺗﺼﺒﺢ ﻗﺪ اﻟﺤﺎﻟﺔ هﺬﻩ وﻓﻰ ﻣﻦ اﻟﻌﺪﻳﺪ ﻋﻠﻰ ﻳﺤﺘﻮي أو ﺟﺪا آﺒﻴﺮ اﺳﺘﻘﺒﺎﻟﻪ ﻳﺘﻢ اﻟﺬي اﻟﻤﺴﺘﻨﺪ آﺎن إذا اﻟﺘﻠﻘﺎﺋﻲ اﻟﺘﺼﻐﻴﺮ ﻳﺘﻌﺬر ﻗﺪ إرﺳﺎﻟ ﺗﻢ أو اﻟﺪﻗﻴﻘﺔ اﻟﺼﻮر أو اﻟﺮﺳﻮﻣﺎت ﻋﺎﻟﻴﺔ دﻗﺔ ﺑﺪرﺟﺔ ﻪ اﻟﺠﺰء ﻃﺒﺎﻋﺔ ﻳﺘﻢ اﻟﺤﺎﻟﺔ هﺬﻩ وﻓﻲ اﻟﺘﺎﻟﻴﺔ اﻟﺼﻔﺤﺔ ﻋﻠﻰ اﻟﻤﺴﺘﻨﺪ ﻣﻦ اﻟﻤﺘﺒﻘﻲ اﻟﺸﺎﺷﺔ اﺿﻐﻂ واﺣﺪة ﻣﺮة و واﺣﺪة ﻣﺮة ١ اﺿﻐﻂ واﺣﺪة ﻣﺮة و أ رﺑﻊ ﻣﺮات ٢ اﺿﻐﻂ واﺣﺪة ﻣﺮة ٣ ﺑﻚ اﻟﺨﺎص اﻟﺘﺤﺪﻳﺪ اﻟﺸﺎﺷ...

Page 161: ... ـ ﺳﺘﻈﻬ ﺮة ــ اﻟﺮﺳ ﺮ ـ ﺎﻟﺔ FAX RX IN MEMORY ﻓﺎآﺲ اﺳﺘﻘﺒﺎل ﺗﻢ اﻟﺬاآﺮة ﻓﻲ اﻟﺮﺳﺎﻟﺔ ﺗﺘﺒﻌﻬﺎ اﻟﻌﺮض ﺷﺎﺷﺔ ﻋﻠﻰ ADD PAPER PRESS START KEY ورﻗ أﺿﻒ ً ﺎ ﻣﻔﺘﺎح واﺿﻐﻂ START ﺑﺪء اﻟﺮﺳﺎﻟﺔ أو CHECK FILM CHECK COVER CHECK PAPER JAM ا اﻓﺤﺺ اﻟﺤ ﻟﻮرق ــ ﺮاري اﻟﻐﻄﺎء اﻓﺤﺺ اﻧﺤﺸ اﻓﺤﺺ ـ اﻟﻮرق ﺎر ورق إﺿﺎﻓﺔ ﻋﻨﺪ اﺿﻐﻂ و ﺳﻴﺘﻢ اﻟﻮرق اﻧﺤﺸﺎر إزاﻟﺔ أو اﻟﺤﺮاري اﻟﻮرق اﺳﺘﺒﺪال أو ً ﺎ ﺗﻠﻘﺎﺋﻴ اﻟﻤﺨﺰﻧﺔ اﻟﻤﺴﺘﻨﺪات ﻃﺒﺎﻋﺔ اﻟﺬاآﺮة ﻓﻲ اﻟﺒﺪﻳﻞ اﻻﺳﺘﻘﺒ...

Page 162: ...ﻦ اﻷﺻﻞ ﻣﻦ اﻟﻨﺴﺦ ﻋﺪد اﺿﻐﻂ ﻣﻦ رﻗﻢ ﻹدﺧﺎل اﻷرﻗﺎم ﻣﻔﺎﺗﻴﺢ 1 إﻟﻰ 99 هﻮ اﻻﻓﺘﺮاﺿﻲ اﻟﺮﻗﻢ 1 ﻣﺜﺎل اﺿﻐﻂ ﻟﻌﻤﻞ ٥ ﻧﺴﺦ ٢ اﺿﻐﻂ ﻟﻠﻨﺴﺦ ً ا ﺟﺎهﺰ ﺗﻜﻮن ﻋﻨﺪﻣﺎ ٣ رﺳﺎﻟﺔ ﻇﻬﻮر ﻋﻨﺪ MEMORY IS FULL ﻣﻤﺘﻠﺌﺔ اﻟﺬاآﺮة اﻣﺘ ﻋﻨﺪ ـ اﻟﺬاآ ﻼء ـ أﺛﻨ ﺮة ـ اﻟﻤﺴ ﺎء ــ اﻟﻀ ﺢ ـ ﻟﻠﻤﺴﺘ ﻮﺋﻲ ـ ﻨ ـ ﺳﺘ ﺪ ـ ﻈﻬ ــ اﻟﺸ ﻋﻠﻰ ﺮ ـ اﻟﺮﺳ ﺎﺷﺔ ــ ﺎﻟﺔ MEMORY IS FULL ﻣﻤﺘﻠﺌﺔ اﻟﺬاآﺮة واﻟﺮﺳﺎﻟﺔ SEE MANUAL اﻻﺳﺘﺨﺪام دﻟﻴﻞ اﻧﻈﺮ ﺑﺎﻟﺘﺘ ـ وﺳﺘﺘ ﺎﺑﻊ ـ ﻮﻗ ـ ﺗﻐ ﻒ ـ اﻟﻤﺴﺘ ﺬﻳﺔ ـ ...

Page 163: ...ﻊ اﻟﻀﺒﻂ ﻟﺘﻐﻴﻴﺮ أدﻧﺎﻩ اﻟﻤﻮﺟﻮدة اﻟﺨﻄﻮات اﺗﺒﻊ اﻟﺸﺎﺷﺔ اﺿﻐﻂ و واﺣﺪة ﻣﺮة واﺣﺪة ﻣﺮة ١ اﺿﻐﻂ و واﺣﺪة ﻣﺮة واﺣﺪة ﻣﺮة ٢ اﺿﻐﻂ واﺣﺪة ﻣﺮة ٣ ﺑﻚ اﻟﺨﺎص اﻟﺘﺤﺪﻳﺪ اﻟﺸﺎﺷﺔ ﺗﻌﺮض ﺛﻢ وﺟﻴﺰة ﻟﻔﺘﺮة اﺿﻐﻂ ﻋﻠﻰ اﻟﻨﺴﺨﺔ ﻗﻄﻊ ﻟﻀﺒﻂ YES ﻧﻌﻢ ﻣﻦ اﻟﻤﺘﺒﻘﻲ اﻟﺠﺰء ﻃﺒﺎﻋﺔ ﻳﺘﻢ ﻟﻦ اﻟﻤﺴﺘﻨﺪ اﺿﻐﻂ أو ﻋﻠﻰ اﻟﻨﺴﺨﺔ ﻗﻄﻊ ﻟﻀﺒﻂ NO ﻻ ﻃﺒﺎﻋﺔ ﺳﻴﺘﻢ اﻟﺘﺎﻟﻴﺔ اﻟﺼﻔﺤﺔ ﻋﻠﻰ اﻟﻤﺴﺘﻨﺪ ﻣﻦ اﻟﻤﺘﺒﻘﻲ اﻟﺠﺰء ٤ اﺿﻐﻂ واﻟﻮﻗﺖ اﻟﺘﺎرﻳﺦ ﻋﺮض إﻟﻰ ﻟﻠﻌﻮدة ٥ OPTION SETTING COPY CUT OFF 1 YES...

Page 164: ...ﻻﺳﺘﺨﺪام ﺗﺮﻳﺪ ﻻ اﻟﺬي اﻟﻔﺎآﺲ رﻗﻢ ﻹدﺧﺎل اﻟﺘﺎﻟﻴﺔ ات اﺳﺘﻘﺒﺎل أﻳﺔ ﻣﻨﻪ ﻓﺎآﺴﺎت ﻓﻘﻂ واﺣﺪ ﻓﺎآﺲ رﻗﻢ إدﺧﺎل ﻳﻤﻜﻨﻚ اﻟﺸﺎﺷﺔ اﺿﻐﻂ و واﺣﺪة ﻣﺮة ﻣﺮﺗﻴﻦ ١ اﺿﻐﻂ و واﺣﺪة ﻣﺮة واﺣﺪة ﻣﺮة ٢ ا ﺿﻐﻂ ﻋﻠﻰ واﺣﺪة ﻣﺮة ٣ اﺿﻐﻂ ﻓﺎآﺴ اﺳﺘﻘﺒﺎل ﺗﺮﻳﺪ ﻻ اﻟﺬي اﻟﻔﺎآﺲ رﻗﻢ ﻟﺘﺨﺰﻳﻦ اﺿﻐﻂ أو ﻣﻨﻪ ﺎت ﺗﻢ رﻗﻢ ﻟﻤﺴﺢ ﺗﺨﺰﻳﻨﻪ ﻣﺴﺒﻘﺎ ﻟﻠﺨﻄﻮة اﻧﺘﻘﻞ ٦ ﻣﻮﺟﻮد رﻗﻢ ﺑﻤﺴﺢ ﺗﻘﻮم آﻨﺖ إذا ٤ اﻷرﻗﺎم ﻣﻔﺎﺗﻴﺢ ﻋﻠﻰ ﺑﺎﻟﻀﻐﻂ اﻟﻔﺎآﺲ رﻗﻢ أدﺧﻞ أﻗﺼﻰ ﺑﺤﺪ ٢٠ رﻗﻤﺎ ٥ اﺿﻐﻂ اﺿﻐﻂ ﺛﻢ واﻟﻮﻗﺖ اﻟﺘ...

Page 165: ...ﻮاﺑﻂ ﺗﻮﺿﺢ ﻗﻮاﺋﻢ ﻃﺒﺎﻋﺔ ﻳﻤﻜﻨﻚ اﻟﻘﻮاﺋﻢ وهﺬﻩ أدﻧﺎﻩ ﻣﻮﺿﺤﺔ اﻟﺘﺎﻟﻴﺔ اﻟﺨﻄﻮات اﺗﺒﻊ ﻗﺎﺋﻤﺔ ﻟﻄﺒﺎﻋﺔ اﻟﺸﺎﺷﺔ اﺿﻐﻂ و واﺣﺪة ﻣﺮة ﻣﺮﺗﻴﻦ ١ اﺿﻐﻂ ﻣﺮة واﺣﺪة ٢ اﺿﻐﻂ أو اﻟﻤﻄﻠﻮﺑﺔ اﻟﻘﺎﺋﻤﺔ ﺗﻈﻬﺮ ﺣﺘﻰ اﻟﻌﺮض ﺷﺎﺷﺔ ﻋﻠﻰ ٣ اﺿﻐﻂ واﺣﺪة ﻣﺮة ٤ اﺿﻐﻂ اﻟﻘﺎﺋﻤﺔ ﻟﻄﺒﺎﻋﺔ ٥ LISTING MODE TEL LIST PRESS START KEY ...

Page 166: ...ﻟﻀﻮاﺑﻂ اﻟﺤﺎﻟﻴﺔ اﺧﺘﻴﺎراﺗﻚ اﻟﻘﺎﺋﻤﺔ هﺬﻩ ﺗﻮﺿﺢ FUNCTION وﻇﻴﻔﺔ ﺗﻌ آﻤﺎ هﺬﻩ ﺮض اﻟﻔﺎآﺲ ورﻗﻢ اﺳﻤﻚ اﻟﻘﺎﺋﻤﺔ اﻟﺘﻲ اﻟﻤﻌﻠﻮﻣﺎت ﻣﻦ ﻋﻴﻨﺔ آﺬﻟﻚ وﺗﻮﺿﺢ اﻟﺠﻬﺎز ﻓﻲ إدﺧﺎﻟﻪ ﺗﻢ آﻤﺎ اﻟﻬﺎﺗﻒ ﺗﻄﺒﻊ أﻋ ﺑﺈرﺳﺎﻟﻬﺎ ﺗﻘﻮم ﺻﻔﺤﺔ آﻞ ﻠﻰ HEADER PRINT اﻟﺮﺳﺎﺋﻞ ﺗﻘﺮﻳﺮ ﺗﺎرﻳ ذﻟﻚ ﻓﻲ ﺑﻤﺎ اﻵﻟﻲ اﻟﺮد ﺟﻬﺎز ﻓﻲ ﺣﺎﻟﻴﺎ اﻟﻤﺴﺠﻠﺔ اﻟﺮﺳﺎﺋﻞ ﺣﻮل ﻣﻌﻠﻮﻣﺎت اﻟﻘﺎﺋﻤﺔ هﺬﻩ ﺗﻮﺿﺢ ﺦ وﻧﻮﻋﻬﺎ ﻃﻮﻟﻬﺎ وآﺬﻟﻚ رﺳﺎﻟﺔ آﻞ ﺗﺴﺠﻴﻞ ووﻗﺖ ...

Page 167: ...ﺒﺎﻟﻬﺎ PAGES ﻋﻨﻮان ﺗﺤﺖ اﻟﺘﺎﻟﻴﺔ اﻟﻤﻼﺣﻈﺎت إﺣﺪى ﺗﻈﻬﺮ NOTE ﻣﻼﺣﻈﺔ اﻟﺘﻘﺮﻳﺮ ﻓﻲ ﺗﺘﻢ ﻟﻢ إذا اﻟﻌﻤﻠﻴﺔ ﻓﺸﻞ وﺳﺒﺐ ﻻ أم ﻧﺎﺟﺤﺔ اﻟﻌﻤﻠﻴﺔ آﺎﻧﺖ إذا ﻣﺎ إﻟﻰ ﻟﻺﺷﺎرة OK اﻹرﺳﺎل ﻋﻤﻠﻴﺔ ﺗﻤﺖ اﻻﺳﺘﻘﺒﺎ ﺑﻨﺠﺎح ل P FAIL اﻟﻌﻤﻠﻴﺔ ﺗﻨﻔﻴﺬ دون اﻟﺘﻴﺎر اﻧﻘﻄﺎع ﺣﺎل JAM اﻟﻌﻤﻠﻴﺔ ﺗﻨﻔﻴﺬ دون اﻟﻤﺴﺘﻨﺪ أو اﻟﻄﺒﺎﻋﺔ ورق اﻧﺤﺸﺎر ﺣﺎل BUSY ً ﻻ ﻣﺸﻐﻮ آﺎن اﻟﺨﻂ ﻷن ﻳﺘﻢ ﻟﻢ اﻟﻔﺎآﺲ إرﺳﺎل COM E X ﻳﺸﻴﺮ ﺣﻴﺚ X رﻗﻢ إﻟﻰ دون اﻟﻬﺎﺗﻒ ﺧﻂ ﻓﻲ ﺧﻄﺄ ﺣﺎل اﻟﻌﻤﻠﻴﺔ ﺗﻨﻔﻴﺬ اﻧﻈﺮ اﻟﻬ ﺧﻂ ...

Page 168: ...رﻗﻤ اﺿﻐﻂ إﻟﻰ اﻟﻄﺒﺎﻋﺔ ﺷﺮط ﻟﺘﺤﺪﻳﺪ ALWAYS PRINT إرﺳﺎل ﻋﻤﻠﻴﺔ آﻞ ﺑﻌﺪ ﺗﻘﺮﻳﺮ ﻃﺒﺎﻋﺔ ﺳﺘﺘﻢ اﺳﺘﻘﺒﺎل أو ﺧﻄﺄ ﺣﺪوث أو ERROR MEMORY أو ﺧﻄﺄ ﺣﺪوث ﺑﻌﺪ ﺗﻘﺮﻳﺮ ﻃﺒﺎﻋﺔ ﺳﺘﺘﻢ ذاآﺮة ﻋﻤﻠﻴﺔ SEND ONLY ﺳﺘﺘﻢ إرﺳﺎل ﻋﻤﻠﻴﺔ آﻞ ﺑﻌﺪ ﺗﻘﺮﻳﺮ ﻃﺒﺎﻋﺔ ERROR ONLY ﻓﻘﻂ ﺧﻄﺄ ﺣﺪوث ﻋﻨﺪ ﺗﻘﺮﻳﺮ ﻃﺒﺎﻋﺔ ﺳﺘﺘﻢ NEVER PRINT ً ﺎ ﻧﻬﺎﺋﻴ ﺗﻘﺮﻳﺮ ﻃﺒﺎﻋﺔ ﺗﺘﻢ ﻟﻦ ٤ اﺿﻐﻂ واﻟﻮﻗﺖ اﻟﺘﺎرﻳﺦ ﻋﺮض إﻟﻰ ﻟﻠﻌﻮدة ٥ OPTION SETTING TRANSACTION 1 ALWAYS PRINT DIAL MODE اﻟﺘﺤﺪﻳﺪ اﻟﺸﺎﺷﺔ ...

Page 169: ...اﻟﺘﺸﻐﻴﻞ ﻟﻮﺣﺔ واﻓﺘﺢ اﻟﺘﻴﺎر اﺿﻐﻂ ١ أﺧﺮج اﻟﺤﺮاري اﻟﻮرق ﻣﻦ وﺣﺪة وﺿﻌﻪ اﻟﻄﺒﺎﻋﺔ ﻋﻠﻰ ورﻗﺔ ٢ ﺑﻜﺤﻮل اﻟﻄﺒﺎﻋﺔ رأس اﻣﺴﺢ ﻣﺬﻳﺐ آﺤﻮل أو ﺻﻨﺎﻋﻲ ﺗﺤﺬﻳﺮ اﻟﻤﺨﻔﻔﺎت أو اﻟﺒﻨﺰﻳﻦ اﺳﺘﺨﺪام ﺗﺠﻨﺐ ﺗﻠﻤﺲ ﻻ ﺻﻠﺐ ﺷﻲء ﺑﺄي اﻟﻄﺒﺎﻋﺔ رأس ﺟﻬﺎز آﺎن إذا ﺳﺎﺧﻨﺎ اﻟﻄﺒﺎﻋﺔ رأس ﻳﻜﻮن ﻗﺪ اﻟﻤﺴﺘﻨﺪات ﻣﻦ آﺒﻴﺮا ﻋﺪدا اﺳﺘﻘﺒﻞ ﻗﺪ اﻟﻔﺎآﺲ ﻣﺒﺎﺷﺮة ذﻟﻚ ﻗﺒﻞ اﺗﺮك آﺬﻟﻚ اﻷﻣﺮ آﺎن ﻓﺈذا اﻟﺘﻨﻈﻴﻒ ﻗﺒﻞ ﻳﺒﺮد ﺣﺘﻰ اﻟﻄﺒﺎﻋﺔ رأس ٣ اﻟﻄﺒﺎﻋﺔ رأس ...

Page 170: ...ﻠﻖ ﺛﻢ اﻟﺤﺮاري اﻟﻮرق ﺗﺸﺪ ﺣﺘﻰ اﻷﻣﺎﻣﻲ اﻟﺘﺮس ﻟﻒ اﻟﻠ ﺟﺎﻧﺒﻲ ﻋﻠﻰ اﺿﻐﻂ ﻮﺣﺔ ﺣﺘﻰ ﺗ ﻣﻜﺎﻧﻬﺎ ﻓﻲ ﺴﺘﻘﺮ ٥ واﻟﺒﻜﺮات اﻟﻀﻮﺋﻲ اﻟﻤﺴﺢ زﺟﺎج اﻟﻤ واﻟﺼﻮر ﺴﺦ اﻟﻨ ﺟﻮدة ﻟﻀﻤﺎن ﻵﺧﺮ ﺣﻴﻦ ﻣﻦ واﻟﺒﻜﺮات اﻟﻀﻮﺋﻲ اﻟﻤﺴﺢ زﺟﺎج ﻧﻈﻒ ﺮﺳﻠﺔ ﻣﻼﺣﻈﺔ واﻟﺒﻜﺮات اﻟﻀﻮﺋﻲ اﻟﻤﺴﺢ زﺟﺎج ﺗﻨﻈﻴﻒ ﻗﺒﻞ اﻟﻮرق درج ﻣﻦ اﻟﻮرق أﺧﺮج اﻟﺘﺸﻐﻴﻞ ﻟﻮﺣﺔ اﻓﺘﺢ اﺿﻐﻂ ١ ...

Page 171: ...اﻟﻤﺴﺢ ﺟﺎج ﻣﺒﻠﻠﺔ ﻗﻄﻦ ﻗﻄﻌﺔ اﺳﺘﺨﺪام ﻳﻤﻜﻨﻚ اﻷﺗﺮﺑﺔ ﻣﻦ اﻟﻀﻮﺋﻲ اﻟﻤﺴﺢ زﺟﺎج ﺗﻨﻈﻴﻒ ﻓﻲ ﺻﻌﻮﺑﺔ وﺟﻮد ﻋﻨﺪ ﻣﺬﻳﺐ ﺑﻜﺤﻮل isopropyl ﺻﻨﺎﻋﻲ آﺤﻮل أو اﻟﺒﻜﺮات ﻋﻠﻰ اﻟﻜﺤﻮل ﻣﻦ ﻗﻄﺮات أﻳﺔ ﺳﻘﻮط ﺗﺠﻨﺐ ﻷﺳﻔﻞ اﻟﺒﻴﻀﺎء اﻟﺒﻜﺮة ﺟﺎﻧﺒﻲ ﻋﻠﻰ اﻟﺨﻀﺮاوﻳﻦ اﻟﺬراﻋﻴﻦ اﻗﻠﺐ اﻷﻣﺎﻣﻲ اﻟﺘﺮس ﻟﻒ اﻟﻮرق ﺗﺸﺪ ﺣﺘﻰ اﻟﺘﺸﻐﻴﻞ ﻟﻮﺣﺔ أﻏﻠﻖ ﺛﻢ اﻟﺤﺮاري اﻟﻠﻮﺣﺔ ﺟﺎﻧﺒﻲ ﻋﻠﻰ اﺿﻐﻂ ﺣﺘﻰ ﺗ ﻣﻜﺎﻧﻬﺎ ﻓﻲ ﺴﺘﻘﺮ ٤ اﻟﺨﺎرﺟﻲ اﻟﻬﻴﻜﻞ اﻟﺠﻬﺎز وﺳﻄﺢ اﻟﺨﺎرﺟﻴﺔ اﻷﺟﺰاء اﻣﺴﺢ ﺑ ﺟﺎﻓﺔ ﻗﻤﺎش ﻘﻄﻌﺔ ﺗﺤﺬﻳﺮ اﻟﻤ...

Page 172: ...ﻟﺴﻠﻚ ﻃﻮل ﻳﺰﻳﺪ أﻻ ﻳﻨﺒﻐﻲ ﺑﺤﻴﺚ TEL LINE ﻣﺘﺮﻳﻦ ﻋﻦ اﻟﺤﺎﺋﻂ ﻣﻘﺒﺲ إﻟﻰ ﺗﻌﻤ ﻣﻮدم أﺟﻬﺰة وﺟﻮد ﻋﺪم ﻣﻦ ﺗﺄآﺪ اﻟﻬﺎﺗﻒ ﺧﻂ ﻧﻔﺲ ﻋﻠﻰ ﻞ ﻟﺪﻳﻪ اﻟﻔﺎآﺲ ﺟﻬﺎز أن ﻣﻦ ﻟﻠﺘﺄآﺪ اﻵﺧﺮ اﻟﻄﺮف ﻣﻊ راﺟﻊ ﺳﻠﻴﻢ ﺑﺸﻜﻞ ﻳﻌﻤﻞ ﺿﻮﺿﺎء وﺟﻮد ﻋﺪم ﻣﻦ ﻟﻠﺘﺄآﺪ ﻟﺪﻳﻚ اﻟﻬﺎﺗﻒ ﺧﻂ اﻓﺤﺺ ﺑﺎﻟﺨﻂ ﻣﺨﺘﻠﻒ هﺎﺗﻒ ﺑﺨﻂ اﻟﻔﺎآﺲ ﺟﻬﺎز ﺗﻮﺻﻴﻞ ﺣﺎول اﻟﻔﺎآﺲ ﺟﻬﺎز ﻳﻜﻮن أن اﻟﻤﻤﻜﻦ ﻓﻤﻦ اﻟﻤﺸﻜﻠﺔ اﺳﺘﻤﺮت إذا ﺻﻴﺎﻧﺔ إﻟﻰ ﺑﺤﺎﺟﺔ ﻟﺪﻳﻚ ﺗﻈﻬﺮ رﺳﺎﻟﺔ LINE ERROR ﺧﻄﺄ ﻓﻲ ﺧﻂ اﻟﻬﺎﺗﻒ ﻋﻠﻰ اﻟﻌﺮض ﺷﺎﺷﺔ ...

Page 173: ... ورق وﺟﻮد ﻣﻦ ﺗﺄآﺪ ﺑ ﻣﺘﺼﻞ اﻟﻬﺎﺗﻒ ﺧﻂ أن ﺗﺄآﺪ ﻤﻘﺒﺲ TEL LINE ﺑﻤﻘﺒﺲ وﻟﻴﺲ TEL SET اﻟﻴﺪوي اﻟﺘﺸﻐﻴﻞ وﺿﻊ ﻓﻲ اﻟﻤﺴﺘﻘﺒﻞ اﻟﻔﺎآﺲ ﺟﻬﺎز آﺎن إذا اﻻﺳﺘﻘﺒﺎل ﻳﺘﻢ ﻓﻠﻦ ﺑﺘﺸﻐﻴﻠﻪ ﻳﻘﻮم ﻦ ﻣ وﺟﻮد ﺑﺪون ﺧﻄﺄ رﺳﺎﺋﻞ أي ﻋﻦ ﺎ ﺑﺤﺜ اﻟﻌﺮض ﺷﺎﺷﺔ راﺟﻊ اﻻﺗﺼﺎل ﻧﻐﻤﺔ وﺟﻮد ﻣﻦ وﺗﺄآﺪ اﻟﺴﻤﺎﻋﺔ ارﻓﻊ ﻻ وﻟﻜﻦ آﻬﺮﺑﻲ ﺗﻴﺎر ﻳﻮﺟﺪ إرﺳﺎل ﻳﺤﺪث ﺗﺄآﺪ ووﺟﻪ اﻟﺘﻐﺬﻳﺔ وﺣﺪة ﻓﻲ ﻣﻮﺿﻮع اﻹرﺳﺎل ﻣﺴﺘﻨﺪ أن ﻷﺳﻔﻞ اﻟﻄﺒﺎﻋﺔ اﻟﻄﺮف ﻟﺪى اﻟﻄﺒﺎﻋﺔ ﺗﺘﻢ ﻻ اﻟﻤﺴﺘﻘﺒﻞ ﺻﻮرة ﺗﺸﻮﻳﻪ إﻟﻰ اﻟﻬﺎﺗﻒ ﺑﺨ...

Page 174: ... اﻟﻄﺮف ﻣﻦ اﻃﻠﺐ ﻋﺎﻟﻴﺔ اﻟﻤ ﻓﻤﻦ ﻟﻠﻐﺎﻳﺔ ﻣﻨﺨﻔﻀﺔ اﻟﺘﺒﺎﻳﻦ درﺟﺔ ﻇﻠﺖ ﻓﺈذا ﻤﻜﻦ ﺻﻴﺎﻧﺔ إﻟﻰ ﺑﺤﺎﺟﺔ ﻟﺪﻳﻚ اﻟﻔﺎآﺲ ﺟﻬﺎز ﻳﻜﻮن أن ﺑﻌﻤﻞ ﻗﻢ ﺟﻬﺎز ﻓﻲ اﻟﻄﺒﺎﻋﺔ إﻣﻜﺎﻧﻴﺔ ﻣﻦ ﻟﻠﺘﺄآﺪ ﺗﻘﺮﻳﺮا اﻃﺒﻊ أو ﻧﺴﺨﺔ ﻟﺪﻳﻚ اﻟﻔﺎآﺲ ﺑﺎهﺖ اﺳﺘﻘﺒﺎﻟﻪ ﺗﻢ اﻟﺬي اﻟﻤﺴﺘﻨﺪ اﻟﻠﻮن ﺻﻮرة ﺗﺸﻮﻳﻪ إﻟﻰ اﻟﻬﺎﺗﻒ ﺑﺨﻂ ﺿﻮﺿﺎء وﺟﻮد ﻳﺆدي ﻗﺪ اﻟﻤﺴﺘﻨﺪ ﻣ اﻟﻤﺴﺘﻨﺪ إرﺳﺎل ﻣﺤﺎوﻟﺔ اﻵﺧﺮ اﻟﻄﺮف ﻣﻦ اﻃﻠﺐ ﺮة أﺧﺮى ﻣﺘﺴﺨﺎ اﻟﻄﺒﺎﻋﺔ رأس ﻳﻜﻮن ﻗﺪ ﺻﻔﺤﺔ اﻟﻄﺒﺎﻋﺔ رأس اﻧﻈﺮ ٧٤ ﻟﺪﻳﻚ اﻟﻔﺎآﺲ ﺟﻬﺎز ﻣﻦ ﺗﻘﺮﻳﺮا...

Page 175: ...ﺗﺸﻐﻴﻞ أﺛﻨﺎء ﺎ اﻟﺴﻤﺎﻋﺔ ﺗﺸﻐﻴﻞ أوﻗﻒ ﺻﻮت ﺻﺪى ﺣﺪوث وﻟﺘﺠﻨﺐ اﻟﺨﺎرﺟﻴﺔ اﺿﻐﻂ ﻣﻜﺎﻧﻬﺎ إﻟﻰ اﻟﻴﺪوﻳﺔ اﻟﺴﻤﺎﻋﺔ إﻋﺎدة ﻗﺒﻞ ﻋﻨﺪ ﻣﺰﻋﺞ ﻋﺎل ﺻﻮت ﻳﺼﺪر اﻟﺨﺎرﺟﻴﺔ اﻟﺴﻤﺎﻋﺔ اﺳﺘﺨﺪام اﻟﺤﺮاري اﻟﻮرق وﺗﺤﻤﻴﻞ اﻟﻔﺎآﺲ ﺗﻮﺻﻴﻞ ﻣﻦ ﺗﺄآﺪ ﻳﺘﻌﺬر اﻟﺘﻠﻘﺎﺋﻲ اﻻﺗﺼﺎل أرﻗﺎم ﺗﺨﺰﻳﻦ اﻟﺤﺮاري اﻟﻮرق ﻳﻜﻦ ﻟﻢ إذا ﻣﺤﻤﻼ ﺻﻔﺤﺔ اﻟﺤﺮاري اﻟﻮرق ﺗﺤﻤﻴﻞ اﻧﻈﺮ ١٤ اﻻﺗﺼﺎل أرﻗﺎم ﺗﺨﺰﻳﻦ ﻳﺘﻌﺬر اﻟﻔﺎآﺲ ﻓﻲ اﻟﺘﻠﻘﺎﺋﻲ ﺳﻠﻴﻢ ﺑﺸﻜﻞ اﻟﺘﻴﺎر ﺑﻤﺄﺧﺬ ﻣﻮﺻﻼ اﻟﺘﻴﺎر ﺳﻠﻚ أن ﺗﺄآﺪ ﺗﻴﺎر وﺟﻮد ﻣﻦ ﻟﻠﺘﺄآﺪ...

Page 176: ... ﻋﻠﻰ اﺿﻐﻂ ﺣﺪث إذا اﻻﻧﺤﺸﺎر ﺑﺈزاﻟﺔ ﻗﻢ ﻟﻠﻮرق اﻧﺤﺸﺎر اﻟﻤﻘﻄﻊ ﻓﻲ ﻣﻮﺿﺢ هﻮ آﻤﺎ اﻟﻮرق اﻧﺤﺸﺎر إزاﻟﺔ اﻟﺘﺎﻟﻲ CHECK FILM CHECK COVER CHECK PAPER JAM اﻟﻮرق اﻓﺤﺺ اﻟﺤﺮاري اﻓﺤﺺ اﻟﻐﻄﺎء اﻟﻮرق اﻧﺤﺸﺎر اﻓﺤﺺ ﺑﺎﻟﺘﺘﺎﺑﻊ اﻟﺮﺳﺎﺋﻞ هﺬﻩ ﺗﻈﻬﺮ ﺻﺤﻴﺢ ﻏﻴﺮ اﻟﻮرق ﻣﻘﺎس ﺿﺒﻂ اﻟﻮرق ﻣﻘﺎس ﺿﺒﻂ ﺑﺘﻐﻴﻴﺮ ﻗﻢ ﺻﻔﺤﺔ ﻓﻲ ﻣﻮﺿﺢ هﻮ آﻤﺎ ١٧ CHECK PAPER SIZE اﻟﻮرق ﻣﻘﺎس اﻓﺤﺺ ﻣﺤﺸﻮر اﻷﺻﻠﻲ اﻟﻤﺴﺘﻨﺪ اﻧﺤﺸﺎر إزاﻟﺔ اﻟﺘﺎﻟﻲ اﻟﻤﻘﻄﻊ اﻧﻈﺮ اﻟﻮرق ﻣﻦ أآﺜﺮ ﺑﺘﺤﻤﻴﻞ ﻗﻤﺖ إذا اﻟﻤ...

Page 177: ...ﺑﻴﻨﻤﺎ ﻣﺨﺰن رﻗﻢ أي ﻳﻮﺟﺪ ﻻ NO DATA ﺑﻴﺎﻧﺎت ﺗﻮﺟﺪ ﻻ إﻋﺎدة ﻧﺴﻴﺖ إذا اﻟﺮﺳﺎﻟﺔ هﺬﻩ ﺗﻈﻬﺮ اﺳﺘﺨﺪاﻣﻬﺎ ﺑﻌﺪ اﻟﺴﻤﺎﻋﺔ وﺿﻊ ﻓﺎآﺲ وإرﺳﺎل اﻻﺗﺼﺎل ﻓﻲ ﻣﻔﺘﺎح ﻋﻠﻰ اﺿﻐﻂ أو اﻟﺴﻤﺎﻋﺔ ﺿﻊ STOP إﻳﻘﺎف اﻟﺮﺳﺎﻟﺔ هﺬﻩ ﻟﻤﺴﺢ OFF HOOK اﻟﺴﻤﺎﻋﺔ ﻣﻜﺎﻧﻬﺎ ﻓﻲ ﻟﻴﺴﺖ ﻋﻠﻰ اﻟﻀﻐﻂ ﺗﻢ اﻟ ﻤﻔﺘﺎح اﻟﻔﺎآﺲ وﺟﻬﺎز اﻧﺘ ﻓﻲ ﻗﻴﺎﻣﻚ ﻈﺎر ﺑﺎﻻﺗﺼﺎل ON HOOK DIAL اﻟﺴﻤﺎﻋﺔ ﺟﺎهﺰ واﻟﻔﺎآﺲ ﻣﻜﺎﻧﻬﺎ ﻓﻲ ﻟﻼﺗﺼﺎل ﻣﺮﺗﻔﻌﺔ اﻟﻄﺒﺎﻋﺔ رأس ﺣﺮارة درﺟﺔ ﺑﻌﺪ اﻟﺘﺸﻐﻴﻞ ﻣﻮاﺻﻠﺔ ﻳﻤﻜﻦ ﻳﺒﺮد أن ﺿﺒﻂ ﺗﻐﻴﻴﺮ ﺣ...

Page 178: ...ﺨﻬﺎ أو اﺳﺘﻘﺒﺎﻟﻬﺎ أو إرﺳﺎﻟﻬﺎ ﺗﻢ اﻟﺘﻲ اﻟﺼﻔﺤﺎت ﻋﺪد TOTAL PAGE S 01 اﻟﺼﻔﺤﺔ إﺟﻤﺎﻟﻲ اﻟﺼﻔﺤﺎت ٠١ اﻟﻤﺴﻤﻮﻋﺔ اﻹﺷﺎرات ﻧﻬﺎﻳﺔ إﻟﻰ ﺗﺸﻴﺮ ﻋﻤﻠﻴﺔ أو اﻹرﺳﺎل اﻟﻨﺴﺦ أو اﻻﺳﺘﻘﺒﺎل ٣ ﺛﻮان ﻧﻐﻤﺔ ﻣﺴﺘﻤﺮة إﻟﻰ ﺗﺸﻴﺮ ﻋﺪم إ آ ﺘﻤﺎ ﻋﻤﻠﻴﺔ ل أو اﻹرﺳﺎل اﻟﻨﺴﺦ أو اﻻﺳﺘﻘﺒﺎل ٥ ﺛﻮان ﻟﻺﻳﻘﺎف واﺣﺪة ﺛﺎﻧﻴﺔ ﻟﻠﺘﺸﻐﻴﻞ واﺣﺪة وﺛﺎﻧﻴﺔ ﻣﺘﻘﻄﻌﺔ ﻧﻐﻤﺔ ٣ ﺻﻔﺎرات اﻟﺴﻤﺎﻋﺔ أن إﻟﻰ ﺗﺸﻴﺮ ﻣﻜﺎﻧﻬﺎ ﻓﻲ ﻟﻴﺴﺖ ٣٥ ﺛ ﺎﻧﻴﺔ ٠ ٧ ﻟﻠﺘﺸﻐﻴﻞ ﺛﺎﻧﻴﺔ ٠ ٣ ﻟﻺﻳﻘﺎف ﺛﺎﻧﻴﺔ ﺳﺮﻳﻌﺔ ﻣﺘﻘﻄﻌﺔ ﻧﻐﻤﺔ ...

Page 179: ...AMMED ﻣﺤﺸﻮر ﻣﺴﺘﻨﺪ ﻳﻮﺟﺪ ﻋﻠﻰ أوﻻ اﺿﻐﻂ اﻟﻌﺮض ﺷﺎﺷﺔ ﻋﻠﻰ ﻣ هﻮ آﻤﺎ ﺑﺈﺧﺮاﺟﻪ ﻓﻘﻢ اﻟﺠﻬﺎز ﻣﻦ اﻟﻤﺴﺘﻨﺪ ﻳﺨﺮج ﻟﻢ وإذا أدﻧﺎﻩ ﻮﺿﺢ هﺎم أدﻧﺎﻩ ﻣﻮﺿﺢ هﻮ آﻤﺎ ﺳﺤﺒﻪ دون اﻟﻤﺤﺸﻮر اﻟﻤﺴﺘﻨﺪ إﺧﺮاج ﺗﺤﺎول ﻻ ﺁﻟﻴﺔ ﺗﻠﻒ إﻟﻰ ذﻟﻚ ﻳﺆدي ﻓﻘﺪ اﻟﺘﻐﺬﻳﺔ وﺣﺪة اﺿﻐﻂ ﻧﺼﻒ ﻟﺘﺼﺒﺢ ﺑﺒﻂء اﻟﺘﺸﻐﻴﻞ ﻟﻮﺣﺔ واﻓﺘﺢ ﻣﻔﺘﻮﺣﺔ ١ ﻷﻋﻠﻰ اﻟﺒﻴﻀﺎء اﻟﺒﻜﺮة ﺟﺎﻧﺒﻲ ﻋﻠﻰ اﻟﺨﻀﺮاوﻳﻦ اﻟﺬراﻋﻴﻦ اﻗﻠﺐ ٢ ﺑﺮﻓﻖ اﻟﻤﺴﺘﻨﺪ أﺧﺮج ﺗﻮﺧ اﻟﻤﺴﺘﻨﺪ ﺗﻤﺰق ﻻ ﺣﺘﻰ اﻟﺤﺬر ﻰ ٣ ...

Page 180: ...اﻟﺘﺸﻐﻴﻞ ﻟﻮﺣﺔ أﻏﻠﻖ ﺛﻢ اﻟﺤﺮاري اﻟﻠﻮﺣﺔ ﺟﺎﻧﺒﻲ ﻋﻠﻰ اﺿﻐﻂ ﺗﺴﺘﻘﺮ ﺣﺘﻰ ﻣﻜﺎﻧﻬﺎ ﻓﻲ ٤ اﻟﻤﺤﺸﻮر اﻟﻄﺒﺎﻋﺔ ورق إزاﻟﺔ اﻟﺘﺸﻐﻴﻞ ﻟﻮﺣﺔ اﻓﺘﺢ اﺿﻐﻂ ١ ﻣﻦ وﺗﺄآﺪ ﺑﺮﻓﻖ اﻟﺠﻬﺎز ﺧﺎرج اﻟﻤﺤﺸﻮر اﻟﻮرق اﺳﺤﺐ اﻟﻄﺒﺎﻋﺔ وﺣﺪة ﻓﻲ اﻟﻮرق ﻣﻦ ﻣﻤﺰﻗﺔ أﺟﺰاء وﺟﻮد ﻋﺪم اﻟﺒﻜﺮات ﻋﻠﻰ أو ٢ اﻟﺘﺸﻐﻴﻞ ﻟﻮﺣﺔ أﻏﻠﻖ ﺛﻢ اﻟﺤﺮاري اﻟﻮرق ﺗﺸﺪ ﺣﺘﻰ اﻷﻣﺎﻣﻲ اﻟﺘﺮس ﻟﻒ اﻟﻠﻮﺣﺔ ﺟﺎﻧﺒﻲ ﻋﻠﻰ اﺿﻐﻂ ﺣﺘﻰ ﺗ ﻣﻜﺎﻧﻬﺎ ﻓﻲ ﺴﺘﻘﺮ ٣ ...

Page 181: ...ﺘﻠﻘﺎﺋﻲ اﻻﺗﺼﺎل ١ اﺿﻐﻂ و ﻣﺮة ﻣﺮﺗﻴﻦ ٢ اﻟﻔﺎآﺲ رﻗﻢ أدﺧﻞ ﺑﺎﻟﻜﺎﻣﻞ اﻟﻬﺎﺗﻒ ٣ اﺿﻐﻂ ٤ اﻷرﻗﺎم ﻣﻔﺎﺗﻴﺢ ﺑﺎﺳﺘﺨﺪام اﺳﻤﺎ أدﺧﻞ ﻹدﺧﺎل اﺿﻐﻂ اﻟﻤﻔﺘﺎح ﻧﻔﺲ ﻳﺘﻄﻠﺒﺎن ﻣﺘﺘﺎﻟﻴﻴﻦ ﺣﺮﻓﻴﻦ ﻋﻠﻰ اﻷول اﻟﺤﺮف إدﺧﺎل ﺑﻌﺪ ٥ اﺿﻐﻂ ﺛﻢ إرﺳﺎﻟﻪ اﻟﻤﺮاد اﻟﻤﺴﺘﻨﺪ ﺿﻊ أﻗﺼﻰ ﺑﺤﺪ ١٠ ﺻﻔﺤﺎت ﻓﻲ ﻷﺳﻔﻞ اﻟﻄﺒﺎﻋﺔ ووﺟﻪ ﺑﺎﻟﻤﺴﺘﻨﺪات اﻟﺘﻐﺬﻳﺔ وﺣﺪة اﻻﺗﺼﺎل اﻟﻌﺎدي ١ اﺿﻐﻂ أو اﻟﺴﻤﺎﻋﺔ ارﻓﻊ ٢ اﻟﻔﺎآﺲ رﻗﻢ اﻃﻠﺐ ٣ اﻻﺳﺘﻘﺒﺎل ﻧﻐﻤﺔ ﺗﺴﻤﻊ ﺣﺘﻰ اﻧﺘﻈﺮ رد إذا ﻋﻠﻰ ﻳﻀﻐﻂ أن ﻣﻨﻪ ﻓﺎﻃﻠﺐ أﺣﺪ ﻋﻠﻴﻚ...

Page 182: ...ﻮرق ﺗﺤﻤﻴﻞ ١٦ اﻟﻤﺴﺘﻨﺪ ﺗﺤﻤﻴﻞ ٤٥ اﻟﻌﻤﻠﻴﺎت ﺗﻘﺮﻳﺮ ٧٢ ح إدﺧﺎل اﻟﺤﺮوف ٢٠ ٥٠ خ اﻟﻬﺎﺗﻒ ﺧﻂ ﻓﻲ ﺧﻄﺄ ٧٧ د اﻟﺪﻗﺔ ٤٦ در دﻋﺎﻣﺔ اﻟﻮرق ج ١٢ ذ ﻓﻲ اﻻﺳﺘﻘﺒﺎل اﻟﺬاآﺮة ٦٦ ر اﻟﺮﺳﺎﺋﻞ ﻣﺴﺢ ٣٠ إﻟﻰ اﻻﺳﺘﻤﺎع ٢٩ ﺑﻌﺪ ﻋﻦ اﻻﺳﺘﻤﺎع ٣٩ اﻟﻤﺴﻤﻮح اﻟﻀﺒﻂ وﻗﺖ ٣١ اﻟﺼﺎدرة اﻟﺮﺳﺎﺋﻞ ٢٦ اﻟﻌﺮض ﺷﺎﺷﺔ رﺳﺎﺋﻞ ٨١ ﺗﻨﻈﻴﻒ اﻟﻄﺒﺎﻋﺔ رأس ٧٤ ٧٥ ﺑﻌﺪ ﻋﻦ اﻟﺘﺸﻐﻴﻞ رﻣﺰ رﻗﻢ ٣٨ إدﺧﺎل واﺳﻤﻪ اﻟﻤﺮﺳﻞ رﻗﻢ ١٩ ٢٠ ﻋﻦ اﻟﺘﺸﻐﻴﻞ رﻗﻢ ﻟﻮﺿﻊ ﺑﻌﺪ Tel Fax ٤٦ ز ﺗﻨﻈﻴﻒ اﻟﻀﻮﺋﻲ اﻟﻤﺴﺢ زﺟﺎج ٧٥ ...

Page 183: ...ﺢ ﻟﻤﻘﺎس اﻷﻗﺼﻰ اﻟﺤﺪ اﻟﻤﺴﺘﻨﺪ ٤٤ ن اﻟﻨﺴﺦ ٦٧ اﻵﻟﻲ اﻟﺮد ﺟﻬﺎز ﺗﺠﺎوز ﻧﻐﻤﺎت هـ ﺗﻨﻈﻴﻒ اﻟﺨﺎرﺟﻲ اﻟﻬﻴﻜﻞ ٧٦ ﻓﺮﻋﻲ هﺎﺗﻒ ﺗﻮﺻﻴﻞ ١٣ اﺳﺘﺨﺪام ٦٢ و اﺳﺘﻘﺒﺎل وﺿﻊ A M ٢٣ ٢٧ ٥٩ اﻻﺗﺼﺎل وﺿﻊ ١١ اﻟﺘﻐﺬﻳ وﺣﺪة ﺑﺎﻟﻤﺴﺘﻨﺪات ﺔ ٤٥ اﻟﺨﻄﺄ ﺗﺼﺤﻴﺢ وﺿﻊ ECM ٥٥ اﺳﺘﻘﺒﺎل وﺿﻊ FAX ﻓﺎآﺲ ٢٣ ٦٠ وﺿﻊ OGM اﻟﺼﺎدرة اﻟﺮﺳﺎﺋﻞ ﻓﻘﻂ ٣٢ اﻻﺳﺘﻘﺒﺎل وﺿﻊ اﺳﺘﻘﺒﺎل وﺿﻊ A M ﺁﻟﻲ رد ٢٣ ٢٧ ٥٩ وﺿﻊ FAX ﻓﺎآﺲ ٢٣ ٦٠ وﺿﻊ TEL ه ﺎ ﺗﻒ ٢٣ ٦١ وﺿﻊ TEL FAX ه ﺎ ﺗﻒ ﻓﺎآﺲ ٢٣ ٥٨ اﻻﺳﺘﻘﺒﺎل و...

Page 184: ...ﺗﻜﻮن ﻋﻨﺪﻣﺎ ﻣﻌﻚ وﺧﺬهﺎ ﺑﻘﺼﻬﺎ ﻗﻢ ﻋﻦ اﻟﺘﺸﻐﻴﻞ دﻟﻴﻞ ﺑﻌﺪ ١ ﺑﺎﻻﺗﺼﺎل ﻳﻌﻤﻞ هﺎﺗﻒ ﻣﻦ ﺑﻚ اﻟﺨﺎص اﻟﻔﺎآﺲ ﺑﺠﻬﺎز اﺗﺼﻞ ﻋﻠﻰ واﺿﻐﻂ ﺑﺎﻟﻠﻤﺲ اﻟﺼﺎدرة اﻟﺮﺳﺎﻟﺔ ﺗﺒﺪأ ﻋﻨﺪﻣﺎ ٢ ﺑﻚ اﻟﺨﺎص ﺑﻌﺪ ﻋﻦ اﻟﺘﺸﻐﻴﻞ رﻣﺰ أدﺧﻞ ٣ اﺿﻐﻂ ٤ ﻟﺤﻔﻆ اﻻﺳﺘﻤﺎع ﺗﻌﻠﻴﻖ ﻳﻤﻜﻨﻚ اﻟﺮﺳﺎﺋﻞ إﻟﻰ اﻻﺳﺘﻤﺎع ﺑﻌﺪ اﻟﻌﻜﺴﻲ اﻟﺠﺎﻧﺐ ﻋﻠﻰ اﻷواﻣﺮ أﺣﺪ إدﺧﺎل أو اﻟﺮﺳﺎﺋﻞ ...

Page 185: ...ﻣﺴﺢ 3 اﻟﺮﺳﺎﺋﻞ آﻞ ﻣﺴﺢ 3 3 ﺗﺬآﻴﺮ ﺗﺴﺠﻴﻞ ﺑﺪء إﻧﻬﺎء 0 ﺟﺪﻳﺪ ﺻﺎدرة رﺳﺎﻟﺔ ﺗﺴﺠﻴﻞ ة ﺑﺪء 4 اﻟﻔﺎآﺲ اﺳﺘﻘﺒﺎل أوﺿﺎع وﺿﻊ A M ﺗﻠﻘﺎﺋﻲ رد 8 1 وﺿﻊ FAX ﻓﺎآﺲ 8 2 وﺿﻊ TEL هﺎﺗﻒ 8 3 وﺿﻊ TEL FAX هﺎﺗﻒ ﻓﺎآﺲ 8 4 اﻟﺘﺤﻮﻳﻞ وﻇﻴﻔﺔ ﺗﺸﻐﻴﻞ 9 1 ﺗﺸﻐﻴﻞ إﻳﻘﺎف 9 2 ﺟﺪﻳﺪ ﺗﺤﻮﻳﻞ رﻗﻢ 9 0 رﻗ ــ ﻢ اﻟﻬ ـــ ﺎﺗ ـ ﻒ رﺳ ﺗﺴﺠﻴﻞ ﻟﻠﺘﺤﻮﻳﻞ ﺻﺎدرة ﺎﻟﺔ 9 3 ﺑﺴﺮﻋﺔ اﻻﺗﺼﺎل ﻟﻘﻄﻊ ﻓﻘﻂ اﻟﺼﺎدرة اﻟﺮﺳﺎﻟﺔ وﺿﻊ ﺗﺸﻐﻴﻞ 1 1 ﺗﺸﻐﻴﻞ إﻳﻘﺎف 1 2 ...

Page 186: ... اﻟﺘ ﺮآﻴﺐ ٢ اﻵﻟﻲ اﻟﺮد ﺟﻬﺎز اﺳﺘﺨﺪام ٣ اﻟﻔﺎآﺴﺎت إرﺳﺎل ٤ اﻟﻔﺎآﺴﺎت اﺳﺘﻘﺒﺎل ٥ اﻟﻨﺴﺦ ٦ ﺧﺎﺻﺔ وﻇﺎﺋﻒ ٧ اﻟﻘﻮاﺋﻢ ﻃﺒﺎﻋﺔ ٨ اﻟﺼﻴﺎﻧﺔ ٩ ا اﺳﺘﻜﺸﺎف ﻟﻤﺸﺎآﻞ واﺻﻼﺣﻬﺎ اﻟﻔﺎآــﺲ ﺟﻬﺎز اﻟﺘﺸﻐﻴﻞ دﻟﻴﻞ FO A650 ﻣ ــ ﻮدﻳ ــﻞ ﺗــﺎﻳــــﻼ ﻓﻲ ﻃـﺒــﻊ ﻧـــﺪ TINSA4268XHTZ ...

Reviews: