background image

2

Safety Precautions (continued)

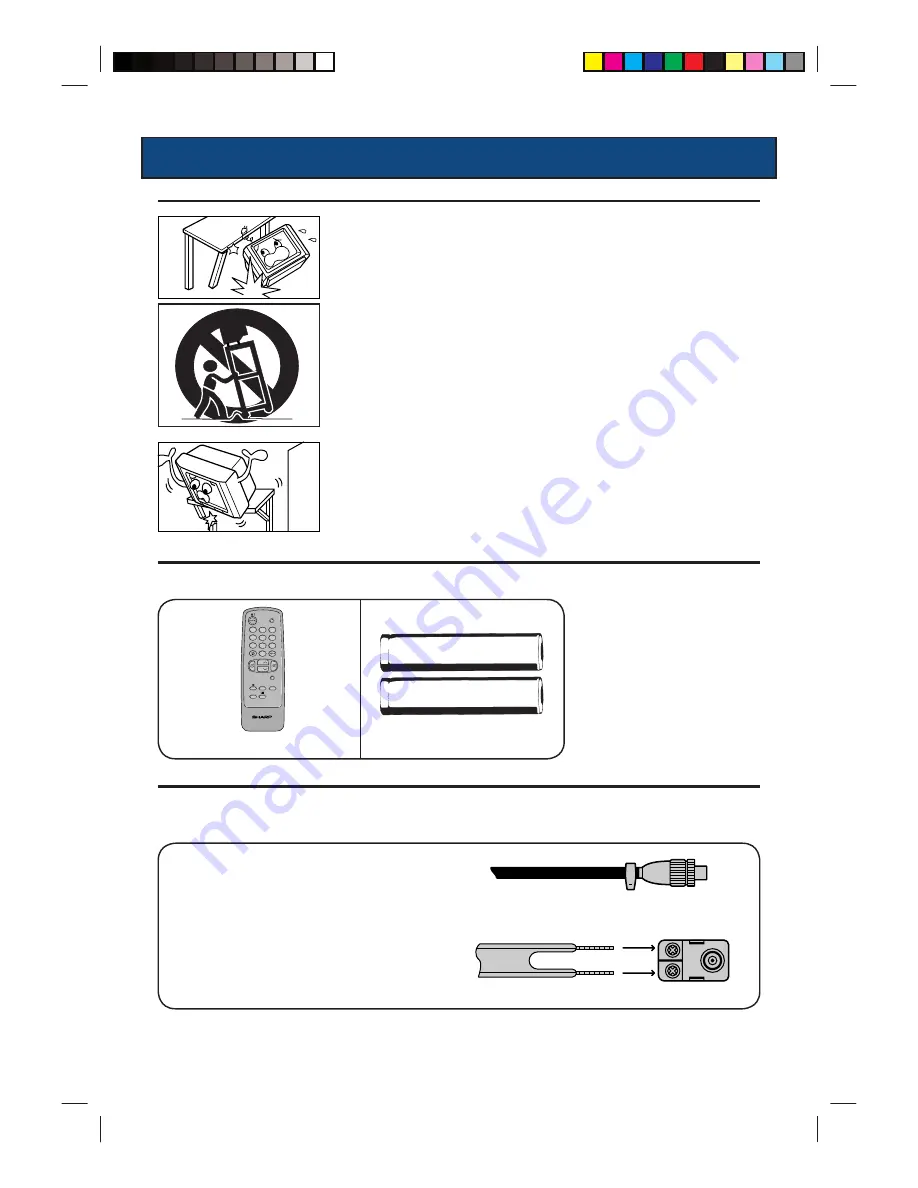
Do not place this television equipment on an unstable cart, stand or table. The televi-

sion  equipment  may  fall,  causing  serious  injury  to  a  child  or  an  adult  and  serious 

damage to the equipment. Use only with a cart or stand recommended by the manu-

facturer, or sold with the television equipment.

Television equipment and cart combination should be moved with care. Quick stops, 

excessive force, and uneven surfaces may cause the equipment and cart combina-

tion to overturn.

Wall or shelf mounting should follow the manufacturers instructions. Use a mounting 

kit approved by the manufacturer.

Accessories

Antenna Connection

Remote Control

Size - AA batteries

• To enjoy a clearer picture, we recommend that you use an outdoor antenna. The following is a brief explanation 

of the types of antenna connections.

(1) 75-OHM COAXIAL CABLE :

Connect the cable from the antenna to a standard 

DIN45325 plug (IEC 169-2) and plug directly into the 

antenna socket on the rear of the TV set.

(2) 300-OHM RIBBON CABLE :

Connect the cable from the antenna to a balun 

(Balanced Transformer) and plug directly into the 

antenna socket on the rear of the TV set.

Note :

 Balun not supplied.

Note :

 Remove the power cord from the electrical outlet before connecting the antenna to the rear of the TV set.

• After unpacking, check to make sure that the following accessories are included.

75-ohm coaxial cable (Round cable)

300-ohm ribbon cable

Balun

TV/VIDEO

SAVE

AV MODE NORMAL

TV

1

2

3

4

5

6

7

8
0

9

CH

CH

POWER

MENU

Summary of Contents for CX68K5

Page 1: ...COLOUR TELEVISION MODEL CX68K5 OPERATION MANUAL Please read this operation manual carefully before using the colour television ON TIMER POWER SAVE AV STEREO ...

Page 2: ... Product News New Releases Service Educational resources Sharp World Wide web links plus much more Safety Precautions To prevent re or electri cal shock do not use the TV set in an excessively damp place Do not cover the venti lation holes on the back of the TV set this can cause re or other seri ous problems Leave an adequate open space behind the TV set for good ventilation Do not place the TV s...

Page 3: ...n Remote Control Size AA batteries To enjoy a clearer picture we recommend that you use an outdoor antenna The following is a brief explanation of the types of antenna connections 1 75 OHM COAXIAL CABLE Connect the cable from the antenna to a standard DIN45325 plug IEC 169 2 and plug directly into the antenna socket on the rear of the TV set 2 300 OHM RIBBON CABLE Connect the cable from the antenn...

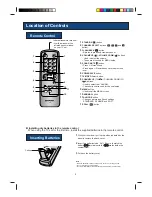
Page 4: ...not mix old and new batteries In correct installation of the batteries may damage the remote control 1 STAND ON button 2 CHANNEL SELECT buttons 1 9 0 and button 3 FLASHBACK button Returns to previously viewed channel 4 VOLUME UP VOLUME DOWN buttons Used to adjust the volume These are also used for MENU setup 5 SOUND MUTE button Press ð Mutes sound Press again ð Restores sound to the previous level...

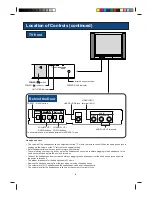
Page 5: ...ol When the head phone jack is unplugged the volume of the TV returns to the original setting Select an appropriate volume so as not to injure your hearing To avoid injuring your hearing do not put on the headphones on your ears before plugging in the head phone to the head phone jack and before the power is turned on Take out the headphones from your ears before unplugging the headphones from the...

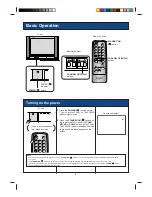
Page 6: ...rst time you press the POWER switch on the TV set a picture appears and the POWER indicator lights up in green The STANDBY ON button on the remote control lets you change between ON and Standby mode when the main power is ON If you will not be at home for a considerable length of time as a safety precaution turn off the main power by pressing the POWER switch on the TV set and unplug the cord from...

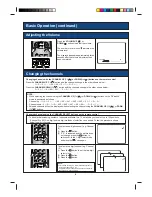
Page 7: ...sing the CHANNEL UP CH or DOWN CH buttons Changing channels using the CHANNEL SELECT buttons on the remote control To handle the increasing number of channels available this TV set allows you to select up to 100 positions Channel 0 to 99 One digit and two digit methods of selection can be used Follow the procedure shown below to select channels 5 PAL 1 15 PAL To select a one digit channel e g Chan...

Page 8: ...AN MALAY or ARABIC n Setting the On screen Display lan guage 1 Press the PRESET MENU button on the TV set for more than two seconds The LANGUAGE select mode screen appears 2 Press the CHANNEL UP CH or DOWN CH buttons to select the lan guage you wish to display The selected language will be highlighted in yellow 3 Press the PRESET MENU button until the normal screen appears 2 1 3 PRESET MENU CH ...

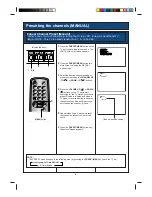
Page 9: ...N CH buttons 4 Press the VOLUME UP or DOWN buttons on the TV set to start searching for the TV station you want to preset Search is initiated and when a TV signal is received during the search the search stops Repeat this process until the desired channel is found 5 Repeat steps 3 and 4 above to preset the channel positions for other broad casts 6 Press the PRESET MENU button until the normal scre...

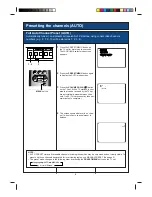
Page 10: ...following order by pressing the PRESET MENU button on the TV set 1 Press the PRESET MENU button on the TV set for more than two seconds The LANGUAGE select mode screen appears 2 Press the PRESET MENU button again to display the AUTO mode screen 3 Press the VOLUME DOWN button on the TV set All the TV stations in your area that can be received by the TV set are automatically preset between chan nels...

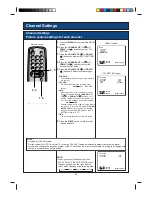
Page 11: ...ss the CHAN NEL SELECT buttons to select the desired channel then set the SKIP mode on the CH SETTING menu to OFF FINE The frequency changes to allow ne tuning 6 Press the MENU button until the normal screen appears NOTE Switching COLOUR system Set the system to AUTO for normal TV reception The AUTO mode automatically detects the receiving signal system and changes the reception system of the TV s...

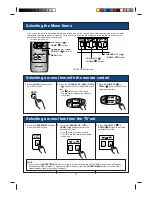
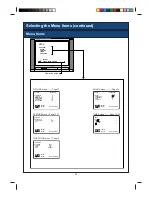
Page 12: ...item The mark moves up or down The mark indicates the selected menu item 1 Press VOLUME UP or DOWN buttons to enter the selected menu item Selecting a menu item from the TV set 1 Press the PRESET MENU button to call the MENU screen 2 Press the CHANNEL UP CH or DOWN CH buttons to select the desired menu item The mark moves up or down The mark indicates the selected menu item 1 Press VOLUME UP or DO...

Page 13: ... 10 TREBLE 10 BASS 20 BALANCE 0 I CH SETTING CH SELECT ADJUST MENU RETURN POSITION CH27 COLOUR AUTO SKIP OFF FINE 168 25MHz FEATURE CH SELECT ADJUST MENU RETURN BLUE BACK ON AUTO SELECT OFF VM ON TIMER CH SELECT ADJUST MENU RETURN OFF ON POSITION VOLUME PICTURE menu Page 13 FEATURE menu Page 15 17 SOUND menu Page 14 TIMER menu Page 18 20 CH SETTING menu Page 10 ON TIMER POWER SAVE MENU PICTURE SOU...

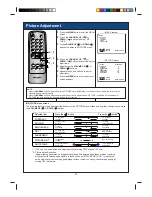
Page 14: ...et to the standard factory setting position n PICTURE menu screen The following table lists the adjustment items shown in the PICTURE menu screen and how they change as you press the VOLUME UP or DOWN buttons Selected Item CONTRAST COLOUR BRIGHTNESS TINT 1 SHARPNESS PICTURE NR 2 WHITE TEMP Press the button Press the button To decrease contrast For less colour intensity For less brightness To move ...

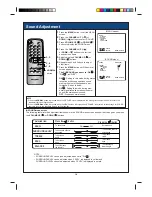
Page 15: ...und NOTE When the NORMAL button is pressed while the PICTURE menu is displayed the setting for the selected item is reset to the standard factory setting position When the NORMAL button is pressed while the MENU screen is displayed and SOUND is selected all the settings for SOUND items are reset to the standard factory setting position n SOUND menu screen The following table lists the adjustment i...

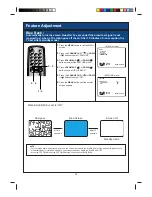
Page 16: ...ak signals and too much noise might activate the BLUE BACK function despite the presence of a broadcast signal To continue watching TV under these conditions switch the BLUE BACK OFF When the OFF TIMER is set the OFF TIMER setting has priority over BLUE BACK 1 Press the MENU button to call the MENU screen 2 Press the CHANNEL UP CH or DOWN CH buttons to select FEATURE 3 Press VOLUME UP or DOWN butt...

Page 17: ...ally is selected POWER OFF VIDEO EQUIPMENT NOTE If the video equipment is connected to the rear terminals on the TV set the video mode will not be automatically selected If the TV set receives a signal with noise or does not receive a signal even when the video equipment is turned on the video mode may not be automatically selected When the power on the video equipment is turned off the input mode...

Page 18: ...anual tuning Press and hold the PRESET button for more than 2 seconds Press the PRESET button to go to the manual mode 3 Select a channel that you want the VCR to playback on for best results use 0 by pressing the CHANNEL UP or DOWN BUTTON 4 Press the VOLUME UP button if the frequency display is less than 590 mhz or the VOLUME DOWN button if the frequency display is greater than 591 mhz When tunin...

Page 19: ... for the TV to turn off Maximum time that can be preset is 12 hours and 50 minutes As soon as the time is entered the timer starts to count down 6 Press the MENU button until the normal screen appears 5 minutes before the OFF TIMER acti vates the remaining time is displayed on the screen When the preset length of time in the example 2 hours and 30 minutes has passed the TV set enters the Standby m...

Page 20: ...f the volume was not preset during the ON TIMER setting displayed then it is set to the volume setting prior to the Standby mode when the 1 Press the MENU button to call the MENU screen 2 Press the CHANNEL UP CH or DOWN CH buttons to select TIMER 3 Press VOLUME UP or DOWN buttons to select the TIMER menu 4 Press CHANNEL UP CH or DOWN CH buttons to select ON 5 Press the VOLUME UP or DOWN buttons to...

Page 21: ...NEL UP CH or DOWN CH buttons to select TIMER 3 Press VOLUME UP or DOWN buttons to select the TIMER menu 4 Press CHANNEL UP CH or DOWN CH buttons to select 5 Press the VOLUME UP or DOWN buttons to set the time Maximum time that can be preset is 12 hours and 50 minutes NOTE The example on the right shows that the REMINDER will be activated after 1 hour 50 minutes 6 Press the MENU button until the no...

Page 22: ...s the FLASHBACK button The channel previously viewed returns to the screen Example If after switching from channel 5 to channel 7 the FLASHBACK button is pressed the channel will change to channel 5 Press the FLASHBACK button again to return to channel 7 1 Press the SOUND MUTE button The sound mute symbol appears on the screen and the sound is silenced 2 Press the SOUND MUTE button again The volum...

Page 23: ...EO button the input switches between AV1 or SV1 AV2 AV3 and the TV programme NOTE The input from the S Video in terminal has priority over the normal signal for AV1 NOTE When no timer is set the channel number and colour system appear on the screen Press the CALL button again to clear this current setting from the screen 1 Press the CALL button The time remaining on the OFF TIMER ON TIMER and REMI...

Page 24: ... only one of the speakers FRONT Example of connection REAR S VIDEO AV 1 IN AV 1 IN VIDEO AUDIO L R MONO AV 2 IN OUT S VIDEO AV 1 IN AV 1 IN VIDEO AUDIO L R MONO AV 2 IN OUT S VIDEO AV 1 IN AV 1 IN VIDEO AUDIO L R MONO AV 2 IN OUT ON TIMERPOWER SAVE Audio out Audio in Video in Video out OUT AV 1 IN Antenna In Example of connection To RF out To antenna in To Audio Video out terminals Laser Disc Play...

Page 25: ...olume Problems Remote control does not work Bars on screen Picture distorted Picture rolls vertically No colour Poor reception on some channels Picture weak Picture lines or streaks Picture ghosting Picture blurred Sound OK picture poor Picture OK sound poor No picture or sound Patches of colour on screen l l l l l l l l l l l l l l l l l l l l l l l l l l l l l l l l l l l l l l l l l l l l l l l...

Page 26: ...er Consumption Power Consumption during Standby Mode Dimensions Weight 46 25 MHz 863 25 MHz 100 channel Electronic Tuner with Full Auto Tuning System 68 cm dark tinted CRT Audio Video input x 3 front x 1 Rear x 2 S Video input x 1 Rear Audio Video output x 1 Rear Headphone jack Front x 1 7 5 W 10 RMS x 2 total 15 W 10 RMS AC 220 240V 50 Hz 150 W Less than 1 W 759 W x 585 H x 497 D mm 38 2 kg Appro...

Page 27: ...horised by Sharp Please retain your sales documentation as this should be produced to validate a warranty claim This warranty is in addition to and no way limits varies or excludes any express and implied rights and remedies under any relevant legislation in the country of sale 48 months further parts only warranty for compressors on refrigerators and air conditioners IMPORTANT DO NOT RETURN THIS ...

Page 28: ...SHARP CORPORATION OSAKA JAPAN SHARP CORPORATION OF AUSTRALIA A C N 003 039 405 1 HUNTINGWOOD DRIVE HUNTINGWOOD N S W 2148 Printed in Australia TINS 7028CEZZ ...

Reviews: