background image


03/12/17

XL-UH240 20-28.fm


23


XL-UH240


CD or MP3/WMA disc Playback


Procedure to playback MP3/WMA disc


To playback CD-R/RW.


Note:


If "NO SUPPORT" is displayed, it means "Copyright protected
WMA file" or "Not supported playback file" is selected.


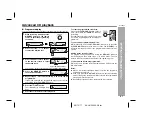
1


Press the CD button, and load a MP3/WMA disc.


After disc is loaded, disc info will be displayed.


In case folder is selected, proceed to step 2.


In case file is selected, proceed to step 4.


2


Press the FOLDER button, and press the TUNING   (  or  )
button to select desired playback folder. (Folder mode on)


To start playback with folder mode on, go to step 5.


To change the playback folder, press the TUNING (  or  ) to
select another folder.


3


Select desired file to be played back by pressing the 


or  


button. Proceed to step 5.

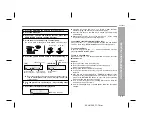
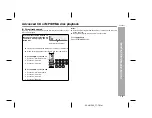
Total number of files

TOTAL indicator

MP3 indicator

Disc Name

WMA indicator

Disc 1 Blinking

Total files in Folder 3

FOLDER indicator

FOLDER number


4


Select desired file to be played back by pressing the 


or  


button. (Folder mode off)


5


Press the 


 / 


(CD


 /  ) button.

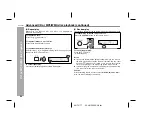
Playback will start and file name will be displayed.


Title, Artist & Album name is displayed if it is recorded on the disc.


Display content can be changed by pressing the DISPLAY button.

In case of playback with the folder mode on, press the TUNING (
or )  button, and the folder can be selected eventhough it is
playback/pause mode.
It will continue playback/pause mode in the 1st track of the selected
folder.
(

 1) MP3 ID3-Tag only support version 1.x.

(

 2) Only appears when clock is already set.

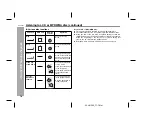
File Name Display

   Title Display  

Function Display

   Artist Display  


TITLE-1 Indicator 


TITLE-2 Indicator 

Clock Display

   Album Display  


TITLE-3 Indicator 

(     1) 

(     1) 

(     2) 

Summary of Contents for CP-UH240

Page 1: ... SYSTEM XL UH240 Micro Component System consisting of XL UH240 main unit and CP UH240 speaker system Accessories Please confirm that the following accessories are included MODEL OPERATION MANUAL XL UH240 Note Only the above accessories are included Remote control 1 RRMCGA081AWSA AM loop antenna 1 QANTL0010AWZZ FM antenna 1 92LFANT1535A Note This product is not compatible with MTP and AAC file syst...

Page 2: ... a Class B digital device pursuant to Part 15 of the FCC Rules These limits are designed to provide reasonable protection against harmful in terference in a residential installation This equipment generates uses and can radiate radio frequency energy and if not installed and used in accordance with the instructions may cause harmful interference to ra dio communications However there is no guarant...

Page 3: ... by placing the product on a bed sofa rug or other similar surface This product should not be placed in a built in installation such as a bookcase or rack unless proper ventilation is provided or the manufacturer s instructions have been adhered to 11 Power Sources This product should be operated only from the type of power source indicated on the marking label If you are not sure of the type of p...

Page 4: ...removing covers may expose you to dangerous voltage or other hazards Refer all servicing to qualified service personnel 21 Damage Requiring Service Unplug this product from the wall outlet and refer servicing to qualified service personnel under the following conditions a When the power supply cord or plug is damaged b If liquid has been spilled or objects have fallen into the product c If the pro...

Page 5: ... Playback Listening to USB mass storage device MP3 Player 24 25 To remove USB memory device 25 Advanced USB playback 26 Radio Listening to the radio 27 28 Advanced Features Timer and sleep operation Remote Control only 29 32 Enhancing your system 33 34 References Troubleshooting chart 34 36 Maintenance 36 Specifications 37 CONSUMER LIMITED WARRANTY Back cover ENERGY STAR Program Information 0312 P...

Page 6: ...ny dam age resulting from use of this unit with a voltage other than that which is specified Volume control The sound level at a given volume setting depends on speaker effi ciency location and various other factors It is advisable to avoid ex posure to high volume levels which occurs while turning the unit on with the volume control setting up high or while continually listening at high volumes U...

Page 7: ...er Indicator 30 3 Remote Sensor 13 4 Disc or USB Stop Button 18 5 Disc or USB Play or Repeat Button 16 20 6 Power ON STANDBY Button 14 7 CD Button 16 8 Tuner Band Button 27 9 Video Auxiliary USB Button 33 10 USB Terminal 24 11 Headphone Jack 33 12 Volume Control 14 13 Disc Number Select Buttons 16 14 Disc Tray Open Close Button 16 ...

Page 8: ...y Indicator 20 26 15 Disc or USB Pause Indicator 18 16 Disc or USB Play Indicator 17 26 Rear panel Reference page 1 Speaker Terminals 11 2 AC Power Cord 12 3 FM 75 Ohms Antenna Jack 11 4 AM Antenna Ground Terminal 11 5 AM Loop Antenna Terminal 11 6 Video Auxiliary Audio Signal Input Jacks 33 7 Cooling Fan 12 8 Speaker Light up Jacks 11 9 Subwoofer Pre output Jack 34 Speaker system 1 2 3 4 5 6 7 9 ...

Page 9: ... Disc Clear Dimmer Button 14 21 12 Disc Random Button 20 26 13 Disc Stop Button 18 14 USB Stop Button 24 15 Memory Button 15 21 28 32 16 Disc Pause Button 18 17 Disc Play or Repeat Button 16 20 18 USB Play or Repeat Button 24 19 Tuning Up Button 27 20 CD Track Up or Fast Forward Tuner Preset Up Time Up Button 15 23 24 28 29 32 21 CD Track Down or Fast Reverse Tuner Preset Down Time Down Button 15 ...

Page 10: ...ERS LEFT LEFT RIGHT SPEAKERS LIGHT UP ANTENNA FM 75 OHMS AM GND SUBWOOFER PRE OUT Left speaker Right speaker AC outlet AC 120 V 60 Hz Speaker connection see page 11 AM loop antenna FM antenna Make sure to unplug the AC power cord before any connections Antenna connection see page 11 AC power connection see page 12 Speaker light up wire Speaker light up wire ...

Page 11: ...EAR DIMMER button on the remote control for 2 seconds or more Note Placing the right speaker light up wire to the RIGHT jack and the left speaker light up wire to the LEFT jack Assembling Attaching to the wall Wall Screws not supplied RATED SPEAKER IMPEDANCE 6 OHMS MIN AC INPUT RIGHT RIGHT LEFT VIDEO AUX IN SPEAKERS LEFT LEFT RIGHT SPEAKERS LIGHT UP ANTENNA FM 75 OHMS AM GND SUBWOOFER PRE OUT ANTE...

Page 12: ... AC INPUT RIGHT RIGHT LEFT VIDEO AUX IN SPEAKERS LEFT LEFT RIGHT SPEAKERS LIGHT UP ANTENNA FM 75 OHMS AM GND SUBWOOFER PRE OUT AC outlet AC 120 V 60 Hz RATED SPEAKER IMPEDANCE 6 OHMS MIN AC INPUT RIGHT RIGHT LEFT VIDEO AUX IN SPEAKERS LEFT LEFT RIGHT SPEAKERS LIGHT UP ANTENNA FM 75 OHMS AM GND SUBWOOFER PRE OUT RATED SPEAKER IMPEDANCE 6 OHMS MIN AC INPUT RIGHT RIGHT LEFT VIDEO AUX IN SPEAKERS LEFT...

Page 13: ... the transmitter on the remote control and the sensor on the unit with a soft cloth Exposing the sensor on the unit to strong light may interfere with operation Change the lighting or the direction of the unit if this occurs Keep the remote control away from moisture heat shock and vibrations Test of the remote control Check the remote control after checking all the connections see pages 10 12 Poi...

Page 14: ...control Main unit operation When the VOLUME control is turned clockwise the volume will increase When it is turned counterclockwise the volume will decrease Remote control operation Press the VOLUME or button to increase or decrease the volume Bass control When the power is first turned on the unit will enter the extra bass mode which emphasizes the bass frequencies and X BASS will appear To cance...

Page 15: ... 24 hour display will be skipped To change the 12 hour or 24 hour display 1 Press the ON STAND BY button to turn the power on 2 Press the CLOCK TIMER button 3 Within 10 seconds press the or button to select CLOCK and press the MEMORY button 4 Press the or button to select 12 hour or 24 hour display and then press the MEMORY button AM 12 00 The 12 hour display will appear AM 12 00 PM 11 59 AM 0 00 ...

Page 16: ... may differ from its actual playback time WMA WMA files are Advanced System Format files that include audio files which are compressed with Windows Media Audio codec WMA is developed by Microsoft as an audio format file for Windows Media Player MP3 or WMA indicator will light up after the unit reads information on an MP3 or WMA disc Auto power on function When you press any of the following button...

Page 17: ...isc tray is stopped with force ER CD20 will appear on the display for 3 seconds and the unit will not function If this occurs press the ON STAND BY button to enter the power stand by mode and then turn the power on again If TV or radio interference occurs during CD operation move the unit away from the TV or radio If a disc is damaged dirty or loaded upside down the disc will be skipped 1 Press th...

Page 18: ... you press the button in the stop mode press the button to start the desired track Fast for ward Fast reverse Press and hold down in the playback mode Release the button to resume playback Track up track down is possible only within individual discs Fast forward fast reverse is possible only within individual discs When the end of the last track is reached during fast forward END will appear on th...

Page 19: ...ch is not possible To stop playback Press the CD button Use the direct search buttons on the remote control to select the de sired track while playing the se lected disc Selected track number The direct search buttons allow you to select up to number 9 When selecting number 10 or higher use the 10 button A For example to choose 13 1 Press the 10 button once 2 Press the 1 button 3 Press the 3 butto...

Page 20: ...ext by the random operation On the other hand the button does not allow you to move to the previous track The beginning of the track being played will be located In random play the unit will select and play tracks automatically You cannot select the order of the tracks Caution After performing repeat be sure to press the CD button Other wise the disc s will play continuously To repeat one disc Pre...

Page 21: ...on to enter the stand by mode or change the function from CD to another the programmed selections will not be cleared During the program operation random play is not possible 1 While in the stop mode press the MEMORY button on the remote control to enter the programming save mode 2 Press one of the 1 5 buttons to select the desired disc Selected disc number 3 Press the direct search buttons on the...

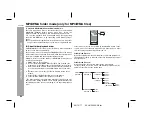
Page 22: ... possibilities that this unit will playback the files not according to our expected playback order Folder mode on off can be operated by the FOLDER button on the remote control Files that are played back in folder mode on differ from those played back during folder mode off Folder Mode Off case All the files starting from the selected folder or file will be played back If file 3 inside Folder C is...

Page 23: ...or button Proceed to step 5 Total number of files TOTAL indicator MP3 indicator Disc Name WMA indicator Disc 1 Blinking Total files in Folder 3 FOLDER indicator FOLDER number 4 Select desired file to be played back by pressing the or button Folder mode off 5 Press the CD button Playback will start and file name will be displayed Title Artist Album name is displayed if it is recorded on the disc Di...

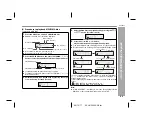
Page 24: ...B memory is connected to the main unit the device information will be displayed In case folder is selected proceed to step 2 In case file is selected proceed to step 4 2 Press the FOLDER button and press the TUNING or button to select desired playback folder Folder mode on To start playback with folder on mode go to step 5 To change the playback folder press the TUNING or but ton to select another...

Page 25: ...ake longer time for data to be read The USB terminal in this unit is not intended for a PC connection but is used for music streaming with a USB memory device 3 Select desired file to be played back by pressing the or button Proceed to step 5 4 Select desired file to be played back by pressing the or button Folder mode off 5 Press the USB button Playback will start and the file name will be displa...

Page 26: ...MP1 MP2 format are not supported Programme playback for USB memory is not available Playback order for MP3 files may differ sometimes depending on the writing software used during file download Bitrate which is supported by MP3 is 32 320 kbps WMA is 64 160 kbps For MP3 WMA files please put MP3 WMA extension Files cannot be played back if there is no MP3 WMA extension Playlist are not supported by ...

Page 27: ...BAND button to display the ST indicator will appear when an FM broadcast is in stereo If the FM reception is weak press the TUNER BAND button to extinguish the ST indicator The reception changes to monaural and the sound becomes clearer POWER ON STANDBY TUNER BAND 1 Press the ON STAND BY button to turn the power on 2 Press the TUNER BAND button repeatedly to select the desired frequency band FM or...

Page 28: ...ions in memory in order starting with preset channel 1 4 Within 30 seconds press the MEMORY button to store that station in memory If the MEMORY and preset number indicators go out before the station is memorized repeat the operation from step 2 5 Repeat steps 1 4 to set other stations or to change a pre set station When a new station is stored in memory the station previously memorized for that p...

Page 29: ...2 types of timer ONCE TIMER and DAILY TIMER Once timer Once timer play works for one time only at a preset time Daily timer Daily timer play works at the same preset time every day For example set the timer as a wake up call every morning 1 Set the daily timer pages 29 31 2 Set the once timer pages 29 31 Start Daily timer Once timer 1 minute or more Stop Start Stop 1 Check that the clock is set to...

Page 30: ...ess the MEMORY button 7 Set the time to finish as in steps 5 and 6 above 8 Switch input with the or button and then press the MEMORY button To select the timer playback source CD TUNER USB or AUX When you select the tuner select a station by pressing the or button and then press the MEMORY button If a station has not been programmed NO PRESET will be displayed and timer setting will be canceled 9 ...

Page 31: ...USB or AUX in step 8 This unit will turn on or enter the power stand by mode automatically however the connected unit to AUX IN jacks will not turn on or off 1 Press the CLOCK TIMER button 2 Within 10 seconds press the or button to select ONCE or DAILY and press the MEMORY button 3 Within 10 seconds press the or button to select ONCE CALL or DAILY CALL and press the MEMORY button The unit returns ...

Page 32: ...ours 5 minutes 5 minute intervals 5 minutes 1 minute 1 minute intervals 5 Press the MEMORY button SLEEP will appear 6 The unit will enter the power stand by mode automatically after the preset time has elapsed The volume will be turned down 1 minute before the sleep operation finishes 1 While SLEEP is indicated press the CLOCK TIMER button 2 Within 10 seconds press the or button to select SLEEP X ...

Page 33: ...nes Before plugging in or unplugging the headphones reduce the volume Be sure your headphones have a 1 8 3 5 mm diameter plug and impedance between 16 and 50 ohms The recommended impedance is 32 ohms Plugging in the headphones disconnects the speakers automatically Adjust the volume using the VOLUME control RATED SPEAKER IMPEDANCE 6 OHMS MIN AC INPUT RIGHT RIGHT LEFT VIDEO AUX IN SPEAKERS LEFT LEF...

Page 34: ...KERS LEFT LEFT RIGHT SPEAKERS LIGHT UP ANTENNA FM 75 OHMS AM GND SUBWOOFER PRE OUT Subwoofer with a built in amplifier SUBWOOFER PRE OUT Symptom Possible cause The clock is not set to the correct time Did a power failure occur Reset the clock When a button is pressed the unit does not respond Set the unit to the power stand by mode and then turn it back on If the unit still malfunctions reset it N...

Page 35: ...ower on again 2 If the unit is not restored in the previous operation unplug and plug in the unit and then turn the power on Note If neither operation above restores the unit clear all the memory by resetting it Clearing all the memory reset 1 Press the ON STAND BY button to enter the power stand by mode 2 While pressing down the 1 button and the 5 button press the POWER ON STANDBY button until CL...

Page 36: ...away from direct sunlight heat and excessive moisture Always hold the CDs by the edges Fingerprints dirt or water on the CDs can cause noise or mistracking If a CD is dirty or does not play properly clean it with a soft dry cloth wiping straight out from the center along the radius Maintenance Cleaning the CD pickup lens In order to ensure proper operation of the CD player preventative maintenance...

Page 37: ...terminals Speakers 6 ohms Headphones 16 50 ohms recommended 32 ohms Subwoofer pre out audio signal 200 mV 10 k ohms at 70 Hz Input terminals Video Auxiliary audio signal 500 mV 47 k ohms Class Mass storage class Support File MP3 WMA do not support DRM file Format support FAT 16 or FAT 32 Bitrate support MP3 32 320 kbps WMA 64 160 kbps Other MP3 lD3 tag only supports version 1 x USB supports versio...

Page 38: ...MEMO MEMO 11 16 05 4 41 PM 1 ...

Page 39: ...MEMO MEMO 11 16 05 4 41 PM 2 ...

Page 40: ...ATION CALL 1 800 BE SHARP 0311 Printed in Malaysia TINSEA121AWZZ 06A R AS 2 SHARP ELECTRONICS CORPORATION Sharp Plaza Mahwah New Jersey 07430 2135 SHARP CORPORATION CONSUMER LIMITED WARRANTY SHARP ELECTRONICS CORPORATION warrants to the first consumer purchaser that this Sharp brand product the Product when shipped in its original con tainer will be free from defective workmanship and materials an...

Reviews: