background image

10

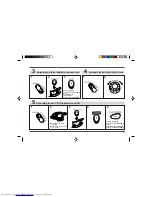
Quick Guide / Guía rápida

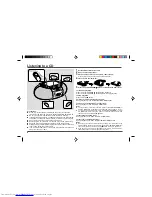
Operation with AC power

■ 

Funccionamiento con corriente  alterna

Operation with batteries

Funccionamiento con pilas

To an AC outlet
A un tomacorriente de CA

To AC INPUT
A la toma AC INPUT

AC 120 V, 60 Hz
120 V de CA, 60 Hz

6 “D” size batteries (UM/SUM-1, R20, HP-2 or similar)

Batteries are not included.

6 pilas del tamaño “D” (UM/SUM-1, R20, HP-2 o similares)

Las pians no están incluidas.

5

4

6

1

3

2

■ 

Turning the power
ON and OFF

Conexión (ON) y
desconexión (OFF)
de la alimentación

● 

Label side up.

● 

Con el lado de la etiqueta

encarada hacia arriba.

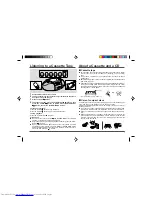
To stop playback
Press the STOP 

 button.

Para detener la
reproducción
Pulse el botón STOP 

.

1

2

3

4

5

1

Preparation for use / Preparación para su uso

2

Listening to a CD / Audictión de CD

Summary of Contents for CD180

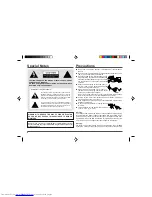
Page 1: ...of the following measures Reorient or relocate the receiving antenna Increase the separation between the equipment and receiver Connect the equipment into an outlet on a circuit different from that to which the receiver is connected Consult the dealer or an experienced radio TV technician for help WARNING FCC Regulations state that any unauthorized changes or modifications to this equipment not ex...

Page 2: ...t with a higher voltage other than which is specified is dan gerous and may result in a fire or other type of accident causing dam age SHARP will not be held responsible for any damage resulting from use of this unit with a voltage other than that which is specified Warning CD players use a laser pickup which can damage the eyes if viewed directly Do not look at the pickup and do not touch the pic...

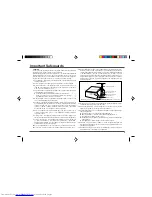
Page 3: ... walked on or pinched by items placed upon or against them paying particular attention to cords at plugs convenience receptacles and the point where they exit from the appliance 10 Do not use liquid cleaners or aerosol cleaners Use a damp cloth for cleaning 11 Power Lines An outdoor antenna should be located away from power lines 12 Outdoor Antenna Grounding If an outside antenna is connected to t...

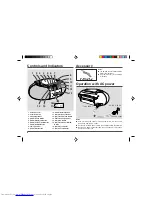
Page 4: ...n AC outlet To AC INPUT AC 120 V 60 Hz Accessory Notes The AC power cord is located in the battery compartment Only the accessory in the drawing is included AC power cord x 1 QACCU0001SJ00 10 TAPE Record Button 11 CD Play Pause Button 12 CD Track Up Cue Button 13 Cassette Compartment 14 CD Stop Button 15 CD Track Down Review Button 16 CD Play Indicator 17 CD Pause Indicator 01 Volume Control 02 Fu...

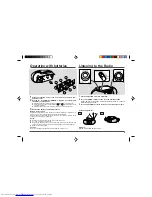
Page 5: ...nserting or removing the batteries 3 and 6 push them toward the ë battery terminals Installing the batteries incorrectly may cause the unit to malfunction 3 Replace the battery compartment cover Battery replacement Replace the batteries when they become weak and or recording or playback is im paired This may occur even though radio broadcasts are audible Remove the battery compartment cover and in...

Page 6: ...will appear in the display and CD operation is paused Press the REVIEW DOWN 5 but ton for fast reverse or press the STOP button to stop CD operation If the beginning of the disc is reached while reviewing the mode will au tomatically switch to normal playback at that point 1 Set the FUNCTION switch to CD 2 Open the CD compartment 3 Place a compact disc on the spindle label side up 3 8 cm discs may...

Page 7: ... CrO2 tape is not recommended For recording use only normal tape Do not use C 120 tapes or poor quality tapes as they may cause malfunctions Before loading a tape into the cassette compartment tighten the slack with a pen or pencil Cassettes have removable tabs which prevent accidental recording or erasing from taking place Removing the tab will protect the corre sponding side from being erased Co...

Page 8: ...Press the RECORD button 5 Press the PLAY PAUSE 0 6 0 6 0 6 0 6 0 6 button on the CD To stop recording Press the STOP EJECT 7 button If the STOP or PLAY PAUSE 0 6 button is pressed while recording or if the CD comes to its end the tape deck will not stop To record a specific track Press the REVIEW DOWN 5 or CUE UP 4 button until the desired track number is displayed then start recording Recording f...

Page 9: ...ve the power on with no disc or cassette in the unit until normal playback is possible about 1 hour B C D E A Maintenance Specifications SHARP reserves the right to make design and specification changes for product improvement without prior notice Tape recorder Frequency response Signal noise ratio Wow and flutter Motor Bias system Erase system 50 14 000 Hz Normal tape 50 dB 0 25 WRMS DC 9 V elect...

Page 10: ...M SUM 1 R20 HP 2 or similar Batteries are not included 6 pilas del tamaño D UM SUM 1 R20 HP 2 o similares Las pians no están incluidas 5 4 6 1 3 2 Turning the power ON and OFF Conexión ON y desconexión OFF de la alimentación Label side up Con el lado de la etiqueta encarada hacia arriba To stop playback Press the STOP button Para detener la reproducción Pulse el botón STOP 1 2 3 4 5 1Preparation f...

Page 11: ...TOP EJECT 7 1 2 1 3 5 2 Load the disc to be recorded Introduzca el disco que va a grabar To stop recording Press the STOP EJECT 7 button Para detener la grabación PulseelbotónSTOP EJECT 7 3 Listening to a tape Audictión de una cinta 4 Listening to the radio Audictión de la radio 5 Recording from a CD Grabaciones de CD 4 ...

Page 12: ...for any damages or defects in the Product which were caused by repairs or attempted repairs performed by anyone other than an authorized servicer Nor shall Sharp be liable or in any way responsible for any incidental or consequential economic or property damage Some states do not allow the exclusion of incidental or consequential damages so the above exclusion may not apply to you THIS WARRANTY GI...

Reviews: