background image

03/12/17

CD-SW340 02-43.fm

30

CD-SW340

Tape Recording

Recording on a cassette tape (continued) 

Recording from a CD or MP3/WMA disc  

To stop recording:

Press the   (TAPE  ) button.
The disc and tape will stop.

To perform programmed recording:

To stop recording:

Press the   (TAPE  ) button.
The disc and tape will stop.
 

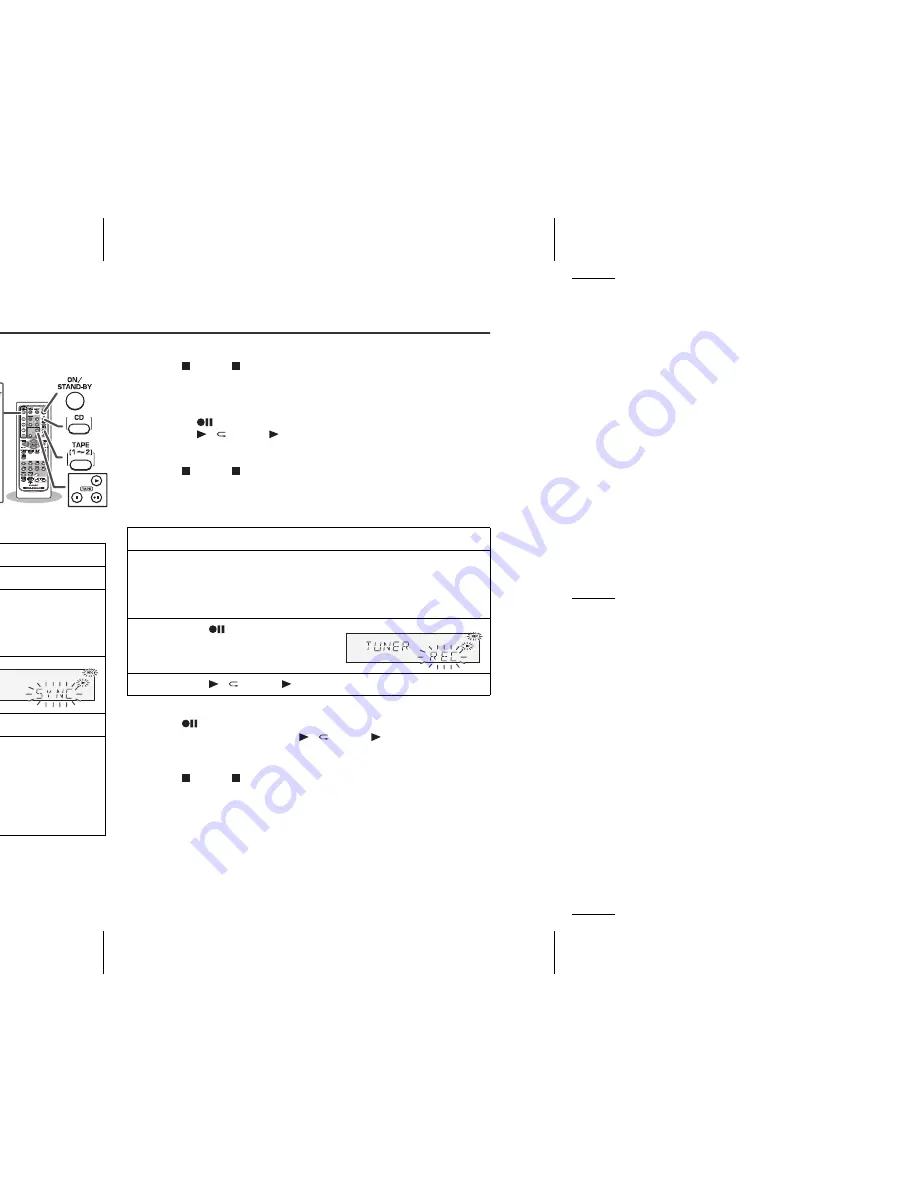
Recording from the radio

To interrupt recording:

Press the 

 button.

To resume recording, press the   /   (TAPE  ) button.

To stop recording:

Press the   (TAPE  ) button.

Note:

If you hear a whistling noise while recording an AM station, move the
AM loop antenna.

1

Press the ON/STAND-BY button to turn the power on.

2

Press the CD button.

3

Load a cassette into the TAPE 2 cassette compartment
with the side to be recorded on facing you.

Wind past the leader of the tape, on which recording cannot be 
performed.

4

Press the 

 button.

Recording will be paused.

5

Press one of the   1 -   5 buttons to select the desired disc.

6

Within 5 seconds, press the   /   button to start recording.

Recording is started from the selected disc. When the 
playback of the last track is finished or the end of the tape is 
reached, the disc and the cassette will stop automatically.

Playback of the disc will start approximately 7 seconds after 
the tape starts.

TIMER

CD

4

5

3

2

1

PHONE

S

RECORD/PLAYBACK

PLAYBACK 

(PLAY & STOP)

AUDIO

IN

OPEN/
CLO

S

E

POWER

ON/ 

S

TAND-BY

CD

4

5

3

2

1

1 Program discs and tracks (see page 21).
2 Press the 

 button.

3 Press the 


/


 (TAPE  ) button to start recording.

1

Tune in to the desired station (see page 26).

2

Load a cassette into the TAPE 2 cassette compartment
with the side to be recorded on facing you.

Wind past the leader of the tape, on which recording cannot be 
performed.

3

Press the 

 button.

Recording will be paused.

4

Press the   /   (TAPE  ) button to start recording.

Summary of Contents for CD-SW340

Page 1: ...ll guide you in operating your SHARP product EM CD SW340 Mini Component System consisting of CD SW340 main unit CP S340 front speaker and CP SW340 Subwoofer Accessories Please confirm that the following accessories are included Note Only the above accessories are included Remote control 1 RRMCGA161AWSA AM loop antenna 1 QANTL0010AWZZ FM antenna 1 92LFANT1535A ...

Page 2: ...ing the equipment off and on the user is encouraged to try to correct the interference by one or more of the following measures Reorient or relocate the receiving antenna Increase the separation between the equipment and receiver Connect the equipment into an outlet on a circuit different from that to which the receiver is connected Consult the dealer or an experienced radio TV technician for help...

Page 3: ...personnel Servicing is required when the apparatus has been damaged in any way such as power supply cord or plug is damaged liquid has been spilled or objects have fallen into the apparatus the apparatus has been exposed to rain or moisture does not operate normally or has been dropped Additional Safety Information 15 Power Sources This product should be operated only from the type of power source...

Page 4: ...nt Plug The product is equipped with an attachment plug having overload protection This is a safety feature See Instruction Manual for replacement or resetting of protective device If replacement of the plug is required be sure the service technician has used a replace ment plug specified by the manufacturer that has the same overload protection as the original plug 25 Stand Do not place the produ...

Page 5: ...ote control only 16 CD or MP3 WMA disc Playback Listening to a CD or MP3 WMA disc 17 19 Advanced CD or MP3 WMA disc playback 19 21 MP3 WMA Navigation only for MP3 WMA files 22 25 Radio Listening to the AM FM stations 26 27 Tape Playback Listening to a cassette tape TAPE 1 or TAPE 2 28 29 Tape Recording Recording on a cassette tape 29 31 Advanced Features Timer and sleep operation Remote control on...

Page 6: ...ciency location and various other factors It is advisable to avoid exposure to high volume levels which occurs while turning the unit on with the volume control setting up high or while continually listening at high volumes Excessive sound pressure from earphones and headphones can cause hearing loss me surface as main playback 4 10 cm 10 cm TIMER CD 4 3 1 5 4 5 3 2 1 PHONES RECORD PLAYBACK PLAYBA...

Page 7: ...2 Rewind Tuner Preset Down Time Down Button 16 19 26 27 29 32 10 Tuning Down Cursor Down Button 22 26 11 Tape 1 Cassette Compartment 28 12 Headphone Jack 35 13 Audio In Jack 35 14 Remote Sensor 14 15 Volume Control 15 16 CD Play or Repeat Tape Play Button 17 20 28 17 Disc Tray Open Close Button 17 18 Disc Number Select Buttons 17 19 CD Track Up or Fast Forward Tape 2 Fast Forward Tuner Preset Up T...

Page 8: ... o e r e t S M F 2 1 6 2 r o t a c i d n I g n i v i e c e R o e r e t S M F 3 1 0 3 r o t a c i d n I y a l P e p a T 4 1 1 2 r o t a c i d n I y r o m e M 5 1 5 1 r o t a c i d n I s s a B a r t x E 6 1 0 2 r o t a c i d n I y a l P t a e p e R c s i D 7 1 9 1 r o t a c i d n I e s u a P c s i D 8 1 8 1 r o t a c i d n I y a l P c s i D 9 1 l e n a p r a e R e g a p e c n e r e f e R 3 1 n a F g...

Page 9: ... 02 43 fm 9 CD SW340 General Information Front Speaker 1 Tweeter 2 Woofer 3 Bass Reflex Duct 4 Speaker Wire 5 Speaker Light Up Wire Subwoofer 1 Subwoofer 2 Bass Reflex Duct 3 Subwoofer Light Up Wire 4 Speaker Wire 3 5 4 ...

Page 10: ...sc Random Button 20 15 Disc Stop Button 19 16 Tape Stop Button 29 17 Memory Button 16 21 27 32 18 Disc Pause Button 19 19 Disc Play or Repeat Button 17 20 20 Tape Play Button 28 21 Tape 2 Record Pause Button 29 22 Tuning Up Cursor Up Button 22 26 23 Disc Track Up or Fast Forward Tape Fast Forward Tuner Preset Up Time Up Cursor Right Button 16 19 26 27 29 32 24 Disc Track Down or Fast Reverse Tape ...

Page 11: ... o w b u S r e k a e p s t f e L 2 1 e g a p e e s n o 3 1 e g a p e e s n o i t c e n n o c r e w o p C A t e l t u O C A z H 0 6 V 0 2 1 C A s n o i t c e n n o c y n a g n i k a m a n n e t n a p o o l M A r e f o o w b u S e r i w p u t h g i L e r i w p u t h g i l r e k a e p S ...

Page 12: ...to the LEFT jack 2 Connect the subwoofer light up wire to the SUBWOOFER LIGHT UP jack Never mistake the FRONT SPEAKERS and the SUBWOOFER terminals The unit or the speakers may be damaged If you use other speakers with an impedance lower than that specified the unit may be damaged Front speakers 6 ohms Subwoofer 12 ohms Do not mistake the right and the left channels The right speaker is the one on ...

Page 13: ...nstration mode You will see words scroll and the subwoofer and front speaker will light up in flashing mode To cancel the demonstration mode When the unit is in the power stand by mode demonstration mode press the X BASS SURROUND DEMO button The unit will enter the low power consumption mode and the subwoofer and front speaker light up will be off To return to the demonstration mode When the unit ...

Page 14: ...g light may interfere with operation Change the lighting or the direction of the unit Keep the remote control away from moisture heat shock and vibrations Test of the remote control Check the remote control after checking all the connections see pages 11 13 Point the remote control directly at the remote sensor on the unit The remote control can be used within the range shown below Press the ON ST...

Page 15: ... button is pressed in the surround mode it will be canceled automatically tand by mode Main unit operation When the VOLUME control is turned clockwise the volume will increase When it is turned counterclockwise the volume will decrease Remote control operation Press the VOLUME or button to increase or decrease the volume When the X BASS SURROUND DEMO button is pressed the unit will enter the surro...

Page 16: ...e clock Perform Setting the clock from step 1 If the CLOCK does not appear in step 3 step 4 for selecting the 12 hour or 24 hour display will be skipped To change the 12 hour or 24 hour display he power on button to Y button ect 12 hour or 24 Y button l appear l appear l appear 5 Press the or button to adjust the hour and then press the MEMORY button Press the or button once to advance the time by...

Page 17: ...ue r recording which stands by significant very little loss 2 Layer 3 and play may differ include audio Audio codec format file for the unit reads t turns on nit turns on and urns on and CD and playback of IN main unit enters TIMER CD 4 5 3 2 1 PHONES RECORD PLAYBACK PLAYBACK PLAY STOP AUDIO IN OPEN CLOSE 4 5 3 2 1 CD ...

Page 18: ...e two discs in a same tray Do not play discs of special shapes heart octagon etc as it may cause malfunctions Do not push the disc tray while it is moving If the power fails while the tray is open wait until the power is restored If the disc tray is stopped with force ER CD21 will appear on the display for 3 seconds and the unit will not function If this occurs press the ON STAND BY button to ente...

Page 19: ... a disc tray with no disc is selected playback will not start and the disc indicator will disappear To stop playback Press the CD button ration top mode layback mode ayback mode button to ack from the ayback or stop e button in the ess the the desired d down in the e utton to ack ual discs dividual discs g fast forward will be paused ed during fast ot finished can 1 Press one of the 1 5 buttons to...

Page 20: ... the previous track It will go to the beginning of the current track instead In random play the unit will select and play tracks automatically You cannot select the order of the tracks Caution After performing repeat or random play be sure to press the CD button Otherwise the disc s will play continuously d track number ect up to number 9 e the 10 button To repeat one disc Press the button twice T...

Page 21: ...riginal program To check which tracks are programmed While the unit is stopped in the programmed play mode press the or button Notes When a disc with programmed tracks is ejected the program is automatically canceled Even if you press the ON STAND BY button to enter the stand by mode or change the function from CD to another the programmed selections will not be cleared During the program operatio...

Page 22: ...tle n be recognized Notes MP3 files must have the extension mp3 WMA files must have the extension wma Up to 100 folders or 300 files can be read on the unit If either limit is exceeded no more folders files are displayed This unit recognizes and displays up to 48 characters for folder names and up to 32 characters for title 1 2 3 All file folder names appear in uppercase p3 p3 Folder Title 1 Title...

Page 23: ...ncorrectly remove and reinsert the disc and try again If you press the RANDOM button in the stop mode the MP3 WMA navigation mode will be canceled ct a disc tray read the MP3 e total number er for 2 seconds played e step back er MP3 indicator WMA indicator r Title 1 2 Title 3 e e 7 Use the or cursor button to scroll and select a folder or title and then press the ENTER button If you press the butt...

Page 24: ...the beginning with the Folder Title 1 Title 2 Title 3 8 When finished press the ENTER button The unit searches for the same name within folders or titles If the search word is not in the folder or title name NOT FOUND appears and the menu returns 9 Use the or cursor button to scroll and select a folder or title 10 Press the button to start playback All files in the selected folder or title are pla...

Page 25: ...The programmed contents are cleared Notes The programmed contents are cleared when you eject a disc play another disc switch the function or enter the stand by mode with the ON STAND BY button If you press the RANDOM button in the stop mode the MP3 WMA navigation mode will be canceled If tracks are programmed using track numbers see Programmed play on page 21 In the MP3 WMA navigation mode only pr...

Page 26: ...tion is weak press the TUNER BAND button to extinguish the ST indicator The reception changes to monaural and the sound becomes clearer 1 Press the ON STAND BY button to turn the power on 2 Press the TUNER BAND button repeatedly to select the desired frequency band FM or AM 3 Press the TUNING or button on the remote control to tune in to the desired station Manual tuning Press the TUNING or button...

Page 27: ...p to change a tion previously e erased Press the PRESET or button for less than 0 5 seconds to select the desired station 1 Press the PRESET or button for more than 0 5 seconds The preset number will flash and the programmed stations will be tuned in sequentially for 5 seconds each 2 Press the PRESET or button again when the desired station is located 1 Press the ON STAND BY button to enter the st...

Page 28: ...he ON STAND BY button to turn the power on 2 Open the cassette compartment by pushing the area marked 3 Load a cassette into the TAPE 1 compartment or TAPE 2 compartment with the side to be played facing toward you 4 Press the TAPE 1 2 button to select the cassette you want to listen to 5 Press the TAPE to start playback Tape play indicator CD 4 3 2 1 5 PRESET TUNING PRESET TUNING VOL VOL PHONES R...

Page 29: ...rding arising from malfunction of this unit The volume and sound controls can be adjusted with no effect on the recorded signal Variable Sound Monitor For recording use only normal tapes Do not use metal or CrO tapes Erase prevention tab of cassette tapes When recording on a cassette tape make sure that the erase prevention tabs are not removed Cassettes have removable tabs that prevent accidental...

Page 30: ...ording an AM station move the AM loop antenna he power on ette compartment ou ecording cannot be ct the desired disc to start recording sc When the e end of the tape is op automatically ely 7 seconds after 1 Program discs and tracks see page 21 2 Press the button 3 Press the TAPE button to start recording 1 Tune in to the desired station see page 26 2 Load a cassette into the TAPE 2 cassette compa...

Page 31: ...timer takes priority Allow an interval of at least 1 minute between operations ower on ame length as 1 appears on bing ette ward you pears on the TAPE 2 4 3 2 1 5 PRESET TUNING VOL RECORD PLAYBACK This unit has 2 types of timer ONCE TIMER and DAILY TIMER Once timer Once timer play or once timer recording works for one time only at a preset time For example if you are away but want to record a prog...

Page 32: ... The illustrations show the timer playback setting in the daily timer mode 7 Press the or button to adjust the minutes and then press the MEMORY button 8 Set the time to finish as in steps 6 and 7 above 9 Switch input with the or button and then press the MEMORY button To select the timer playback source CD TUNER TAPE 1 or TAPE 2 To select the timer recording source TUNER When you select the tuner...

Page 33: ...ress the CLOCK TIMER button 2 Within 10 seconds press the or button to select ONCE or DAILY and press the MEMORY button 3 Within 10 seconds press the or button to select ONCE CALL or DAILY CALL and press the MEMORY button The unit returns to the timer stand by mode after displaying the settings in order 1 Press the CLOCK TIMER button 2 Within 10 seconds press the or button to select ONCE or DAILY ...

Page 34: ...ape length is long enough to perform both functions If you want to sleep and wake up listening to a tape and the length of the tape is shorter than the sleep timer setting timer playback or recording will not be possible ct the time s ode automatically efore the sleep CK TIMER button button to select out 10 seconds ile it is displayed by 1 While SLEEP is indicated press the CLOCK TIMER button 2 Wi...

Page 35: ...ounds of Portable Audio Player etc Headphones Before plugging in or unplugging the headphones reduce the volume Be sure your headphones have a 1 8 3 5 mm diameter plug and impedance between 16 and 50 ohms The recommended impedance is 32 ohms Plugging in the headphones disconnects the speakers automatically Adjust the volume using the VOLUME control ont AUDIO IN ower on rs 1 Insert a cassette in th...

Page 36: ... with proper sound quality Is it a normal tape You cannot record on a metal or CrO tape Cannot erase completely Sound skipping Is there any slack Cannot hear treble Is the tape stretched Sound fluctuation Are the capstans pinch rollers or heads dirty Cannot remove the tape If a power failure occurs during playback the heads remain engaged with the tape Do not open the compartment with great force ...

Page 37: ... set the unit to the power stand by mode Carrying the unit with discs left inside can damage the unit Care of compact discs Compact discs are fairly resistant to damage however mistracking can occur due to an accumulation of dirt on the disc surface Follow the guidelines below for maximum enjoyment from your CD collection and player Do not write on either side of the disc particularly the non labe...

Page 38: ...these values in individual units General Amplifier ad g Playback head A C B C D B E Power source AC 120 V 60 Hz Power consumption 195 W Dimensions Width 10 1 4 260 mm Height 13 332 mm Depth 12 7 8 324 mm Weight 21 6 lbs 9 8 kg Output power Front Speakers RMS Total 250 W 125 watts per channel into 6 ohms at 1 KHz 10 Total harmonic distortion Front Speakers FTC 100 watts minimum RMS per channel into...

Page 39: ...r Maximum input power 250 W Rated input power 125 W Impedance 6 ohms Dimensions Width 7 7 8 200 mm Height 13 330 mm Depth 8 11 16 220 5 mm Weight 7 0 lbs 3 18 kg each Type Subwoofer system 8 20 cm subwoofer Maximum input power 500 W Rated input power 250 W Impedance 12 ohms Dimensions Width 9 13 16 250 mm Height 13 330 mm Depth 11 5 16 288 mm Weight 12 9 lbs 5 85 kg ...

Page 40: ...rp usive warranties granted by Sharp and shall be the sole and exclusive remedy available to the purchaser me described herein shall constitute complete fulfillment of all liabilities and responsibilities of Sharp to the full satisfaction of all claims whether based on contract negligence strict liability or otherwise In no event mages or defects in the Product which were caused by repairs or atte...

Reviews: