background image

19

COPY FUNCTIONS

2

SETTING THE NUMBER OF COPIES

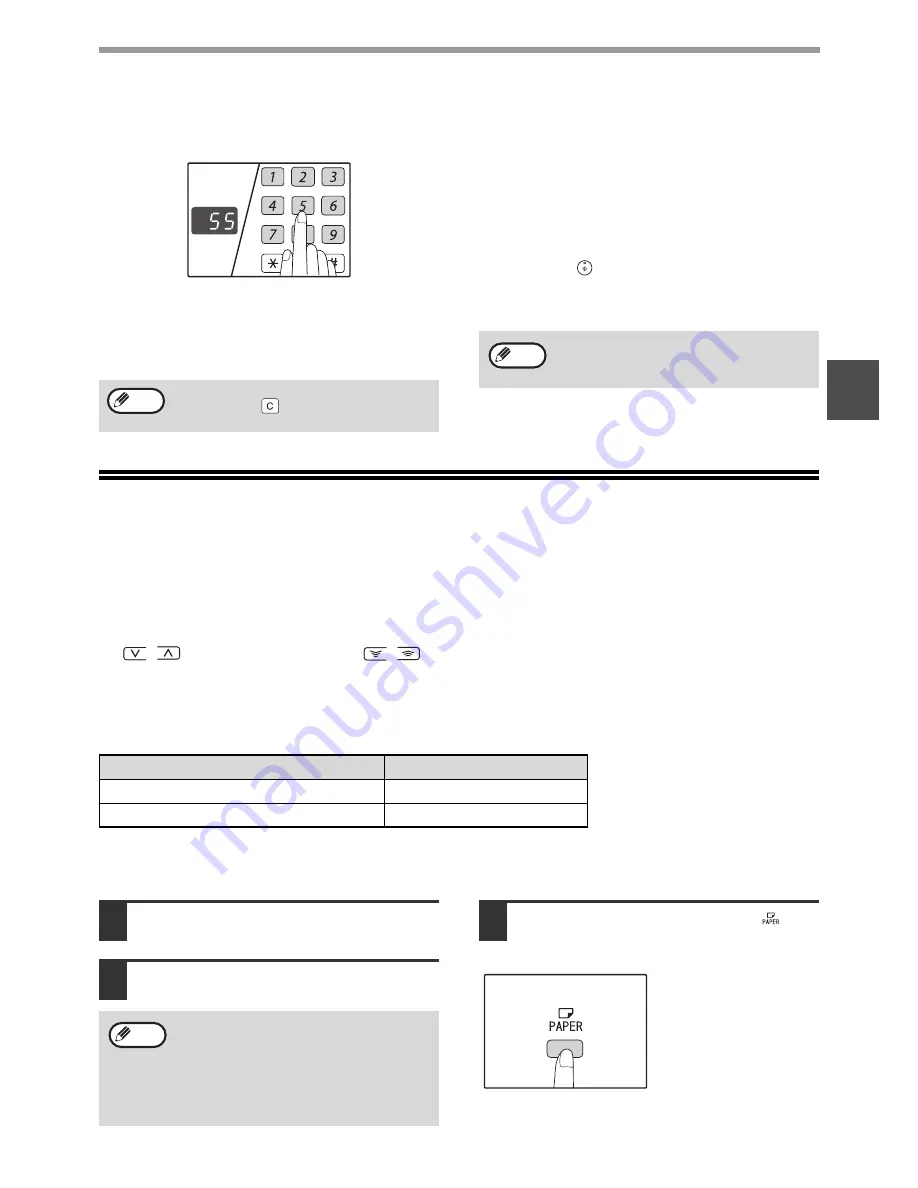
Press the numeric keys to set the number of copies.

The set number of copies appears in the display. A 
maximum of 999 copies (factory default setting) 
can be set.

If you wish to make only a single copy, copying is 
possible with the display showing "0".

Important note when making a large number 
of copies

When the maximum number of pages (about 250 
pages) that can be held in the paper output tray are 
output, copying will temporarily stop. When this 
happens, promptly remove the copies and press the 
[START] key (

) to resume copying. Copying will 

also stop after about 500 pages and 750 pages. 
Remove the pages and resume copying in the same 
way.

REDUCTION/ENLARGEMENT/ZOOM

The zoom function enables precise copy ratio selection from 25% to 400% in increments of 1%. 
There are three ways to enlarge and reduce copies, as explained below.

Reduction and enlargement ratios can be selected automatically with the [AUTO IMAGE] key (

).

"AUTOMATIC RATIO SELECTION"

 (below)

Reduction and enlargement ratios can be selected manually with the [PRESET RATIO] selector keys
 (

) and/or the [ZOOM] keys (

).

"MANUAL RATIO SELECTION" (p.20)

Separate settings can be selected for the vertical and horizontal ratios.

"SELECTING THE VERTICAL AND HORIZONTAL COPY RATIOS SEPARATELY (XY ZOOM Copying)" (p.21)

Ratios that can be selected will vary depending on whether the original is placed on the document glass or in the 
SPF.

AUTOMATIC RATIO SELECTION

1

Place the original(s) in the document 
feeder tray or on the document glass.

2

If the original is placed on the document 
glass, select the original size. 

(p.15)

3

Use the [PAPER SELECT] key (

) to 

select the paper tray with the desired 
paper size.

This feature will not work 
when using copy paper 
of non-standard size or 
when using the bypass 
tray.

If you enter the wrong number, press the 
[CLEAR] key (

) and enter the correct 

number.

Note

The maximum number of copies can 
be changed in the system settings. 

(p.37)

Note

AUTO %

Original position

Selectable ratios

Document glass

25% – 400%

SPF

50% – 200%

• Automatic ratio selection can be used when 

the original size is A5, B5, B5R, A4, A4R, 
B4, A3. It cannot be used for other sizes.

• After placing the original, be sure to close 

the document cover/SPF. If left open, parts 
outside of the original will be copied black, 
causing excessive use of toner.

Note

Summary of Contents for AR-5516S

Page 1: ...MODEL AR 5516S AR 5520S DIGITAL MULTIFUNCTIONAL SYSTEM OPERATION GUIDE ...

Page 2: ......

Page 3: ...R FROM THE Start BUTTON 27 PRINTER DRIVER SETTING SCREEN 28 SETTING ADVANCED PRINT FUNCTIONS 29 PRINTING MULTIPLE PAGES ON ONE PAGE N Up Printing 29 FITTING THE PRINTED IMAGE TO THE PAPER Fit To Paper Size 30 ROTATING THE PRINT IMAGE 180 DEGREES Rotate 180 degrees 30 ENLARGING REDUCING THE PRINT IMAGE Zoom 31 PRINTING FAINT TEXT AND LINES IN BLACK Text To Black Vector To Black 31 ADJUSTING THE BRI...

Page 4: ...NE MAINTENANCE CHECKING THE TOTAL OUTPUT COUNT AND TONER LEVEL 58 CHECKING THE TOTAL OUTPUT COUNT 58 CHECKING THE TONER LEVEL 59 ROUTINE MAINTENANCE 60 CLEANING THE DOCUMENT GLASS AND SPF DOCUMENT COVER 60 CLEANING THE ORIGINAL SCANNING GLASS ONLY WHEN AN SPF IS INSTALLED 60 CLEANING THE BYPASS TRAY PAPER FEED ROLLER 61 CLEANING THE TRANSFER CHARGER 61 7 PERIPHERAL DEVICES AND SUPPLIES PERIPHERAL ...

Page 5: ...ODELS in the Start Guide The screen images and procedures that appear in this manual are mainly for Windows Vista With other versions of Windows some screen images may be different from those in this manual For information on using your operating system refer to your operating system s manual or online Help The display screens messages and key names shown in the manual may differ from those on the...

Page 6: ...put tray Copies and prints are deposited to this tray Front cover Open to remove paper misfeeds and perform machine maintenance p 53 p 57 Paper trays Each tray holds 250 sheets of paper p 10 Side cover Open to remove paper misfeeds and perform machine maintenance p 51 p 52 Side cover handle Pull to open the side cover p 51 Bypass tray guides Adjust to the width of the paper p 11 Bypass tray Paper ...

Page 7: ...ock release lever To replace the toner cartridge pull out the toner cartridge while pushing on this lever Toner cartridge Contains toner p 57 Roller rotating knob Turn to remove misfed paper p 52 p 53 Fusing unit release levers To remove a paper misfeed from the fusing unit push down on these levers and remove the paper p 53 Photoconductive drum Copy images are formed on the photoconductive drum F...

Page 8: ...PAPER SIZE indicators Light up to show the selected copy paper size p 12 Paper feed location misfeed location indicators The selected paper feed location is shown by a lit indicator p 15 The general location of misfed paper is shown by a blinking red indicator p 50 Alarm indicators Maintenance indicator p 49 Toner cartridge replacement required indicator p 49 Developer replacement required indicat...

Page 9: ...ios p 20 Zoom keys Use to select any reduction or enlargement copy ratio from 25 to 400 in increments of 1 p 21 Copy ratio display key Hold down when the machine is not in use to display the copy ratio in the display p 21 ZOOM indicator Lights up when a zoom ratio is set p 21 Audit clear key Closes an open account p 42 key Use to check the total number of copies made p 58 CLEAR ALL key Clears all ...

Page 10: ...nel is pressed an original is placed or a print job is received Auto power shut off mode This function automatically switches the machine to a state that consumes even less power than preheat mode if the set duration of time elapses without the machine being used when the power is on All lights except the POWER SAVE indicator and ON LINE indicator go off To resume normal operation press the START ...

Page 11: ...ed paper may result in misfeeds or smudges on the output If other than SHARP recommended media must be used feed each sheet one at a time using the bypass tray do not attempt continuous copying or printing There are many varieties of special paper available on the market and some cannot be used with this machine Before using special paper contact your authorised service representative Before using...

Page 12: ...f paper is straight before loading it Make sure that the paper fits under the tabs on the right side of the tray 4 Gently push the paper tray into the machine Do not load paper higher than the line on the tray up to 250 sheets Do not add paper to the loaded paper It may cause multiple feed of paper A5 can be used in the upper paper tray but cannot be used in other trays including trays in optional...

Page 13: ...ed transparency film labels and envelopes must be fed one sheet at a time through the bypass tray When adding paper first remove any paper remaining in the tray combine it with the paper to be added and then reload as a single stack The paper to be added must be the same size and type as the paper already in the tray Do not use paper that is smaller than the original This may cause smudges or uncl...

Page 14: ...G key for more than 5 seconds to set the selected paper size The currently selected paper feed location indicator will blink and the corresponding paper size which is currently set indicator will light steadily All other indicators will go out 2 If the machine has two or more paper trays use the PAPER SELECT key to select the paper tray for which you wish to change the paper size setting Each time...

Page 15: ... and slide the guide to the indicator line of the paper to be loaded The left guide is an insert type guide Remove it and then insert it at the indicator line of the paper to be loaded If the bypass tray is selected set the paper guides to the copy paper width 5 Press the START key and then the TRAY SETTING key To change the paper size setting of another tray repeat steps 2 to 5 after pressing the...

Page 16: ... will begin when the CLEAR ALL key is pressed after the copy job is finished or when the ON LINE key is pressed to switch the machine online Printing will also begin after the set auto clear time elapses or after 60 seconds if Auto clear time is disabled 3 The print job is paused and copying begins Modes Copying Printing Copy Copy key input Yes Yes During copying Yes 1 No 2 Printer During printing...

Page 17: ...e sure that the PAPER SIZE indicator lights up If the indicator is not lit no tray has the same size of paper as the original Load paper of the required size in a tray or select the bypass tray with the PAPER SELECT key and copy from the bypass tray The bypass tray must be manually selected To copy on paper of a different size than the original select the paper with the PAPER SELECT key If the ORI...

Page 18: ...s tray with the PAPER SELECT key and copy from the bypass tray The bypass tray must be manually selected To copy on paper of a different size than the original select the paper with the PAPER SELECT key 4 Set the number of copies 5 Press the START key to begin copying The copy is delivered to the paper output tray Do not place originals of different sizes together in the document feeder tray This ...

Page 19: ... fuzzy Straighten originals with folds or creases well before placing Originals that can be used in the SPF Originals that are A5 to A3 and 56 g m2 to 90 g m2 can be used A maximum of 40 pages can be placed at once For originals that are B4 or larger B4 A3 a maximum of 30 pages can be placed at once Originals that cannot be used in the SPF The following originals cannot be used These may cause mis...

Page 20: ... If exposure level 2 or 4 is selected the two indicators will light simultaneously SELECTING THE TRAY Auto paper select mode p 17 normally operates unless it has been disabled and thus when the original is placed on the document glass and the original size is selected or when the original is placed in the SPF the tray with the same size of paper as the original is automatically selected If you wis...

Page 21: ...th the PRESET RATIO selector keys and or the ZOOM keys MANUAL RATIO SELECTION p 20 Separate settings can be selected for the vertical and horizontal ratios SELECTING THE VERTICAL AND HORIZONTAL COPY RATIOS SEPARATELY XY ZOOM Copying p 21 Ratios that can be selected will vary depending on whether the original is placed on the document glass or in the SPF AUTOMATIC RATIO SELECTION 1 Place the origin...

Page 22: ...crease or increase the zoom ratio rapidly hold down the Zoom keys or When a Zoom key or is pressed the ZOOM indicator will light up and the zoom ratio will appear in the display for about two seconds 4 Set the number of copies and other copy settings and then press the START key The copy will be delivered to the paper output tray If the ORIGINAL SIZE indicator blinks change the orientation of the ...

Page 23: ...ATIO selector keys and Zoom keys to change the copy ratio in the vertical direction Press the PRESET RATIO selector keys to select a ratio close to the desired ratio and then press the Zoom keys to adjust the ratio in increments of 1 The ratio appears in the display 5 Press the Copy ratio display key The selected ratio for the vertical direction will be entered To use the XY ZOOM feature with the ...

Page 24: ... and the display will change to the number of copies display 8 Set the number of copies and other copy settings and then press the START key The copy will be delivered to the paper output tray To verify the copy ratios press and hold down the Copy ratio display key The vertical and horizontal ratios will be alternately displayed If you need to change the ratios press the PRESET RATIO selector keys...

Page 25: ...ion of the edge closest to you insert it in the bypass tray Insert the paper all the way in 4 Select the bypass tray with the PAPER SELECT key and then press the START key The copy is delivered to the paper output tray Original A Original B Copy 1 1 Original A Copied original A 1 1 Original A Copied original A 2 Original B 2 Original B Copies made on the back side of paper should always be made on...

Page 26: ... the paper output tray Original Copy A4 paper is used for dual page copying When used in combination with XY ZOOM copying enlargement is not possible Dual page copying cannot be used in combination with the enlargement copying Automatic ratio selection cannot be used when dual page copying is used Dual page copying cannot be selected when an original is placed in the SPF Note To keep the copies in...

Page 27: ...mber of copies and other copy settings and then press the START key 4 When the copy job is finished press the INTERRUPT key and remove the original s The INTERRUPT indicator will go off indicating that the interrupt function is no longer operating The copy settings will automatically revert to the settings selected for the copy run before the run was interrupted 5 Replace the previous original s a...

Page 28: ...he printer If you need to change any print settings click the Preferences button to open the printer driver setup screen The printer driver setup screen will appear Windows 2000 does not have the Preferences button in this dialog box Select settings as needed on each of the tabs in the setup screen and click the OK button PRINTER DRIVER SETTING SCREEN p 28 SETTING ADVANCED PRINT FUNCTIONS p 29 5 C...

Page 29: ... begin printing When Use close paper size is enabled Printing will take place using a size of paper that is close to the size of the print image OPENING THE PRINTER DRIVER FROM THE Start BUTTON You can open the printer driver and change the printer driver settings from the Windows Start button Settings adjusted in this way will be the initial settings when you print from an application If you chan...

Page 30: ... down list Allows you to make a selection from a list of choices Image of paper trays The tray selected in Paper Selection in the Paper tab appears in blue You can also click on a tray to select it Check button Allows you to select one item from a list of options OK button Click this button to save your settings and exit the dialog box Cancel button Click this button to exit the dialog box without...

Page 31: ...is convenient when you want to print multiple images such as photos on a single sheet of paper and when you want to conserve paper The following print results will be obtained depending on the order selected 1 Click the Main tab in the printer driver setup screen 2 Select the number of pages per sheet If you wish to print borderlines check the Border box 3 Select the order of the pages N Up Pages ...

Page 32: ...e print image in Paper Size 3 Check the Fit To Paper Size button 4 Select the actual size of paper to be used for printing A4 The size of the printed image will be automatically adjusted to match the paper loaded in the machine ROTATING THE PRINT IMAGE 180 DEGREES Rotate 180 degrees The feature rotates the image 180 degrees so that it can be printed correctly on paper that can only be loaded in on...

Page 33: ... ratio in increments of 1 PRINTING FAINT TEXT AND LINES IN BLACK Text To Black Vector To Black When printing a colour image colour text and lines that are faint can be printed in black Raster data such as bitmap images cannot be adjusted This allows you to bring out colour text and lines that are faint and difficult to see 1 Click the Advanced tab in the printer driver setup screen 2 Check the Tex...

Page 34: ... slide bar or click the or button ADDING A WATERMARK TO PRINTED PAGES Watermark Faint shadow like text can be added to the background of the printed image as a watermark The size density and angle of the watermark text can be adjusted The text can be selected from a pre stored list or entered to create an original watermark 1 Click the Watermarks tab in the printer driver setup screen 2 Select the...

Page 35: ...isted at the time of saving allowing you to check the settings as you save them For the steps for opening the printer driver see BASIC PRINTING p 26 1 Configure print settings on each tab and click the Save button on any tab 2 After checking the displayed settings enter a name for the settings maximum of 20 characters 3 Click the OK button Using saved settings Select the user settings that you wis...

Page 36: ... below Follow the instructions in the status window to solve the problem Tab Click a tab to bring it to the front The Options tab allows you to select display options for the Print Status Window Document Name Shows the name of the document currently being printed Cancel Job button Printing can be cancelled by clicking this button before the machine receives the job Help button Click this button to...

Page 37: ...exposure level in the SPF place the original in the SPF p 16 Make sure that the SPF indicator is lit 2 Press the AUTO TEXT PHOTO key to select PHOTO 3 Hold down the AUTO TEXT PHOTO key until the AUTO indicator blinks The exposure level indicators show the current setting 4 Press the Light key or Dark key to lighten or darken the automatic exposure level as desired 5 Press the AUTO TEXT PHOTO key t...

Page 38: ...sumes even less power than preheat mode if the set duration of time elapses without the machine being used when the power is on All lights except the POWER SAVE indicator and ON LINE indicator go off To resume normal operation press the START key Normal operation also resumes automatically when a print job is received While in auto power shut off mode no keys except the START key can be used 4 Str...

Page 39: ...is sets the volume of beep signals p 38 28 Base setting beep signal 0 OFF 1 ON Use this to sound a beep when a base setting is selected p 38 29 Number of copies limit 1 99 copies 2 999 copies Use this setting to select 99 or 999 for the maximum number of copies 30 Use close paper size 0 OFF 1 ON When this function is enabled printing in printer mode will automatically continue using a different si...

Page 40: ...setting beep The machine sounds three different types of beep signals a key entry beep that sounds when a valid key is pressed an invalid key beep that sounds when an invalid key is pressed and a base setting beep that sounds when a setting is the same as the base setting base settings are explained below The base setting beep is initially disabled If you wish to enable the base setting beep see B...

Page 41: ...old Explanation 10 Auditing mode 0 OFF 1 ON Use to enable or disable Auditing mode Auditing mode is initially disabled 11 Account number entry None Use to set up account numbers Up to 20 accounts can be established 12 Account number change None Use to change an account number 13 Account number deletion 0 Delete single account 1 Delete all accounts Use to delete an account number A single account n...

Page 42: ... currently selected setting code blinks on the right side of the display 4 Enter the desired setting code for the program as explained in the detailed procedures on the following pages For the setting codes see AUDITING MODE SETTINGS p 39 5 Press the Light key to complete the settings The alarm indicators go off and the display returns to the number of copies display If you enter the wrong number ...

Page 43: ...mber to be deleted with the Copy ratio display key and then press the START key Number of copies per account program No 14 Use this procedure to display the copy count of each account If no account numbers have been established the error code 14E will appear in the display 1 Select the account number with the Copy ratio display key 2 Hold down the 0 key The copy count of the selected account will ...

Page 44: ... enabled appears in the display 1 Enter your 3 digit account number with the numeric keys When you enter your account number 0 appears in the display to indicate that copying is possible 2 Follow the appropriate steps to make the copy 3 When finished press the key To reset another account number enter the program number 15 for account number deletion and then repeat the procedure for Resetting a s...

Page 45: ...ars in places 44 Paper misfeed 45 Original size not selected automatically When the SPF is installed 45 Copies are smudged or dirty 46 White or black lines appear on copies 46 Paper size for a paper tray cannot be set 46 A copy job stops before it is finished 46 The POWER SAVE indicator is lit 46 Any one of the alarm indicators is lit or blinking 46 Lighting fixture flickers 46 PRINTING PROBLEMS T...

Page 46: ...lect AUTO with the AUTO TEXT PHOTO key or press the Light key and Dark key to manually select an appropriate exposure If the copy is too light or too dark even though AUTO was selected with the AUTO TEXT PHOTO key adjust the automatic exposure level 18 35 Blank copies The original is not placed face up in the SPF or face down on the document glass Place the original face up in the SPF or face down...

Page 47: ...e paper and reload so that the stack does not exceed the line 10 Some sheets of paper stick together Fan the paper well before loading it 10 The guides on the bypass tray do not match the width of the paper Adjust the guides to match the width of the paper 11 The bypass tray extension is not pulled out When loading a large size of paper pull out the extension 11 The bypass paper feed roller is dir...

Page 48: ...full Long copy runs are automatically paused every 250 copies Remove the copies in the paper output tray and press the START key to resume copying 19 The tray is out of paper Load paper 10 The POWER SAVE indicator is lit Any other indicators are lit If other indicators are lit the machine is in Preheat mode Press any key on the operation panel to resume normal operation 8 The POWER SAVE indicator ...

Page 49: ...ntrol Panel and then click Printer In Windows XP click the start button and then click Printer and Faxes In Windows 2000 click the Start button select Settings and then click Printers 2 If the SHARP AR XXXX printer driver icon is shown but you still cannot print the printer driver may not have been installed correctly In this case delete the software and then reinstall it The machine does not prin...

Page 50: ... runs off the paper The paper loaded in the tray is not the same size as that specified in the printer driver Check if the Paper Size options suit the size of the paper loaded in the tray If the Fit To Paper Size setting is activated make sure that the paper size selected from the drop down list is the same as the size of the loaded paper The orientation of document setting is not correct Click th...

Page 51: ...s different from the paper size setting for the tray Change the paper size setting To clear the display do one of the following Use the PAPER SELECT key to change the tray selection Open and close the tray Press the CLEAR ALL key 12 CH appears in display Steadily lit The front cover or the side cover is open Close the front cover or the side cover Blinking The toner cartridge is not installed corr...

Page 52: ...lose the feeding roller cover Section B Open the SPF and rotate the two release rollers in the direction of the arrow to feed the original out Close the SPF and then remove the original If a small original A5 etc is misfed or if an original misfeed occurs in the reversing tray of the SPF if installed open the right side cover and remove the original Close the right side cover The paper may tear wh...

Page 53: ... opening and closing the feeding roller cover or the right side cover 3 Return the originals indicated by the minus number in the display to the document feeder tray and press the START key Copying will resume from the originals that still remained when the misfeed occurred MISFEED IN THE BYPASS TRAY 1 Gently pull the misfed paper out 2 Open and close the side cover The misfeed indicator will go o...

Page 54: ...e misfeed indicator will go out If paper is misfed here go to B Misfeed in the fusing area If paper is misfed here go to A Misfeed in the paper feed area If the misfed paper is visible here go to C Misfeed in the transport area The fusing unit is hot Do not touch the fusing unit when removing misfed paper Doing so may cause a burn or injury Do not touch the photoconductive drum green portion when ...

Page 55: ...over The misfeed indicator will go out The fusing unit is hot Do not touch the fusing unit when removing misfed paper Doing so may cause a burn or injury Do not touch the photoconductive drum green portion when removing the misfed paper Doing so may damage the drum and cause smudges on copies Be careful about unfixed toner on the misfed paper not to soil your hands or clothes Roller rotating knob ...

Page 56: ... area remove the paper by pulling it into the paper output area Be careful not to tear the misfed paper during removal 3 Close the side cover The misfeed indicator will go out The fusing unit is hot Do not touch the fusing unit when removing misfed paper Doing so may cause a burn or injury When closing the side cover press on the handle If the paper was torn make sure that no torn pieces remain in...

Page 57: ...emoval 2 Open and close the side cover The misfeed indicator will go out 3 Close the upper paper tray Push the upper paper tray in completely Make sure that there is no misfed paper in the tray before pulling it out p 52 Note When closing the side cover press on the handle If the misfeed indicator does not stop blinking check for torn pieces of paper in the machine Note ...

Page 58: ... tray and remove the misfed paper Be careful not to tear the misfed paper during removal 4 Close the lower side cover The misfeed indicator will go out 5 Close the lower paper tray Make sure that there is no misfed paper in the tray before pulling it out p 52 Use the following procedure to remove misfeeds that occur in the 250 sheet paper feed unit 2 x 250 sheet paper feed unit Note If the misfeed...

Page 59: ...fore installing the cartridge 5 Close the front cover The toner cartridge replacement required indicator will go out When the toner cartridge replacement indicator lights up little toner remains and thus copies may be faint Note After removing the toner cartridge do not shake it or tap on it Doing so may cause toner to leak from the cartridge Put the old cartridge immediately in the bag contained ...

Page 60: ...rinting and copying printed by the machine and the total output count can be counted up to 999 999 Total output count Hold down the 0 key The total output count appears sequentially in two parts while you hold down the 0 key Example Total number of pages output is 12 345 Total copy count Hold down the key The total copy count appears in the display while you hold down the key The count display and...

Page 61: ...ors blink The display will show 2 Hold down the Copy ratio display key for more than 5 seconds The approximate quantity of toner remaining will be indicated in the display as a percentage 100 75 50 25 10 is displayed When the percentage is less than 10 LO will be displayed 3 Press the Light key to return to the normal display The alarm indicators go off The display returns to the number of copies ...

Page 62: ...ne or similar volatile cleaning agents CLEANING THE ORIGINAL SCANNING GLASS ONLY WHEN AN SPF IS INSTALLED If white or black lines appear in copies made with using the SPF use the provided glass cleaner to clean the original scanning glass If white or black lines appear in copies or printed pages when the SPF is not used see CLEANING THE TRANSFER CHARGER p 61 1 Open the SPF and take out the glass c...

Page 63: ...the side cover 3 Lift and pull out the upper paper tray 4 Take the charger cleaner out by holding the tab 5 Set the charger cleaner onto the transfer charger and gently slide the cleaner in the direction indicated by the arrow two or three times If the white sheet metal is smudged with toner wipe it with a soft clean cloth 6 Return the charger cleaner to its original position Close the upper paper...

Page 64: ...without prior notice The performance specification figures indicated are nominal values of production units There may be some deviations from these values in individual units Note AR 5520S AR 5516S Options that can be installed on both models 250 sheet paper feed unit AR D34 2 x 250 sheet paper feed unit AR D35 Single pass feeder AR SP10 You cannot attach two units of 250 sheet paper feed unit to ...

Page 65: ...eder Acceptable original Weight 56 g m2 to 90 g m2 Size A5 to A3 Capacity Up to 40 sheets Thickness 4 mm and below For B4 and larger sizes up to 30 sheets Detectable original sizes A5 B5 B5R A4 A4R B4 A3 Weight 5 0 kg Dimensions 583 mm W x 435 mm D x 133 mm H 250 sheet paper feed unit 2 x 250 sheet paper feed unit AR D34 AR D35 Tray Trays Side cover Side cover AR D34 AR D35 Paper size B5 to A3 Pap...

Page 66: ...r best copying results be sure to use only SHARP products Only genuine SHARP consumables carry the Genuine Supplies label GENUINE SUPPLIES Supply of spare parts and consumables The supply of spare parts for repair of the machine is guaranteed for at least 7 years following the termination of production Spare parts are those parts of the machine which may break down within the scope of the ordinary...

Page 67: ...OPERATION GUIDE AR5520S GB1 ...

Reviews: