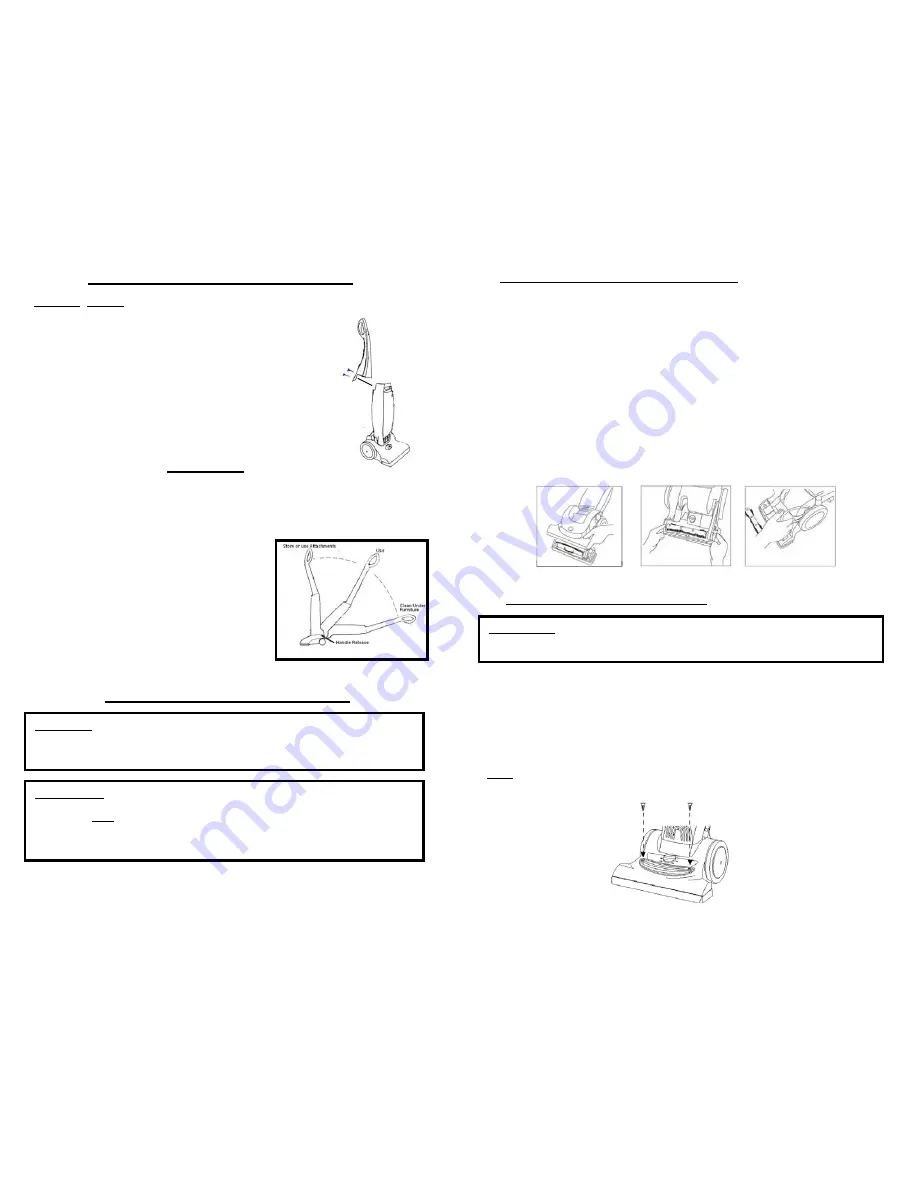
Assembling Your Vacuum Cleaner
5. Cambio de la correa de la boquilla eléctrica:
A)
Ocasionalmente se deberá cambiar la correa de propulsión de la boquilla
eléctrica, cuán seguido dependerá del uso de la aspiradora.
B)
Apague la unidad y desenchúfela del tomacorriente.
C)
Utilice un destornillador Phillips para sacar los dos tornillos de la parte
posterior de la cubierta del cabezal eléctrico.
D)
Saque los dos tornillos de la parte inferior del cabezal eléctrico.
E)
Si se rompe la correa, saque las piezas sueltas antes de cambiarla.
F)
Agarre la barra rotatoria de ambos lados y levántela.
G)
Coloque un extremo de la nueva correa sobre el eje motor y el otro en el
extremo de la polea circular de la barra rotatoria.
H)
Alinee los soportes de caucho en los extremos de la barra rotatoria, con las
ranuras en el cabezal eléctrico. Presione hasta que se ajuste en su lugar.
Asegúrese de que los recortes en los soportes de caucho estén hacia arriba.
I) Coloque los dos tornillos de la parte inferior del cabezal eléctrico y luego
coloque la cubierta. Coloque los dos tornillos de la parte posterior del cabezal
eléctrico.
Warning: Do not plug in vacuum unit until it is fully assembled.
1.
Carefully unpack all components, set aside packaging.
2.
Lift vacuum body to upright position.
3.
Remove the screws (2) that are already attached to the
body.
4.
From the rear of the vacuum, align the handle with
groove and slide onto vacuum. If necessary, use thumb
and finger pressure to slide handle into position.
5.
Once handle is in place, attach the handle with
the screws (2).
Operation
1.
Adjust the motorized power head for the
correct carpet height from low to high.
2.
Plug power cord into electrical outlet.
3.
Step on the handle release button to
release the handle.
(See illustration at right.)
4.
Press the On/Off button to the On position.
5.
You are now ready to vacuum.
The lightweight upright vacuum can be used on multiple types of carpeting,
bare floors or upholstery with attachments. When using the attachment
tools such as the crevice nozzle or the dusting brush, place the handle in
the upright position.
6.
Cambio de los focos de la luz frontal:
Advertencia
:
Siempre desconecte de la fuente de energía cuando revise o limpie
la unidad. Si no lo hace, y la limpiadora accidentalmente se enciende, se podrían
producir descargas eléctricas o daños personales.
1. Apague la unidad y desenchúfela del tomacorriente.
2. Con un destornillador Phillips Nº 2, saque los dos tornillos de la mica
de la luz frontal.
3. Retire la mica de la luz frontal.
4. Saque los focos de luz jalándolos cuidadosamente.
5. Coloque los nuevos focos, presionándolos para que se ajusten.
6. Coloque la mica de la luz frontal y luego coloque los dos tornillos
en la mica para ajustarla en su lugar.
How to Adjust for Carpet Height
WARNING:
To avoid injury, keep loose clothing, hair, fingers and all other
parts of body away from any moving part (such as the beater brush). Turn
off the switch and unplug the vacuum before adjusting the vacuum for the
carpet height.
Nota:
Siempre reemplace el foco de luz por uno de igual o menor vataje
(12V 4W) para evitar que se dañen las piezas contiguas.
IMPORTANT:
The front of the vacuum cleaner has a carpet adjustment knob
that raises and lowers the motorized power head to match the type of carpet. With
the vacuum
NOT
connected to the electrical outlet, set the adjustment knob to the
lowest setting for maximum cleaning. If the vacuum is to difficult to push, move
the knob to the next highest setting until the vacuum is comfortable to push. The
beater brush must reach the carpet for effective cleaning.
3
16


