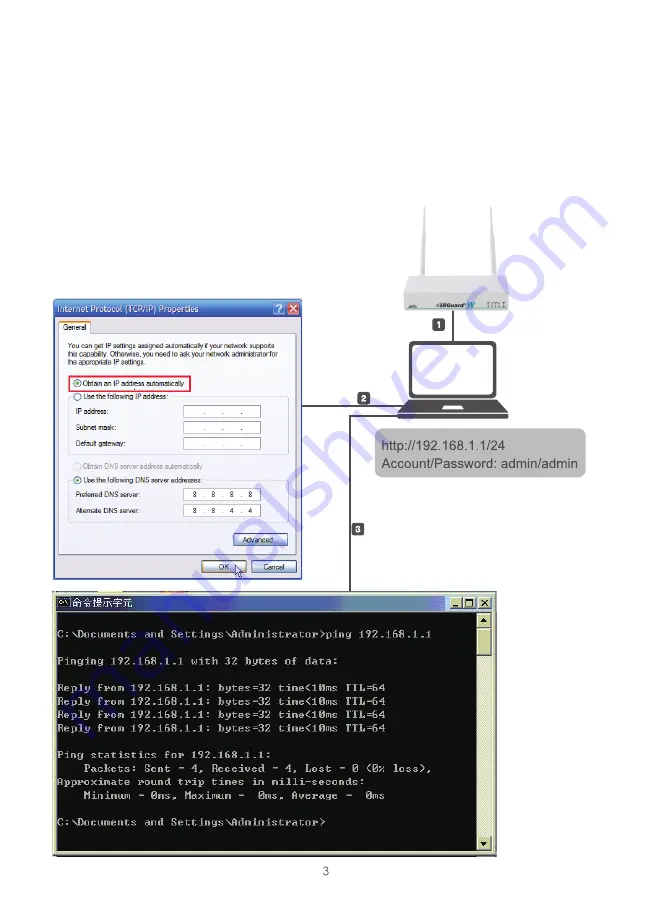
2. Deployment
1. Please make sure you fasten two wireless ISP radio antennas to HiGuard W.
2. Connect one end of the RJ45 Ethernet Cable to the LAN port on the back panel of
HiGuard W and the other end to a laptop/computer.
3. Configure a LAN with DHCP and you will obtain 192.168.1.x/24(IP segment)
automatically.
4. After getting the IP, ping 192.168.1.1 to ensure network connection.
Summary of Contents for HiGuard W
Page 1: ...QUICK INSTALLATION GUIDE W...
Page 12: ...2 1 HiGuard W 2 RJ45 HiGuard W LAN 3 DHCP 192 168 1 x 24 IP 4 IP Ping 192 168 1 1...
Page 13: ...STEP 1 STEP 2 IP 192 168 1 1 admin admin LAN WAN WiFi URL...
Page 14: ...STEP 1 Chrome 1 1 Chrome https 192 168 1 1 1 2 Chrome admin admin...
Page 15: ...1 3 2 1 LAN IP STEP2...
Page 16: ...2 2 WAN WAN STATIC IP 255 255 255 0 DHCP IP PPPOE IP IP STATIC 2 3 WiFi SSID SSID...
Page 17: ...2 4 URL URL IP 2 5 IP...
Page 18: ...2 6 2 7 120...


