background image

- 13 -

Remote Control

4. TV Button

Press to enter TV mode.

5. AV Button

Press to enter external AV source input

mode.

6. FM/AM Button

Press to enter FM/AM radio mode.

7. DVB-T Button

Press to enter DVB -T mode.

8. OK Button

Press to confirm selections.

9.

,

,

/CH+,

/CH- Buttons

Press to select menu items or settings.

Press



buttons to adjust value in

the picture setup menu.

Press



buttons to select channels

or radio stations forward and backward

in TV or radio mode.

Press to adjust the value of time when

setting time on the display panel.

10. SET Button

Press to enter or exit the Alarm setup

menu. Press to memorize the selected

radio station under AM/FM status.

11.

/SEEK – Button

In radio mode, press once to fine tune

frequency backward. Press for about

1.5 seconds to search radio stations

backward automatically.

In DVD mode, press to activate fast

backward playback.

12.

/SEEK + Button

In radio mode, press once to fine tune

frequency forward. Press for about 1.5

seconds

to

search

radio

stations

forw ard automatically.

In DVD mode, press to activate fast

forward playback.

13.

(PLAY) Button

Press to start playback in DVD mode.

14.

(STOP) Button

Press to stop playback in DVD mode.

15. TITLE/EPG Button

Press to display titles if exist on the disc

in DV D mode.

Press to enter the channel schedule in

the DVB-T mode.

16. MENU/FAV Button

Press to access the disc menu in DVD

mode.

In the DVB-T mode, press to enter the

favourite

list,

then

use

the



direction buttons to select, then press

the OK button to confirm and start

playback.

17. REPEAT/EXIT Button

Press to repeat a title, chapter or the

entire disc in DVD mode.

Press to return to the previous menu in

the DVB-T setup menu.

18. A-B/TVR Button

In DVD mode, press to play a section of

the disc from point “A” to point “B”.

Press once to select the starting point

(A), press it again to select the end

point (B). Then the selected section will

be played repeatedly. Press this button

the third time to stop A-B repeat.

In the DVB-T mode, press to realize the

switch function between TV mode and

radio mode.

Summary of Contents for KITCHEN CENTER 1

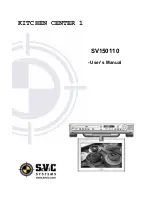
Page 1: ... 1 KITCHEN CENTER 1 SV150110 User s Manual ...

Page 2: ... AV Signal Source Connecting To TV Signal Input Source Connecting To Antenna Connecting To the Power Adapter Connecting to DVB T Antenna DVD Play Operation DVD Playback Functions DVD System Setup DVD Setup LCD Setup TV Function AV Function Radio Function DVB T Setup Installation Troubleshooting Specifications Warranty 3 6 7 8 10 12 15 15 15 16 17 17 18 21 23 23 24 25 28 29 30 39 41 42 43 ...

Page 3: ... The manufacturer should not hold responsibility for the damage caused by any substitutions and modifications of the product without authorization from the manufacturer or authorized unit WARNING The apparatus shall not be exposed to dripping or splashing and that no objects filled with liquids such as vases shall be placed on the apparatus The lightning flash with arrowhead symbol within an equil...

Page 4: ...t the power cord from being walked on or pinched particularly at plugs convenience receptacles and the point where they exit from the apparatus 9 Only use attachments accessories specified by the manufacturer 10 Unplug the apparatus during lightning storms or when unused for long periods of time 11 Refer all servicing to qualified service personnel Servicing is required when the apparatus has been...

Page 5: ...If this equipment does cause harmful interference to radio or television reception which can be determined by turning the equipment off and on the user is encouraged to try to correct the interference by one or more of the following measures Reorient or relocate the receiving antenna Increase the separation between the equipment and receiver Connect the equipment into an outlet on a circuit differ...

Page 6: ...ltiple Mode DVD TV Radio External Audio Video Input Mode DVB T High Quality Property Video Screen Supports normal screen 4 3 and wide screen 16 9 aspect ratios AV Input External Audio Video input can be connected to most external AV sources Amplifier Function Built in 2x5w stereo amplifier with left and right speakers Advanced Playing Function On Screen Display Displays you choices of English Fren...

Page 7: ...sc maker specifies the operation of some DVD discs Please refer to the instruction manual with the disc Care of Discs Do not touch the playing surface of the disc Do not stick paper or labels on the disc Storage of Discs Do not expose discs to direct sunlight or excessive temperatures Cleaning of Discs If a disc has fingerprints or dust on it lightly wipe the disc with soft cloth from the centre o...

Page 8: ...ause playback under DVD mode 4 STOP Button Press to stop playback under DVD mode 5 Button When DVD disc is playing press this button once to go to beginning of the current track chapter Press it twice to go to the previous track chapter 6 Button Press to go to the next track under DVD mode 7 SOURCE Button Press to shift between DVD TV AV FM AM and DVB T mode ...

Page 9: ...tatus the time is still displayed on the panel Use the buttons to select the editing position of hour or minute and then use the buttons to adjust the value of the hour or minute upward and downward 14 SET Button Press to enter and exit the alarm setup menu Or press to memorize the radio stations under AM FM status 15 CH CH Buttons Press to select items in the setup menu Press to select the channe...

Page 10: ...Left Right AUDIO Input Jack Connection for audio input 6 VIDEO Input Jack Connection for video input 7 Direct Current 12V Input Jack Display Panel Drawing 1 FM radio status indicator 2 AM radio status indicator AM time indicator 3 PM time indicator 4 Hour or character indicators 5 Minute or character indicators 6 Character indicators 7 FM frequency unit of MHz indicator 8 AM frequency unit of KHz ...

Page 11: ...trol works best at a distance less than 7m and at an angle of up to 60 to the front of the unit No obstacles may stand in the way between remote control and infrared sensor The battery normally lasts for about six months This depends on how often and for what operations the remote control is used If the remote control unit fails to work even when it is operated near the player replace the battery ...

Page 12: ...trol Drawing 1 POWER Button Press to access to or exit the STANDBY mode 2 SUBTITLE Button Press to select a subtitle language or turn subtitle off when a DVD disc with multi subtitles is playing 3 DVD Button Press to enter DVD mode ...

Page 13: ...requency forward Press for about 1 5 seconds to search radio stations forward automatically In DVD mode press to activate fast forward playback 13 PLAY Button Press to start playback in DVD mode 14 STOP Button Press to stop playback in DVD mode 15 TITLE EPG Button Press to display titles if exist on the disc in DVD mode Press to enter the channel schedule in the DVB T mode 16 MENU FAV Button Press...

Page 14: ... 26 SLOW Button Press to activate slow playback in DVD mode 27 LCD ON OFF Button Press to turn On Off the LCD screen display 28 LCD SETUP Button Press once to enter the PICTURE setup menu Then press the button to enter the TV SETUP menu in TV mode 29 NEXT Button Press to go to next track or chapter in DVD mode 30 PREV Button In DVD mode press once to go to the beginning of current track or chapter...

Page 15: ...ase make all the connections before installing the unit in the kitchen Connecting To External AV Signal Source Connections should be made as follows Connect the L R audio cables according to the marks on the rear panel of the unit Left audio cable is plugged into the upper jack the right audio cable is plugged into the lower jack Connecting To TV Signal Input Source ...

Page 16: ...as possible after connection When connecting the supplied AM loop antenna connect two black cords to AM and ground jacks as shown below If the FM reception is poor use a 75Ω coaxial cable not supplied to connect system to an outdoor FM antenna as above If you connect the system with outdoor FM antenna you should earth the system in order to avoid lightning strike Do not connect the earth wire to g...

Page 17: ...e two prong end of the power cord to the grounded electrical socket 3 When not using the unit turn off the power of the unit first and then unplug the power supply to prevent malfunctions Connecting to DVB T Antenna The unit is designed with an antenna input jack Plug the DVB T antenna into the DVB T jack on the rear panel of the unit to receive TV signal then press DVB T button on the remote cont...

Page 18: ...e root menu during DVD disc playback and use the direction buttons to highlight an item you would like to play Press the OK ENT button to confirm your selection Title Chapter Normally there are several titles in a DVD disc and several chapters sections in a title You can select any title or chapter quickly by entering the relevant number Audio DVD discs can contain up to 8 audio bit streams For Ex...

Page 19: ...yback Load a JPEG disc in Use the direction button and OK button to select a submenu with pictures and then use the direction button to select the contents Many discs have other contents besides pictures Picture Rotation The rotation function is only available when the picture is normally displayed Once another picture is selected the rotation will be cancelled automatically During playback use th...

Page 20: ...next file Audio Press the AUDIO button to select the desired sound effect Keep pressing for about 2 seconds to remove display from the screen Subtitle During playback press the SUBTITLE button to select a subtitle language or to turn the subtitle off This function is only available for the discs recorded with multi subtitles Some MPEG4 discs may not support Subtitle or Audio function Info During p...

Page 21: ...from the location where it was stopped This function will not operate if the disc is removed from the DVD Player Press the STOP button twice 2x Playback of the disc will stop When the PLAY button is pressed again playback of the disc will start from the beginning of disc Zoom Press the ZOOM TTX button on the remote control to cycle through the different zoom settings Fast Playback Press the SEEK S...

Page 22: ...epeat To repeat a Title Chapter or Track press the REPEAT EXIT button on the remote control Continually pressing the REPEAT EXIT button will display a menu as follows Repeat Chapter Title All You can temporarily select a section of a DVD that you would like to play repeatedly You do this by marking the start and the end of the section using the A B TVR button During playback press the A B TVR butt...

Page 23: ...ew selection will be highlighted Press the OK button for confirmation Press the left direction button to enter the other setup menu s General Setup TV Display Select Normal PS or Normal LB when a 4 3 TV is connected Select WIDE when using a 16 9 screen on the unit or when a wide screen TV is connected to the video output OSD Lang There are five different OSD languages for selection You can choose ...

Page 24: ...ll the settings Note For preference setting the unit must be in the stop mode LCD Setup Under DVD mode press the LCD SETUP button on the remote control or the TV LCD SETUP button on the front panel once there will be menu displayed on the screen Use the buttons to select the item you want to set Brightness Contrast Colour Use the buttons to adjust you can adjust the items between 0 and 20 Use the ...

Page 25: ...TV LCD SETUP button on the front panel once to enter PICTURE setup menu and screen display as shown Use the buttons to select the item you want to set Brightness Contrast and Colour Use the buttons to adjust you can adjust the items between 0 and 20 Use the buttons to select the Language press the buttons to select English French or Spanish etc To restore a setting to the original value use the bu...

Page 26: ... select channels When the button is used to turn the function OFF it will play the channels in sequence when selecting under normal playback status Swap Use the buttons to select SWAP press the number buttons on the remote control to input the channel number then the channel will be swapped to selected channel Blue Screen This function is only available when there is no input signal Use the button...

Page 27: ...m you want to set Use the buttons to enter the item and to select Press the SET button again to exit from the setup menu Alarm Use the direction buttons to select ON or OFF This function allows you to set the alarm clock time of this unit To set the alarm clock time first press any number button to enter the time input state Then use number buttons to input the desired alarm time in sequence of ho...

Page 28: ...hown below Use the buttons to select the item you want to set Brightness Contrast and Colour Use the buttons to adjust the items between 0 and 20 Use the buttons to select the Language press the buttons to select English French or Spanish etc Select Reset and press the OK button to return to the factory default settings First use the buttons to highlight PICTURE and then press the button on the re...

Page 29: ...the buttons to adjust the channel number for your preference and then press the SET button again the station will be memorized with the coded station number Press the SET button again the station will be automatically memorized with the default station number in sequence You can store radio stations from 0 to 19 total 20FM or 20AM radio stations If no button is pressed within 3 seconds after press...

Page 30: ...TUP button the screen will display as below System Setting Press the direction buttons to select System Setting Press OK ENT button to enter the item the screen will display as below In the main menu press the direction buttons to select the item you want to set up Press the OK ENT button to enter the item Press the DVD DVB SETUP button or EXIT button to exit In this menu press the direction butto...

Page 31: ...rent sleep time press OK button to confirm your selection During setting press the EXIT button to return 3 Display Timer Setting Select Display Timer Setting press the OK button to enter Then press the button to enter the selecting items use the button to select different display time press OK button to confirm your selection During setting press the EXIT button to return Language Setting You can ...

Page 32: ... EXIT button to return A V Setting This item is used to set the audio and video mode Press the buttons to select A V Setting press the OK ENT button to enter the screen will display as below 1 Brightness Contrast Select Bright Contrast press the buttons to adjust the value 2 Saturation Select Saturation press the buttons to adjust the value 3 Conversion Select Conversion press the to enter then pr...

Page 33: ...p menu and then press the button to enter press the buttons to select items press the OK ENT button to confirm your selection Press EXIT button to return 3 Restore Setting Press the button to select Restore Setting and then press the OK ENT button to return to the default status or press the EXIT button to return In the menu use the number buttons to input the pin code press the OK button to confi...

Page 34: ... confirm your selection Press the EXIT button to return 2 Channel No Select the Channel No use the number buttons to input the channel number press the button to delete the incorrect input Press the button to enter the character and number list In the list press the direction buttons to select character or number press the OK button to confirm the input NOTE this item is not available when the Sea...

Page 35: ...ection buttons to select Save or No Save press OK ENT button to confirm your selection press the EXIT button to return 6 Update Mode Select the Update Mode press the button to enter and then press the direction buttons to select Append or Replace press OK ENT button to confirm press the EXIT button to return After setting these items use the direction buttons to highlight the Start Search then pre...

Page 36: ...utton to display a menu Add Channel Press the button to enter Add menu press the OK ENT button confirm The screen will display as below Press the direction buttons to select the desired item press the button to enter or use the number buttons to input press the button to delete the incorrect input Press the button to enter the character and number list In the list press the direction buttons to se...

Page 37: ...of this channel Favourites List Select the Favourites List press the OK ENT button to enter the screen will display as below Add Favourite Press the button to enter press the OK button the screen will display as below During initial setting you should set the channel list at first Then you can select channels from the channel list and add the channel into the favourites list Also you can delete th...

Page 38: ...ystem Info press the OK button to enter the screen will display as below Use the buttons to select channel press the OK button to booking channel press the EXIT button to return In the menu press the direction buttons to select the item press the OK button to enter Press the EXIT button to return to the previous menu ...

Page 39: ...r a cabinet The player unit may be installed in the kitchen with or without the spacer The suggested mounting position of the unit is under a wall cabinet See drawings below NOTE The dimensions of the player 7 9cm H x 37 2cmW x 28 7cmD There should be at least 35 mm distance between the unit and the wall Installing steps ...

Page 40: ...d the cabinet and this can look like better Quick hints Since the unit is rather heavy be careful while doing the installation work To reduce risk of fire do not place any heating or cooking appliance beneath the unit especially while the LCD screen is open for viewing Mount the unit so that its AC power cord can be plugged directly to a wall outlet Do not use a converter or extension cord Be sure...

Page 41: ...ion of the picture is incorrect Make sure the video type of the AV signal source is PAL Make sure system connection is correct Is your disc dirty or warped Clean or replace it Cannot continue to play and plays a section repeatedly Make sure the player is not in A B repeat status Press A B button to cancel A B repeat status Is your disc dirty or warped Clean or replace it The remote control does no...

Page 42: ...io Frequency Range FM 87 5 108MHz Power AC100V 240V 50 60Hz Power Consumption 30W Dimensions 7 9cm H x 37 2cmW x 28 7cmD Weight About 3 1 kg DESIGN AND SPECIFICATIONS ARE SUBJECT TO CHANGE WITHOUT NOTICE MPEG Layer 3 audio coding technology licensed from Fraunhofer IIS and Thomson Manufactured under license from Dolby Laboratories Dolby and the double D symbol are trademarks of Dolby Laboratories ...

Page 43: ...defect THE WARRANTY DOES NOT COVER Transport costs nor charges relating to an intervention at the address of the purchaser Scratches splinters or marks in the packaging of the device or its accessories which were not noted at the time of delivery breakable accessories except in case of manufacturing defects recognized by our technical department Moreover we wave any liability for general damages r...

Reviews:

Related manuals for KITCHEN CENTER 1