11
If this cannot be avoided, however, suitable insulation must be
in installed between the heat source and the unit.
∙
The unit must not be installed inside a cupboard; when
positioning the unit, also ensure that it is not placed directly
underneath a shelf or any other similar object.
∙
Ensure that there is suf
fi
cient space in front for the door to
open to 160°.
∙
In the case of uneven
fl
oors, the adjustable feet at the front
can be used to compensate and ensure optimum stability.
Ventilation
Ensure that there is enough space around the unit so that the air
circulation round and behind it is not obstructed. (Rear and sides 5
cm, top 10 cm.)
Reversible door
If necessary, the door may be reversed, i.e. from right-hinged
(default installation) to left-hinged.
Warning:
Always disconnect the unit from the mains before
any maintenance or repair work is carried out.
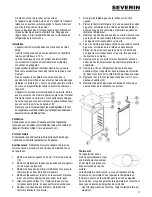
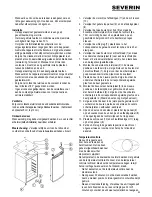
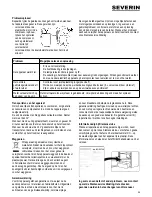
1. Remove the four screw covers (11) and the screws (10).
2. Remove the entire top panel (9), and the cover plate (8).
3. Remove the two threaded bolts (6) securing the upper
hinge plate (5) on the right-hand side.
4. Carefully lift up the door and place it on a suitable surface
to protect it from scratches.
5. Take off the white plug (7) and re-position it in the
corresponding hole on the right-hand side, pushing it
fi
rmly
down.
6. Remove the two threaded bolts (1) securing the lower
hinge plate (2) on the right-hand side.
7. Take out the left-hand adjustable foot (4) and
fi
t it on the
opposite side.
8. Mount the lower hinge plate (2) in its new position on the
left-hand side, using the threaded bolts (1). Ensure that
the hinge plate is aligned parallel to the side edge of the
fridge.
9. Replace the door in its new position. Ensure that the lower
hinge pin is inserted into the corresponding guide bush on
the door.
10. Mount the upper hinge plate (5) in its new position on the
left-hand side, using the two threaded bolts (6). Ensure
that the hinge pin is inserted into the corresponding guide
bush in the door. (Do not fully tighten the bolts yet).
11. Ensure that the door is in its properly closed position
before tightening the bolts holding the lower and upper
hinge plates.
12. Open the fridge door, place the top panel (9) on top of the
unit and
fi
t the cover plate (8) into the opening on the right-
hand side of the top panel.
13. Replace the screws (10) and screw covers (11) on the top
panel (9).
14. Put the unit back in its intended position and wait for about
two hours before connecting it to the mains.
Temperature control
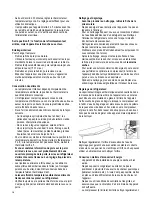
The unit is re-activated by
connecting it to the mains. It
is only switched off completely
when the plug is removed from
the wall socket.
The temperature in the refrigerator cabinet can be adjusted by
setting the temperature control. Turning the control clockwise
will decrease the temperature, while turning it anti-clockwise
will increase it.
∙
After switching on, set the temperature control to its
maximum setting.
∙
After approx. 30 minutes, the setting should be changed to a
medium position, usually suf
fi
cient for home or of
fi
ce use.
∙
Following a power interruption, or if the unit has been
disconnected from the mains, there may be a delay of 3 to 5
minutes before the unit automatically switches on again.
In position ‘0’, the cooling function is switched off, though
the appliance is still connected to the mains.
Interior light
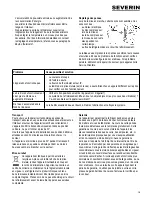
Changing the light bulb:
∙
Remove the plug from the wall socket.
∙
Use a suitable screw-driver to remove the screw holding the
light cover and take the cover off.
∙
Take out the defective bulb and
fi
t a new one (max. 15 W).
∙
Slide the cover back into position, replace the screw and
tighten it.
∙
Insert the plug into the wall socket. The unit will
automatically switch on after 3 to 5 minutes.
Storing food
∙
The temperature inside the refrigerator depends mainly on
the ambient temperature, the temperature control setting
and the amount of food stored.
∙
Different areas of the refrigerator cabinet are affected
differently by the cooling effect. The warmest area is around
the door in the higher part of the cabinet, the coldest around
the rear wall and in the lower part of the cabinet.
∙
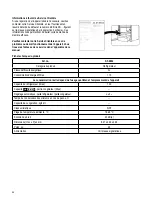
The food should therefore be stored as follows:


