Quick Reference Sheet
SL-202-DV / SL-402-DV
Dual Monitors DVI/VGA USB KVM Switch w/ Audio & Mic
Rev. 1.0 Copyright© All rights reserved
Q u i c k R e f e r e n c e S h e e t
Notes:
1. The USB keyboard hotkeys allows you a faster and broader control for your KVM switching operation in addition to the front-panel button. If you have configured a hotkey preceding sequence other than two
consecutive scroll locks, here you should change your hotkey sequence accordingly. (For preceding sequence key configuration, please refer to ”Define Hotkey Preceding Sequence
”
in above table.)
2. When the binding of PC & USB hub port control switching is enabled by the hotkey sequence: ScrLk + ScrLk + Z, any PC and hub port control switching are bound together. To remove this binding, use the
hotkey sequence: ScrLk + ScrLk + X.
3. When the binding of PC and audio&mic switching is enabled by the hotkey sequence: ScrLk + ScrLk + Q, any PC and audio&mic switching are bound together. To remove this binding, use the hotkey sequence:
ScrLk + ScrLk + W.
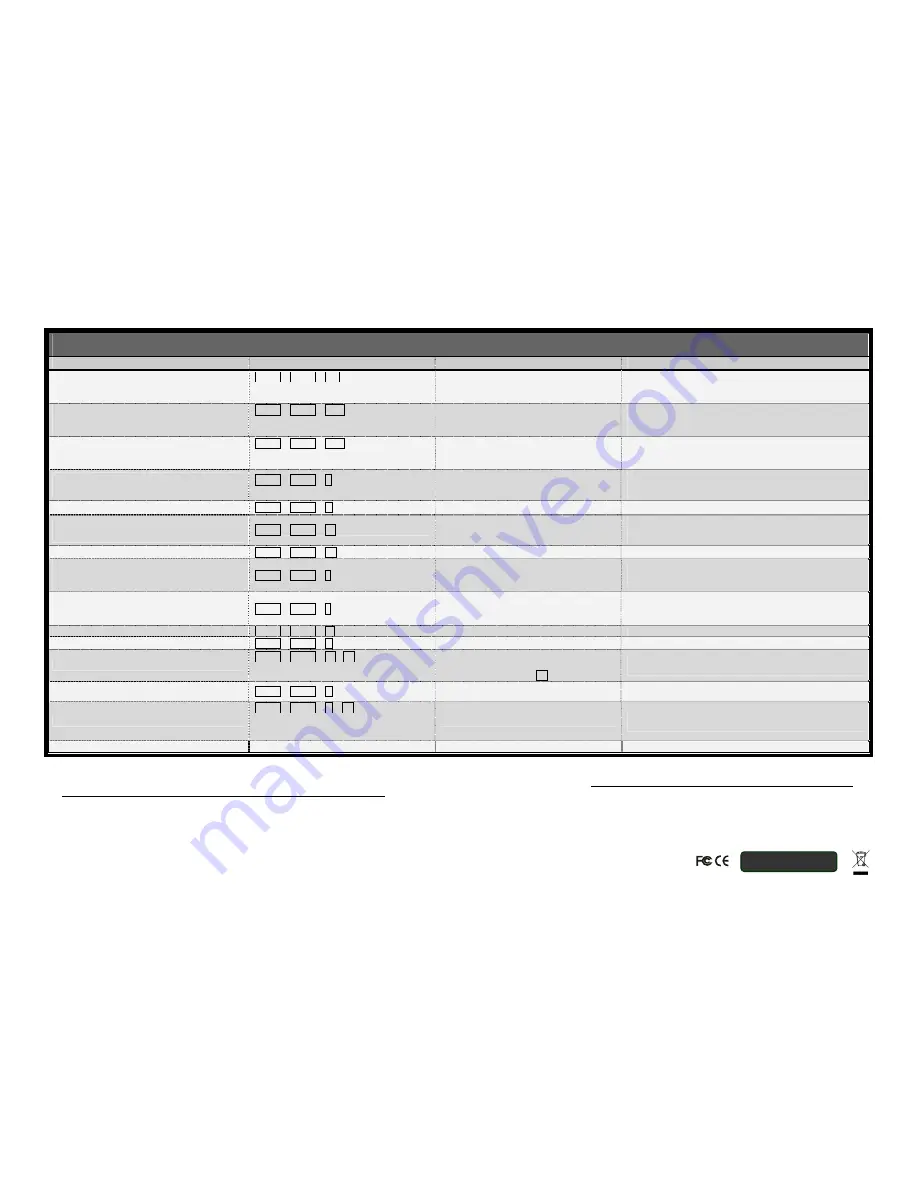
Dual Monitors DVI/VGA USB KVM Switch w/ Audio & Mic -- Operation Commands for Hotkeys / Front-Panel Button
Hotkey sequence = [ScrLk]
*
+ [ScrLk]
*
+
Command key(s)
* User-definable Preceding sequence = SCROLL LOCK
,
CAPS
,
ESC
,
F12
or
NUM LOCK
Command
Hotkeys
1
Front-Panel Button
Description
Select PC Port
2
(Jointly select PC port/ hub port control/
audio&mic, if binding is enabled)
ScrLk + ScrLk + (x)
x =
1~2/ 1~4
for PC port number
Press the corresponding button to select the
active PC port.
Select the active PC port
(Jointly select
PC port/ hub port control/ audio mic, if binding
is enabled)
Select Hub Port Control
2
(Jointly select PC and hub port control, if binding
is enabled)
ScrLk + ScrLk + (Fx)
Fx
= F1~F2/ F1~F
4 (Fx is a
function key
)
x =
1~2/ 1~4
for hub port number
Press the button to toggle the specific
PC+USB hub port control. (It works only if
PC port/ hub port control binding is enabled.)
Select the PC port that control all USB hub ports
(Jointly select PC & hub port control, if PC/ hub port control
binding is enabled)
Select Audio&Mic Port
3
(Jointly select PC port and audio&mic, if binding
is enabled)
ScrLk + ScrLk + (Fy)
Fy
= F5~F6/ F5~F8
(Fy is a
function key
)
y = 5~6/ 5~8 for audio&mic port number
--
Select the active audio&mic port
(Jointly select PC & audio&mic port, if binding is enabled)
Bind PC and Hub Port Control Switching
2
[Default]
ScrLk + ScrLk + Z
--
Enable the binding of PC port and hub port control switching.
(Once this feature is enabled, any pc and/or hub port control
switching is bound together)
(factory default)
Unbind PC and Hub Port Control Switching
2
ScrLk + ScrLk + X
--
Disable the binding of PC port and hub port control switching
Bind PC and Audio&Mic Switching
3
[Default]
ScrLk + ScrLk + Q
--
Enable the binding of PC port and audio&mic switching.
(Once this feature is enabled, any pc and/or audio&mic
switching is bound together)
(factory default)
Unbind PC and Audio&Mic Switching
3
ScrLk + ScrLk + W
--
Disable the binding of PC port and audio&mic switching
Previous PC port
2
(Jointly select PC/ hub port control, if binding is
enabled)
ScrLk + ScrLk +
↑
(arrow up)
--
Select the previous connected PC port
(Jointly select PC/ hub port control, if binding is enabled)
Next PC port
2
(Jointly select PC/ hub port control, if binding is
enabled)
ScrLk + ScrLk +
↓
(
arrow down
)
--
Select the next connected PC port
(Jointly select PC/ hub port control, if binding is enabled)
Previous PC port
ScrLk + ScrLk +
(Backspace)
-
-
Toggle between the previous port and current port
Beep Sound On/Off
ScrLk + ScrLk + B
Toggle on/off the beep sound while autoscanning
Define Hotkey Preceding Sequence
ScrLk + ScrLk + H + (y)
y =
SCROLL LOCK, CAPS, ESC,
F12 or NUM LOCK
Press and hold down last button (Button 2 /
Butotn4) till two beeps, release the button,
then press
(y)
key
Select the hotkey preceding sequence among 5 alternative
keys
Autoscan
ScrLk + ScrLk + S
--
Autoscan through every connected port for quick screen
browsing of each port (scan delay = 5 sec.).
Autoscan with Programmable Delay Time
ScrLk + ScrLk + S
+
(z)
z = 0~9
1
10” ; 2
20” ; 3
30” ; 4
40” ; 5
50”
6
60” ; 7
70” ; 8
80” ; 9
90” ; 0
100”
-
-
Autoscan with a user-defined delay time within a range of
10 ~ 100 seconds
Stop Autoscan
Press any key on keyboard
Press any button
Terminate autoscan activity
RoHS Compliant


