


Data Pro
P/N 10029355 Rev AE
Operation Manual
Page 38 of 92
The address configuration window opens up (
) that has the gauge serial numbers printed
adjacent to the Modbus addresses.
The user selects the sensor/channel and clicks ‘OK’. Then another window opens up for the address
assignment and the selected channel address appears on top of the screen. The user enters the new
address and clicks
‘Save’
. The application shows the warning if the address is already assigned to
another gauge.
Verify new gauge addresses by viewing the individual channel address in the channel information tab
(see Section 8.5.6).
** CAUTION **
DO NOT ATTEMPT TO CHANGE ADDRESS OF A GAUGE AT TEMPERATURES ABOVE
80
0
C.
8.5.6
Ch. Info (Channel Information)
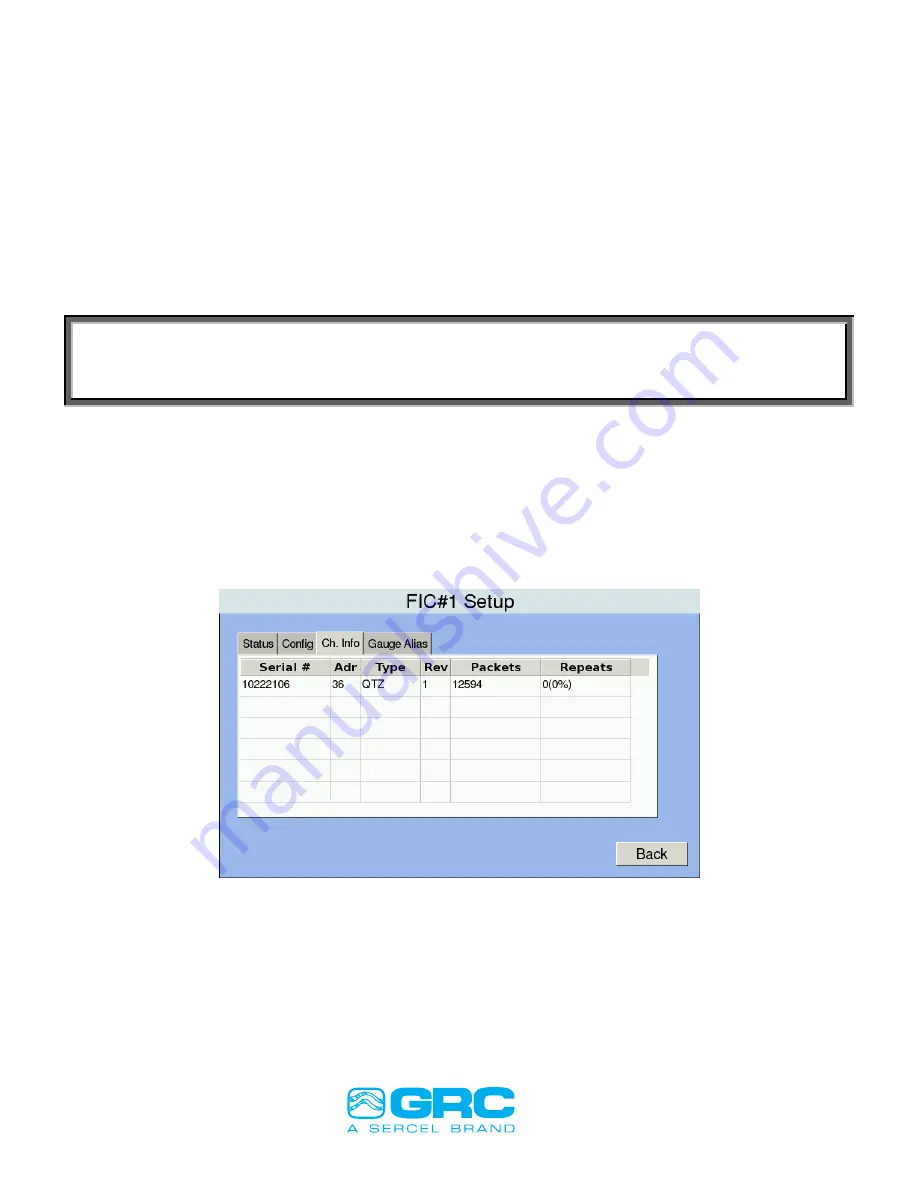
The application displays the Modbus address and communication information on the menu tab ‘Ch.
Info’. (
)shows the gauge serial number and the gauge type (capacitive transducer, quartz
transducer, or vibration transducer) and the Modbus address of each channel. The increasing number
of ‘Packets’ count provides an indication of proper communication between the FIC and the downhole
gauge. Access
‘Ch. Info’
tab via:
Menu
Interface Setup
Interface For Gauge
Ch. Info
Figure 35
– Channel Info tab in FIC Configuration
8.5.7
Gauge Alias
Follow the menu steps below to enter/change the
gauge alias
:
Menu
Interface Setup
Interface For Gauge
Config
Gauge Alias
Edit
The
‘Gauge Alias’
screen displays a maximum of six gauge connections. The user selects the ‘
Edit’
button corresponding to the gauge serial number in order to assign/change gauge alias. The user
enters the alias name using onboard
keyboard and then selects ‘
Save
’. The Main screen will show the