background image

3. 

Access Camera 

Step 1. 

Power your camera using the correct power source (PoE switch, PoE injector, or 
12V adapter).


Step 2. 

Download, install, and run sentryView™, Sentry360’s camera configuration tool, 
here: 

http://sentry360.com/product/sentryview/


Step 3. 

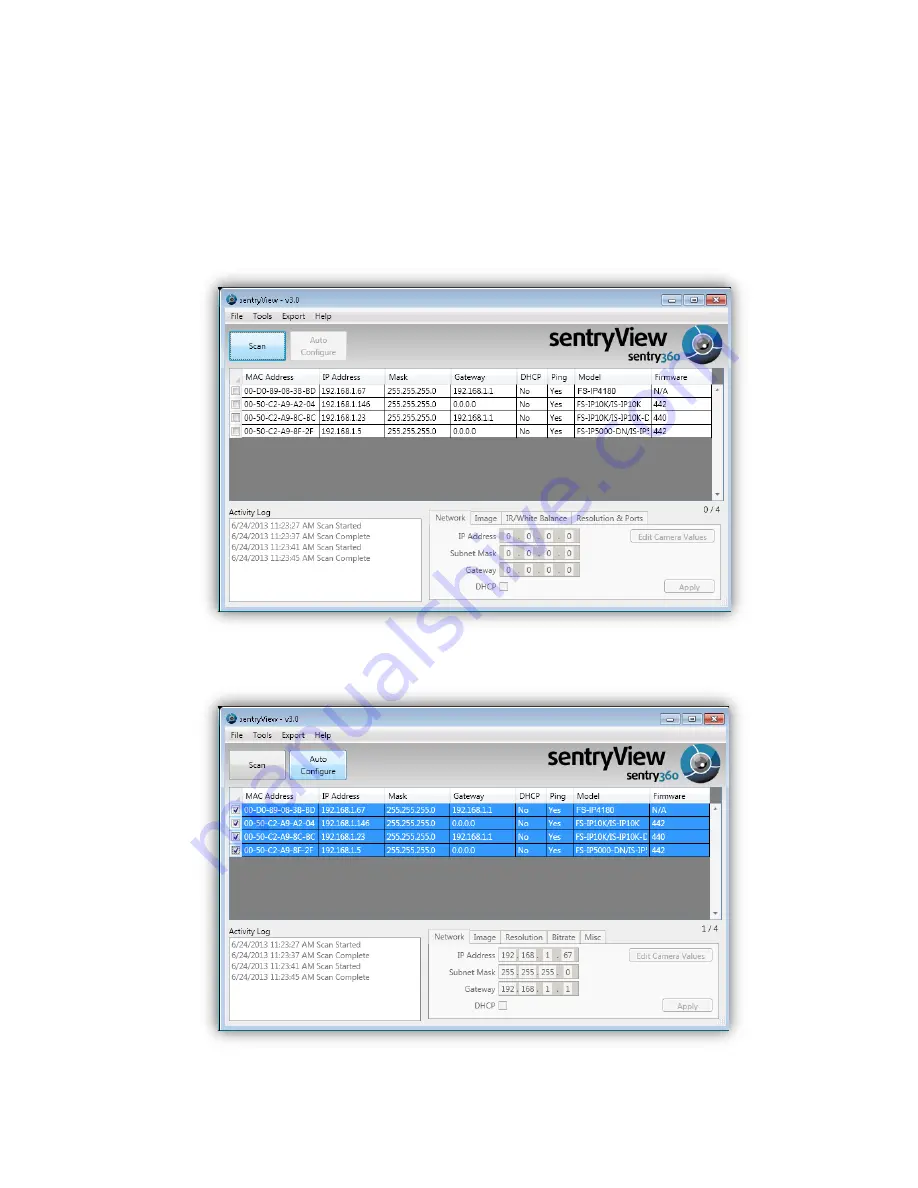
Click the 

Scan

 button in sentryView™ to scan your network for connected cameras.


Step 4. 

To automatically configure your camera network settings, check the boxes of the 
cameras you want to configure. Then click 

Auto Configure


Summary of Contents for FS-IP14K-DN

Page 1: ... Sentry360 2014 FS IP14K DN User Manual Ver 1 0 ...

Page 2: ...Table of Contents 1 Overview 3 1 1 Features 3 1 2 Package Contents 3 1 3 Dimensions 4 1 4 Connectors 5 2 System Requirements 6 3 Access Camera 7 3 1 Web Browser Configuration 9 ...

Page 3: ...ck can be one of the following Panoramic Display Quad Virtual Camera display Single Virtual PTZ camera display or panoramic with 2 virtual camera displays with calibrated PTZ capability between the panoramic image and virtual cameras The FS IP14K DN is equipped with a mechanical IR cut filter that filters infrared light to display high quality video images in low light environments 1 1 Features 14...

Page 4: ...1 3 Dimensions The FS IP14K DN camera and lens dimensions are shown below ...

Page 5: ...1 4 Connectors The diagram below shows the FS IP14K DN connections Designation Description 1 DC Power 12V DC Power Connector 2 LAN Port PoE and Ethernet Port ...

Page 6: ...he FS IP14K DN via web browser please ensure your PC has a good network connection and meets system requirements as described below Items System Requirement Web Browser Microsoft Internet Explorer Mozilla Firefox Google Chrome Apple Safari ...

Page 7: ...tall and run sentryView Sentry360 s camera configuration tool here http sentry360 com product sentryview Step 3 Click the Scan button in sentryView to scan your network for connected cameras Step 4 To automatically configure your camera network settings check the boxes of the cameras you want to configure Then click Auto Configure ...

Page 8: ...way and DHCP settings Click Apply to save these values Step 7 Your cameras are now configured If you are using sentryCore as your Video Management System please download the latest version here http sentry360 com product sentrycore Step 8 Right click on a camera and select Browse The prompt for entering the default username and password will appear for logging in to the FS IP5000 M ...

Page 9: ...r Configuration Camera configuration is accessed through the web browser interface by clicking the Show Settings button When configuration is complete click the System Tab Save to commit settings to permanent memory ...

Reviews: