

Sensor doesn’t fit in the prescribed location
Try another place in the vicinity of the prescribed location
where the sensor will be properly triggered. Consult the full
manual on www.sensara.eu for further instructions.
Adding sensor
Insert the batteries into the sensor and wait at least
30 seconds.
Press the small button on top of the gateway. The
green
and
orange
lights will start blinking.
Now press the small button on the sensor. In the case of
a door sensor, use a paperclip to press inside the hole next
to the light. In the case of an activity sensor, press the small
button inside the housing next to the batteries.
When the light on the gateway stops blinking, the sensor is
ready for use.
Deleting sensor
To remove a sensor from the configuration of the system,
you can use the ‘
Test/Delete sensors
’ tool that can be found
under ‘
Settings>Sensors
’.
Pets are disturbing the system’s operation
The system is not suitable for houses with large
dogs (>80cm)
In the case of cats, we recommend avoiding pointing the
sensors at high objects such as tables or closets.
Testing the sensors
All system components are continuously externally
monitored. If there is any malfunction, you will be informed
about it by means of a notification on the app.
Go to ‘Settings’ and choose the option ‘Test sensors’.
Here you can check if the sensors are working properly.
What the lights on the gateway mean
Reset
Use this button to reset all settings.
Error
Red light on:
there is an outage – check the Internet
connection.
Zigbee
Blinks orange:
the gateway is communicating with a sensor.
Power
Blinks green:
the gateway is starting up or exchanging data
via the Internet.
Continuously green:
The gateway is connected.
Alternately blinking green/orange: sensor join mode is active.
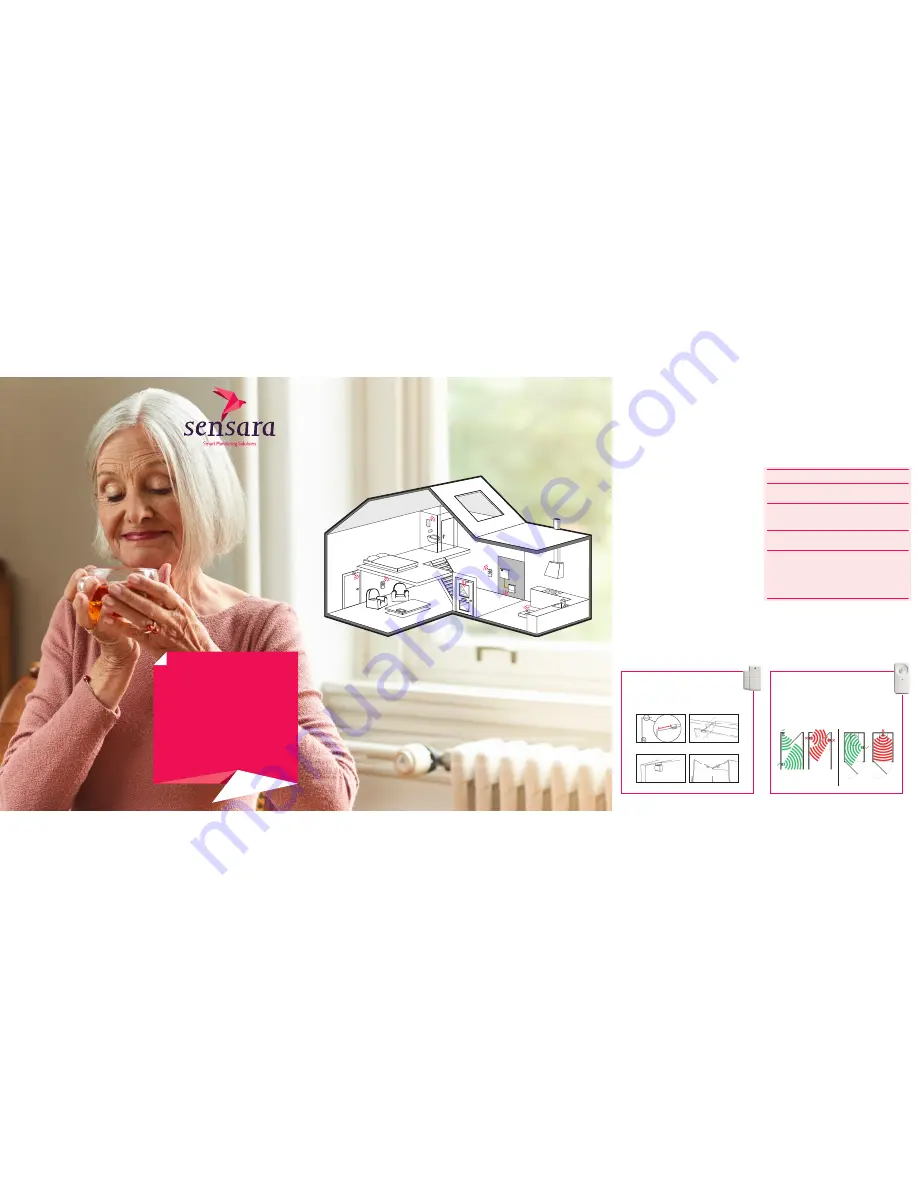
Sensara HomeCare is a remote monitoring system that uses small, unobtrusive sensors to help keep a caring eye on elderly
family members or friends who live alone. Sensara lets you keep an eye on the person’s well-being using a convenient
smartphone app, and is the result of 12 years of international research into how new technologies can support the elderly to
live at home longer. Safely, without worries or intrusion into their daily lives.
To determine the best positions for the sensors, consult the following useful tips. Make sure the gateway is correctly installed
before you insert the batteries in the sensors. If you install the batteries too early, starting up the system will take longer.
HomeCare
Quick
installation
guide
Switchboard
Cabinet
Modem
receiver
Door sensor
Motion
sensor
Motion
sensor
Door
sensor
Motio
n
senso
r
Smart-
phone App
Door
sensor
Welcome
to Sensara HomeCare
Tips when placing
the sensors
Sensors
Possible issues
Doors sensors
Install the sensor in the prescribed area, as described
on the back.
Which doors are most regularly used by the resident?
Which doors/drawers are regularly used by the resident
when preparing food?
Example hall
Example toilet
Chest
Door
sensor
Contact
point
Door
Frame
Doorsensor
Kitchen drawer
Buffet
Doorsensor
Contact
point
20
cm
Doorhandle
Door
sensor
Chest assembling
Angle assembling
Drawer assembling
Plane assembling
Activity sensors
Install the sensor in the prescribed area,
as described on the back.
Ensure the lens is pointing upwards!
Place the sensors at a height of approx. 1.4 meters.
Choose a wall that is pointing into the room.
Make sure the sensor has as much free view as
possible within the room.
Example hall
Example toilet
Chest
Door
sensor
Contact
point
Door
Frame
Doorsensor
Kitchen drawer
Buffet
Doorsensor
Contact
point
20
cm
Doorhandle
Door
sensor
Chest assembling
Angle assembling
Drawer assembling
Plane assembling
More information
You can find more information on using Sensara services and products at
www.sensara.eu
Customer service
Do you have further questions? Call +31 10 7640 803 or email us at
MAN.EN.001.01


