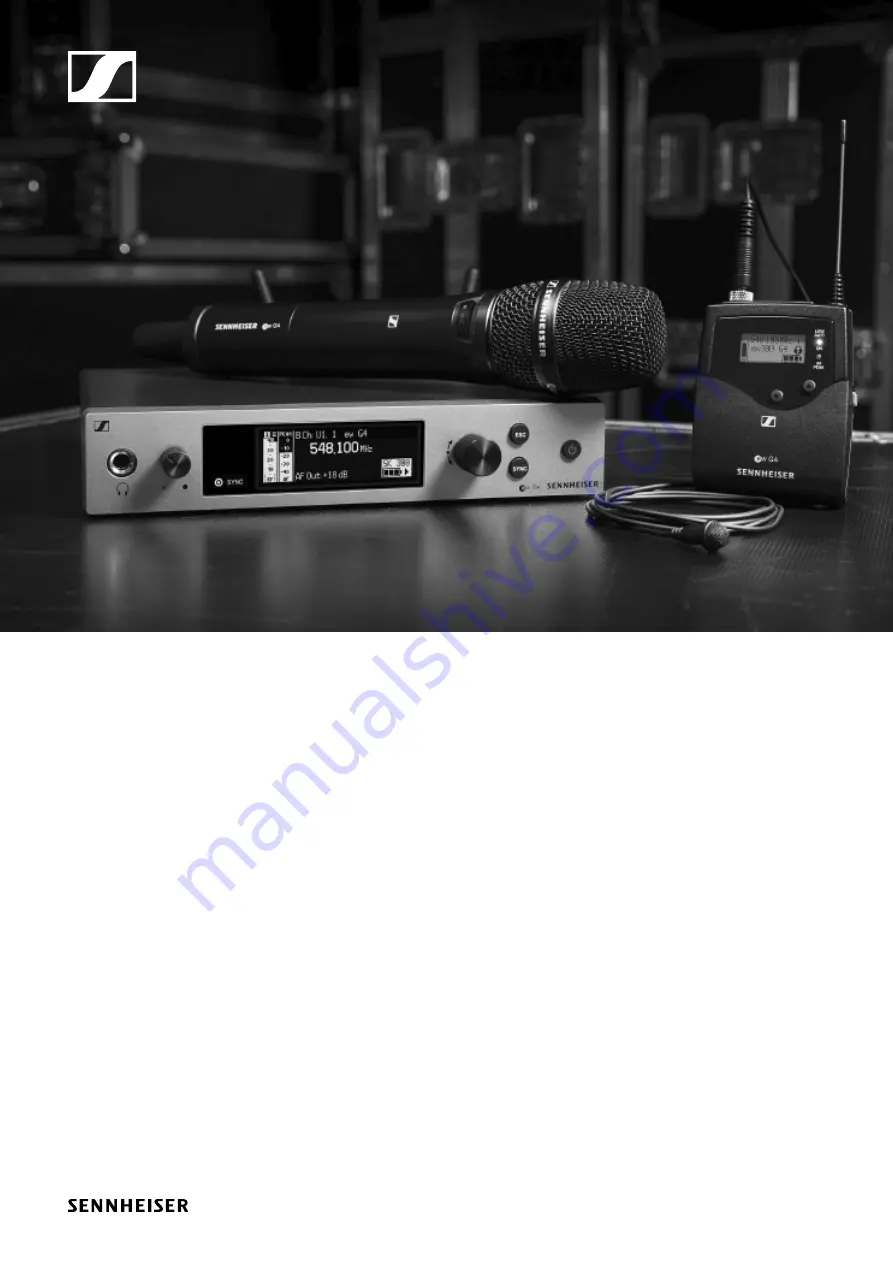
evolution wireless G4
300 series / 500 series
Instruction Manual
Sennheiser electronic GmbH & Co. KG
Am Labor 1, 30900 Wedemark, Germany, www.sennheiser.com
ew 300-500 G4 - v1.
1
Page 1: ...evolution wireless G4 300 series 500 series Instruction Manual Sennheiser electronic GmbH Co KG Am Labor 1 30900 Wedemark Germany www sennheiser com ew 300 500 G4 v1 1 ...
Page 2: ...namic super cardioid black 502576 MME 865 1 BK Capacitor super cardioid black 502581 MMD 935 1 BK Dynamic cardioid black 502577 MMD 945 1 BK Dynamic super cardioid black 502579 MMK 965 1 BK Capacitor switchable Cardioid super cardioid black 502582 MMK 965 1 NI Capacitor switchable Cardioid super cardioid nickel 502584 MD 9235 BK Dynamic cardioid black 502585 MD 9235 NI Dynamic cardioid black 50258...
Page 3: ...cable with 6 3 mm jack plug on lockable 3 5 mm jack plug article no 005021 Microphone Features Article no ME 2 II Lavalier microphone omni direc tional black 507437 ME 3 II Headset microphone cardioid black 506295 ME 4 N Lavalier microphone cardioid black 005020 MKE 1 ew Lavalier microphone omni direc tional black 502876 MKE 1 ew 3 Lavalier microphone omni direc tional beige 502879 MKE 2 ew Gold L...
Page 4: ... is designed for use with evolution wire less G4 series handheld transmitters bodypack transmitters and bodypack receivers Article no 009950 L 2015 charger The BA 2015 rechargeable battery can be charged in the L 2015 charger on its own or inside of the bodypack transmitter bodypack receiver Article no 009828 ...
Page 5: ...Accessories 18 LA 2 charging adapter Charging adapter for L 2015 charger for charging SKM G4 handheld trans mitters with installed BA 2015 rechargeable battery Article no 503162 ...
Page 6: ... EM 300 G4 EM 500 G4 or SR 300 IEM G4 in a 19 rack Article no 503167 AM 2 antenna front mounting kit Antenna front mounting kit for installing antenna connections on the front of the rack when using the EM 100 G4 EM 300 G4 EM 500 G4 or SR 300 IEM G4 together with the GA 3 rack mounting kit Article no 009912 ...
Page 7: ...onal antenna article no 004645 Directional antennas A 2003 UHF passive directional antenna article no 003658 Antenna splitter ASA 214 active antenna splitter 2 1 4 ASA 214 UHF variant 470 870 MHz article no 508241 Antenna amplifiers AB 3700 broadband antenna amplifier article no 502196 AB 4 antenna amplifier up to 88 MHz bandwidth Available from the end of 2018 ...
Page 8: ...r labeling set KEN 2 color labeling set for SKM handheld transmitters article no 530195 Microphone clamp MZQ 1 microphone clamp for SKM handheld transmitters article no 076670 MUTE switch RMS 1 remote mute switch for SK 300 G4 article no 503164 ...
Page 9: ...range 470 558 MHz AS range 520 558 MHz Gw1 range 558 608 MHz Gw range 558 626 MHz GBw range 606 678 MHz Bw range 526 698 MHz Cw range 718 790 MHz Dw range 790 865 MHz JB range 806 810 MHz K range 925 937 5 MHz Every frequency range has 26 frequency banks with up to 32 channels You can find information about the frequency presets in the frequen cy tables of the respective frequency ranges under Fre...
Page 10: ...necting antennas 2 BNC socket antenna input I ANT I with remote power supply unit See Connecting antennas 3 6 3 mm jack socket for audio output unbalanced AF OUT UNBAL See Outputting audio signals 4 XLR 3 socket for audio output balanced AF OUT BAL See Outputting audio signals 5 LAN connection socket ETHERNET RJ 45 See Creating a data network 6 Connecting cables for the power supply unit DC IN See...
Page 11: ...ply system Insert the plug of the power supply unit into the DC IN socket of the re ceiver Pass the cable of the power supply unit through the cable grip Slide the supplied country adapter onto the power supply unit Plug the power supply unit into the wall socket To completely disconnect the EM 300 500 G4 from the power supply sys tem Unplug the power supply unit from the wall socket Unplug the po...
Page 12: ...the WSM software See Easy Setup menu item To connect the EM 300 500 G4 to a network Connect a network cable with an RJ 45 connector to the Ethernet socket on the rear side of the EM 300 500 G4 Connect the other end of the network cable to a network switch For more information about controlling devices via the Sennheiser Wireless Systems Manager WSM software refer to the instruc tion manual for the...
Page 13: ...cket and an unbal anced 6 3 mm jack output socket Always use only one of the two BAL AF OUT output sockets for each channel To connect an XLR cable Plug the XLR cable into the AF OUT BAL socket of the EM 300 500 G4 To connect a jack cable Plug the jack cable into the AF OUT UNBAL socket of the EM 300 500 G4 ...
Page 14: ...300 500 G4 Connect the second rod antenna to the ANT II socket on the rear side of the EM 300 500 G4 Gently angle the rod antennas to the left and right as shown in the fig ure If you are using more than one receiver we recommend using remote antennas and as needed Sennheiser antenna accessories For more information visit the ew G4 product page at www sennheiser com ...
Page 15: ... ceed the permissible temperature limit specified in the specifications See Specifications Ensure sufficient ventilation if necessary provide additional ventila tion Make sure that the mechanical loading of the rack is even When connecting to the power supply system observe the information indicated on the type plate Avoid circuit overloading If necessary pro vide overcurrent protection When rack ...
Page 16: ...ure both of the the mounting angles to the sides of the receiver us ing the previously removed recessed head screws Secure the blanking plate to one of the mounting angles using two re cessed head screws M6x10 Attach the AM 2 antenna front mounting set optional accessory and mount the rod antennas on the blanking plate right diagram Slide the receiver with the mounted blanking plate into the 19 ra...
Page 17: ... antenna splitter in com bination with the AM 2 front mounting kit and an additional GA 3 rack mounting kit See Installing the ASA 214 To mount the receiver using the GA 3 rack mounting kit optional accesso ry Place both receivers upside down and side by side on an even surface Secure the jointing plate to the transmitters using the six recessed head screws M3x6 Secure the mounting angle ...
Page 18: ...ow counter clockwise off of the handle of the wireless microphone When you remove the wireless microphone during operation mute is automatically activated MUTE appears in the display panel When you screw the microphone back together mute is deactivated Pull the rear part of the wireless microphone all the way out Open the cover of the battery compartment Place the batteries or the BA 2015 recharge...
Page 19: ...Installing the SKM 300 G4 34 Battery status Charge status of the batteries Charge status is critical LOW BATT ...
Page 20: ...ne module Unscrew the microphone module Screw the desired microphone module on Do not touch the wireless microphone contacts or the microphone module contacts If you touch the contacts they may become dirty or bent When you unscrew the microphone module during operation mute is au tomatically activated MUTE appears in the display panel When you screw the microphone module back on mute is deactivat...
Page 21: ...Installing the SKM 300 G4 36 Changing the colored ring To change the colored ring Pull the colored ring off as shown in the diagram Attached a colored ring in the color you want as shown in the diagram ...
Page 22: ...nd removing the batteries rechargeable batteries You can operate the bodypack transmitter either with batteries AA 1 5 V or with the rechargeable Sennheiser BA 2015 battery Press the two catches and open the battery compartment cover Insert the batteries or the rechargeable battery as shown below Please observe correct polarity when inserting the batteries Close the battery compartment The cover l...
Page 23: ...Installing the SK 300 G4 42 Battery status Charge status of the batteries Charge status is critical LOW BATT ...
Page 24: ...t microphones for the bodypack transmitter under Microphones and cables To connect a microphone to the bodypack transmitter Insert the cable s 3 5 mm jack plug into the MIC LINE socket on the bodypack transmitter as shown in the diagram Screw the plug s coupling ring onto the audio socket thread of the bodypack transmitter ...
Page 25: ... need the Ci 1 N 6 3 mm jack plug on a lockable 3 5 mm jack plug or CL 2 XLR 3F plug on lockable 3 5 mm jack plug Sennheiser cables To connect an instrument or line source to bodypack transmitter Insert the cable s 3 5 mm jack plug into the MIC LINE socket on the bodypack transmitter as shown in the diagram Screw the plug s coupling ring onto the audio socket thread of the bodypack transmitter ...
Page 26: ... with the RMS 1 remote mute switch 2 STATUS LED See Advanced MIC LED menu item 3 2 5 mm jack plug To connect the RMS 1 to the SK 300 G4 Insert the 2 5 mm jack plug of the RMS 1 into the 2 5 mm jack socket of the SK 300 This deactivates the function of the MUTE switch of the SK 300 G4 You can find information about operating the RMS 1 under Using the SK 300 G4 with the RMS 1 remote mute switch ...
Page 27: ... bodypack trans mitter with the antenna pointing downwards To do so withdraw the belt clip from its fixing points and attach it the other way round The belt clip is secured so that it cannot slide out of its fixing points acci dentally To detach the belt clip Lift the belt clip as shown in the diagram Press one side of the clip downward on the fixing hole and pull it out of the transmitter housing...
Page 28: ...t of diversity branch B See Connecting antennas 2 RF OUT A BNC socket RF output only for connecting an additional ASA 214 to build an 8 channel diversity system See Configuring multi channel systems 3 DC INsocket To connect the NT 1 1 power supply unit See Connecting disconnecting the ASA 214 to from the power sup ply system 4 4 BNC sockets B1 to B4 RF outputs of diversity branch B for connection ...
Page 29: ... need the NT 1 1 power supply unit Only use the supplied NT 1 1 power supply unit It is designed for your an tenna splitter and ensures safe operation To connect the ASA 214 antenna splitter to the power supply system Plug the hollow jack plug of the power supply unit into the DC IN socket of the antenna splitter Pass the cable of the power supply unit through the cable grip Slide the supplied cou...
Page 30: ... wireless G3 EM 100 G3 EM 300 G3 EM 500 G3 2000 series EM 2000 with its own power supply EM 2050 with its own power supply To connect the receivers to the ASA 214 antenna splitter Connect one of the receiver s antenna inputs to one of the BNC sockets A1 to A4 using one of the supplied BNC cables The compatible receivers listed above do not require their own power supply They are powered via the BN...
Page 31: ...ase of poor recep tion conditions we recommend using remote antennas Connecting remote antennas Mount two antennas or a combination of an antenna and an antenna amplifier to the BNC sockets ANT RF IN A and ANT RF IN B Connecting rod antennas Mount the antennas to the BNC sockets ANT RF IN A and ANT RF IN B Align the antennas in a V shape in order to ensure the best possible re ception ...
Page 32: ...ng the ASA 214 56 Information on antenna amplifiers and cable lengths The following table shows which cable lengths require the use of the AB 3 antenna amplifier as well as the maximum recommended cable lengths ...
Page 33: ...Installing the ASA 214 57 Configuring multi channel systems The following options for connecting multi channel systems are possible Option 1 Two antennas supply a 4 channel system ...
Page 34: ...Installing the ASA 214 58 Option 2 Two 4 channel systems are interconnected Option 3 Two antennas supply a 8 channel system ...
Page 35: ...the permissible temperature limit specified in the specifications See Specifications Ensure sufficient ventilation if necessary provide additional ventila tion Make sure that the mechanical loading of the rack is even When connecting to the power supply system observe the information indicated on the type plate Avoid circuit overloading If necessary pro vide overcurrent protection When rack mounti...
Page 36: ...ccessory To fasten the mounting angle of the GA 3 rack mounting kit Unscrew and remove the two recessed head screws M4x8 on each side of the antenna splitter Secure the mounting angles to the sides of the antenna splitter using the previously removed recessed head screws Secure the blanking plate to one of the mounting angles using two re cessed head screws M6x10 ...
Page 37: ...se cover the antenna holes with the two covers left diagram Attach the AM 2 antenna front mounting set optional accessory and mount the rod antennas on the blanking plate right diagram Slide the antenna splitter with the mounted blanking plate into the 19 rack Secure the mounting angle and the blanking plate to the 19 rack Align the mounted antennas in a V shape ...
Page 38: ...rack To mount the antenna splitters using the GA 3 rack mounting kit optional accessory Place both antenna splitters upside down and side by side on an even surface Secure the jointing plate to the transmitters using the six recessed head screws M3x6 Secure the mounting angle ...
Page 39: ...ocket See Using the headphone output 2 Volume control for the headphone socket See Using the headphone output 3 Infrared interface with a blue LED See Synchronizing devices 4 Red LED for warnings See Advanced Fullscreen Warnings menu item 5 Display panel See Displays on the EM 300 500 G4 display panel 6 Jog dial for navigating through the menu See Buttons for navigating through the menu 7 SYNC but...
Page 40: ...ndard dis play appears To switch the receiver to standby mode If necessary deactivate the lock off function see Lock off function Press and hold the STANDBY button until OFF appears on the display panel The display panel switches off To completely switch the receiver off Disconnect the receiver from the power supply system by unplugging the power supply unit from the wall socket ...
Page 41: ...he receiver Press the STANDBY button in one of the standard displays The RX Mute On display appears Press the SET button The audio signal is muted To cancel the muting Press the STANDBY button The RX Mute Off display appears Press the SET button The audio output is no longer muted ...
Page 42: ...evels Volume levels that are too high may damage your hearing Turn down the volume of the headphone output before you put on the headphone Increasing the volume of the audio output AF Out see AF Out menu item to more than 18 dB also increases the volume of the headphone output Connect the headphone to the headphone socket Control the volume by turning the volume control next to the head phone sock...
Page 43: ...function Press the jog dial Locked appears in the display panel Turn the jog dial Unlock appears in the display panel Press the jog dial Lock off function is now temporarily deactivated When you are in the operating menu Lock off function is deactivated long enough for you to work in the op erating menu When one of the standard displays is shown Lock off function is automatically activated after 1...
Page 44: ...tus information such as reception quality battery status audio level etc is displayed on the home screen of the display panel See Home screen The display panel also displays the operating menu which you can use to configure all of the settings See Setting options in the menu ...
Page 45: ... the previous display Long press the ESC button Cancels the entry and returns to the home screen Press the jog dial Changes from the current standard display to the operating menu Calls up a menu item Changes to a submenu Stores the settings and returns to the operating menu Turn the jog dial Selects a standard display see Home screen Changes to the previous or next menu item Changes the setting o...
Page 46: ...creen is then displayed The home screen has three different standard displays On the home screen turn the jog dial to switch between the standard displays The display is dimmed automatically after 2 minutes of inactivity If there is no radio link to a transmitter the display switches off after 20 minutes The display can be reactivated by pressing any button ...
Page 47: ...shown inverted See AF Out menu item 3 Frequency bank and channel Current frequency bank and channel number See Frequency Preset menu item 4 Frequency Current receiving frequency See Frequency Preset menu item 5 Name Freely selectable name of the receiver See Name menu item 6 Lock off function Lock off function is activated on the receiver See Lock off function 7 Warnings Activated warning messages...
Page 48: ...eries recharge able batteries SKM 500 G4 see Inserting and removing the batteries recharge able batteries SK 300 G4 see Inserting and removing the batteries rechargeable batteries SK 500 G4 see Inserting and removing the batteries rechargeable batteries 13Transmitter type Product name of the connected transmitter Transmitter Parameters standard display The Transmitter Parameters standard display s...
Page 49: ... level must be well above the squelch threshold level for one of the two anten nas Ways to optimize Check that the antennas and the antenna cables are correctly connect ed Improve the position of the antennas If necessary use an antenna booster RF Max Maximum RF signal level both antennas should reach 40 dBμV Ways to optimize Check that the antennas and the antenna cables are correctly connect ed ...
Page 50: ...put level See AF Out menu item Adjusting the frequency response of the output signal See Equalizer menu item Activating deactivating automatic lock off function See Auto Lock menu item Configuring enhanced settings in the Advanced Menu Setting the receiving frequencies for the frequency banks U1 to U6 Activating deactivating the parameters to be transferred to the trans mitters Activating deactiva...
Page 51: ...Using the EM 300 500 G4 78 Menu structure The figure shows the complete EM 300 500 G4 menu structure in an over view ...
Page 52: ...F signal lev el area CAUTION Risk of hearing and material damage If you set the squelch threshold to a very low value a very loud hissing noise can occur in the receiver This hissing noise can be loud enough to cause hearing damage or overload your system s loudspeakers Before adjusting the squelch threshold set the volume of the audio out put to the minimum Never change the squelch threshold duri...
Page 53: ...g dial to open the operating menu Turn the jog dial until the Squelch menu item appears in the selection frame Press the jog dial to open the menu Adjust the settings as desired Press the jog dial to save your selection or Press the ESC button to cancel the entry without saving the setting ...
Page 54: ...up menu item On the home screen press the jog dial to open the operating menu Turn the jog dial until the Easy Setup menu item appears in the selec tion frame Press the jog dial to open the menu Scan New List Select Scan New List to scan for unused frequencies Press the jog dial to start the scan The frequency range of the receiver is scanned As a result the number of unused frequencies is display...
Page 55: ...ction manual for the software You can down load the software here www sennheiser com wsm To perform the automatic frequency setup for multiple radio links simulta neously Connect all of the receivers to one network using a network switch See Creating a data network Please note that all receivers must be in the same IP address range The IP addresses can be automatically assigned if there is a DHCP ...
Page 56: ...the scan results in the master receiver select a frequency bank with enough free channels After you make your selection the display panels of the other receivers will display the message Assign New Frequency Receivers with non compatible frequency ranges will display the mes sage Unassignable Frequency ...
Page 57: ...the particular receiver to save your selected frequency and synchronize it with the corresponding transmitter at a later point see Synchronizing devices or Press the SYNC button to synchronize the selected frequency with the transmitter immediately Use this procedure to assign an unused frequency to all connected re ceivers one after another For the last step assign a frequency to the master recei...
Page 58: ... menu item On the home screen press the jog dial to open the operating menu Turn the jog dial until the Frequency Preset menu item appears in the selection frame Press the jog dial to open the menu Adjust the settings as desired Press the jog dial to save your selection or Press the ESC button to cancel the entry without saving the setting You can set the frequencies of the frequency bank U here A...
Page 59: ...u item On the home screen press the jog dial to open the operating menu Turn the jog dial until the Name menu item appears in the selection frame Press the jog dial to open the menu Adjust the settings as desired Press the jog dial to save your selection or Press the ESC button to cancel the entry without saving the setting ...
Page 60: ...4 dB in 3 dB steps To open the AF Out menu item On the home screen press the jog dial to open the operating menu Turn the jog dial until the AF Out menu item appears in the selection frame Press the jog dial to open the menu Adjust the settings as desired Press the jog dial to save your selection or Press the ESC button to cancel the entry without saving the setting ...
Page 61: ...ost the treble range To open the AF Out menu item On the home screen press the jog dial to open the operating menu Turn the jog dial until the AF Out menu item appears in the selection frame Press the jog dial to open the menu Adjust the settings as desired Press the jog dial to save your selection or Press the ESC button to cancel the entry without saving the setting ...
Page 62: ...nction during operation under Lock off function To open the Auto Lock menu item On the home screen press the jog dial to open the operating menu Turn the jog dial until the Auto Lock menu item appears in the selec tion frame Press the jog dial to open the menu Adjust the settings as desired Press the jog dial to save your selection or Press the ESC button to cancel the entry without saving the set...
Page 63: ...eceiving frequency for the frequency bank U See Advanced Tune menu item Receiving frequency See Advanced Sync Settings menu item Activating deactivating the pilot tone evaluation See Advanced Pilot Tone menu item Activating deactivating warnings See Advanced Fullscreen Warnings menu item Adjusting the contrast of the display panel See Advanced Brightness menu item Resetting the receiver See Advanc...
Page 64: ...ng the frequency Open the Tune menu item in the Advanced menu Press the jog dial to save your selection or Press the ESC button to cancel the entry without saving the setting Setting the channel and frequency Select the Tune menu item and call it up by holding down the SET but ton until the channel selection appears Adjust the settings Press the jog dial to save your selection or Press the ESC but...
Page 65: ... in question in the Advanced Sync Settings menu Press the jog dial to open the sub item Turn the jog dial to set the value Press the jog dial to save your setting Turn the jog dial to activate or deactivate the check box When the check box is activated the value will be transmitted during synchronization If it is deactivated the value will not be transmitted Press the jog dial to save your setting...
Page 66: ...vate the following warnings AF Peak The audio level is too high Low RF Signal The RF signal is too weak RF Mute The RF signal from the transmitter to the receiver is deactivated TX Mute The transmitter audio signal is muted RX Mute The receiver audio output is muted Low battery The battery charge of the transmitter is low Advanced Brightness menu item In the Brightness menu item of the Advanced su...
Page 67: ...ed IP Address menu item In the IP Address menu item of the Advanced submenu you can configure the IP addresses The IP addresses can be obtained automatically automatic or entered manually manual Advanced Software Revision menu item In the Software Revision menu item of the Advanced submenu you can display the current software version of the receiver ...