background image

SETTING UP YOUR TV

-11-

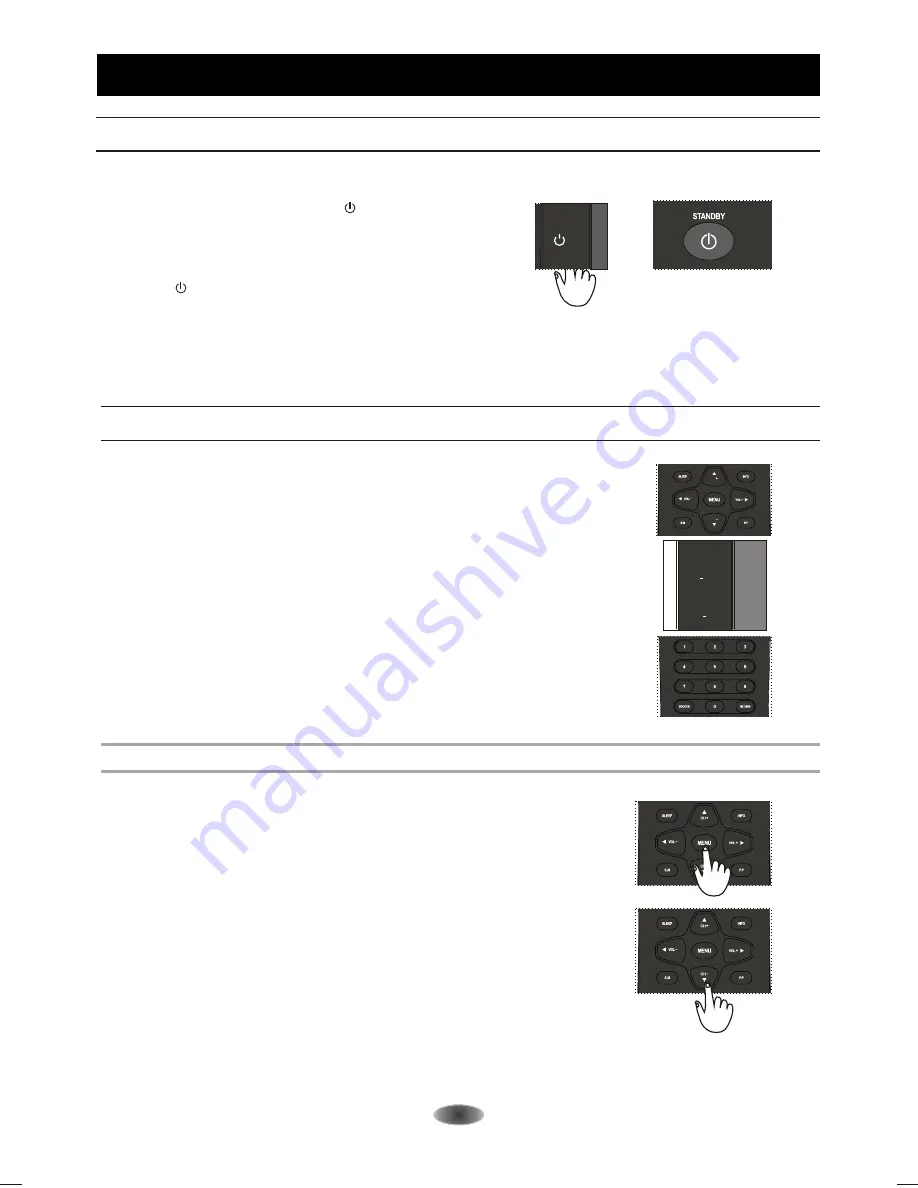
1. Turn On Or Turn Off The TV

When the power of the TV is connected, 
the power indicator lights up in red, the 
TV is in standby mode, press the "

 " 

button on the remote control or 

 to switch the TV to 

normal operation mode.

function

keys panel on TV

Press the "  " button on the remote 
control or 
 to switch the TV to standby mode. 

function keys panel on TV

Note

:

Unplug the set from the AC outlet when it is not used for a long period of time.

2. Select Channel And Adjust Sound

1)Press CHANNEL UP/DOWN on the remote control
 to select memorized TV programs (press VOLUME 
UP/DOWN to adjust the volume). 

2)Press CHANNEL UP/DOWN on the TV key panel 
to select memorized TV programs (press VOLUME 
UP/DOWN to adjust the volume). 

3)Press the number buttons to enter a program number 
directly, after a while, the set will turn to the program
automatically.

3. Menu Basic Operation

1.  Press MENU on the remote control or on the TV key 
     panel to display the main menu.

2.  Press 

t

/

u

 and 

p

/

q

 to highlight the desired menu/item.

3. Press 

t

/

u

 to change the setting.

4.  Press MENU to save setting and go back to last menu,
     until exit the menu.

Note:
Button on the key panel have the same functions 
as the corresponding buttons on the remote control.

CH

VOL+

VOL

CH +

CH

CH

Summary of Contents for LE-240

Page 1: ...LE 240 ...

Page 2: ...ettings 13 Channel Settings 14 Function Settings 13 SHORTCUTS 16 17 TROUBLESHOOTING 18 Geometry Settings 15 EXTERNAL SCHEMATICAND INSTALLATION 6 10 Antenna Cable Connection 9 Front Panel 6 Back Panel 8 Remote Control 10 Antenna And Power Connections 6 Inserting Batteries In The Remote 6 Positioning The TV Set 6 Menu Basic Operation 11 Turn On Or Turn Off The TV 11 1 CONTENTS Stand Foot Installatio...

Page 3: ... a long period of time Do not dismantle this product by yourself as this may cause damage Do not touch the screen surface with fingers as this may scratch or mar the LCD screen Do not impact the LCD screen with hard pressure as this may damage the LCD screen severely The battery battery or batteries or battery pack shall not be exposed to excessive heat such as sunshine fire or the like WARNING AN...

Page 4: ...tened on the wall Place the set on a place that allows good ventilation Do not use the set near damp and cold areas protect the set from overheating Keep away from direct sunlight The apparatus shall not be exposed to dripping or splashing and that no objects filled with liquids such as vases shall be placed on the apparatus Do not use the set near dust place To reduce the risk of fire or electric...

Page 5: ...TURES Thanks for your purchase of our digital high definition LED television This product with diverse functions is designed to fulfill the optimum requirements from commercial industrial and household uses LED television possesses the display function of both TV and PC It features advanced picture performance smaller in size and lighter in weight meanwhile consumes less power and makes no radiati...

Page 6: ...ording to the following left installation photo Step Two Installation of the stand foot 1 Put the TV on the platform and make sure the screen down to the platform with one soft Cloth Pad to avoid the scratch of the LCD screen and cabinet Photo A 2 Insert the base pillar pilot hole below the TV please note that the direction of the base such as the wrong direction the base will not be into the TV D...

Page 7: ...y cover located on the back of the handset by gently pulling up wards from be indicated part Insert two AAA Alkaline or equivalent batteries Following the marking in the battery compartment Replace the battery cover EXTERNAL SCHEMATIC AND INSTALLATION 6 Antenna And Power Connections 1 Connect the antenna cable into the antenna input terminal at the rear panel and wall antenna socket 2 Connect the ...

Page 8: ...XTERNAL SCHEMATIC AND INSTALLATION 7 3 Up Down Button Channel 4 Volume Up Down Button 6 Source Button 7 S Button tandby 5 Menu Button 2 Remote Sensor Power Indicator 7 1 3 4 5 1 Power Button 6 CH CH VOL VOL MENU SOURCE CH VOL VOL MENU SOURCE CH 2 8 8 Speakers 8 ...

Page 9: ...6 Y Pb Pr hares the same audio input as AV2 7 AV OUT 8 ANTENNA IN Connect a coaxial cable to receive signal from the antenna or cable 9 S VIDEO Connect S VIDEO Share the same AUDIO input with AV Audio output speakers will be muted when earphone plugged in 4 Audio input for PC and audio input for HDMI when the signal is DVI timing Component input Connect YPbPr signal from signal source such as DVD ...

Page 10: ...ith this unit then connect to the antenna input of this unit for best reception 2 If the antenna cable in your home is other than the above two or you have problems in installing the antenna please contact your dealer Notes 1 Current outdoor antenna or cable TV usually use 75 OHM coaxial antenna cable For better reception suggest using this kind of antenna cable 2 Flat cable or indoor antenna are ...

Page 11: ...10 11 12 13 STANDBY MUTE 1 2 4 5 7 8 0 SOURCE MENU S M SLEEP VOL 3 6 9 RETURN INFO P P VOL MTS ZOOM EXIT CC CH CH 4 SOURCE button Press to display the signal source selection menu 6 SLEEP button Press to select a time period after which the TV will turn itself off 11 SOUND button S M Press to select a different sound effect 12 PICTURE button P P Press to select a different picture effect 5 RETURN ...

Page 12: ...te control to select memorized TV programs press VOLUME UP DOWN to adjust the volume 2 Press CHANNEL UP DOWN on the TV key panel to select memorized TV programs press VOLUME UP DOWN to adjust the volume 3 Press the number buttons to enter a program number directly after a while the set will turn to the program automatically 3 Menu Basic Operation 1 Press MENU on the remote control or on the TV key...

Page 13: ...ted to the proper value Color Adjusts the richness of color This function is not available in PC mode Picture Settings This section explains the menus of your TV Each menu is outlined and detailed to help you get the most from your TV The scheme and description are in TV mode as below there will be a note if there is exception MENUS CONTROL CONTRAST BRIGHTNESS TINT COLOR SHARPNESS BACK LIGHT COLOR...

Page 14: ...TION MOVE SELECT EXIT MENU OFF FULL OFF OFF SLEEP TIMER SCALE C CAPTION V CHIP NOISE REDUCTION FACTORY RESET Factory Reset Press to reset some out of box setting Noise Reduction You can select OFF LOW MID HIGH to set the noise reduction level to get a better picture view Scale Select your desired picture zoom effect You can select FULL 4 3 13 Duration Set the OSD display duration when no operation...

Page 15: ... get good performance before or after auto scan Fine tuning Tune RF frequency finely Note can be selected when AFT is set as OFF Press t or u button fine tuning until the best reception is obtained AFT Select ON to enable the frequenly auto tuning to obtain the best reception 14 ADD ERASE Set the current channel to skip or not Note If the channel is set to be ERASE you can not select this channel ...

Page 16: ...ere are close bright dots on the picture or linear shimmer phenomenon happens Auto Adjust Adjusts the screen display to the best state automatically Note You can adjust this value accordingly if the picture is not in the proper position Then adjust the H Position V Position H Size and Phase options to get better quality GEOMETRY MOVE SELECT EXIT MENU 50 50 30 50 H POSITION V POSITION CLOCK PHASE A...

Page 17: ...play will disappear in 3 seconds if you stop adjusting Note You can select 0 off 15 30 45 60 90 or 120 minutes In the last minute of the sleep time the words POWER OFF will display on the screen You can press any button to cancel the setting at this time SOUND MODE S M shortcut 1 Press the SOUND button on the remote control to display the current sound state 2 Press the SOUND button repeatedly to ...

Page 18: ...ortcut Press to change the screen format FULL 4 3 INFO shortcut Press this button to display the settings on the screen Press this button to return to the previously viewed channel RETURN shortcut 17 SHORTCUTS ...

Page 19: ...ggest to change to the best resolution or other standard resolutions of Windows system Set refresh rate to be 60Hz SNOWY DOTS AND INTERFERENCE If the antenna is located in the fringe area of a television signal where the signal is weak the picture may be marred by dots When the signal is extremely weak it may be necessary to install a special antenna to improve the reception 1 Adjust the position ...

Page 20: ... Cable TV Status displaying method On screen display Function adjustment indicator Menu display RF aerial input 75 ohm unbalanced AV video input 75 ohm 1 0Vp p RCA AV audio input 10k ohm 0 5Vrms Power Consumption Audio Output Dimension WxDxH Net Weight System TV NTSC M PAL M N AV PAL NTSC Preset programs 181 Language of OSD Multiple options 55W 3W 3W 5 0Kg 579 5x148x421mm AC 110 240V 50 60Hz ...

Reviews: