background image

10 

SVD832 User’s Manual


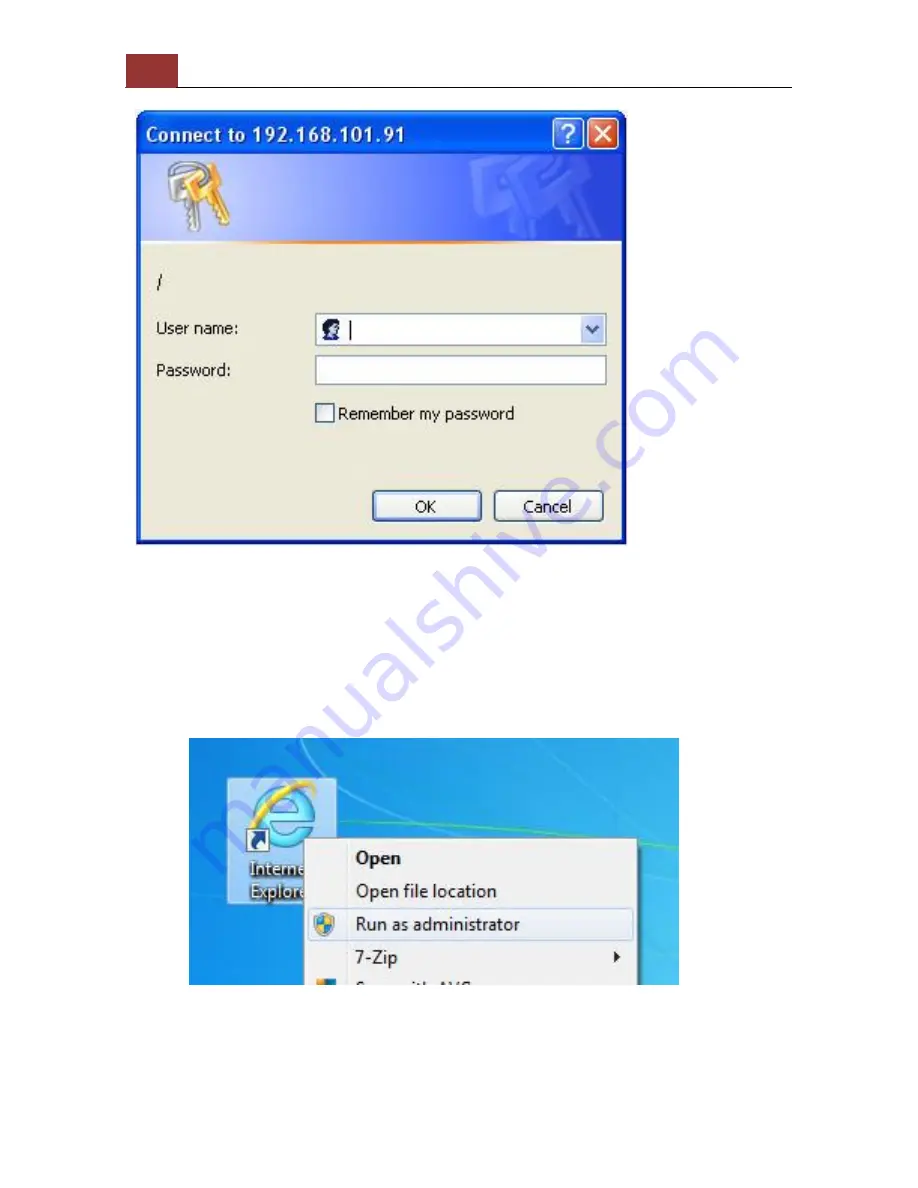
You should be prompted for the NVD’s username and password. Enter 

its default username “admin” and password “admin” 

and then 

click ”OK” to enter the system


Please make sure you are using Internet Explorer 8 or above  


If you are running Windows Vista or 7, please make sure you are 
running Internet Explorer with the “administrator” privilege. 


Summary of Contents for SVD-832

Page 1: ...SVD832 User s Manual 1 Version 1 0 0 SVD 832 Network Video Decoder User s Manual 32CH Full HD Network Video Decoder with Dual Display 05262014 ...

Page 2: ... view 18 k Saved view 18 l Digital zoom 20 Playback view 22 a Zoom on a range of time 24 b Minimize the bar of the playback 24 c Certain functions you can perform to the playback video 24 d Take a snapshot of a playback video 25 Event view 29 NVD Setup Settings 31 Display 31 Network Settings 32 Time and Date 34 Users privileges 36 Add a new user 36 Change the password of the admin account 37 Group...

Page 3: ...al 3 Device Info 52 Log 53 Maintenance 54 Firmware Upgrade 54 Backup Restore 56 Video Wall Mode 57 NVR Media Player 58 Play the backup file with the NVR Media Player 58 Open Event Snapshot images with NVR Media Player 63 ...

Page 4: ...4 SVD832 User s Manual Hardware Overview ...

Page 5: ...us blinking when system is unable to start properly All other LEDs should be off when this LED is blinking in amber Slow blinking indicating the system is shutting down Other LEDs go off according the stage of the process Alarm Red Blinking in red when a system camera event occurs Blinking should last 10 seconds for each event None Goes off if reaches the 10 second duration or when buzzer stop but...

Page 6: ...by using Search Utility The NVD is placed in a network without DHCP server or you are connecting to it directly Access the NVD with its default IP Use Search Utility If the NVD is placed in a corporate network or a local area network where a DHCP server is already presented run the Search utility from a computer that is on the same network and locate the NVD with its IP address that is assigned by...

Page 7: ...SVD832 User s Manual 7 To begin launch the Search utility from the CD and proceed with the installation ...

Page 8: ...8 SVD832 User s Manual Once the installation is complete check the Launch the Search AP option and click Finish The search should start automatically and its status should be dis played ...

Page 9: ...r s Manual 9 The NVD should be located and its IP address should be displayed Double click on an NVD and the search program should automatically access the NVD s web administration page from your default browser ...

Page 10: ...ssword Enter its default username admin and password admin and then click OK to enter the system Please make sure you are using Internet Explorer 8 or above If you are running Windows Vista or 7 please make sure you are running Internet Explorer with the administrator privilege ...

Page 11: ...HCP server presented in the network To connect to the NVD use a PC that is on the same network over a switch or hub or connect the PC directly to the NVD using a crossover CAT5 Ethernet cable The PC that is connected directly to the NVD or within the same local area network should receive an IP from the NVD Simply access the NVD from your web browser with its IP address ...

Page 12: ...ted for the username and password Enter its default username admin and password admin and then click Login to enter the system Besides using web browser you use local UI to operate NVD click to display virtual keyboard to enter user name and password ...

Page 13: ...low The Live View page provides the following functions Retrieve camera s video stream Retrieve camera s status Perform Live Sequence Viewing PTZ Control Click directly on the video Perform PTZ Preset Sequence viewing Perform manual recording Take snapshot as soon as a snapshot selection is made the snapshots are automatically saved to x SnapshotFolder x represents the partition where Windows is i...

Page 14: ...r 3 views will be explained in each chapter b Date and Time display The Date and the Time are defined by the user in the settings section of the NVR c User s configuration It displays the name of the current user If you click on the name of the user the context menu offers the functions bellow Language settings User setting Locking the screen Logout function ...

Page 15: ...eduled and manual recording The channels status page is updated as long as the NVR s main user interface is open f Video frame All the camera s videos are displayed in this frame The PTZ function is available by clicking of the left button of the mouse on the camera s view Double click on the left button of the mouse enables the zoom function To disable it you can click on the right button of the ...

Page 16: ...16 SVD832 User s Manual Main function Digital PTZ snapshot and audio post Lens controls control PTZ ...

Page 17: ...ist of channels added to the NVR Each channel represents a camera with its name the channel number and its currents status The channel s status is defined by 3 colors Red The channel is recording and the live view is available Blue The channel is connected and live view is available Grey The camera is disconnected ...

Page 18: ...ive video of the next n cameras will be displayed i Sequence view The sequence mode will automatically switch between a single or group of cameras every a certain period of time You can define this period to 1 second to 60 seconds j Save view Click on the save view button and you will able to name the current view and save it This will help to quickly display your configured views when needed k Sa...

Page 19: ...e already saved You can choose the views from the list you have created You are also able to switch between saved views every certain period of time by clicking on the start sequence function If you check the box beside the name of the view you can edit or delete the view ...

Page 20: ...20 SVD832 User s Manual l Digital zoom Next hold the mouse left button and draw a square on the video to specify the zoom in area ...

Page 21: ...ightness of the live video from the right click menu Same thing as the brightness you can set the contrast for the live video from the right click menu as well You can change the web UI display language from the current login username link located at the upper right hand corner Click on the link opens up a new window which displays detail information about the user as well as a drop down menu that...

Page 22: ...r The NVR offers synchronized playback from up to 4 channels and various types of search methods are provided to help you find the footage you need quickly You can turn on or off the audio of a recorded video at your choice if audio was also recorded during the recording of the video Playback video can be viewed in full screen and snapshots can be taken and saved during a video playback ...

Page 23: ...SVD832 User s Manual 23 To play a recorded video 1 Select NVR 2 Select channel 3 Choose search mode by times ...

Page 24: ...ils on the playback bar b Minimize the bar of the playback If you click on the icon you can minimize the playback range to get more space for the videos c Certain functions you can perform to the playback video You can do the followings by right clicking on the playback video 1 Play Audio 2 Snapshot 3 Send Audio 4 Digital PTZ ...

Page 25: ...s snapshots option is chosen the new window displays snapshots and lets you view them individually by using the Prev Next buttons shown above However as soon as a snapshot selection is made the snapshots are automatically saved to x SnapshotFolder x represents the partition where Windows is installed e g C You can right click anywhere on the image and select Save Picture As to save the images some...

Page 26: ... Click will set the current playback time as Start time A blue slider should be displayed on the timeline 2 Click again will set the current playback time as end time A blue slider should be displayed on the timeline Click Download to open a pop up dialog for export options ...

Page 27: ... can be backed up to a USB disk with AVI file It is required to plug in a USB disk formatted in FAT32 prior to using the backup function Click OK to open a pop up dialog for USB disk options It will display error message if there is no USB disk ...

Page 28: ...28 SVD832 User s Manual Click OK to start back up ...

Page 29: ... on the NVD s settings You can display the event of all the channels at once or by each channel The event indicators will be shown on live view screen By clicking the event indicator to switch to event monitor You can also click the button to enable monitor To play event video click on one of the event list in the right of the UI to display the event related to it ...

Page 30: ...30 SVD832 User s Manual ...

Page 31: ...ngs page provides users options to setup the device quickly and properly After properly configuring all settings in all the sub pages users should expect a fully working network video decoder that is ready to manage cameras and NVR on the network Display ...

Page 32: ... VGA Secondary as default You can set which to be used as primary and secondary in this page other than setting the resolution You are also able to set the function to be displayed on the secondary monitor in this page Currently you can configure the secondary monitor to display live videos with selected channels in desired layout or live video in automatic sequence view NOTE The NVD will reboot a...

Page 33: ...n this mode is selected 2 Users can change the IP settings You need to adjust settings in this page for the device to work properly in your network It is critical that settings here are configured correctly based on your network configurations so that the recorder can be administered through the local area network and cameras can be connected from it By default the decoder is set to Get network co...

Page 34: ... Choose Use manual configuration 2 Enter the IP address subnet mask default gateway address and DNS server address for the decoder The decoder can detect the presence of a DHCP server upon startup It sets itself to use static IP address if there is no DHCP server currently presented in the network Time and Date ...

Page 35: ...they actually occur After selecting the time zone choose an option below to set the decoder time Sync with NTP server enter the hostname or IP address of a valid NTP server and set how often the recorder should synchronize the time with it by using the Update interval drop down menu Configure manual Use the drop down list and configure the time manually Sync with PC Check this option to synchroniz...

Page 36: ... remove and edit users by using options provided in this page to keep user information organized Each recorder comes with a built in admin account with password admin It s highly recommended to change the password upon your initial login Add a new user Click Add to add new user Enter a username and password ...

Page 37: ...cessed by users other than the administrator There are 7 pre defined user groups for privilege configurations You can do so by creating a group and then remove access privileges for certain configuration pages or cameras Users that are created and assigned to this group will have limited access instead of full administration rights The decoder comes with seven built in groups and five built in pri...

Page 38: ...have the power to make any changes in the Live View page or have access to pages other than the Live View page To change a group configuration after clicking Add to add new user account press Edit to change Group privileges You can change the group name and privilege ...

Page 39: ...mera Automatic Search In Settings Cameras click the Add camera directly or Add cameras from NVR button to perform the camera search After clicking the Add camera directly press to start search and its status should be displayed ...

Page 40: ...40 SVD832 User s Manual Found cameras should be listed and simply select a camera from the list ...

Page 41: ...nd press Next to detect this camera If connection establishes successfully camera s detailed information should be polled and displayed as below Adjust its video format frame rate resolution or bitrate etc if you wish and then click Apply to finish adding the camera You can add cameras through NVR the camera should be added in NVR previously ...

Page 42: ... Manual By click Add cameras from NVR to add NVR the press to start search Double click the NVR then type user name and password to detect By using Assign channel drop down menu assign the camera to NVD with channel ID ...

Page 43: ...SVD832 User s Manual 43 Then click Apply to add this camera ...

Page 44: ...44 SVD832 User s Manual Add a camera manually Simply enter the camera s or NVR s IP address and credential in the Camera Information manually ...

Page 45: ...you need to monitor multiple spots in one area from a particular camera To set up PTZ preset points 1 Select a camera from the Channel drop down menu 2 Use the PTZ control provided in the configuration page to set the preset point 2 Press Add to add preset point Press Edit to enter edit mode to change preset point names or delete preset points The function of Sync from camera is to retrieve preset...

Page 46: ...nient for monitoring to set up the sequencing viewing among those preset point and let the recorder automatically switch between them for you To configure preset sequence for a camera 1 Select a channel from the Channel drop down menu The available preset points should be listed in Camera Presets section 2 Pick the ones you like for sequence viewing and press the button to move them to the Preset ...

Page 47: ... Apply to save the configuration OSD Settings The OSD On Screen Display allows users to add informational text message and embed it onto the video By default this function is turned off To add texts to one or more videos Select a camera you would like to add text to and choose Display OSD ...

Page 48: ...ecorder to automatically embed the system time or the frame rate for you Or simply choose to display a custom message of your own Next define where the text will be displayed by either entering an X Y value based on percentage or use the system pre defined position from the drop down menu ...

Page 49: ... to save the configuration Event sources notifications The Event sources section allows users to define conditions that constitute an event its corresponding trigger action and when it will be triggered Such setting can reduce the management overhead and notify the administrator only when it s necessary ...

Page 50: ...ystem events should trigger the decoder to send out notifications Notifications Event servers are to be used with event trigger actions In case of unusual motion detected by the camera or a disk failure the recorder can send notification with the acceptable format image txt to a destined event server according to the configuration E Mail notification ...

Page 51: ...d enter the username and password of the SMTP server if it requires authentication 4 Specify the sender s name in the Sender s name field 5 Enter the sender s e mail address 6 Click OK to save the configuration The NVD supports SMTP servers that use base64 or MD5 authentication methods 3rd party free E mail services such as Gmail openssl is supported ...

Page 52: ...2 User s Manual Device Info The Device Information provides the general information of the device such as firmware version and system time It also provides information of the current network settings and status ...

Page 53: ...SVD832 User s Manual 53 Log Log keeps a record of what s been happening to the device and provides basic information for troubleshooting ...

Page 54: ...the NVD when necessary Restart cameras directly from the NVD Reset the NVD s settings to their factory default values Change device s logo Firmware Upgrade The firmware can be upgraded through web UI Before upgrading firmware please backup configuration in advance the firmware file comes with a bin file extension ...

Page 55: ... dialog should display and let you choose the location of the firmware file When done click Upgrade Follow the on screen instruction and wait for the process to finish After upgrade the system will reboot automatically it s part of the process ...

Page 56: ... Users also can restore the NVR s settings from a previously saved configuration file The configuration can be backed up to or restore from a USB disk It is required to plug in a USB disk formatted in FAT32 prior to using the backup and restore functions Once it s detected click Backup to store configuration file in USB disk ...

Page 57: ...Wall Mode The decoder can be operated in video mode and controlled by CMS software When decoder is controlled by CMS software it switches to video mode automatically If user turns off CMS decoder will switch back to standalone mode ...

Page 58: ...rd party media player or codecs when playing the exported AVI videos The NVR Media Player will be automatically installed after the CMS software is installed You can find it in the Windows Start menu Play the backup file with the NVR Media Player Play Media database The backup files can be played with the NVR media player To do open the player and select Open Media Database ...

Page 59: ...SVD832 User s Manual 59 Click Browse to select the file from the USB disk A new dialog should be prompted for you to select the file location ...

Page 60: ...60 SVD832 User s Manual When done click Check to validate the file Once the file has been successfully verified you should be prompted with the message shown below ...

Page 61: ...er s Manual 61 Select the time zone according to your current location Finally click OK to begin playing The player should now play the backed up file Play Media database Open the player and select Open AVI File ...

Page 62: ...62 SVD832 User s Manual Select the AVI file Click Open to play file ...

Page 63: ...h NVR Media Player The NVR sends snapshots that are taken when an event occurs to a destined FTP server or mail recipient These types of snapshot images are saved in a proprietary image file format h4i or p4i and can only be opened by the NVR media player ...

Reviews: