background image


Contents 

Document Revision History ··································································································· 2


1.


Introduction ··················································································································· 2


2.


Features ·························································································································· 3


3.


Specifications ················································································································· 4


4.


Interface functions ········································································································· 5


5.


Application ideas ············································································································ 6


6.


Usage ······························································································································ 7


6.1 

Set the address of the I2C Motor Driver ··········································································· 7 

6.2 

How to drive 2 DC motors ································································································· 8 

6.3 

How to driver a stepper using I2C motor driver V1.3 ······················································· 9 

7.


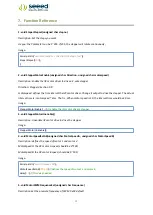
Function Reference ······································································································ 13


8.


Version Tracker ············································································································· 15


9.


Resources ····················································································································· 16


10.


Support ·················································································································· 17


Summary of Contents for Grove I2C Motor Driver

Page 1: ...1 Grove I2C Motor Driver Version 1 0 Release date 9 20 2015 Wiki http www seeedstudio com wiki Grove_ _I2C_Motor_Driver_V1 3 Bazaar http www seeedstudio com depot Grove I2C Motor Driver p 907 html ...

Page 2: ...2 Document Revision History Revision Date Author Description 1 0 Sep 21 2015 Victor He Create file ...

Page 3: ...ifications 4 4 Interface functions 5 5 Application ideas 6 6 Usage 7 6 1 Set the address of the I2C Motor Driver 7 6 2 How to drive 2 DC motors 8 6 3 How to driver a stepper using I2C motor driver V1 3 9 7 Function Reference 13 8 Version Tracker 15 9 Resources 16 10 Support 17 ...

Page 4: ...ision of Seeed Technology Inc this manual has been compiled and published which covered the latest product description and specification The content of this manual is subject to change without notice Copyright The design of this product including software and its accessories is under tutelage of laws Any action to violate relevant right of our product will be penalized through law Please conscious...

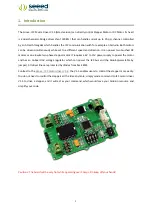
Page 5: ...o phase stepper motor It requires a 6V to 15V power supply to power the motor and has an onboard 5V voltage regulator which can power the I2C bus and the Arduino selectable by jumper All driver lines are protected by diodes from back EMF Contrast to the Grove I2C motor driver V1 2 the V1 3 enables users to control the stepper more easily You do not need to control the steppers all the time anymore...

Page 6: ...3 2 Features Grove Compatible I2C Interface Adjustable motor speed and rotation direction Changeable slave address by hardware ...

Page 7: ...4 3 Specifications Item Min Typical Max Unit Working Voltage 6 15 VDC Max Output Current per channel 0 5 A Maximum Total current 1 0 A Input output voltage on I2C bus 5 V Communication protocol I2C ...

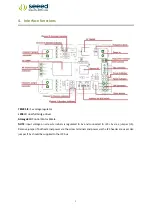
Page 8: ...iver Atmega8 IC Control Motor Rotate NOTE Input voltage on screw terminals is regulated to 5v and connected to I2C 5v via a jumper J4 Remove jumper if both external power via the screw terminals and power via the I2C header are used Use jumper if 5v should be supplied to the I2C bus ...

Page 9: ...6 5 Application ideas Robots Homebuilt RC cars Case fans High power LED illumination ...

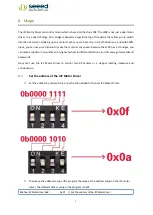
Page 10: ...e the L298 has 2 H bridges you can make a robot turn around by spinning each wheel in different directions and of course go forwards and backwards Now let s use the I2C Motor Driver to control two DC motors or a stepper rotating clockwise and anticlockwise 6 1 Set the address of the I2C Motor Driver Set the address by dial switch is a new function added to the new I2C Motor Driver Then keep the ad...

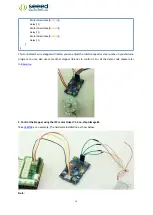
Page 11: ... drive 2 motors you may damage your Arduino if you do so And then program your Arduino as below include Wire h Driver functions void setup Wire begin join i2c bus address optional for master delayMicroseconds 10000 wait for motor driver to initialization void loop while 1 MotorSpeedSetAB 100 20 delay 10 this delay needed MotorDirectionSet 0b1010 0b1010 Rotating in the positive direction ...

Page 12: ...motor driver V1 3 1 Control the stepper directly by Arduino The I2C motor Driver can also be used to drive a 4 wire stepper Connect your stepper to the output pins of I2C motor driver and then connect motor driver to your Arduino Seeeduino with I2C bus Program your Arduino as below include Wire h Driver functions void setup Wire begin join i2c bus address optional for master delayMicroseconds 1000...

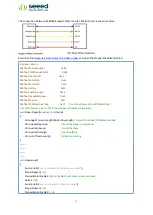
Page 13: ...will rotate you can adjust the rotation speed or step number in your Arduino program You can also use some other stepper libraries to control it For all the demo code please refer to Resource 2 Control the Stepper using the I2C motor Driver V1 3 on chip Atmega8L Take 24BYJ48 as an example The hardware installation as show below Note ...

Page 14: ...rAdd 0x0f Set the address of the I2CMotorDriver set the steps you want if 255 the stepper will rotate continuously void SteperStepset unsigned char stepnu Wire beginTransmission I2CMotorDriverAdd transmit to device I2CMotorDriverAdd Wire write Stepernu Send the stepernu command Wire write stepnu send the steps Wire write Nothing send nothing Wire endTransmission stop transmitting void stepperrun S...

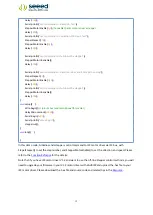
Page 15: ...Unenable delay 5000 void setup Wire begin join i2c bus address optional for master delayMicroseconds 10000 Serial begin 9600 Serial println setup begin stepperrun void loop In this demo code Arduino sends stepper control command to I2C motor driver via I2C bus with SteperStepset to set the step number and StepperMotorEnable to set the direction and speed Please refer to the Function Refrence for t...

Page 16: ...nterval time is motorspeed 4ms That is When motor speed is 10 the interval time would be 40 ms Usage StepperMotorEnable 1 1 enable the i2c motor driver a stepper 3 void StepperMotorUnenable Description Uneanble IIC motor drive to drive the stepper Usage StepperMotorUnenable 4 void MotorSpeedSetAB unsigned char MotorSpeedA unsigned char MotorSpeedB Description defines the speed of motor 1 and motor...

Page 17: ...0b1010 0b1010 defines the output polarity 10 means the M is positive while the M is negative make sure M and M is different polarity when driving DC motors delay 1000 MotorDirectionSet 0b0101 0b0101 Rotating in the opposite direction delay 500 7 void MotorDriectionAndSpeedSet unsigned char Direction unsigned char MotorSpeedA unsigned char MotorSpeedB Description Adjust the direction and speed alto...

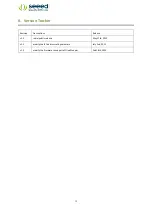
Page 18: ...sion Tracker Revision Descriptions Release v1 0 Initial public release May 17th 2012 v1 2 modify the I2C address set by hardware July 2nd 2012 v1 3 modify the firmware to support off line Stepper Feb 18th 2013 ...

Page 19: ...16 9 Resources Grove I2C Motor Driver Eagle File I2C Motor DriverV13 Demo Code L298 Datasheet 78M05 Datssheet On Chip Firmware for I2C motor driver ...

Page 20: ...17 10 Support If you have questions or other better design ideas you can go to our forum or wish to discuss ...

Page 21: ...Mouser Electronics Authorized Distributor Click to View Pricing Inventory Delivery Lifecycle Information Seeed Studio 105020001 ...

Reviews: