background image

 K24 dp 

4 Connectors/Indicators 


4.2


Connectors 

XLR connectors (1) 

The K24 dp should be connected with a standard symmetrically wired XLR cable. To connect the 

input  signal  to  further  devices,  use  the  male  XLR  Loop  thru  connector.  To  obtain  full  power  per-

formance from the system, the signal source should be able to provide a minimum of 6 dBu distor-

tion free output voltage. 

PowerCon blue (2) 

Power supply input voltage 110-230 VAC. This connector provides the function of an on-off switch. 

After powering on (turn the connector to the right until it locks), the systems starts up and is ready 

for use after approximately 3 seconds. Avoid repeatedly switching the system on and  off, particu-

larly when it is operating. 

PowerCon grey (3) 

110-230  VAC  loop-through  connector.  This  connector  is  to  be  used  when  multiple  active  loud-

speakers  are  to be  provided  with power  from  one  source. Please  observe  carefully  the  maximum 

power capacity of the power source. 


The  nominal  power  consumption  of  the  K24  dp  under  full  power  is 

2.2 A  (measured  with  pink  noise,  Crest  Factor  8).  Transient  peaks 

can,  however,  cause  much  higher  momentary  power  drain.  Observe 

carefully  the  nominal  power  consumption  when  connecting  the  loud-

speaker(s)  to  the  power  source,  and  observe  carefully  the  cut-off 

current of the safety circuit breakers. We recommend using the loud-

speaker on power circuits with circuit breakers with C characteristic. 


Summary of Contents for 01029/dp/60

Page 1: ...User Manual K24 dp Version 3 2 18 05 2020 ...

Page 2: ...nnectors 7 4 3 Controls 8 4 4 Status indication 8 5 Operation 9 5 1 Starting up 9 5 2 Selecting a bank 9 5 3 Setting level 10 5 4 Recalling presets 10 5 4 1 Preset Bank 1 Default Settings 10 5 5 Reprogramming of dp speakers with preset audio files 11 5 6 Locking the buttons 11 6 Technical specifications 12 7 Declaration of conformity 13 ...

Page 3: ... characteristics and minimize disruptive noise The default state of the integrated DSP controller is the standard configuration as described in this manual Custom presets can be installed by the user but must be programmed with the LPI Loud speaker Programming Interface by the manufacturer The preset file is a custom audio file which is simply played into the audio input of the controller In this ...

Page 4: ... power connected This can damage or destroy magnetic storage devices The PowerCon loop through connector is under power when the device is in operation Observe all relevant safety regulations at all times General safety precautions The installation and de rigging of this equipment should only be car ried out by appropriately qualified and experienced personnel and according to all relevant safety ...

Page 5: ...avoid operating in envi ronments below 5 C or above 40 C Be aware of the possibility of condensation forming inside the housing due to rapid changes in temperature Allow the loudspeaker to adjust to ambient temperature before operation Leave the device switched on if operating in unfa vorable conditions To prevent overheating do not operate the loudspeaker in the direct vicinity of strong heat sou...

Page 6: ...K24 dp 4 Connectors Indicators 6 4 Connectors Indicators 4 1 Connection panel PowerCon grey 3 XLR connectors 1 PowerCon blue 2 ...

Page 7: ...er approximately 3 seconds Avoid repeatedly switching the system on and off particu larly when it is operating PowerCon grey 3 110 230 VAC loop through connector This connector is to be used when multiple active loud speakers are to be provided with power from one source Please observe carefully the maximum power capacity of the power source The nominal power consumption of the K24 dp under full p...

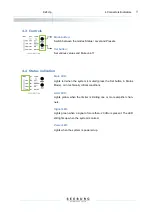
Page 8: ...tion Mute LED Lights red when the system is muted press the Set button in Status Mode or in technically critical conditions Limit LED Lights yellow when the limiter is limiting one or more amplifier chan nels Signal LED Lights green when a signal of more than 20 dBu is present The LED still lights up when the system is muted Power LED Lights when the system is powered up ...

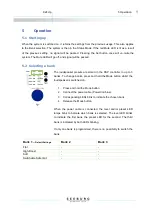
Page 9: ...DSP controller in up to 3 banks To change banks press and hold the Mode button whilst the loudspeaker is switched on 1 Press and hold the Mode button 2 Connect the power cable PowerCon blue 3 Corresponding LEDs blink to indicate the chosen bank 4 Release the Mode button When the power cable is connected the level and or preset LED lamps blink to indicate which bank is selected The level LED blinks...

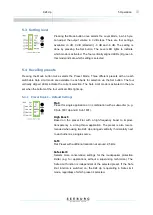
Page 10: ...ction The Safe Limit mode is activated in the pre set when the bottom of the four vertical LEDs lights up 5 4 1 Preset Bank 1 Default Settings Flat Preset for single application or in combination with a subwoofer e g K Sub 1801 dp and K Sub 1801 High Boost Based on the preset Flat with a high frequency boost to improve transparency in a long throw application The preset is also recom mended when u...

Page 11: ...follows 1 Use a mini jack XLR stereo cable to connect the headphone output to the XLR input of the self powered box Use only one of the XLR connectors 2 Mute the box by pressing the Set button in Status Mode The Mute LED lights up The DSP controller can only receive data in the muted state 3 Make sure your computer s volume is set to 100 4 Load the wav file received from SEEBURG acoustic line into...

Page 12: ...cal depends on preset Coverage horizontal vertical 60 x 50 60 version 90 x 50 90 version Max Splay Angle 12 Connectors Neutrik XLR in out Neutrik PowerCon in out Handles 2 x Rigging flying points 5 x M10 4 x 6 mm socket Integrated Flying Hardware 35 mm pole mount Weight 37 0 kg 7 0 kg wheelboard Size height x width x depth 70 0 x 42 0 x 46 0 cm Order No 01029 dp 60 01029 dp 90 The technical data s...

Page 13: ...sses E1 to E4 DIN EN 55103 2 1996 classes E1 to E4 Declared by Winfried Seeburg SEEBURG acoustic line GmbH Place and date Senden 01 01 2018 Legally binding sign ____________________________________________ Die Anhänge sind Bestandteil dieser Erklärung Diese Erklärung bescheinigt die Übereinstimmung mit den genannten Richtlinien beinhaltet jedoch keine Zusicherung von Eigenschaften Die Sicherheitsh...

Page 14: ...ax 49 0 7307 97 00 29 www seeburg com info seeburg net Benutzerhandbuch User Manual Irrtum bei Beschreibung sowie technische Änderungen vorbehalten Alle SEEBURG acoustic line Produkte sind nur für den gewerblichen Einsatz bestimmt All specifications are current at the time of publishing but are subject to change ...

Reviews: