background image


12 

Using a PC to find available IP Addresses 


Before setting up your CVR16 you will first need to find it an IP address. This process is to help you find 

what IP Addresses are currently in use on your computer network, and in turn which ones are still 

available. If you are not connecting the CVR16 to a computer network (or internet connection) then any 

default IP address range may be used. 

e.g.192.168.0.100 to 192.168.0.130.


Before starting you must first have a copy of the “Free IP Scanner” Tool which can be downloaded here: 

http://downloads.rhinoco.com.au/dvr/Free_IP_Scanner.zip


1.  Open the Free IP Scanner Tool (if it asks for registration just press skip as it is free to use). 


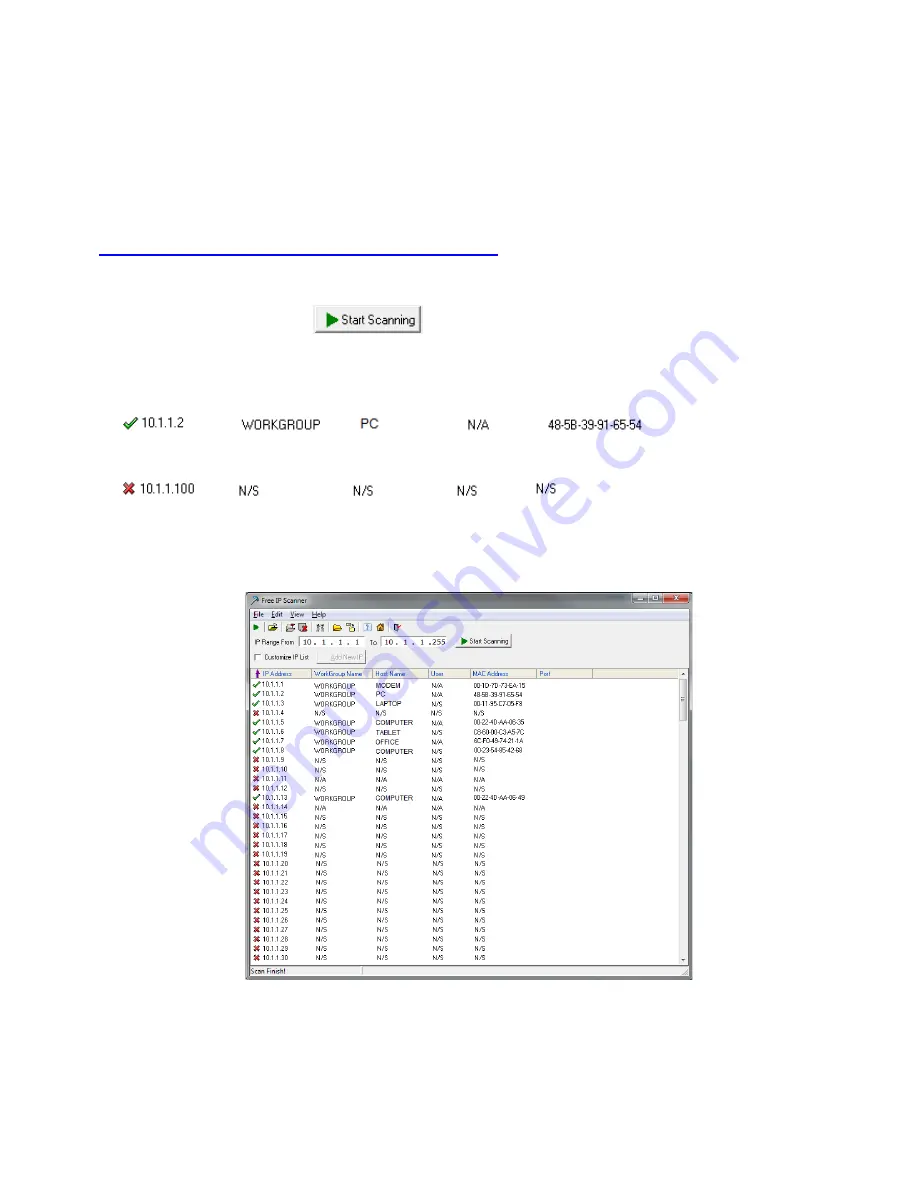
2.  Begin the scan by clicking on   


3.  The “Free IP Scanner” will automatically detect all IP Addresses on your Computer network and 

display which ones are in use by listing with a Green tick beside them. 


Those which have a red cross beside them are not currently in use and may be available. 


Note: Even though lower numbered address may be free (such as “

?.?.?.8

”)    we recommend using 

higher number which are unlikely to be used in the immediate future such as “

?.?.?.100

” onwards. 


4.  If you wish to Export the list, you can do this by going to FILE and choosing EXPORT. It can then be 

saved as text file and even emailed. 

Summary of Contents for CVR16PACK

Page 1: ...nology High Quality 1MP CMOS Image sensor Multiplex Operation IR Night view range of 20 metres Long Recording Duration 720p Resolution Intelligent Video Motion Detection Recording 8 x HDCVI Day Night...

Page 2: ...1...

Page 3: ...B Mouse To operate the CVR16 1 x Switch Mode Low Voltage Power Supplies 1 x 12v Power Supply for use with the CVR16 8 x Day Night Weatherproof Bullet Cameras with Infrared LEDs 20m Range IR LEDs for V...

Page 4: ...ords with rugs or carpet Service should be handled only by qualified technicians Rear Panel 1 VIDEO IN Connect to HDCVI cameras video input signal 2 AUDIO OUT Connect to video output device such as so...

Page 5: ...onnector to the power cable 2 At the recorder connect each of the Coaxial cables to the BNC inputs on the rear 3 Ensure your camera power supply is connected to each of the cameras power cables 4 Conn...

Page 6: ...or offline 4 HDD status indictor light The red light becomes on when HDD is abnormal or HDD space is below the threshold 5 IR IR Receiver Receives the signal from the remote control 6 ESC ESC Go to pr...

Page 7: ...menu Right click or press the ESC button to return to previous menus click on the icon to enter menus Channel View Menu Moving the mouse to the top of each channel in the live view screen will show a...

Page 8: ...on screen keypad Then Right click to open the menu and select MAIN MENU Select SETTING Select GENERAL Set System Time Date Format and DST Daylight Saving Time for your region Click Save before clickin...

Page 9: ...ways set to CIF resolution 10fps Bit Rate CBR of 320kbps To Begin Recording Once you have successfully set up the cameras exit the Menu by right clicking or pressing the CLOSE button By default the CV...

Page 10: ...tected before checking for motion again Region Select Select region of feed within which motion detection will occur Click and drag with the mouse to arm disarm areas of the feed Motion detected in re...

Page 11: ...ch you can select the month and day you wish to playback Any date that is highlighted blue has video available to playback 4 Once you have selected the day you can choose which cameras you wish to pla...

Page 12: ...backup to Choose your device and click BACKUP to continue 4 You will see the CVR16 Backup screen where you can choose the Camera Channel followed by the Start and End times for the section of video y...

Page 13: ...oads rhinoco com au dvr Free_IP_Scanner zip 1 Open the Free IP Scanner Tool if it asks for registration just press skip as it is free to use 2 Begin the scan by clicking on 3 The Free IP Scanner will...

Page 14: ...select SETTINGS followed by NETWORK The device comes pre configured to DHCP which means it will automatically receive an IP Address If you wish to manually give it an IP Address un tick DHCP and then...

Page 15: ...3G Test your Remote Access by connecting to the CVR16 When you are in the same building as the CVR16 you will be able to connect via WIFI and use the Internal IP address of the CVR16 However when you...

Page 16: ...aid services available however a free DDNS service has been built in to these CVR16s This tutorial will go over how to set up your CVR16 to use the free DDNS service How to enable your DDNS In order t...

Page 17: ...patible To enable ActiveX controls go to Tools Internet Options Security Custom Level Then once in the Security Settings enable all ActiveX related options Please see the settings below Important Befo...

Page 18: ...select ADD 2 Set Register Mode to IP DOMAIN 3 Enter in your devices NAME IP Address or DDNS and TCP Port default is 37777 4 Enter your Username Password and the set Live Preview and Playback to Extra...

Page 19: ...switch and the 12V 5A is connected to the CVR16 Turn the CVR16 off and power on while holding the SHIFT button No video over the network with web browser or mobile Make sure that Extra Stream is enabl...

Page 20: ...ss or implied or upon any other basis of liability whatsoever even the loss or damage is caused by its own negligence or fault Seller does not represent that the products it sells may not be compromis...

Page 21: ...possible to ensure that you are happy with your decision and that you have years of satisfaction from your CVR16PACK We take extreme care in the research design and development of our products to ens...

Reviews: