


12
Select a channel number to edit using the
CHANNEL
drop-down menu,
or edit all channels at once by selecting
ALL
.
Select the type of recording you want to edit (
REGULAR
for constant
recording or
MD
for motion detection recording only), then click and
drag with the mouse to highlight the periods you want to add in the
24-hour timeline for each day.
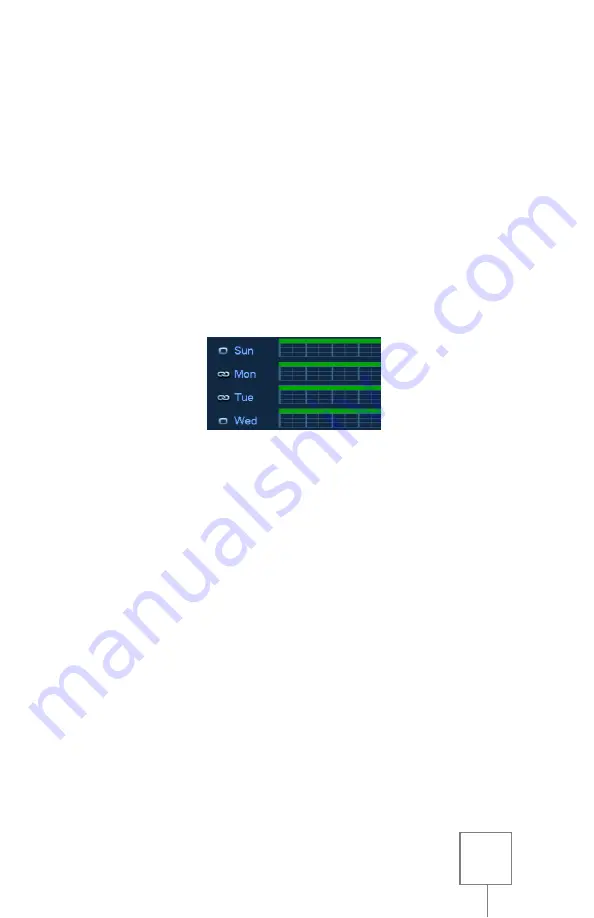
If multiple days will share the same schedule, you may edit those days
all at once by clicking on the checkboxes to the left of the window. If
all days will share the same schedule, then select
ALL
. A chain link icon
will appear to confirm that the selected days are linked.
Once selections are made, any changes in one of the linked days’
timelines will affect all linked days.
To erase sections of schedule, select a recording type as described
above, then click and drag of highlighted areas on the timeline to
remove.
Areas with colored lines will record in their designated modes. Areas
without any colored bars will not record at all. For example: in the
schedule pictured below, Sunday will record constantly, Monday
through Friday will record only motion between 9AM and 5PM while
recording constantly all other hours, and Saturday will not record at
all.


