8
3
Device Installation
Important
The installation wall shall min sustain 3X weight of the bracket and camera.
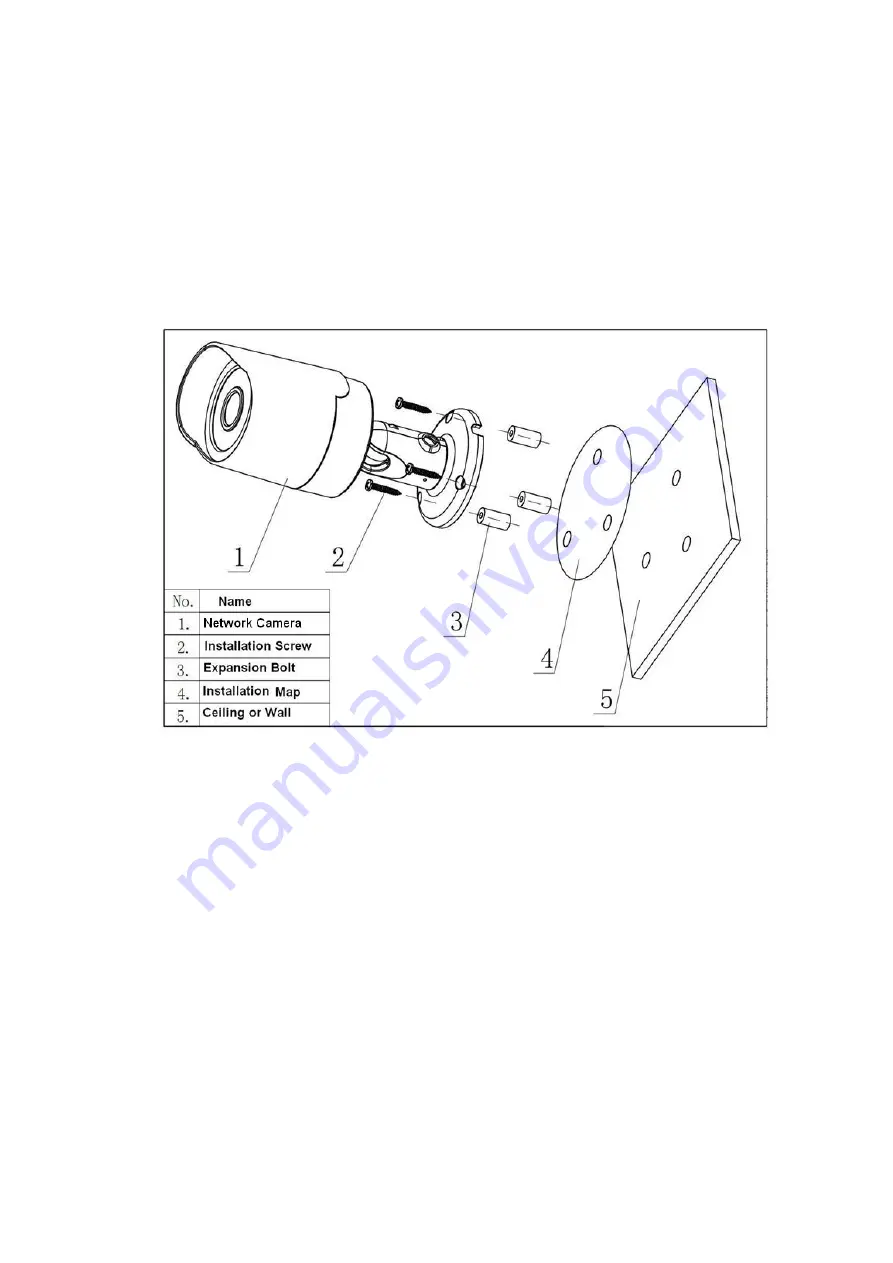
Please follow the steps listed below to install the device. Please refer to Figure 3-1 and Figure 3-2 for
reference.
Step 1
Paste the installation map on the surface of the wall or the ceiling.
Step 2
Dig the installation holes according to the installation map.
Figure 3-1 Device installation 1
Step 3
Open the accessories bag and then take the expansion bolt out. Insert the expansion bolt into the
installation holes.
Step 4
Take the screws from the accessories bag and then use them to secure the device on the installation
surface of the wall or the ceiling. The sun shield of the device can move forward or backward. Please
secure the set screw of the sun shield after you fixed the device.
Step 5
Connect the corresponding cables.
Step 6
Use the cross-head screwdriver to loosen the adjust screw.
Step 7
Turn the device in different directions to make it suitable for the monitor position.
Step 8
Use the cross-head screwdriver to fix the adjust screw firmly.


