Latest products and information available at www.sealite.com
9
NAUTILUS-2200 Ocean Buoy
Assembly Instructions
Check Components
• Unload all components from crate or container.
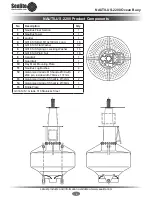
• Check all components are complete and correct. Use assembly diagram on following page for full
list of components.
• Position the Nautilus Float Section (1) on flat level ground.
Prepare Tower Section
•
Optional:
Position the Lantern on the Tower section. For details on Lantern see Lantern
Installation Manual.
Note:
Check for correct Lantern operation before fitting to the tower section.
•
Optional:
Position the Day Mark to the Mounting Plate (10) and secure using 4 x M10 Socket Head
Cap Screws, washers and Nuts.
Connect Tower Section to Float Section
• Position the Nautilus Tower (2) on top of the Float Section (1).
o Secure the Tower to the Float Section.
- If Tower Section is fitted with Solar Panels, it will require 16 x M10 Stainless Steel
Bolts, Nuts and Washers.
- If Tower Section is not fitted with Solar Panels then 18 x M10 Stainless Steel
Bolts, Nuts and Washers are required.
o Place a flat washer onto the bolt,
o Insert bolt into hole through Tower and Float Section
o Secure a second Flat Washer, a Spring Washer and a Nut on to the Bolt.
o Tighten the Nut
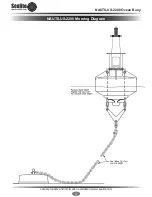
• Fit 2 x Ø38mm Shackles to the Lifting Eyes on the Float Section.
• Lift Buoy up to access the Lug Bushes at the base of the Buoy.
• Cut off the cable tie and fit 2 x Ø38mm Shackles. Secure tightly.
• The buoy is now ready for the Mooring Assembly to be fitted.


