6.1.14.
Always wear eye protection.
6.2.
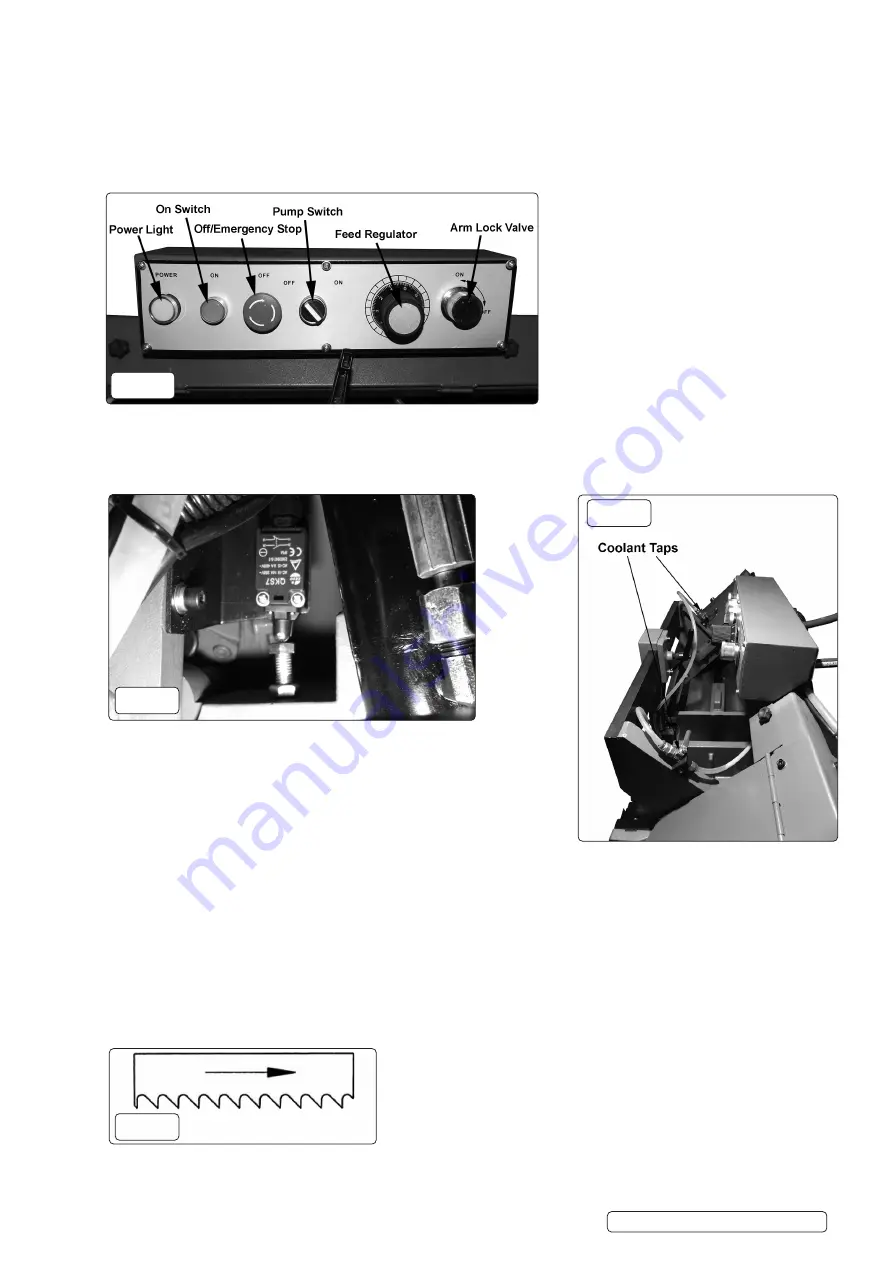
OPERATING SAW CONTROLS FIG 9
6.2.1.
Band saw control panel has SIX functional operations:
POWER LIGHT
- White colour lamp that is illuminated when saw is plugged in.
ON SWITCH
- Green colour push button that energizes the magnetic contactor to start the band saw.
OFF/ EMERGENCY STOP
- Red colour push button that de-energizes the magnetic contactor to stop the band saw. To restart the
saw, turn the knob to reset and depress the ON button.
PUMP SWITCH
- Two position ON/OFF switch to operate the coolant pump.
FEED REGULATOR
- Dial knob to set band saw feed rate. Set the feed rate suitable to application.
6.3.
HORIZONTAL STOP (FIG.10)
6.3.1.
Horizontal stop controls the position of the head at the end of the cut. Bed should contact the horizontal stop when teeth are 1/8”
below the surface of the workbed.
6.3.2.
Adjust the horizontal stop so that the teeth are 1/8” below the surface of the workbed.
6.3.3.
Tighten the nut to lock the position.
6.4.
AUTOMATIC SHUT OFF FIG.10
6.4.1.
The limit switch is activated when the blade passes through the plane of the workbed.
The limit switch should be activated as soon as the cut is finished.
IMPORTANT:
Make sure the action of the limit switch is not restricted by the
horizontal stop.
6.5.
LUBRICATION
All ball bearings are permanently lubricated. They should not require further
lubrication.
If the tracking wheel or head pivot is disassembled for any reason, wipe off the old grease before assembly.
6.6.
BLADE GUIDES
6.6.1.
Band saw blade has to be twisted relative to the plane in which it rotates.
6.6.2.
Blade must be properly positioned relative to the workbed.
6.6.3.
Blade guides hold the cutting portion of the blade in a plane which is perpendicular to both the workbed and the stationary vice and
keeps the blade in line with its natural path around the blade wheels.
6.6.4.
Inner guide bearings on the left and right guide assemblies keep the blade in line with the blade wheels. Outer guide bearings keep the
blade against the inner bearings.
6.6.5.
Entire guide assembly is positioned at the factory to produce the proper twist and should not need adjustment, however, the position of
blade guides should be checked often.
NOTE:
Since the blade position is related to both bed and the vice jaws, the relative position of the jaw to the bed is important. When
assembled, the stationary jaw must be perpendicular to the surface of the workbed.
fig.9
fig.10
fig.11
fig.12
Original Language Version
© Jack Sealey Limited
S
M353CE.V3 Issue 1 23/01/20


