


Original Language Version
SL300 Issue: 2 - 18/10/12
© Jack Sealey Limited
5. SET UP PROCEDURE
5.1. INSERTING SD CARD.
WARNING! DO NOT
insert the SD card when the SL300 is connected
to the power source. This may cause the SD card to malfunction.
NOTE!
Ensure that the SD card does not contain any other images
before inserting.
5.1.1. Remove the front cover retaining screw (fig.2-4). Rotate the front cover
(fig.2-5) counter-clockwise and release from the main body of the
SL300.
5.1.2. Insert the SD card into the SD card memory slot (fig.3-5).
NOTE!
The SD card can only be inserted in one way. If the card does
not insert into the slot,
DO NOT
force it. Remove the card and rotate it
to the correct orientation and re-insert.
5.1.3. To remove the SD card from the SD card slot, gently press the SD card
in, release and the card will eject from the slot.
5.1.4. To replace the front cover (fig.2-5), place onto the main body of the
SL300 and rotate clockwise until the two arrows are aligned (fig.5).
Insert the front cover retaining screw (fig.2-4) and tighten.
5.2. TESTING THE PIR COVERAGE AREA.
5.2.1. Once the SL300 is correctly installed (Section 3), remove the front cover
as described above and switch on the power, the SL300 will turn on
automatically.
5.2.2. Slide the cam switch (fig.3-2) to 'TEST' and the LCD display (fig.3-1) will
show 'TEST'.
5.2.3. In 'TEST' mode, each time the PIR is triggered the test indicator LED
(fig.2-8) will flash red. Walk around the coverage area to determine
whether the SL300 is suitably mounted. Adjust the position of the
camera body (fig.2-9) until the desired coverage area is achieved.
5.2.4. Slide the cam switch (fig.3-2) to 'CAM'. The test indicator LED (fig.2-8)
will flash red and commence operation in 60 seconds.
5.2.5. Re-fit the front cover (fig.2-5) as described on paragraph 5.1.4.
6. ADJUSTING THE SETTINGS
6.1. DEFAULT SETTINGS
6.1.1. The SL300 can be used immediately with the default settings detailed
in the chart below:
SETTING
DEFAULT
PARAMETERS
Time
12:00
HH:MM
Date
01:01:10
MM:DD:YY
AE Frequency
50Hz
50/60
Image Capture Interval
1 second
01-99 seconds
Resolution
High
High/Low
Image Capture Method
Video
Video/Photo
Floodlight Control
Auto
Auto
Video Recording Time
10 seconds
10-60 seconds
NOTE!
Always ensure that the cam switch (fig.3-2) is set to '
CAM
'
before altering any settings.
After altering any settings the test indicator
LED (fig.2-8) will flash for 60 seconds before arming.
6.2. SETTING THE TIME AND DATE.
NOTE!
The SL300 uses the 24hr clock format.
6.2.1. Remove the front cover (fig.2-5) as described in Section 5 and switch on
the power. The SL300 will automatically turn on and commence the 60
second arming procedure.
6.2.2. Press and hold the SET button (fig.3-6) until '
T
' shows on the display
(fig.6).
fig.5
6.2.3. Press the UP or DN buttons (fig.3-6) to adjust the HOURS. Press SET
button (fig.3-6) to confirm the HOURS setting and go to the MINUTES
setting.
6.2.4. Press the UP or DN buttons (fig.3-6) to adjust the MINUTES setting.
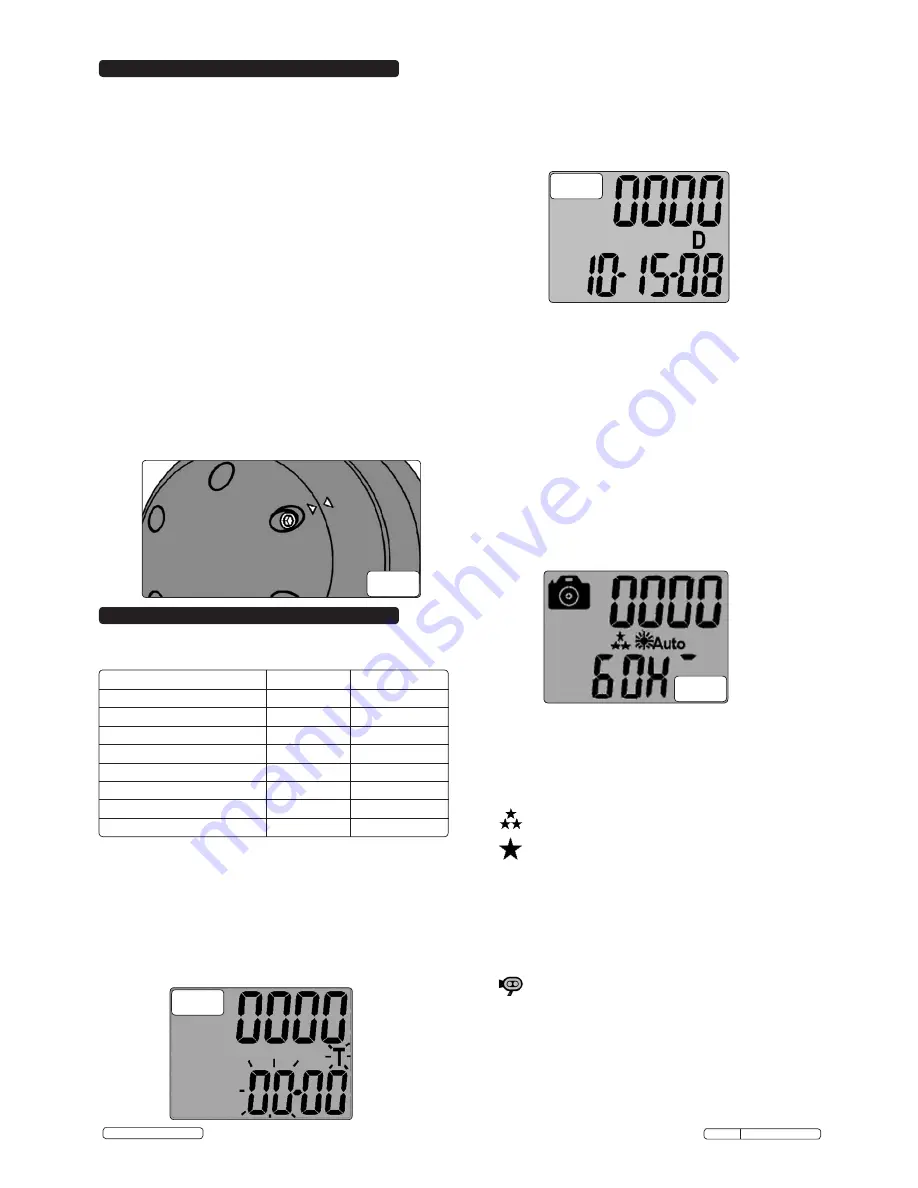
6.2.5. Press the SET button (fig.3-6) to confirm the MINUTES setting, and go
to the DATE setting, the display will show '
D
' (fig.7)
fig.6
fig.7
6.2.6. Press the UP or DN buttons (fig.3-6) to adjust the MONTH. Press SET
button (fig.3-6) to confirm the MONTH setting and go to the DAY
setting.
6.2.7. Press the UP or DN buttons (fig.3-6) to adjust the DAY setting.
6.2.8. Press the SET button (fig.3-6) to confirm the DAY setting, and go
to the YEAR setting.
6.2.9. Press the UP or DN buttons (fig.3-6) to adjust the YEAR setting.
6.2.10. Once the time and date settings are completed, press and hold the
SET button (fig.3-6) for 2 seconds to exit.
NOTE!
The time and date will stamp to captured images and the first
frame of video.
NOTE!
It will be necessary to reset the time and date should the
SL300 be disconnected from the power supply.
6.3. SETTING THE AE FREQUENCY.
NOTE!
For the UK the AE frequency must be set to 50Hz
6.3.1. Press the SET button (fig.3-6) once, the display will show '
ESC
'.
6.3.2. Using the UP or DN buttons (fig.3-6) navigate the menu until the display
shows '
AE
'.
6.3.3. Press the SET button (fig.3-6) to enter the '
AE
' setting. The display will
indicate either 50Hz or 60Hz (fig.8).
6.3.4. Using the UP or DN buttons (fig.3-6) will alter the AE frequency setting.
Once the desired setting has been selected, press the SET button
(fig.3-6) to confirm and revert back to '
AE
' on the display menu.
6.3.5. Navigate the display menu using the UP or DN buttons (fig.3-6) until
'
ESC
' is displayed and press SET (fig.3-6) to exit.
6.4. SETTING THE RESOLUTION.
6.4.1. Slide the RESOLUTION switch (fig.3-4) to either HI or LO as desired.
on the display is High Resolution 5.0M or VGA video recording.
on the display is Low Resolution 2.0M or QVGA video recording.
6.5. SETTING THE BURST CAPTURING AND VIDEO CAPTURING.
6.5.1. Slide the BURST switch (fig.3-3) to 3P for the camera to take 3 images
per trigger.
6.5.2. Slide the BURST switch (fig.3-3) to 9P for the camera to take 9 images
per trigger.
6.5.3. Slide the BURST switch (fig.3-3) to AVI for the camera to take a video
per trigger. Video recording timing can be set as described in Section
6.7.
on the display is Video Capturing.
6.6. SETTING THE CAPTURE INTERVAL TIME.
6.6.1. Press the SET button (fig.3-6) once, the display will show '
ESC
'.
6.6.2. Using the UP or DN buttons (fig.3-6) navigate the menu until the display
shows '
To
'.
6.6.3. Press the SET button (fig.3-6) to enter the '
To
' setting. The display will
indicate '
To 01
'.
6.6.4. Using the UP or DN bittons (fig.3-6) will alter the capturing interval time
from 01 to 99 seconds in increments of 1 second. Once the desired
setting has been selected, press the SET button (fig.3-6) to confirm and
revert back to '
To
' on the display menu.
fig.8