4.2.8.
The output pressure is regulated by the pressure regulator tap (fig.2). Turn the tap clockwise to increase pressure and anti-clockwise to
reduce it, view the result on the output regulator gauge (fig.2).
Note: a)
If the motor does not cut in and out, but runs continuously when using an air appliance, the capacity of the compressor may
be too small for the equipment or tool.
b)
Should the pressure in the main tank exceed the pre-set switch maximum, the safety valve (located under the motor cowling
adjacent to the regulator gauge) will activate.
WArNiNG! for this reason do Not tamper with, or adjust, the pre-set switch or safety valve.
5. mAiNteNANce
In order to keep the compressor in good working condition, periodic maintenance is essential.
WArNiNG!
Before performing any maintenance operation, switch off the compressor, disconnect from electrical supply and release all
air from the tank.
importANt! failure to carry out maintenance tasks may invalidate the warranty on your compressor.
5.1.
operAtioNs to be cArried out After the first 5 WorkiNG hours:
a)
Check that all nuts/bolts are tight, particularly those retaining the crankcase and cylinder heads.
5.2.
operAtioNs to be cArried out dAilY:
a)
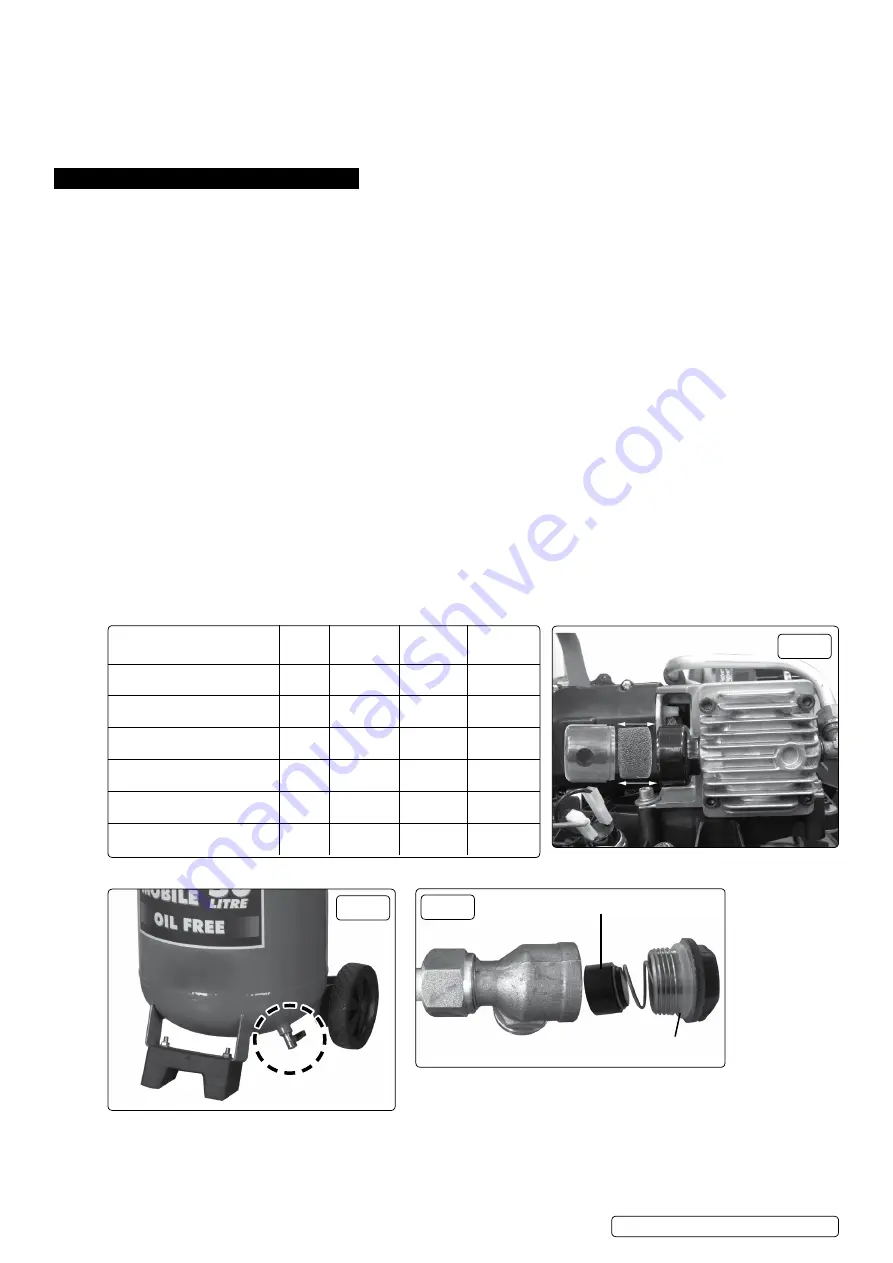
Drain condensation by opening the valve located under the tank (fig.4). Place a container under the valve to collect any
condensation.
Tip the compressor slightly towards the drain valve to ensure all condensation drains. Close valve after draining condensation and
dispose of it safely.
b)
Regularly clean dirt and dust away from the safety devices with a clean cloth or blowing with low pressure compressed air.
Generally keep the compressor clean.
5.3.
operAtioNs to be cArried out everY 100 hours:
(or more frequently, if the compressor operates in a very dusty atmosphere)
cleAN Air filter
a)
ensure the power is off and the tank has been vented. Remove the cowling from the motor by removing the four retaining screws.
Note!
When removing the cowling, care should be taken not to inadvertently disconnect the wires from the switch.
b)
Remove the filter element by pulling the filter cover from the housing (fig.3).
Clean and replace the filter element. Snap the cover back into place.
5.4.
operAtioNs to be cArried out everY 200 hours:
a)
Check the automatic cut-out at maximum pressure and the automatic cut-in at 2 bar below maximum pressure.
b)
Replace air filter.
5.5.
operAtioNs to be cArried out everY 400 hours:
a) Check all fittings and electrical connections.
b) Inspect pressure tank inside and out for damage or corrosion.
5.6.
scheduled mAiNteNANce tAble
.
Original Language Version
© Jack Sealey limited
fig.3
maintenance
operations
daily 100 hrs. 200 hrs. 400 hrs.
drain condensation
•
Clean intake filter
•
General cleaning of compressor
•
Internal & external inspection of
tank
•
Replace air filter
•
Check tube fittings and electrical
connections
•
fig.4
1
2
S
AC05020 | Issue:3 (H,F) 01/08/19
fig.5


