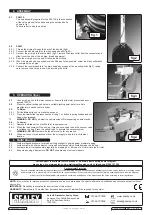
4. ASSEMBLY
4.1. PAFJ3S
The only assembly required for the PAFJ3S is the connection
of the valve bracket to the base using the nuts and bolts
shown in fig.1.
Take care not to trap the air pipe.
4.2. PAFJ3
4.2.1. Thread the air pipe through the back of the handle (fig.2).
4.2.2. Connect the handle using the four hex-headed bolts (fig.2.A)
4.2.3. Connect the air pipe to the valve block (fig.3): remove the brass collar from the connector and
slide it over the end of the air pipe, thread uppermost.
4.2.4. Push the air pipe over the end of the valve block fitting.
4.2.5. When the pipe has been pushed over the fitting as far as possible, screw the brass collar back
to compress the air pipe.
4.2.6. Connect the tubular handle to the main handle by means of the mounting bolts (fig.3), taking
care to move the air pipe to one side, avoiding the bolts.
fig.1
fig.2
fig.3
fig.4
5. OPERATION (fig.4)
5.1.
Connect an air line to the inlet connector. Ensure that the inlet pressure does not
exceed 150PSI.
5.2.
Place the yellow jacking pad below a suitable jacking point (refer to vehicle
manufacturer’s handbook for advice).
5.3.
To Raise:
5.3.1.
Pull the
blue
button out to close the exhaust.
5.3.2. Press the
red
button to pressurise the air bag. The button is spring-loaded and will
close when released.
p
WARNING: DO NOT
go below the vehicle without first supporting on axle stands.
5.4.
To Lower:
5.4.1. Depress the
blue
button (it will hold in) to depressurise.
5.4.2. When the load comes off the air bag, it may be necessary to use the vacuum valve
to collapse the bag. Press the yellow valve to activate the vacuum system.
p
WARNING: DO NOT
tamper with the safety valve for any reason.
5.5.
When not in use store disconnect from the air supply in a safe, dry, childproof
location.
6. MAINTENANCE
6.1.
Avoid prologued exposure to rain and strong sunlight to guard against premature aging.
6.2.
Avoid contact with sharp objects or corrosive substances which could damage the air bag.
6.3.
Lubricate the air valve assembly regularly by dropping 5 or 6 drops of air tool oil into the air inlet.
6.4.
Keep clean using a damp cloth;
DO NOT
use abrasive or solvent cleaners.
Environmental Protection
Recycle unwanted materials instead of disposing of them as waste. All tools, accessories and packaging should be sorted, taken to a recycling centre
and disposed of in a manner which is compatible with the environment. When the product becomes completely unserviceable and requires disposal,
drain off any fluids (if applicable) into approved containers and dispose of the product and the fluids according to local regulations.
Parts support is available for this product. To obtain a parts listing and/or diagram,
please log on to www.sealey.co.uk, email [email protected] or telephone 01284 757500.
NOTE:
It is our policy to improve products continually and as such we reserve the right to alter data, specifications and component parts without
prior notice.
IMPORTANT:
No liability is accepted for incorrect use of this product.
WARRANTY:
Guarantee is 12 months from purchase date, proof of which will be required for any claim.
01284 757500
01284 703534
Sole UK Distributor, Sealey Group,
Kempson Way, Suffolk Business Park
,
Bury St. Edmunds, Suffolk,
IP32 7AR
www.sealey.co.uk
© Jack Sealey Limited
Original Language Version
PAFJ3, PAFJ3S Issue: 1 - 02/03/16


