4. OPERATION
4.2
Mount the lamp to a secure position using the spring loaded gripper. Do not clamp over electrical wiring or onto any
vehicle components that move.to suspend the inspection lamp, use the hanging loop at the end of the handle.
4.1
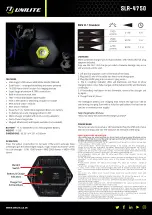
DIrEct thE LEns AWAY froM Your EYEs BEforE sWItchIng on. the lamp has a three position rocker
switch. the centre position is off. Moving the switch to the single bar position turns the lamp onto LoW output.
Moving the switch to the double bar position turns the lamp onto hIgh output.
NOTE: It is our policy to continually improve products and as such we reserve the right to alter data, specifications and component parts without prior notice.
IMPORTANT:
no liability is accepted for incorrect use of this product.
WARRANTY:
Guarantee is 12 months from purchase date, proof of which will be required for any claim.
INFORMATION:
For a copy of our latest catalogue and promotions call us on 01284 757525 and leave your full name and address, including postcode.
01284 757500
01284 703534
Sole UK Distributor, Sealey Group,
Kempson Way, suffolk Business Park
,
Bury st. Edmunds, suffolk,
IP32 7AR
www.sealey.co.uk
Web
Original Language Version
LED28 Issue: 3 - 09/01/12
Note: LED arrays are designed to allow individual LEDs to cease functioning without causing the entire array to
fail. This could be as a result of shock or impact. Shock or impact will invalidate warranty.
Environmental Protection
recycle unwanted materials instead of disposing of them as waste.
All tools, accessories and packaging should be sorted, taken to a recycle centre and disposed of in a
manner which is compatible with the environment.
When the product is no longer required, it must be disposed of in an environmentally protective way.
contact your local solid waste authority for recycling information.
Battery Removal
WARNING!
Ensure the lamp is not connect to the charger when removing the battery.
remove the gripper from its clamp using a large cross head screwdriver and the correct size socket.
1.
With the gripper removed, unscrew the 2 screws on the head of the lamp and 3 screws on the rear of the
2.
handle.
slide the handle away from the head of the lamp and remove one side of the handle.
3.
cut each wire that connects to the battery pack.
4.
Dispose of batteries according to local authority guidelines
.
under
the Waste Batteries and Accumulators Regulations 2009, Jack Sealey Ltd are required to inform
potential purchasers of products containing batteries (as defined within these regulations), that they are
registered with Valpak’s registered compliance scheme.
Jack Sealey Ltd’s Batteries Producer Registration Number (BPRN) is BPRN00705
3.3
Plug the charger into a 230V mains supply.
3.4
the red LED in the centre of the lense will illuminate to indicate that charging is in progress.
3.5
The lamp will take 14 hours to fully charge. Do not continue charging beyond this period.
3.6
unplug the charger from the mains supply. unplug the charging lead from the inspection lamp.
3.7
the inspection lamp will operate continuously for seven hours on the low output setting and three and a half hours
on the high output setting.
3.8
charger Part no:
LED28.C
.


