No-Load Speed . . . . . . . . . . . . . . . .0-2300rpm
Impact Rate . . . . . . . . . . . . . . . . . .0-3000bmp
Maximum Torque . . . . . . . .98ft.lb / 1355kg.cm
Weight . . . . . . . . . . . . . . . . . . . . . . . . . .1.8kg
Battery Pack . . .12V 2Ah (Part No. CP1211BP)
1.3.5. DO regularly inspect power supply leads, plugs and sockets for wear, damage or loose connections.
1.3.6. DO check that the voltage marked on the product is the same as the power supply
to be used and check the plug is fitted with the correct capacity fuse (see right).
1.3.7. DO NOT pull or carry the appliance by the cables.
1.3.8. DO NOT pull the plug from the socket by the cable.
1.3.9. DO NOT use worn or damage leads, plugs or connections. Immediately replace,
or have repaired, by qualified electrician. A U.K. 3 pin plug with ASTA/BS approval
is fitted. In case of damage, cut off and fit a new plug according to the following
instructions (UK only - see diagram right).
Ensure that the double insulated charger is correctly connected via a three-pin plug, as follows:
a) Connect the Brown live wire to live terminal L.
b) Connect the Blue neutral wire to the neutral terminal N.
c) After wiring, check that there are no bare wires, that all wires have been correctly connected, that the cable outer insulation extends
past the cable clamp and that the clamp is tight.
Note that the earth pin remains unconnected.
1.4. BATTERY CHARGER SAFETY INSTRUCTIONS
p
p
WARNING! DO NOT attempt to charge any battery other than that supplied for the wrench. Other types of batteries may explode!
3
All mains electrical supply safety features must be followed as described in 1.3. above.
3
Disconnect the charger from the mains supply when not in use.
7
DO NOT charge battery if room temperature is below 41
O
F (5
O
C) or above 104
O
F (40
O
C)
7
DO NOT expose the charger to damp or wet conditions.
7
DO NOT pull or carry the charger by the power lead.
7
DO NOT operate the charger if it has been dropped, or has received a sharp knock, or is damaged. Take the charger to an authorised
agent for repair or obtain a replacement.
7
DO NOT dismantle the charger as this may cause damage and/or personal injury and will invalidate the warranty.
7
DO NOT insert foreign objects or material into the hole reserved for the battery pack.
7
DO NOT recharge a second battery pack immediately after charging the first. Consecutive charging will overheat the charger. Allow the
unit to cool for 15 minutes before charging the next pack.
7
DO NOT attempt to connect two chargers together.
3
Store the charger in the same manner as the battery pack in 1.2.
2. INTRODUCTION & SPECIFICATION
Blue -
Neutral
Wire
Brown -
Live Wire
3. OPERATING INSTRUCTIONS
Note:
When new, the battery pack will have been shipped in a low charge state. It will take longer to charge initially, and several subsequent charges
may also take a little longer than when the battery pack reaches its optimum performance. Remove battery pack from case and charge as below:
3.1.
CHARGING THE BATTERY PACK
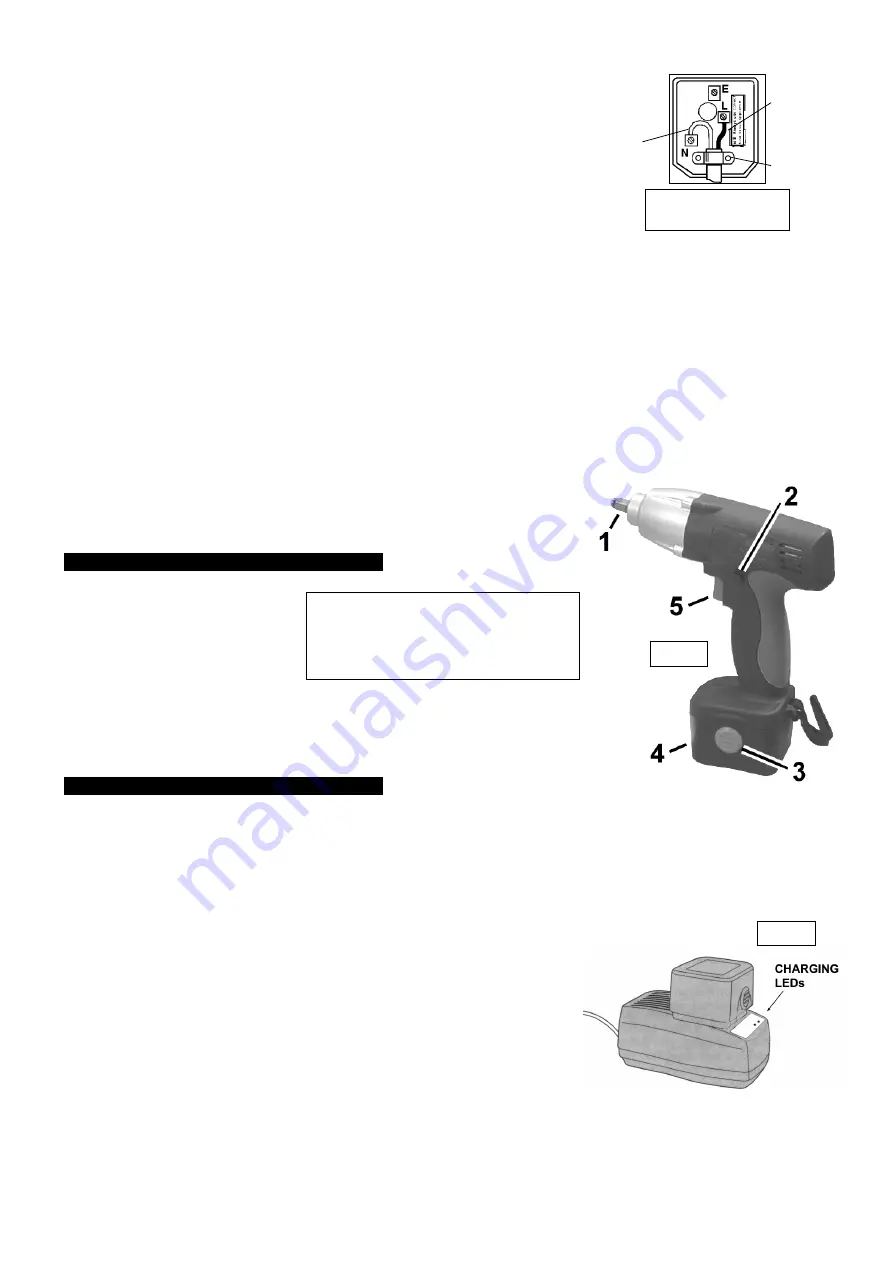
3.1.1. To remove the battery pack (fig. 1.4) from wrench, depress the two side release clips (3).
p
p
WARNING! Do not touch metal terminals.
3.1.2. Place wrench in carry case and remove the battery charger.
3.1.3. The battery pack and charger have the positive (+) and negative (-) terminals marked.
Align the correct terminals and insert the battery into the charger (fig. 2).
Note: The battery pack is so designed that it will only enter the charger unit the
correct way
.
When placed in the charger, a very slight downward pressure will seat the pack
firmly into the terminals.
The red LED (fig. 2) will light to indicate fast charging.
3.1.4. When the fast charge is complete the red LED will go out and the green LED will
light to indicate trickle charging. The battery pack is now ready for use.
NOTE:
The charge time is approximately 1 hour.
3.1.5. After removing the battery, disconnect the charger from the mains supply and
store in the carry case.
Cable Clamp
FUSE RATING
5 AMP
Powerful and compact cordless impact
wrench fitted with electronic variable
speed control. The forward and reverse
controls are integrated into the housing
for ease of use. Powerful but balanced
for workshop applications. Includes
12 volt Ni-Cad battery pack, 1 hour
mains charger and 3/8-1/2 drive
adaptor.
fig. 1
fig. 2
CP1211 - 2 - 160902


