background image

try values allowed by the BIOS, which limits the capacity of
each logical drive to 528 Mbytes.

Configuring the computer

Configuring the computer involves updating the computer’s Sys-
tem  Setup  records  with  the  new  drive’s  translation  geometry
(cylinder, head and sector information) and partitioning and for-
matting the drive. The translation geometry is kept on the CMOS
chip and is used by the BIOS to assign locations for the data on
the  drive.  Many  older  BIOSs  place  limits  on  the  translation
geometry parameter values that do not allow it to assign locations
beyond 528 Mbytes when DOS is used. If your computer uses
such a BIOS, it cannot access the full capacity of your new drive.
In this section we describe three methods you can use to config-
ure your computer for DOS: EZ-Drive installation software, stand-
ard setup and dual-drive emulation setup. 

Using the installation software

Note. The  EZ-Drive software  is authorized  for installation  only

with the drive on which it is shipped.

The EZ-Drive installation software allows your computer to ac-
cess your Seagate drive’s full format capacity. It bypasses the
BIOS  during  the  boot  sequence  and  uses  the  information  it
creates  on Drive  C to identify the drive before DOS is loaded.
During the installation, EZ-Drive: 

Determines how many drives are installed 

Enters a drive type in System Setup for the new drive

Modifies the Drive C boot record with the new drive’s transla-
tion geometry 

Partitions and formats the new drive

Copies the boot files to the new drive if it is Drive C 

Enables Maximum Overdrive, which enables read/write mul-
tiple  in  drives  that  have  this  feature.  The  Change  Installed

14

Medalist 1270 Installation Guide, July 1995

Summary of Contents for MEDALIST 1270

Page 1: ... Medalist 1270 ATA Interface Drive Installation Guide ...

Page 2: ...e product offerings or specifications No part of this publication may be reproduced in any form without written permission from Seagate Technology Inc Contents Introduction 1 Before you begin 3 Configuring the drive 5 Attaching the cables 9 Mounting the drive 10 Transferring the software from the drive 11 Determining if your BIOS accepts more than 528 Mbytes 13 Solutions for surpassing the 528 Mby...

Page 3: ...tion software EZ Drive and a 32 bit disk access driver for Windows SEG32BIT 386 that allows the computer to surpass the 528 Mbyte barrier when it is imposed The software is stored on the drive and must be transferred to a diskette in Drive A before you partition and format the drive A program called Seamove is provided to make the transfer easy We hope your installation goes smoothly but if compli...

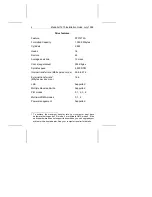
Page 4: ...te1 Mbytes per sec max 16 6 LBA Supported Multiple block read write Supported PIO modes 0 1 2 3 4 Multiword DMA modes 0 1 2 Power management Supported 1 To achieve the maximum transfer rate your computer must have hardware that supports PIO mode 4 or multiword DMA mode 2 If the native hardware does not support these modes you can upgrade your system with a host adapter See your computer reseller f...

Page 5: ...il you are ready to install it Do not attach any cables to the drive while it is in its bag Handle the drive gently and only by its edges or frame Place it on an antistatic surface until you are ready to install it Do not touchthe drive s connector pins or printed circuit board Inspection Use the handling precautions listed above when you inspect the drive If it appears to be damaged call your dis...

Page 6: ...erks werden 4 Schrauben 6 32 UNC 2A benötigt Bei seitlicherBefestigungdarf die maximale Länge der Schrauben im Chassis nicht mehr als 3 3 mm und bei Befestigung an der Unterseite nicht mehr als 5 08 mm betragen 3 Als Versorgungsspannugen werden benötigt 5V æ 5 0 6A 12V æ 5 0 8A 1 9A fur ca 30 Sek fur æ 10 4 Die Versorgungsspannung mub SELV entsprechen 5 Alle Arbeiten auf dem Festplatte dürfen nur ...

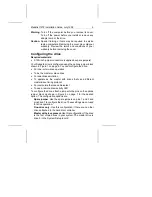
Page 7: ...lave drive For dual drive emulation To operate as the master with drives that use a different master slave timing protocol For computers that use cable select To use a remote drive activity LED To configure the drive attach a jumper to the pins on the options jumper block as shown in Figure 2 on page 7 for the desired option The configuration options are Spare jumper Use the spare jumpers on pins ...

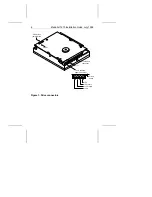
Page 8: ...1 J8 pin 1 J8 Options jumper block J1 Interface connector J3 Standard power connector 1 2 3 4 Circuit board 5V 5V return 12V return 12V Figure 1 Drive connectors 6 Medalist 1270 Installation Guide July 1995 ...
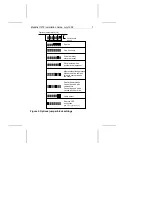
Page 9: ...n pin 13 pin 14 Spares 12 11 Master slave timing protocol Makes the drive compat ible with some drives as the slave 14 13 Dual drive emulation Cannot be used with cable select Cannot be used with a second physical drive Circuit board side up Options jumper block J8 Figure 2 Options jumper block settings Medalist 1270 Installation Guide July 1995 7 ...

Page 10: ...t protocol Try using this setting if the slave is not identified after power on Dual drive emulation This feature allows you to make the most of the BIOS limitation by making the drive two logical drives for the computer Each logical drive is assigned a drive type in System Setup using the maximum translation geome try values the BIOS allows Each logical drive must be parti tioned and formatted A ...

Page 11: ...tor may damage the cable Attach an interface connector to the drive If your interface con nector has a key it can only plug into the drive one way Be sure that you do not bend the pins when you attach the cable Attach an interface connector to the hard disc controller connec tor on the motherboard or host adapter Be sure that pin 1 see your system user s guide or host adapter user s guide to deter...

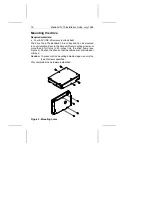
Page 12: ...e drive with four mounting screws not more than 6 full turns 0 20 inches into the drive frame see Figure 3 Position the drive so that the cables are not strained or crimped Caution To prevent drive mounting hole damage use only the type of screws specified This completes the hardware installation Figure 3 Mounting holes 10 Medalist 1270 Installation Guide July 1995 ...

Page 13: ... the hard disc capacity to 528 Mbytes to surpass the 528 Mbyte barrier SEG32BIT 386 This replacement 32 bit diskaccess driver for Windows supports drive capacities above 528 Mbytes multi ple block read write PIO modes 3 and 4 and LBA addressing Seamove This is a program that automatically copies the software files stored on the drive at the factory to a bootable diskette in Drive A It removes the ...

Page 14: ...ot offer drive type 2 use the following values 615 cylinders 4 heads and 17 sectors Note These are interim drive type values that allow you to access the drive for extracting the installation files 5 Activate the prompt for the Seagate drive 6 Type seamove and press ENTER This command transfers the files from the drive to the diskette in Drive A When the transfer is complete the seamove program er...

Page 15: ... The number should be close to the formatted capacity of your drive If the number is less than 528 Mbytes you need to consider alter natives for surpassing the 528 Mbyte barrier Some alterna tives are listed below Solutions for surpassing the 528 Mbyte barrier Upgrade the BIOSto onethat supports more than528 Mbytes Such BIOSs incorporate logical block addressing LBA and extended cylinder head sect...

Page 16: ...g ure your computer for DOS EZ Drive installation software stand ard setup and dual drive emulation setup Using the installation software Note The EZ Drive software is authorized for installation only with the drive on which it is shipped The EZ Drive installation software allows your computer to ac cess your Seagate drive s full format capacity It bypasses the BIOS during the boot sequence and us...

Page 17: ...d the drives Note EZ Drive is designed for DOS installations To use EZ Drive you must have Microsoft MS DOS Version 3 0 or later IBM PC DOS Version 3 1 or later Digital Research DR DOS Version 6 0 or later Novell DOS Version 7 0 or later Compaq DOS Version 3 1 or later EZ Drive allows you to have full access to your drive in DOS when other operating systems are loaded on the drive You must install...

Page 18: ...ly with the drive on which it is shipped Press ENTER to continue 4 Locate the bottom box on the screen The model number of each drive EZ Drive identifies is listed in this box If a drive you have installed is not listed or the drive order Drive 0 is the master Drive 1 is the slave is incorrect or there is a drive not identified message make sure the master and slave jumpers are set correctly on th...

Page 19: ...rive with other operating systems Caution You can corrupt the data on your drive if you boot from a diskette improperly while in this mode Always follow the Booting with a diskette after EZ Drive is installed instruction on page 18 or the Floppy Boot Instruction in EZ Drive when booting with a diskette in this mode Set the time period the computer allows you to press CTRL if you want to boot to a ...

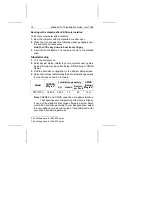
Page 20: ...e hard disc configuration in the System Setup screen 4 Selecta drive type that matches the drivetranslation geometry for your drive as shown in the table Model CHKDSK Mbytes2 Translation geometry CMOS Setup Mbytes3 Cyl Heads Sectors per track ST31270A 1 282 8 2 485 16 63 1221 Note CHKDSK and CMOS capacities are approximations The capacities your computer reports may vary slightly If none of the st...

Page 21: ...al drive emulation installation Dual drive emulation makes the drive two logical drives for the computer Each logical drive is assigned a drive type in System Setup and must be partitioned and formatted Use the translation geometry values shown in the table below They are the maxi mum valuesyour BIOS supports Asecond physical drive cannot be installed on the same port when dual drive emulation is ...

Page 22: ...mat the drive as described below Low level formatting The drive is low level formatted at the factory using 512 bytes per sector Low level formatting is not required Partitioning You must partition the drive into one or more logical drives before you can use it Caution Partitioning or formatting a drive at any level erases all data on it Make a backup copy of your existing files on another drive b...

Page 23: ...uctions Use the DOS FORMAT utility to high level format the drive as follows 1 At the DOS prompt type the following command format drive v s drive designates the drive you are formatting If you are formatting the boot drive or if your system contains only one drive type c To format a second drive type d v tells the computer to create a volume label for the partition after it is formatted Labeling ...

Page 24: ...to the diskette drive 5 In the command line box type drive stsetup 6 Read the license agreement that appears on the screen If you agree to the terms select ACCEPT AGREEMENT to continue 7 The next screen lists the features the SEG32BIT 386 driver supports If your computer supports these features they will be active in 32 bit disk access mode with SEG32BIT 386 for all drives that support them Select...

Page 25: ... damaged es pecially at the connector Try a new cable or a known good cable Make sure no socket pins were bent when the cable was inserted For each cable verify that cable connector pin 1 is aligned with equipment connector pin 1 The edge stripe on the ribbon cable is used to denote pin 1 Caution Do not reverse plug connectors This can damage the computer and the drive Verify equipment configurati...

Page 26: ...if the drive is not running Verify the System Setup drive type values Each drive present must be represented in System Setup Try a warm boot a reboot without turning off computer power To do this press CTRL ALT and DELETE at the same time If the drive is recognized after the warm boot the computer BIOS setup test may be completing before the drive is ready One possible solution is to slow your com...

Page 27: ...recognize the slave drive after power on the slave may not be communicating with the master during the boot cycle Try reconfiguring the drives using the master slave timing protocol jumpers discussed on page 8 The dealer partitioned and high level formatted the drive for you in the store Later you installed the drive and it does not respond Reboot the computer and make sure the drive spins up Chec...

Page 28: ...ype or translation geometry Thecomputer s BIOS may not accept a particular translation geometry for writing into the CMOS setup memory Change the interrupt jumper setting on the host adapter Check for media defects at the beginning of the drive Use a third party surface scan utility Some BIOSs have a Track 0 protection feature that protects Track 0 from viruses This can causes FDISK to hang the sy...

Page 29: ...vantage of the drive s capacity or 4 the drive s physical specifications ex ceed the translation geometry limits imposed by the BIOS Refer to Standard setup on page 18 if any of the first three cases are true Refer to Configuring the computer on page 14 if the last case is true If you reset the System Setup drive type value you must partition and high level format the drive again If you partitione...

Page 30: ... computer will stop access ing EZ Drive installed drives with more than 528 Mbytes The data files are not affected For this operation you need a bootable diskette and a diskette that has the FDISK utility Note Before you disable EZ Drive back up your data files 1 Turn the computer off 2 Insert a bootable diskette into Drive A and turn the com puter on Your computer must boot to Drive A without loa...

Page 31: ...1 Insert the Seagate software diskette with EZ Drive into the diskette drive 2 Type ez at the command line 3 Go to the Main menu and select Installation Options Press ENTER 4 Select Change Install Features and press ENTER 5 Select Disable Maximum Overdrive 6 Press the ENTER key to change the status 7 Usethe down arrow key to select SaveChanges Press ENTER to save Additional EZ Drive troubleshootin...

Page 32: ...modem you can Access documentation drive specifications and jumper set tings for Seagate s entire product line Download software for installing and analyzing your drive SeaBOARD is available 24 hours daily It supports communica tions up to 9 600 baud Set your communications software to eight data bits no parity and one stop bit 8 N 1 SeaBOARD phone numbers are listed in the following table Locatio...

Page 33: ...M Pacific time Monday through Friday SeaFONE provides recorded technical information on se lected Seagate products while you are on hold You can access the recordings 24 hours daily Before calling note your system configuration and drive model number STxxxx SeaTDD 408 438 5382 Using a telecommunications device for the deaf TDD you can send questions or comments 24 hours daily and exchange messages...

Page 34: ...gate drives is available on the internet from Seagate s World Wide Web home page http www seagate com or Seagate s ftp server ftp ftp seagate com The ftp server contains information similar to that found on SeaBOARD 32 Medalist 1270 Installation Guide July 1995 ...

Page 35: ...ve in an unapproved container voids the warranty Call your authorized Seagate distributor to purchase additional boxes The following figure shows how a drive fits in an approved single pack box including the packing materials Foam Antistatic bag Drive Foam Foam Antistatic bag Drive Foam Figure 4 A drive in an approved package Medalist 1270 Installation Guide July 1995 33 ...

Page 36: ...Seagate Technology Inc 920 Disc Drive Scotts Valley CA 95066 USA Publication Number 36315 001 July 1995 Printed in USA ...

Reviews: