7
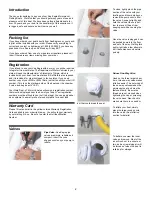
Starting from the bow, roll
toward the stern of the boat
tightly to force out any remain-
ing air.
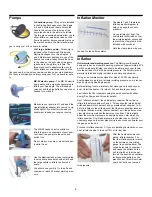
When you are done your boat
will be compact and ready for
storage.
Care and Maintenance
There is very little that you have to do to keep your boat in almost
new condition for many years. You may store it inflated or deflated.
If you leave it outside, you should raise it up off the ground and cover
it with a tarp if it is going to be in direct sunlight or exposed to leaves,
berries or rain. If you leave it in the water, you will probably have to
empty out the water every time it rains (this will also harm the wood-
en floorboards over time).
We do not recommend using your boat below 30 degrees fahrenheit.
PVC material can become brittle in extremely cold temperatures.
This will not harm a boat stored in cold conditions as long as it is not
dropped or subjected to a sudden impact in the extreme cold.
If you store it in a closet, basement or
garage, we recommend picking a cool, dry
spot, making sure the boat is clean and
dry before you pack it up - otherwise mold
can accumulate while it is stored.
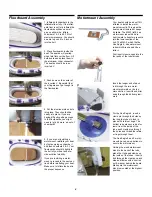
Periodic use of 303 Protectorant, available
in the Accessories section of
SeaEagle.com, will improve the UV resist-
ance of the PolyKrylar hull material of
your Sea Eagle.
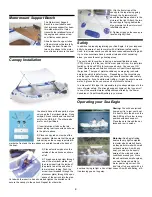
For stain removal, we reccommend the
use of 3M Vinly Cleaner and Restorer,
also available at SeaEagle.com to remove
the toughest stains.
Troubleshooting
Leakage of air:
If your boat appears a bit soft, it might not be
because of a leak. If the boat was inflated late in the day with 90
degree air, that air might cool 20 degrees overnight. The cooler air
exerts less pressure on the hull, so it could appear soft the next
morning.
If there has been no temperature variation, you need to start looking
for a leak. Below are the three best methods
1) Visual inspection.
Get a good look at your boat from just a few
feet away. Flip it over and closely check over the outside. Any large
leaks should be clearly visible.
2) Listening.
If you have a rough idea where your leak is, you can
sometimes hear it in a quiet room.
3) Soapy water.
Use a mix of dishwashing liquid and water in a
spray bottle, and spray over suspicious areas. Any leak will produce
bubbles that will pinpoint the location of the leak.
Check your valves:
Look, listen, and if necessary, spray soapy
water around your valve and the valve base. Leaky valves have sev-
eral causes:
1) Crossed threads.
Make sure that both the inner valve and the
outer cap are firmly screwed together. If threads are crossed on
either item a slow leak could result. A good way to avoid this is to
first turn the outer cap back 1/4 turn.
2) Sand in Diaphragm,
threads, or O-ring. Check the black
diaphragm at the bottom of the inner valve for sand between the
diaphragm and the inner valve. Also check the threads on the inner
valve, boat hull, and outer cap for any dirt or sand which might break
the seal. Check the O-ring on the inside of the outer cap for any
sand or contaminants which might break the seal.
3) Extreme overtightening
of inner valve into valve base can cause
a depression in the top of the valve base. In this case, simply sand
the depression out with fine sandpaper to create a flush surface.
Repairs
Through use you may occa-
sionally puncture your boat.
Most leaks only take a few min-
utes to repair. Your boat comes
with a repair kit, and additional
repair supplies can be ordered
from our website.
Small Repairs:
Deflate your
boat. Thoroughly clean and dry
area to be repaired. For a small puncture (less than 1/8th") apply a
small drop of glue. Let dry 12 hours. If you need to get on the water
sooner, let dry 30 minutes and then inflate the boat, inflating the
compartment with the repair only 3/4 full. Be sure to make a perma-
nent repair later.
Rips or Tears:
Cut a piece of repair material large enough to over-
lap the damaged area by approximately 1/2". Round off the edges.
Apply adhesive to the underneath side of patch and around the area
to be repaired. Too much glue will interfere with a proper repair. Al-
low adhesive to become tacky (2 - 4 minutes). Place the patch on
the damaged area and press down firmly. You may want to use a
weight on top to keep it in place. Allow 12 hours for repair to dry.
After patch has dried, apply glue around the edges for a complete
seal (dry 4 hours).
Large and Difficult Repairs:
Call our office for help on how to
make repairs. We will repair your boat for a minimum of $75, but this
is not always the most cost effective solution since you must pay for
return freight. If you are having problems, call our office and we will
talk you through the repair. Freight to our facility in Port Jefferson, NY
and return freight to your address is your responsibility.


