FA902400TX-Espresso
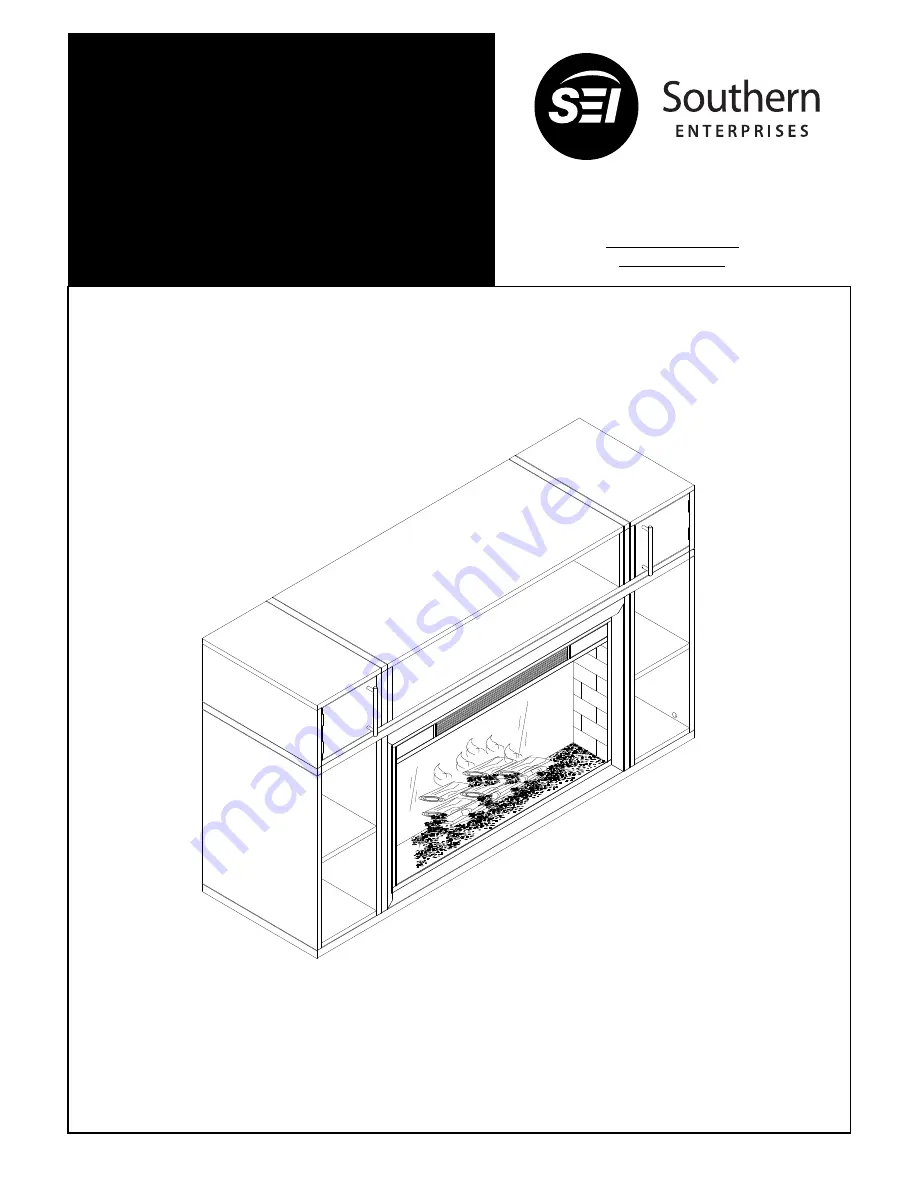
Bexley Media Fireplace
Assembly Instructions
For assistance with assembly, contact:
Southern Enterprises Inc.
Customer Service 1-800-633-5096
[email protected]
www.seidal.com
Page 1: ...FA902400TX Espresso Bexley Media Fireplace Assembly Instructions For assistance with assembly contact Southern Enterprises Inc Customer Service 1 800 633 5096 service seidal com www seidal com ...
Page 2: ...lly study the diagrams below and sort your hardware according to the pictures Using the incorrect hardware will cause damage A Quantity of 45 Cam Bolt B Quantity of 42 Wood Dowel Ø8 x 30mmL C Quantity of 45 Cam Lock D Quantity of 4 Hinge E Quantity of 18 Screw Ø3 x 14mmL F Quantity of 2 Magnet G Quantity of 2 Magnet Plate H Quantity of 2 Handle I Quantity of 4 Bolt Ø5 32 x 3 4 L J Quantity of 48 S...
Page 3: ... Panel 2 Quantity of 1 Left Side Panel 3 Quantity of 1 Right Side Panel 4 Quantity of 2 Middle Side Panel 5 Quantity of 1 Middle Divided Panel 6 Quantity of 1 Lower Left Divided Panel 7 Quantity of 1 Lower Right Divided Panel 8 Quantity of 2 Side Shelf Panel ...
Page 4: ...15 Quantity of 2 Lower Back Panel 15 Quantity of 2 Wood Holder Care and Cleaning Instructions Before using wipe with a clean dry cloth Periodically apply furniture wax to renew the finish Avoid rubbing or scratching the surface with rough or abrasive objects Call customer service at 1 800 633 5096 for assistance questions or parts Assembly Tool Required No 2 Phillips Screwdriver Not Included ...
Page 5: ... divided panel 6 lower right divided panel 7 and top rail 11 meet Tighten by rotating cam locks C clockwise with Phillips screwdriver Figure 2 Insert 7pcs cam locks C into holes on assembled unit Screw 7pcs cam bolts A into holes on middle shelf panel 9 Attach assembled unit to middle shelf panel 9 by inserting wood dowels B and cam bolts A into corresponding holes until middle shelf panel 9 and a...
Page 6: ...wdriver Repeat steps to attach right side panel 3 to side shelf panel 8 Figure 4 Insert cam locks C into holes on left side assembled unit from figure 3 and middle shelf panel 9 Screw cam bolts A into holes on assembled unit from figure 2 and assembled unit from figure 3 Attach assembled unitd from figure 3 to assembled unit from figure 2 by inserting wood dowels B and cam bolts A into correspondi...
Page 7: ...t meet Tighten by rotating cam locks C clockwise with Phillips screwdriver Figure 6 Insert 6pcs cam locks C into holes on middle divided panel 5 and middle side panel 4 Screw 6pcs cam bolts A into holes on assembled unit Attach middle side panels 4 and middle divided panel 5 to assembled unit by inserting wood dowels B and cam bolts A into corresponding holes until middle divided panel 5 middle si...
Page 8: ...ed unit by inserting wood dowels B and cam bolts A into corresponding holes until top panel 1 and assembled unit meet Tighten by rotating cam locks C clockwise with Phillips screwdriver Figure 8 Use screws J to connect upper back panels 14 and lower back panels 15 to the back of the unit as shown Tighten by rotating screws J clockwise with Phillips screwdriver 15 15 1 A B C B 2 3 5 4 4 ...
Page 9: ... clockwise with Phillips screwdriver Assemble magnet F under the top panel by using screws J Then attach magnet plate G to the inside of door panels 12 and 13 by using screws E Use bolts I to connect handles H to door panels 12 and 13 Tighten by rotating bolts I with Phillips screwdriver Figure 10 Place firebox K into the back of the unit as shown E H I I H I I J F E ...
Page 10: ...s shown Tighten screw with Phillips screwdriver Drill 1 4 inch pilot holes in near proximity of the brackets attached to the top panel then tap the plastic anchors into wall Use long screws to connect brackets to plastic anchors on wall Tighten screws with phillips screwdriver Move this item close to the fastened wall brackets and tie in both bracket with plastic straps as shown in diagram Now you...
Page 11: ...rises at 800 633 5096 or in Dallas 972 869 0111 9am 4pm Mon Fri Central time if you have product issues or email us at service seidal com Please ask for customer service representative for issues involving damages or replacement parts Please ask for technical assistance representative for any issues with product and assembly construction Please contact the retailer that you purchased from for retu...
Page 12: ...b each of open side shelf should not be loaded with more than 8 lbs DO NOT EXCEED RECOMMENDED LOAD Use with products heavier than the maximum sizes and weights indicated may result in instability causing possible injury This unit contains a permanent warning sticker located on under side of top shelf or inside drawer Model FA902400TX BEXLEY MEDIA FIREPLACE Southern Enterprises Inc 600 Freeport Par...