


14
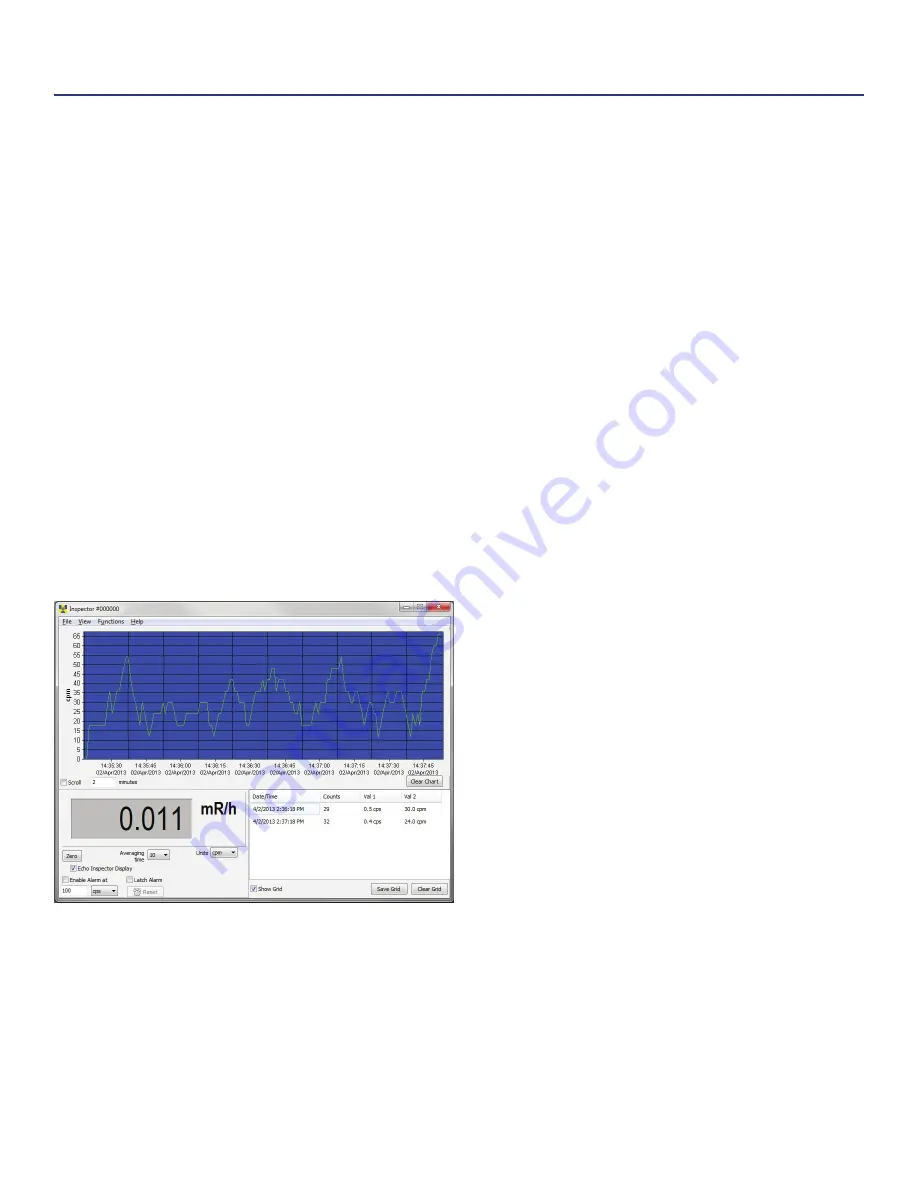
The Observer USB reads in Total Counts, CPM, CPS, µR/hr, mR/hr, µSv/hr and has the ability to collect, log the
data received, calibrate the unit, and echo the readings collected on a PC. The data is displayed on a graph as
well as a digital on-screen meter and can be saved or printed in various ways, including a spreadsheet format.
The dwell/count time can be adjusted for each point on the graph. You can also set the length of time for the
count. The on-screen display in the software has adjustable settings as well as a settable alarm.
Installing the Observer USB Software
To use the Observer USB Software with your unit, you will first need to install the software prior to connecting
your instrument to the computer. You can download a copy at seintl.com/software. After the software has
completed downloading, double click on the installer and follow the on-screen prompts. Once the software is
installed and started, the detector will be automatically detected and identified once the unit is connected via
USB.
Connect to The Inspector
Ensure that you have installed the Observer USB Software before connecting the Inspector. The USB port is a
mini-B type jack located on the side of the Inspector above the Output
Figure 2 (9)
. To connect the Inspector,
power on your detector, plug the cable into the USB jack, and connect the other end to the USB port on your
computer. Note: If the battery icon is on after plugging in your unit to the USB cable connected to the PC, turn
the unit off and then on again and the USB Observer will launch.
Once the unit is connected, the Observer Software will launch and open a window for the instrument with
a serial number displayed in the upper left corner of the title bar. A new window will open for each detector
connected.
Preferences
The alarm settings, auto-save chart feature, and the
grid settings for datalogging frequency and units of
measurement can be adjusted in View > Preferences
menu.
Using the Data Logging Feature
You must set the time and date on the Inspector prior
to collecting data. We recommend the clock be set
prior to collecting data to ensure a correct time and
date in your collected data. If you exceed that amount
of time after setting the time and date, you will need
to reset the clock to the current time and date. In
addition to being able to set the time via the utility
menu, the internal clock of the Inspector can be set
to the time on the PC you are using by clicking Functions > Synchronize Inspector to PC Clock. The Inspector
will beep twice once synchronization has completed. The update will be recorded in the on board memory if
the recording feature is on.
See Chapter 3: Operation, Utility Menu for information on activating the recording
feature.
If the recording feature on the Inspector is activated and the internal clock is set, then the collected data can
be retrieved from the unit’s internal memory by selecting Functions > Retrieve Memory. Data is stored in a
text delimited file, which can be opened in your preferred spreadsheet software. The default data logging
frequency is 10 minutes. You can change the value in the Cal Panel of the Observer USB Software.
Chapter 7: Observer USB Software