4
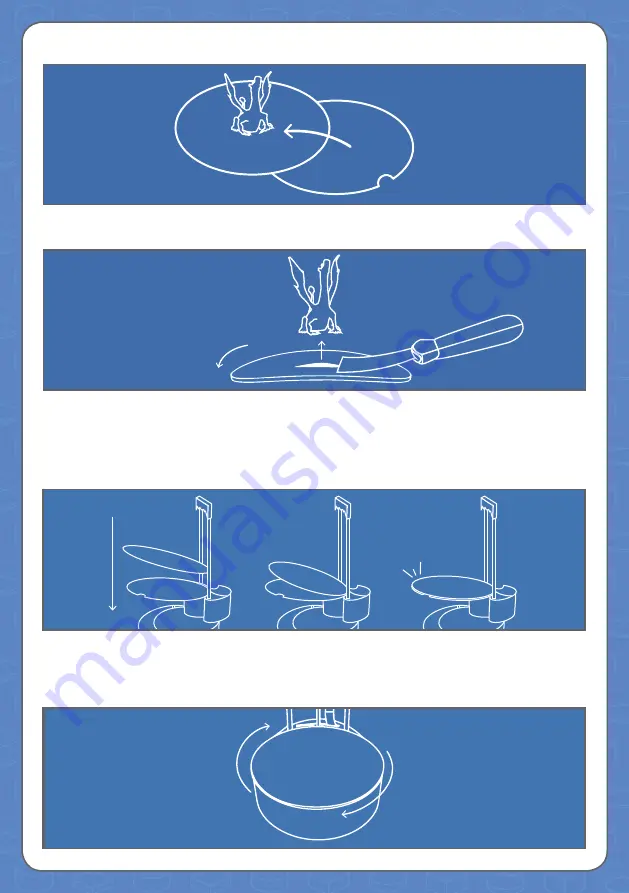
Flex the BUILDTAK with your hands to make the object loosen from the surface (when printing
smaller objects, a spatula can be used to help with the process).
5
Now it’s time to place the BUILDTAK back on the BuildPlate – precision is required! Help
yourself by placing the BuildPlate between the 2 metal axises on the printer. Make sure that the
BulidPlate touches both axises.
Now, do the same with the BUILDTAK and bring the 2 parts together – be careful your fingers
can get squeezed!
6
Check if the BUILDTAK and BuildPlate are perfectly aligned by placing the BuildPlate on the
Printer Base and rotating it 360 degrees.
If it rotates freely – great job! If not, you need to try to merge the BUILDTAK and the BuildPlate
again (don’t worry if it takes a few attempts to master the technique).
3
Afterwards, detach the BUILDTAK from the base of the BuildPlate.


