3
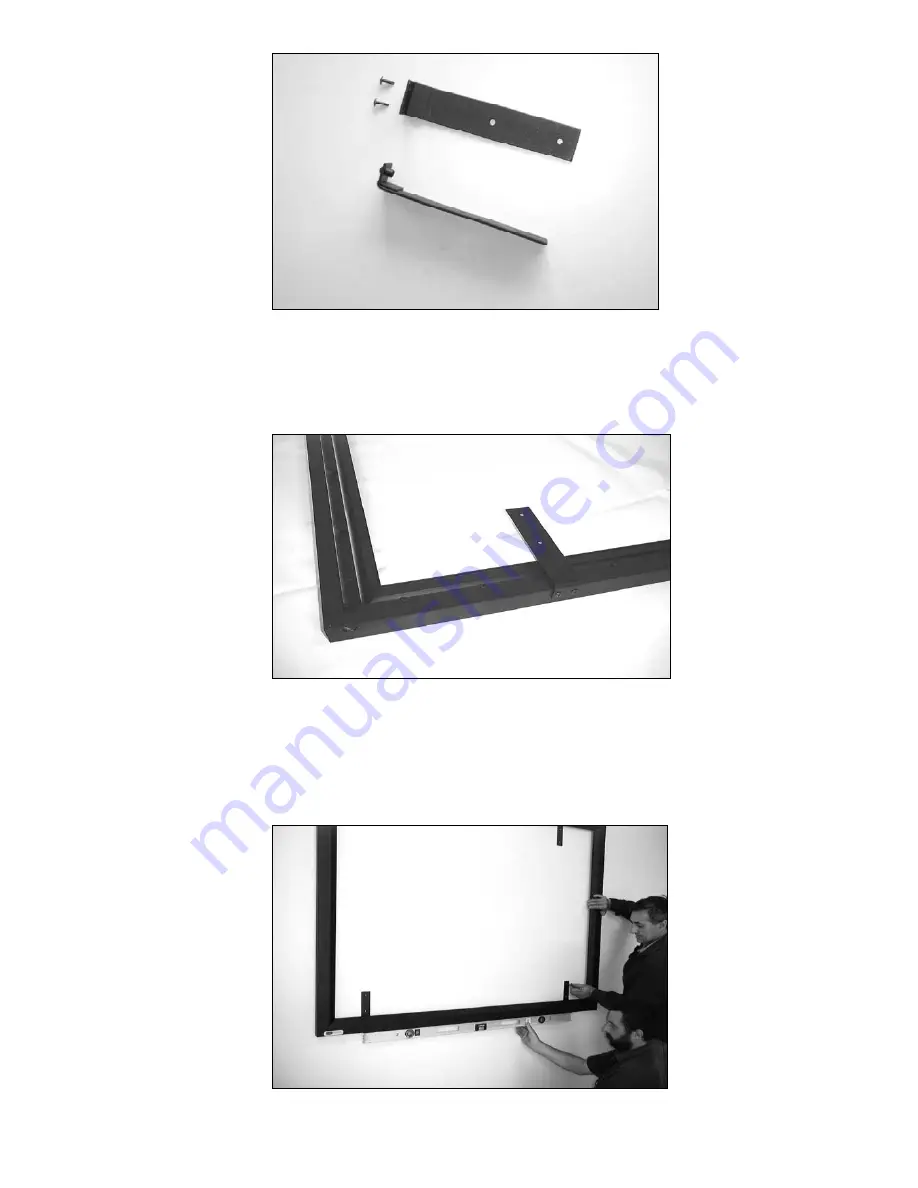
Step 6.
Attach brackets as shown – Utilizing nylon bushes and locating holes only if
necessary as explained in previous step.
Step 7.
With all four brackets attached, place screen frame (not with surface) on the wall
and mark holes.
Page 1: ...n Screen please ensure that you read the following instructions fully before attempting to install this product Step 1 Layout all components ready for assembly as shown below Step 2 Push the four corn...
Page 2: ...pping Tek screws that allow you to drill directly into the frame anywhere that best suits wall stud supports and the like Latter on in the installation you will need enough room to re screw these Tek...
Page 3: ...ch brackets as shown Utilizing nylon bushes and locating holes only if necessary as explained in previous step Step 7 With all four brackets attached place screen frame not with surface on the wall an...
Page 4: ...fe installation tep 9 Remove frame from the wall by undoing outside bracket screws Brackets are to remain on wall Prepare screen surface Please do not allow the steel rods to come into contact with th...
Page 5: ...the screen surface evenly to all four sides Step 12 Once all four sides of the screen surface have been placed evenly the screen surface should be attached to the frame as shown below Now you are rea...
Page 6: ...an white lint free cloth It is most important that you only treat the actual mark by this process and not the entire surface Do not use any abrasive cleanser as this will damage the surface Should you...