1
1
MG984G
-3
6
M
1.
Inserted the correct power source?
2.
Inserted the relevant cellular network providers' activated SIM card - remembering to disable the PIN?
3.
Loaded DATA onto the SIM
(required for Molnus / Email [GPRS] sending)?
4.
Loaded AIRTIME onto the SIM
(required for Phone [MMS] / Phone [Email] sending AND some airtime is also
required for
REMOTE COMMUNICATION purposes)?
5.
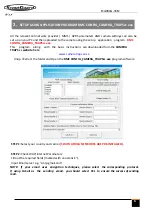
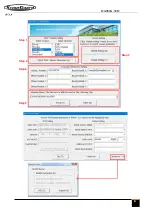
Either manually inserted the cellular network parameters or used the Setup application program BMC
CONFIG
_CAMERA_TRAPScc
.exe?
6.
Either manually inserted the sending e-mail parameters or used the Setup application program BMC
CONFIG
_CAMERA_TRAPScc
.exe? (if using
Gmail - please see note on Page 4)
7.
Either manually inserted the receiving e-mail addresses / cell phone numbers or used the Setup application
program BMC
CONFIG
_CAMERA_TRAPScc
.exe? - remembering No country prefixes (+27 etc.) e.g. '0823456789'
8.
If you used the setup application program BMC CONFIG
_CAMERA_TRAPScc
.exe - have you created the relevant
'GSM' folder and copied it to a
clean / formatted and unlocked SD card to be used in the camera trap?
9.
Inserted this recommended SD card into the camera?
10.
Now Turn the camera to SETUP and wait for it to obtain cellular signal.
11.
Check all your settings / adjust the date / time and others to your preference
12.
Ensure the unit is on Instant sending
13.
Mount the unit and switch to ON...
C
HECKLIST
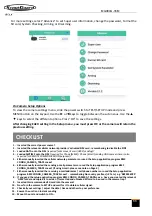
On Camera Setup Options
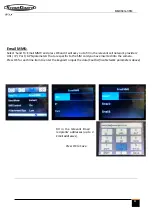
To view the camera settings menu, slide the power switch to TEST/SETUP mode and press
MENU button on the keypad. Use the
►
or
keys to toggle between the sub-menus. Use the
▲
▼
keys to select the different options. Press “OK” to save the settings.
After changing EACH setting in the Setup menu, you must press OK or the camera will retain the
previous setting.
For more settings, select “Advance” to set Super user information, change the password, Format the
SD card, System Checking, Arming, or Disarming.

